
Okay, let’s be honest. You’ve got a kid (or a classroom full of them), a rainy afternoon, and a desperate need for an activity that doesn’t involve a screen. Sound familiar? I’ve been there, staring at a pile of paper plates and googly eyes, wondering if I can pull off something Pinterest-worthy without losing my mind. The good news? You absolutely can. These 15 sea animals crafts for kids are your life raft. They’re simple, use stuff you probably already have, and are guaranteed to spark some under-the-sea imagination. Ready to make a splash?
1. Paper Plate Pufferfish
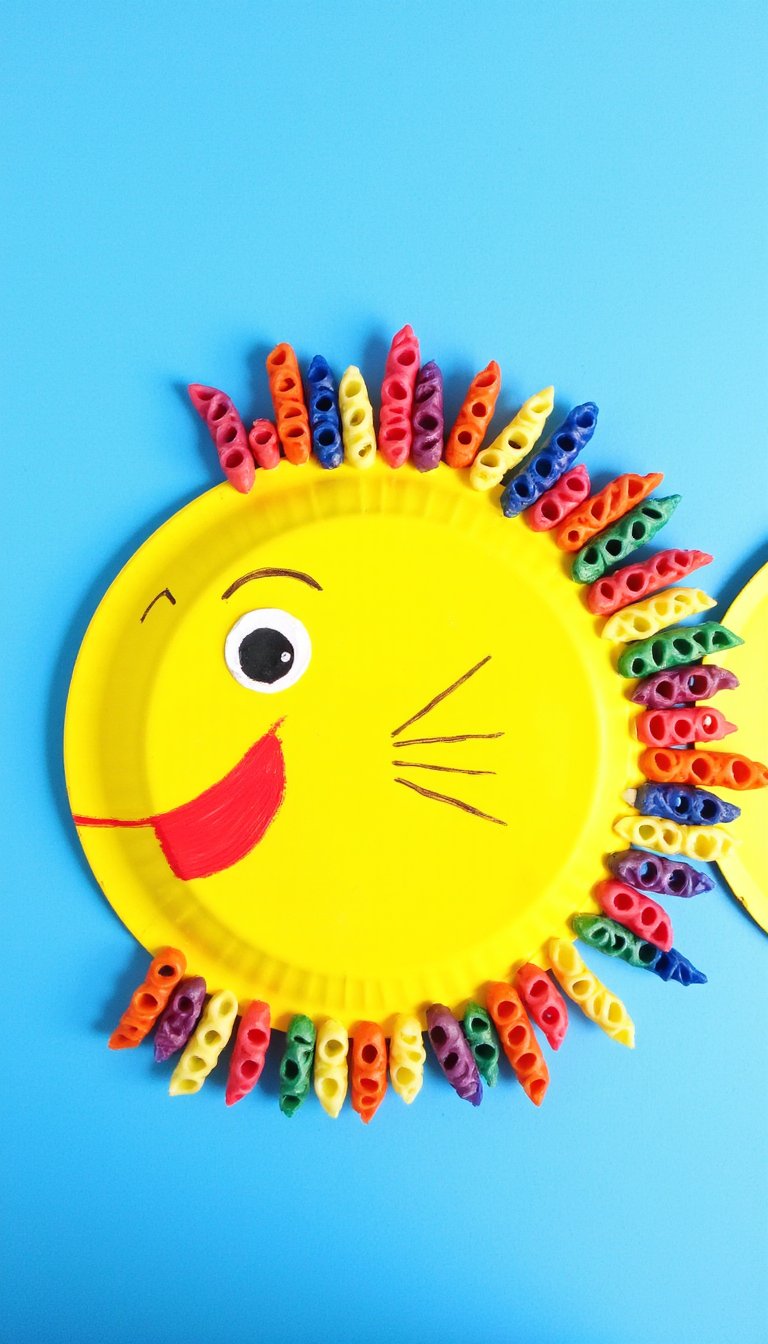
This little guy is all about texture and is hilariously easy. Start with a simple paper plate as your base. Let the kids go wild painting it a bright yellow or orange. The real fun begins with the spikes: cut up a bunch of triangle shapes from construction paper or, for extra pizzazz, use dyed pasta like rigatoni or penne.
Glue those spikes all around the edge of the plate, and don’t forget a grumpy (or happy!) face in the middle. It’s a fantastic craft for practicing scissor skills and talking about how real pufferfish defend themselves. Plus, the final result is so delightfully spiky and cute.
2. Toilet Paper Roll Octopus
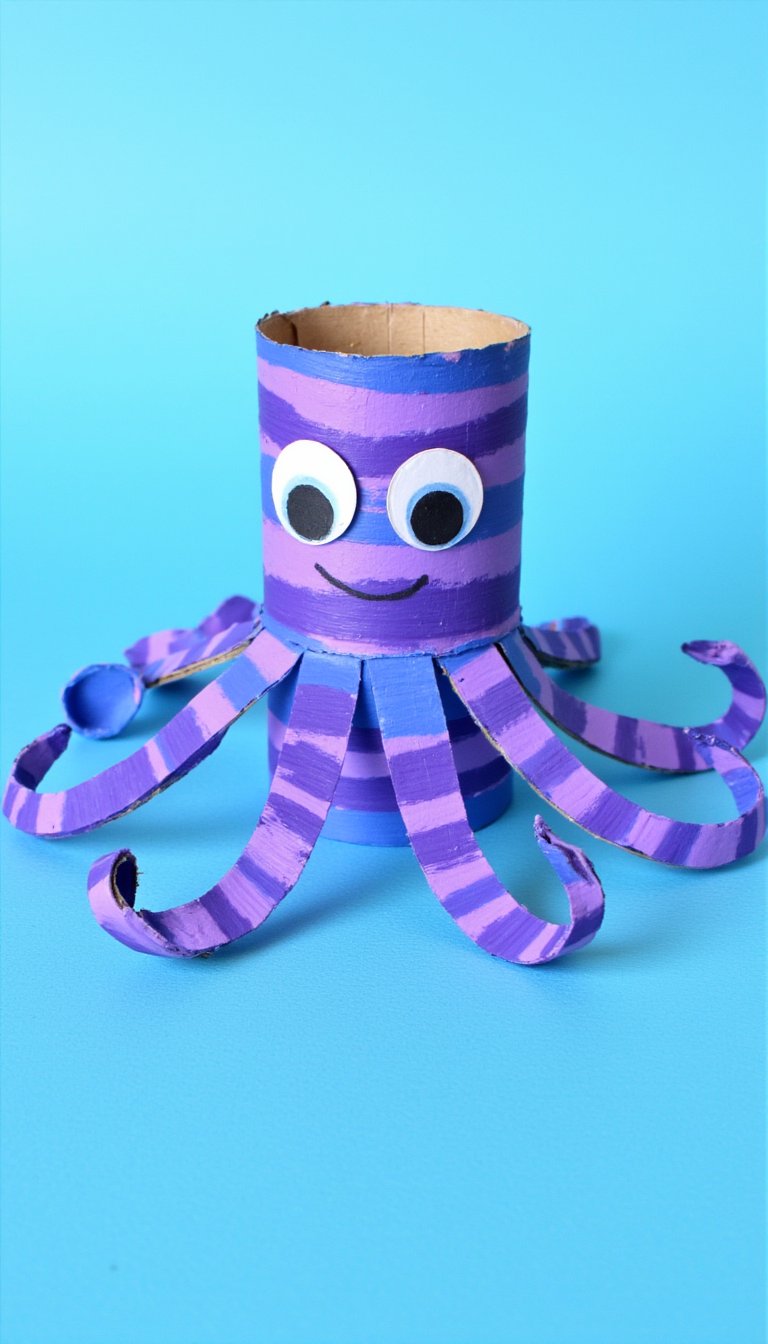
Upcycling at its finest! Grab an empty toilet paper roll and let the kids paint it their favorite octopus color—think purple, blue, or even rainbow. Once it’s dry, make eight equal cuts about halfway up the roll to create the legs. Show them how to curl each leg around a pencil or their finger to give their octopus some charming, wiggly tentacles.
Add googly eyes and draw a little smile. You can even punch a hole at the top and thread some string through to make an ocean mobile. It’s a classic for a reason, and it teaches counting to eight without the kids even realizing it.
3. Coffee Filter Jellyfish
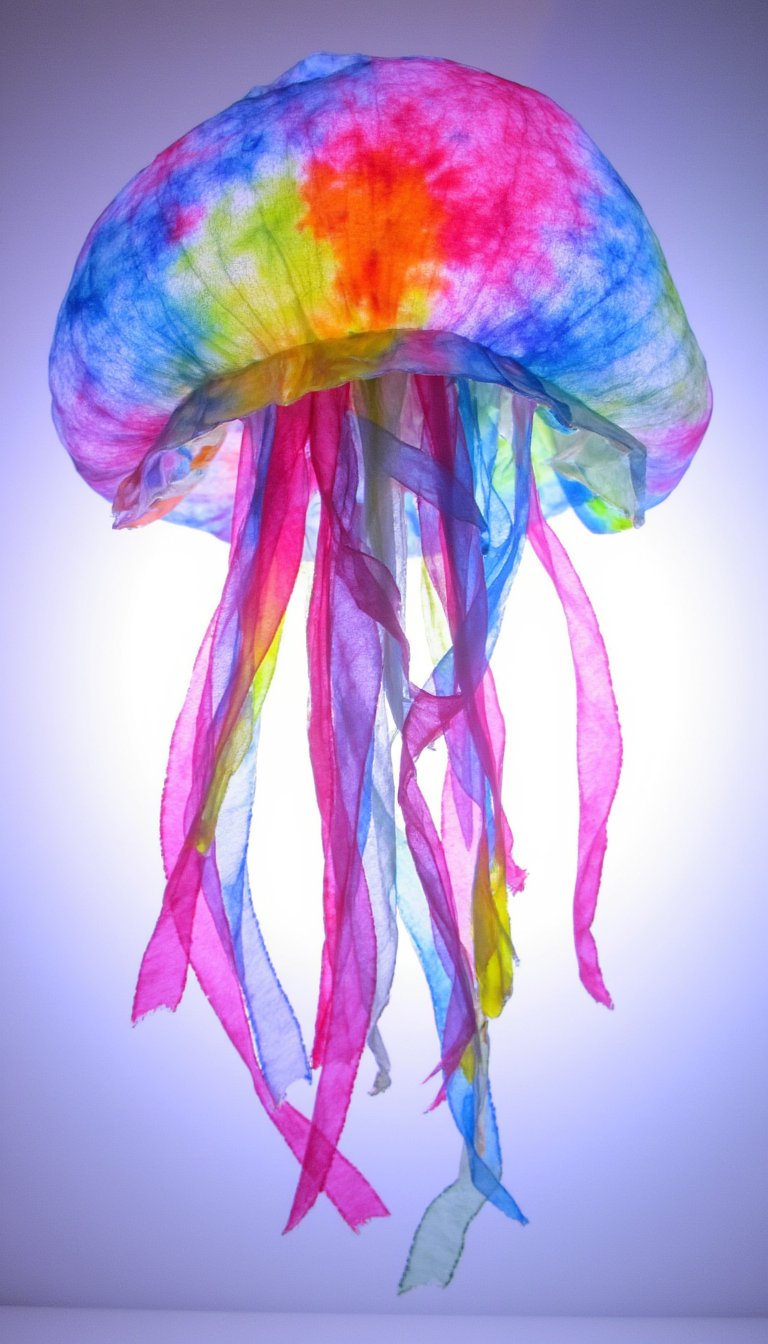
This craft is pure magic and a sneaky science lesson. Give each child a white coffee filter and some washable markers. Let them color it in with blobs and swirls. Then, using an eyedropper or a paintbrush, lightly dab water onto the filter and watch the colors bleed and blend together in a beautiful, tie-dye effect.
Once dry, pinch the center and secure it with a pipe cleaner or a clothespin to form the jellyfish’s “body.” Attach long, curling ribbons or streamers underneath for the tentacles. Hang them in a window and watch the light shine through their gorgeous, translucent colors.
4. Clothespin Crab
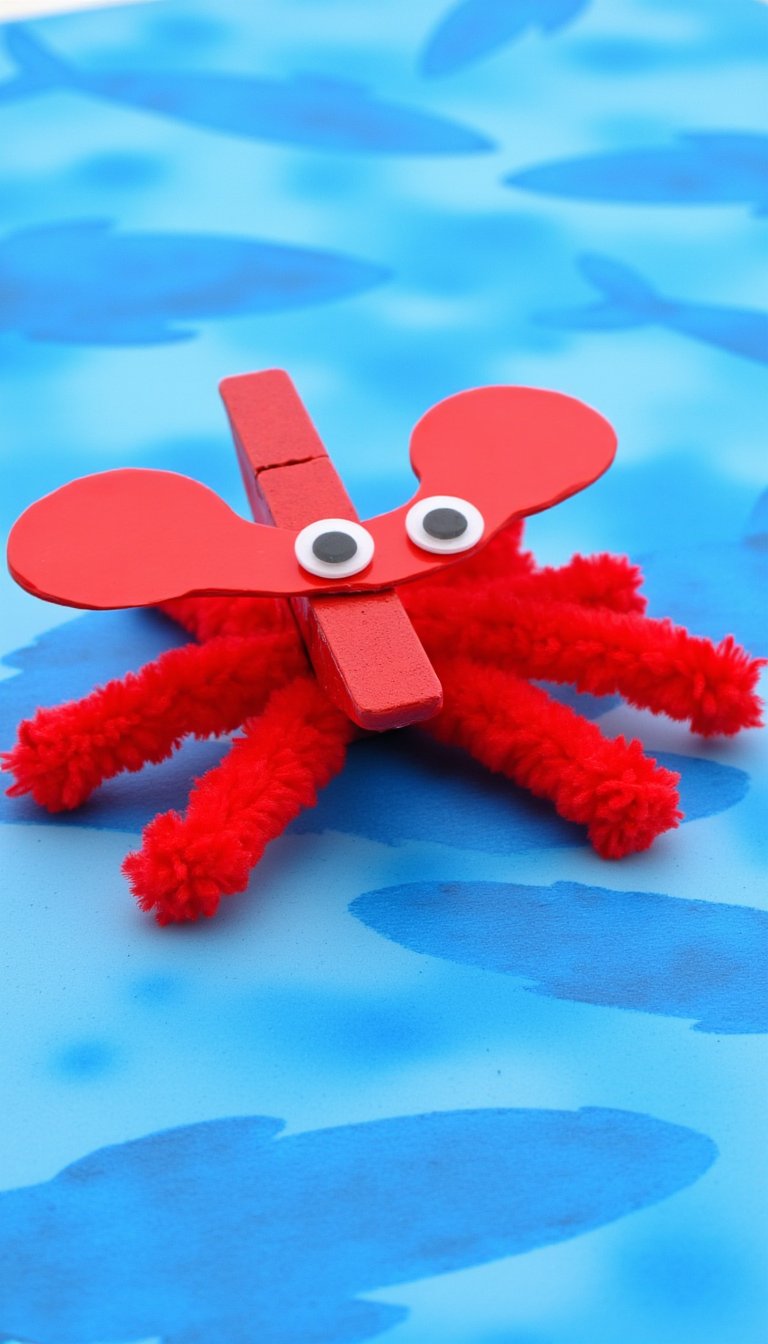
Got a spare clothespin? You’ve got the start of a feisty little crab. Paint the clothespin red or let the kids choose a funky color. While that dries, cut a small crab body shape from red cardstock—a simple oval works perfectly. Glue the clothespin to the bottom of the body so the pincers stick out the front.
Glue on googly eyes, and use pipe cleaners or red paper strips to create eight little legs coming out the sides. This craft is fantastic for fine motor skills (opening and closing that clothespin is great practice) and makes for a fun clip-on decoration for backpacks or curtains.
5. CD Sea Turtle
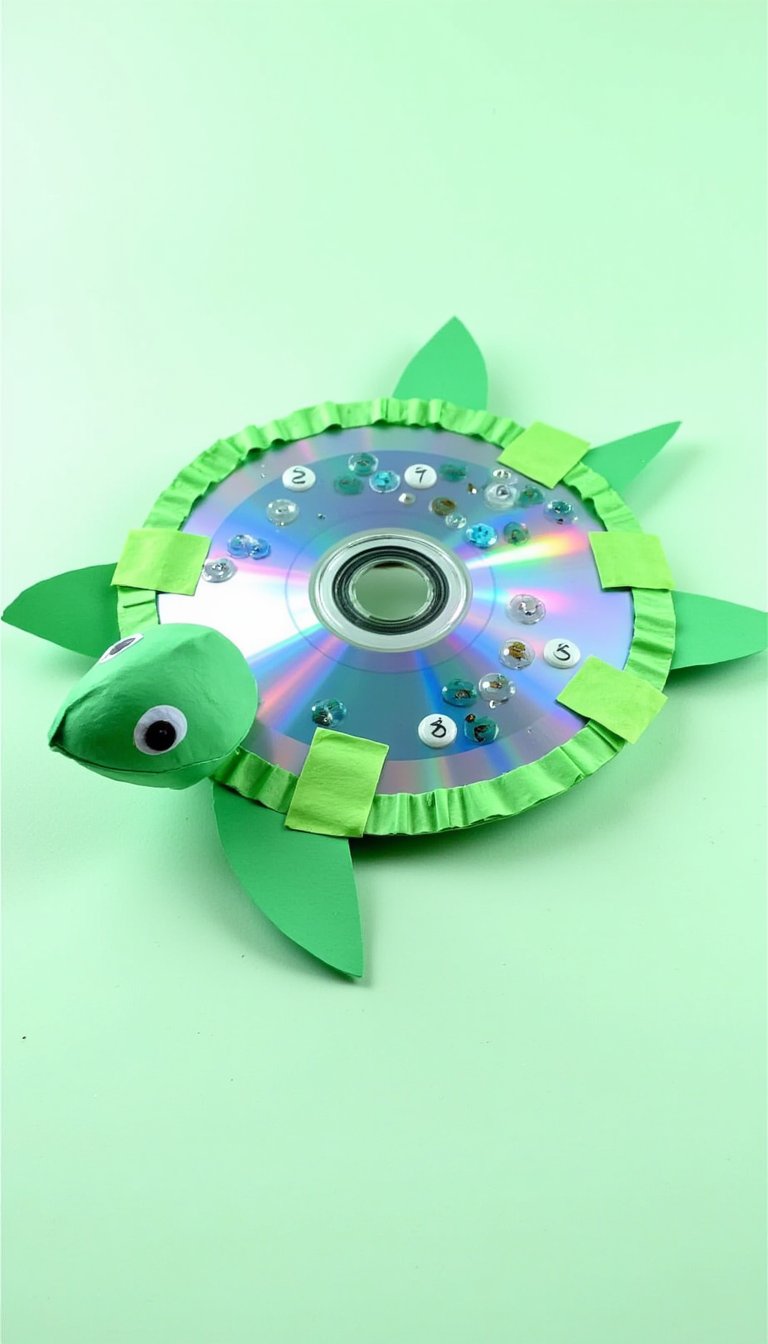
Finally, a brilliant use for those old AOL CDs collecting dust in a drawer! The shiny, reflective surface of a CD makes the perfect turtle shell. Cut a turtle head, four flippers, and a tail from green construction paper or craft foam.
Glue them to the back (non-shiny) side of the CD, so they peek out from the edges. Then, let the kids decorate the “shell” (the shiny side) with green tissue paper squares, sequins, or markers. It’s a wonderful way to talk about recycling and how a turtle’s shell is its home.
6. Bubble Wrap Printing Pufferfish
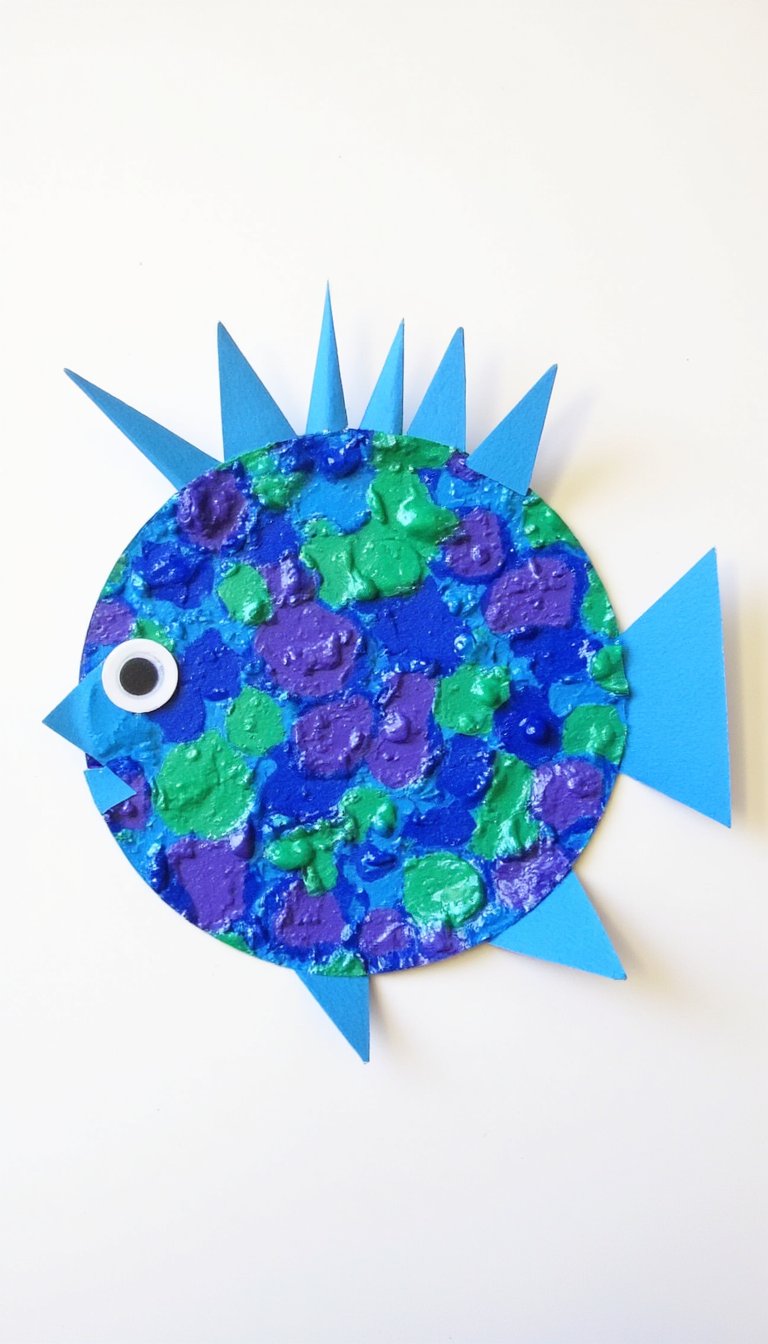
Here’s a craft that’s as much about the process as the product. Cut a pufferfish body shape out of thick paper. Then, dip a small piece of bubble wrap into some paint (blue, purple, or green work well) and stamp it all over the fish body to create amazing textured scales.
While that dries, cut spikes from paper or cardstock. Glue them around the edges and add a face. The sensory experience of popping the bubble wrap first (a parent-approved activity!) and then using it as a tool is a huge hit. Every print is unique, just like real fish.
7. Rocking Paper Bowl Whale
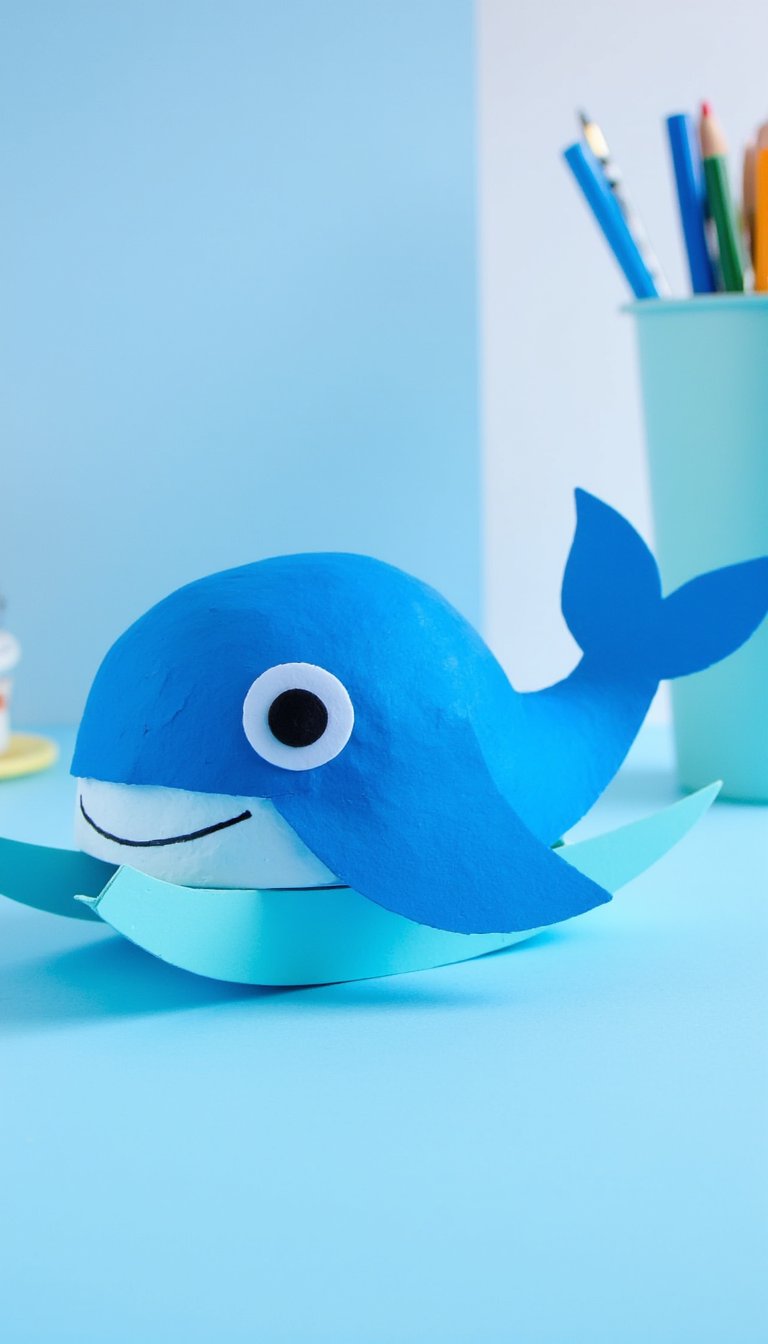
This whale has a fun secret: it rocks! Take a small paper bowl (the kind you’d use for chips) and paint it blue or gray. Cut out a whale tail and a dorsal fin from matching cardstock. Glue them to the back and top of the bowl.
On the front, glue a big, friendly googly eye and draw a smiling mouth. The curved bottom of the bowl lets the whale rock back and forth like it’s swimming through gentle waves. It’s a simple engineering lesson that provides endless amusement.
8. Handprint & Footprint Lobster
This one is a keeper for the memory box. Paint your child’s foot red and press it onto paper—this becomes the lobster’s body. Then, paint both their hands red and press them on either side of the narrow end of the footprint (the heel) to form the big, iconic claws.
Once dry, use markers or more paint to add eyes, antennae, and legs. It’s a wonderfully messy, personal craft that captures a moment in time. Pro tip: have a warm, soapy bowl of water ready for cleanup immediately after!
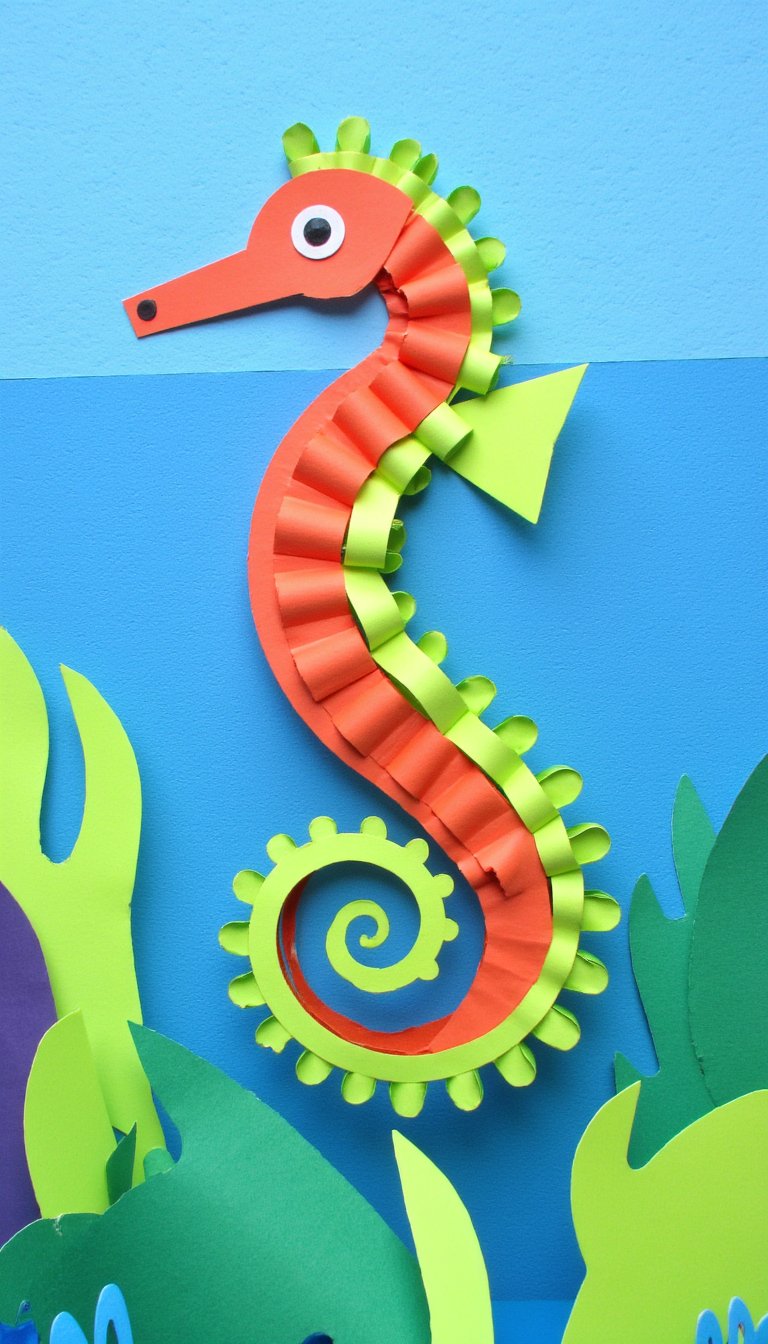
9. Paper Chain Seahorse
Combine crafting with a little math! Create a colorful paper chain using 5-7 strips of colored paper. This chain will form the curvy body of the seahorse. Once the chain is complete, glue it to a piece of blue paper in a curly, upright position.
Then, cut out a seahorse head with a long snout and a cute, curly tail from paper. Glue them to the ends of the chain. Decorate with markers, sequins, or stickers. This craft is excellent for practicing patterns (alternate the chain colors!) and following a sequence.
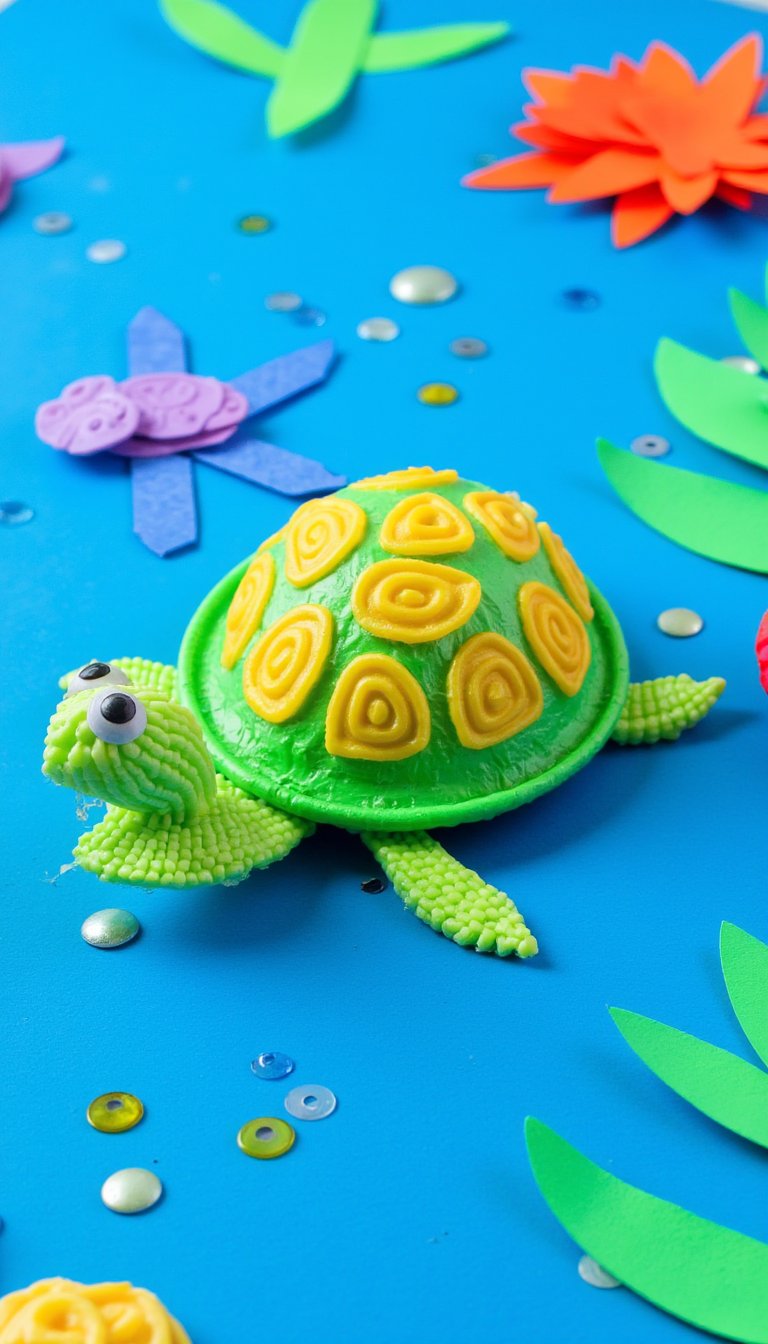
10. Pasta Shell Turtle
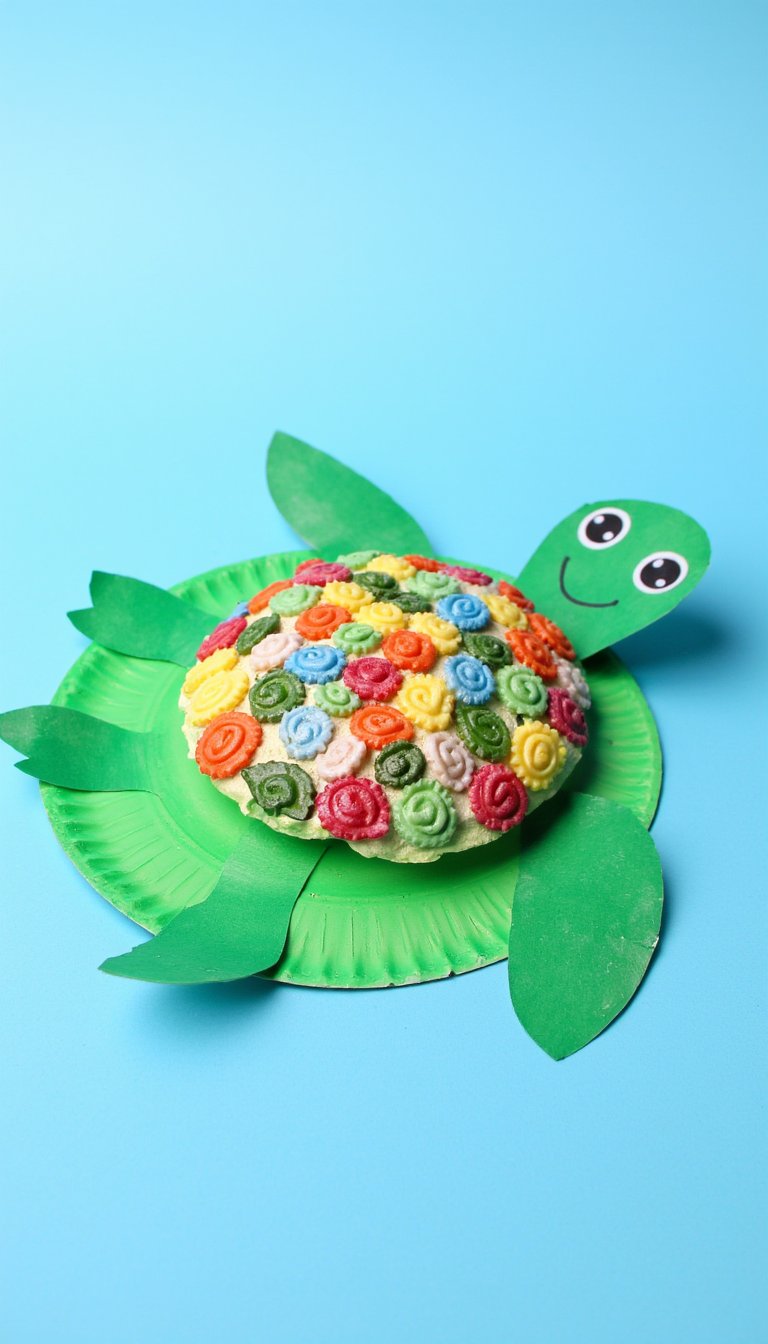
Raid the pantry for this texturally interesting craft. Start with a paper plate or a circle cut from green cardstock for the turtle’s body. Then, glue on dried pasta shells (like large conchiglie) to create the patterned shell. Kids can paint the entire thing green afterward, or paint each shell individually first for a colorful mosaic effect.
Add a head, legs, and a tail cut from green paper. The different shapes and the act of carefully placing the pasta pieces make this a fantastic focus activity. It turns everyday objects into art.
11. Egg Carton Stingray

Cut one cup from a cardboard egg carton—this is your stingray’s body. Let the kids paint it a sandy color or a cool gray. While it dries, cut a wide, diamond-shaped fin from blue tissue paper or a coffee filter. Glue this to the back of the egg cup, letting it flow out behind like a graceful, flapping fin.
Attach googly eyes to the front and a long, thin piece of yarn or a curled pipe cleaner for the tail. It’s an incredibly clever way to reuse materials and the result is surprisingly elegant.
12. Cupcake Liner Fish School
This is a quick, low-mess craft perfect for younger kids or groups. Use colorful cupcake liners (the flat, not pleated, ones work best) as the fish bodies. Flatten them and glue them onto a big piece of blue paper to create an ocean scene.
Then, let the kids add details with markers: draw on tails, fins, scales, and funny faces. They can add seaweed from green paper and sticker bubbles. Creating a whole school of fish on one page makes for a vibrant, collaborative masterpiece.
13. Pinecone Porcupine Fish
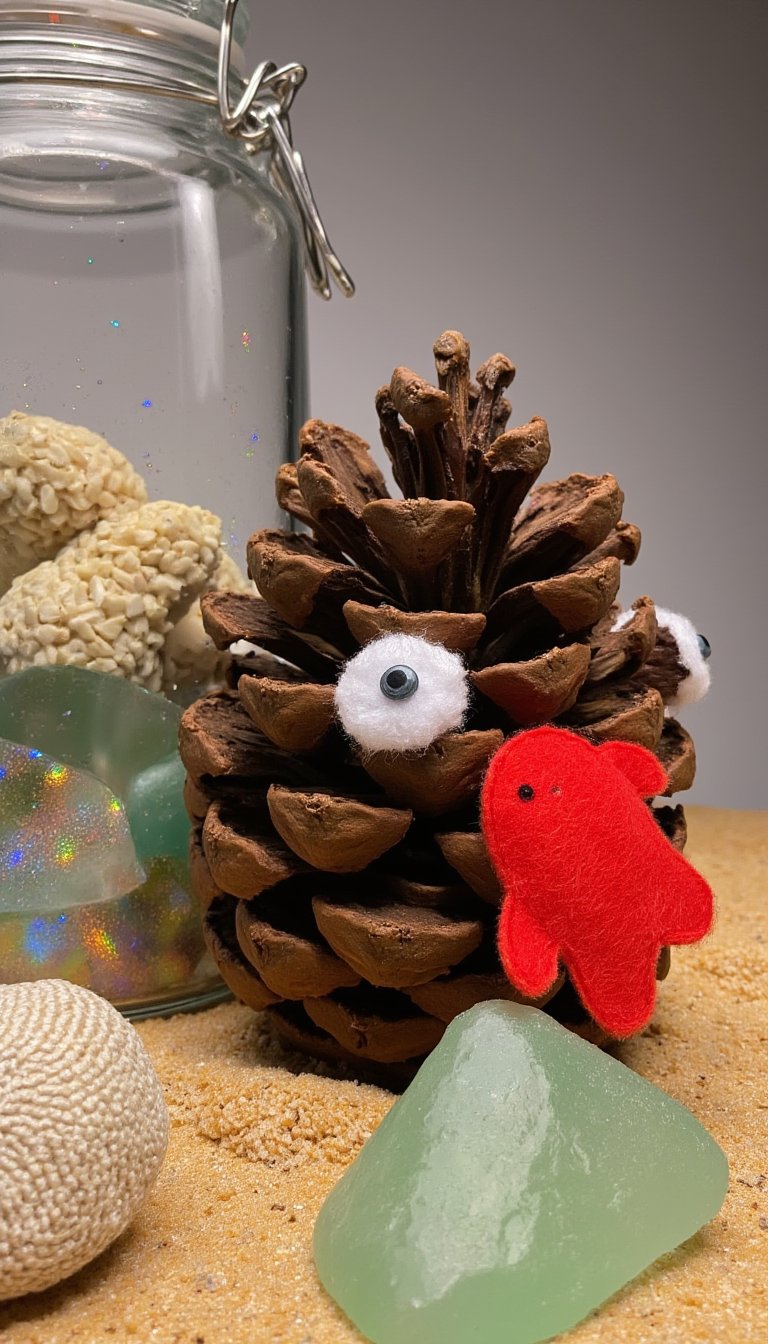
If you have pinecones in your yard or from a craft store, you have the perfect spiky base. This is a great fall or winter craft. Choose a pinecone that is mostly closed. Glue on small pom-poms for eyes and a little felt mouth near the pointed end.
You can leave it natural or give it a light dusting of gold or silver spray paint (adult job!) for a magical touch. It’s a wonderful way to incorporate natural elements and discuss how different sea animals, like the porcupinefish, use spines for protection.
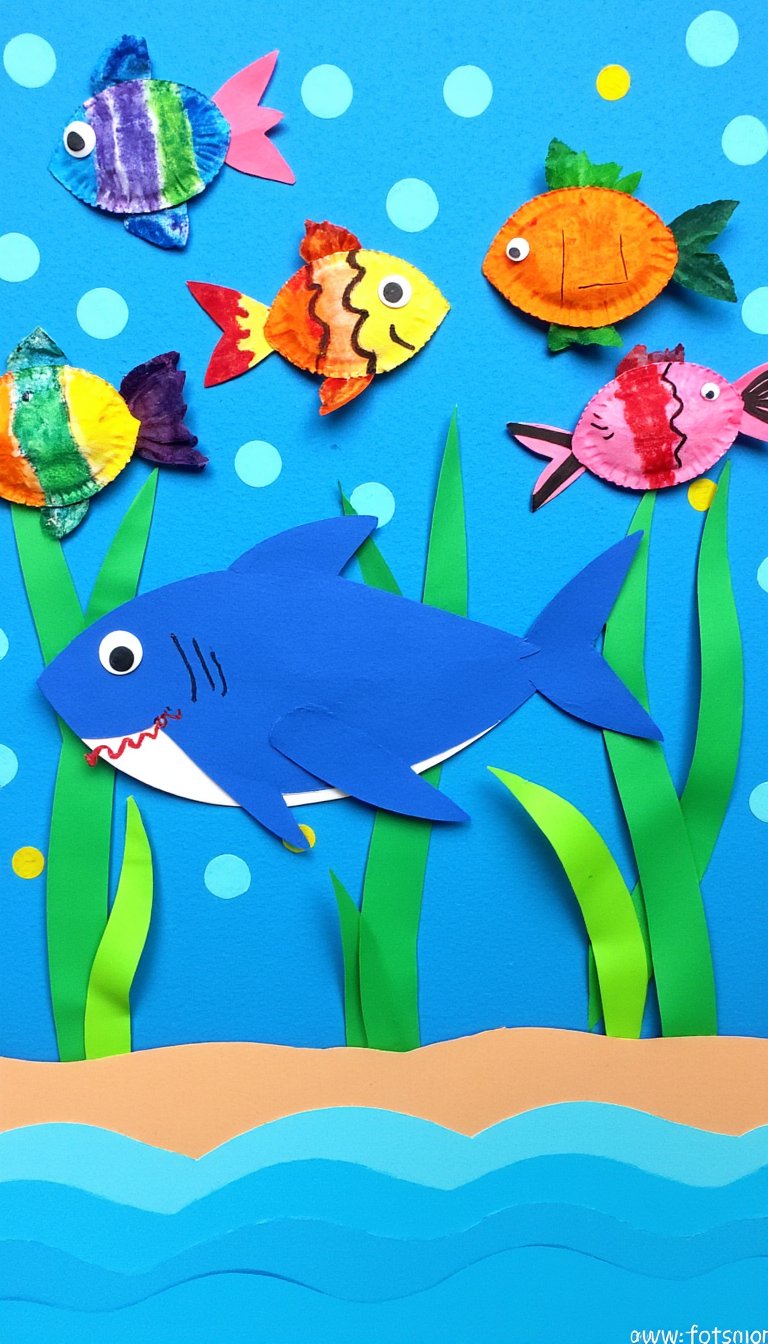
14. Movable Paper Shark
[IMAGE_PLACEHOLDER_9:16]
This craft has a cool interactive element. Cut out a simple shark body shape from gray cardstock. Then, cut a wide mouth from red paper and a set of sharp white teeth from white paper. Attach the mouth to the shark’s head using a brass fastener (brad), so it can open and close.
Glue the teeth inside the red mouth. Add a googly eye and you’ve got a fearsome (or friendly!) shark with a chomping jaw. Kids love making their shark “talk” or eat smaller paper fish. It brings their creation to life.
15. Ocean in a Bottle Sensory Jar
[IMAGE_PLACEHOLDER_9:16]
We’re finishing with a calming sensory experience. Take a clean, clear plastic bottle (like a water bottle). Fill it about 1/3 full with water and add a few drops of blue food coloring. Then, fill the rest with baby oil or clear cooking oil, leaving a little air at the top.
Here’s the fun part: add your sea animals! Drop in small plastic ocean creatures, sequins for bubbles, and some glitter. Hot glue the lid on securely (this is non-negotiable for safety). When the child shakes the bottle, they create a thrilling ocean storm. When they let it sit, the oil and water separate, and the animals slowly float down—it’s mesmerizing.
So, there you have it—your survival guide for the next “I’m bored” emergency. The best part about these sea animals crafts for kids isn’t just the cute final product (though that’s a nice bonus). It’s the focused time creating together, the silly conversations about what a crab might say, and the proud smile when they show off their masterpiece. You don’t need fancy supplies, just a little imagination and a willingness to maybe get some glue on the table. Now, which creature are you going to make first? Your underwater craft adventure awaits.