
Is anyone else staring out the window, willing the world to turn green again? That last stretch of winter can feel endless. But instead of just waiting for spring to arrive, why not craft it into existence? I’ve rounded up 13 of my favorite DIY spring crafts that are light on supplies, heavy on charm, and guaranteed to inject a little sunshine into your space. No professional artist skills required—just a willingness to get your hands a little messy and have some fun.
1. Pressed Flower Lanterns

Capture the fleeting beauty of spring blooms in a glowing, permanent display. This project is perfect for using those first delicate flowers from your garden or a grocery store bouquet on its last legs.
All you need is a simple glass lantern (check the dollar store!), Mod Podge, and a soft brush. Arrange your pressed flowers on the outside of the glass, then carefully seal them in place with a thin layer of adhesive. The magic happens at night when you light a candle inside—the shadows and colors create a stunning, ethereal effect. It’s like holding a piece of a spring evening in your hands.
2. Upcycled Bird Feeder from a Tea Cup

Got a lone, chipped teacup sitting in the back of your cabinet? Give it a charming second act. This craft is the definition of whimsical and takes less than 30 minutes.
Grab a teacup and saucer. Using a strong outdoor adhesive, glue the cup onto the saucer, tilting it on its side as if it’s pouring out. Once it’s completely dry, find a sturdy spot in your garden or on a balcony railing. Fill the cup with birdseed and watch your feathered neighbors enjoy their very fancy new dining spot. The saucer catches any spills—practical and pretty!
3. Citrus Peel Succulent Planters

Before you toss those orange or lemon halves, stop! This craft is a brilliant, fragrant way to start seedlings or display tiny succulents. It smells amazing while you’re making it.
Carefully scoop out the fruit, leaving the peel intact. Poke a small drainage hole in the bottom with a skewer. Let the peel dry for a day or two to prevent mold. Then, simply fill it with a bit of potting soil and add your small plant. They look adorable on a windowsill and will slowly biodegrade when you’re ready to transplant. Talk about zero waste with maximum style.
4. Rainy Day Painted Rock Garden Markers

Never forget what you planted where again. This is a fantastic craft to do with kids on a drizzly spring afternoon, and the results are both functional and artistic.
Head outside and hunt for smooth, flat-ish rocks. Wash and dry them thoroughly. Then, using acrylic paints or even just permanent markers, let your creativity run wild. Paint the vegetable or herb name, or draw a simple picture of the plant. A quick coat of clear sealant will make them weatherproof. Tuck them into your garden beds for a pop of personalized color.
5. Macramé Leaf Wall Hanging

Boho decor meets spring foliage in this elegant, textural piece. If you know the basic macramé knots, you can create this. If you don’t, this is a perfect starter project!
Use natural cotton cord to create a series of leaf shapes using simple square knots and gathering techniques. You can make them in varying sizes for a more organic look. Attach them to a found branch or a simple dowel rod for hanging. The layered, leafy effect brings a soft, natural texture to any blank wall, no green thumb required.
6. Decoupage Spring Eggs (That Last All Year)

Tired of the fleeting nature of real dyed eggs? Create a set of gorgeous, unbreakable spring eggs you can display year after year. This is one of those DIY spring crafts that’s oddly meditative.
Use wooden or papier-mâché eggs from a craft store. Tear pieces of pretty patterned tissue paper, sheet music, or botanical prints. Adhere them to the egg using decoupage glue, layering until you achieve your desired look. Finish with a glossy or matte sealant. Display them in a bowl or a rustic egg crate for a timeless spring centerpiece.
7. A “Bee Hotel” from Scrap Wood & Bamboo

Become a pollinator’s best friend. Solitary bees, which are excellent pollinators and rarely sting, need little nooks to nest in. Your scrap pile is their perfect real estate.
Take a small wooden box or frame without a back. Tightly pack it with hollow bamboo canes of varying diameters, ensuring each tube is closed at one end. You can also drill holes of different sizes into a block of untreated wood. Mount your bee hotel in a sunny, sheltered spot in your garden. Watching these hardworking little guests move in is incredibly rewarding.
8. Yarn-Wrapped Mini Maypoles
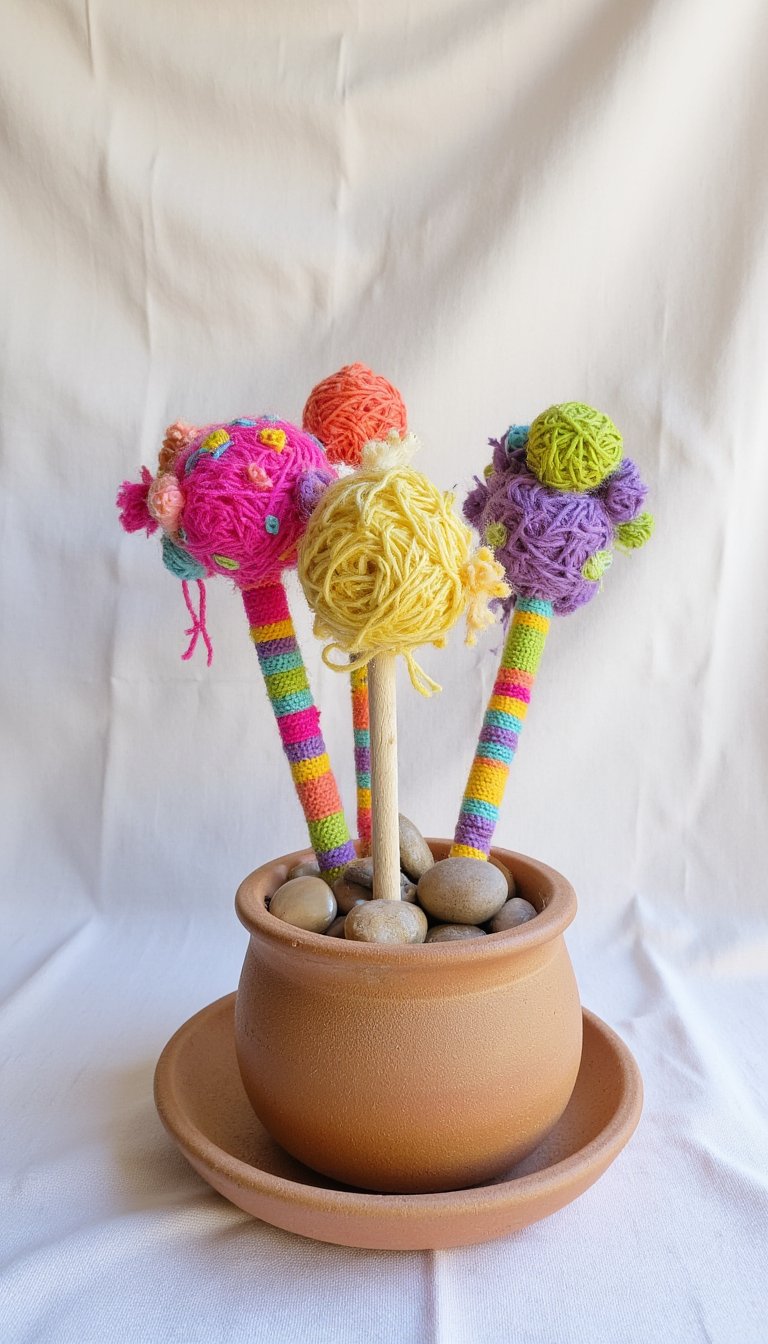
Bring the festive spirit of a spring maypole to your mantel or table. These mini versions are a riot of color and so simple to make. Seriously, if you can wrap yarn, you’ve got this.
Find a few straight twigs or use wooden dowels. Secure them in a small pot with plaster or stones. Then, raid your yarn stash! Wrap the top of the pole, then tie and secure lengths of different colored yarns from the top. Weave the ribbons in a simple pattern or let them hang freely. It’s an instant dose of cheerful, folksy charm.
9. Terracotta Pot Wind Chimes
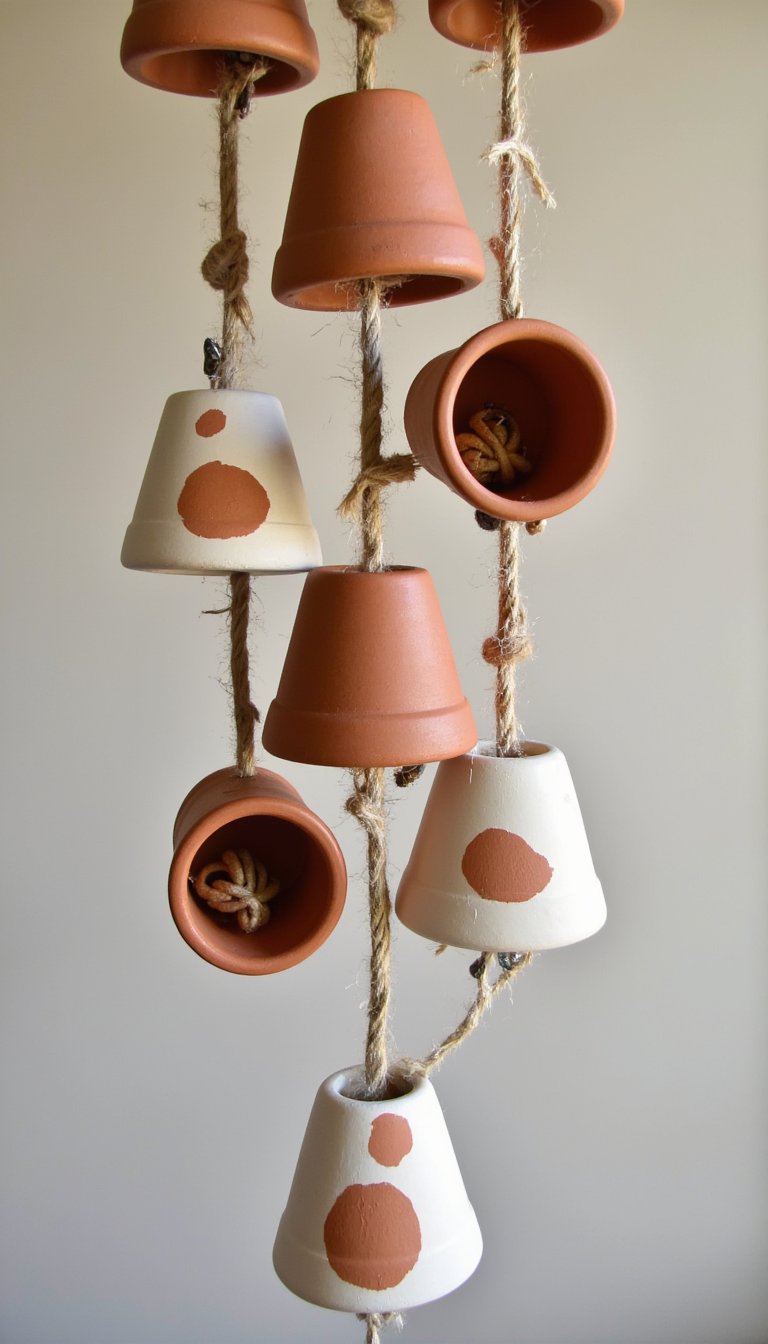
Combine the earthy feel of clay with the gentle music of spring breezes. You can customize this with paint, beads, and whatever jingly bits you have lying around.
Gather a few small terracotta pots in different sizes. Paint them if you like. Using sturdy twine or fishing line, thread them upside-down and right-side-up in an alternating pattern, tying knots inside each pot to space them out. Add beads or small keys between them for extra sound. Hang it from a porch or tree branch and let the soft, clinking melody remind you of the season.
10. Fabric Scrap Butterfly Magnets
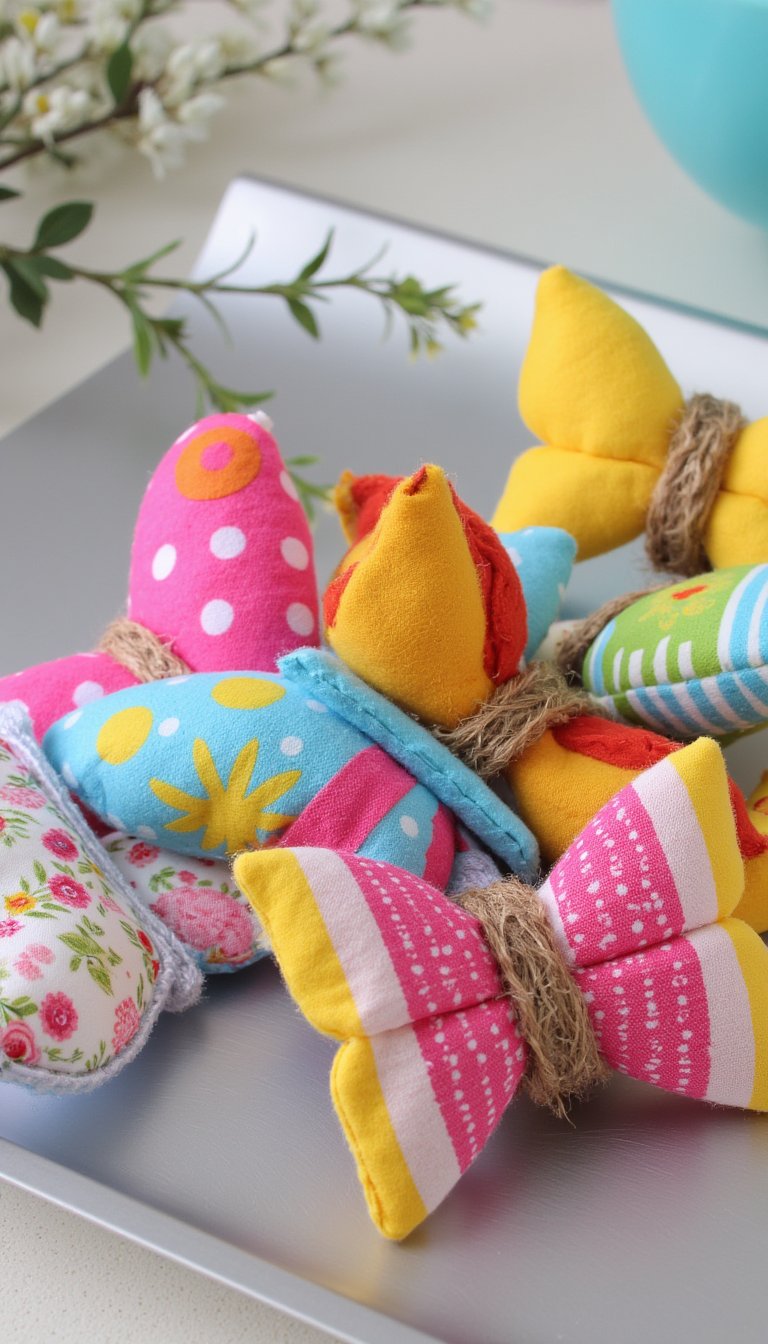
This is the ultimate scrap-buster project. In one afternoon, you can create a whole flutter of butterflies to brighten up your fridge or filing cabinet.
Cut simple butterfly shapes from cardstock or felt. Then, glue on scraps of your favorite patterned fabrics, trimming the edges. Add a small strip of jute or a bead for the body. Glue a strong magnet to the back. Cluster them together for a beautiful, ever-changing magnetic display. It’s a fantastic way to use up those fabric pieces you just couldn’t throw away.
11. Moss & Twig Initial Wall Art
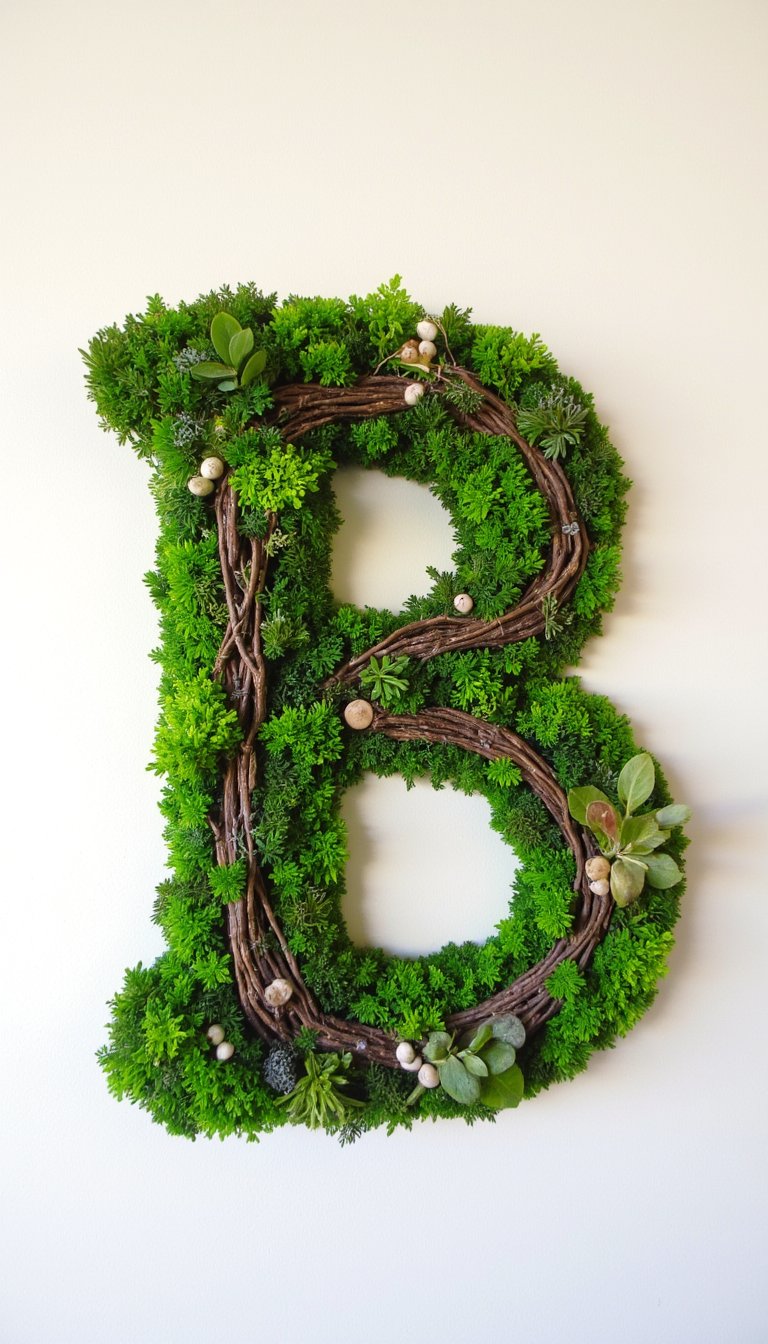
Bring the lush, green feel of the forest right into your home. This piece has serious organic modern vibes and makes a stunning statement.
Find a large, sturdy letter of your initial at a craft store, or cut one from plywood. Using hot glue or strong craft adhesive, cover the letter with sheets of preserved sheet moss. You can then embellish it with small twigs, faux berries, or tiny pinecones. The result is a textured, living-work-of-art (that requires zero watering) perfect for a spring refresh.
12. Marbled Paper Plant Pot Covers

Hide those boring plastic nursery pots with something spectacular. The marbling process is pure, unpredictable fun—no two will ever be the same.
Use a shallow tray of water and special marbling inks or even just nail polish to create your swirly paper masterpieces. Once your marbled sheets are dry, simply measure and wrap them around your plain pots, securing them with double-sided tape or a pretty ribbon. It instantly elevates any basic houseplant into a decor focal point.
13. A “Spring Has Sprung” Wreath with Foraged Finds

Forget the store-bought wreaths. The best one is waiting right outside your door. This is less of a strict tutorial and more of a creative scavenger hunt.
Start with a simple grapevine or straw wreath base. Then, take a walk. Collect flexible budding branches, interesting seed pods, feathers, and dried grasses. Weave and wire your foraged treasures onto the base until you achieve a look you love. The beauty is in its imperfect, natural elegance. Hang it on your door to announce the new season in the most authentic way possible.
And there you have it—13 DIY spring crafts to shake off the last of the winter cobwebs. The best part? None of these require a trip to a fancy craft store or an advanced degree in artistry. They’re about playing with color, texture, and natural elements. So, which one are you trying first? I’m personally torn between the glowing flower lanterns and the fancy teacup bird feeder. Honestly, just pick one, put on some good music, and make a little mess. Your home (and your mood) will thank you for it. Happy crafting! 🌼