Ever wondered how to make your phone special with a handmade case? You can make a beautiful crochet phone case in just one hour. It’s easy, even if you’re new to crochet.
This is your complete guide to making a crochet phone case. It’s a fun DIY project that will improve your crafting skills. You’ll get a unique phone case that’s different from store-bought ones.
Don’t worry if you’re new to crafting or haven’t crocheted in a while. This tutorial will teach you every step. You’ll learn to make a phone case that’s not only protective but also shows off your creativity.
Key Takeaways
- Learn to create a personalized phone case in under an hour
- Perfect project for beginners and intermediate crocheters
- Develop essential crochet techniques while making a practical accessory
- Customize your case with unique colors and designs
- Save money by making your own protective phone accessory
Gather Your Materials
Creating a beautiful crochet phone cover needs careful planning and the right materials. Before starting, gather all the essential supplies. This will make your crafting experience smooth.
Essential Crocheting Supplies
For a successful phone case project, you’ll need a few key items:
- Sharp fabric scissors
- Darning needle for weaving ends
- Sewing needle
- Matching thread
- Your smartphone for precise measurements
Suggested Yarn Types
Choosing the right yarn is key for a durable phone cover. Here are some good yarn options:
- Cotton yarn for less stretch and better shape
- Bulky weight yarn (size 5) like Bernat Roving
- Soft acrylic blends for flexibility
- Wool-blend yarns for warmth and durability
Recommended Crochet Hooks
The right crochet hook affects your phone case’s texture and fit. Use a hook one size smaller than the yarn suggests. A 5.5mm (US size 9) hook is great for bulky yarns.
Pro crafters suggest having a slim silicone case for extra protection. This keeps your phone safe while showing off your crochet cover.
Choosing the Right Pattern
Finding the perfect pattern for your crochet phone sleeve is important. It makes your crafting journey better. Whether you’re new or have some experience, picking the right pattern is key. It helps you make a protective and stylish phone cover.
Simple Patterns for Beginners
If you’re new to crocheting, start with a simple pattern. Look for a free crochet pattern for a phone case that’s easy. A basic rectangular sleeve is a good start. It should fit your phone well.
- Choose a foundation chain matching your phone’s width
- Work continuous single crochet rounds
- Aim for consistent tension
- Keep stitch count uniform
Intermediate Pattern Options
For those ready for more, try adding decorations to your phone sleeve. Magic circle techniques can add interesting designs.
| Pattern Complexity | Skill Level | Design Elements |
|---|---|---|
| Basic Rectangle | Beginner | Simple single crochet |
| Textured Sleeve | Intermediate | Mixed stitches, small embellishments |
| Decorative Pattern | Advanced | Complex stitch combinations |
Remember, each phone is different. You’ll need to adjust your pattern for a perfect fit. Practice and patience are key to creating a beautiful crochet phone sleeve!
Learning Basic Crochet Stitches
Learning basic crochet stitches is key for a great phone case tutorial. It doesn’t matter if you’re new or need a refresher. Knowing these basics will help you craft well.
Beginners should start with three main stitches. These stitches will make your phone case strong and cool.
Single Crochet Technique
The single crochet is very important. Here’s how to do it:
- Insert your hook into the stitch you choose
- Yarn over and pull through the first loop
- Yarn over again and pull through both loops
Pro tip: Keep your tension even. This makes your fabric tight and safe for your phone.
Double Crochet Technique
Double crochet makes a taller, more open stitch. It’s great for adding flair:
- Yarn over before inserting the hook
- Pull through the first two loops
- Yarn over and pull through the rest
Slip Stitch Overview
The slip stitch is vital for neat edges and joining parts. It’s the shortest stitch and makes your project smooth.
Practice these stitches, and you’ll make a custom phone case. It will be both useful and fashionable!
Measuring Your Phone
Creating a custom fit phone case needs precision and care. Getting your phone’s size right is key. This ensures your case looks great and protects your phone well.

When making a phone case, getting it right is very important. Your phone’s size is what makes your case a success.
Why Accurate Measurements Matter
A good fit keeps your phone safe from harm. You need to measure:
- Phone width
- Phone length
- Phone thickness
- Any protective case already on the phone
Step-by-Step Measurement Guide
- Put your phone on a flat piece of paper
- Trace the phone’s outline carefully
- Use a flexible measuring tape for precise dimensions
- Measure width, length, and thickness
- Write down measurements for reference
For a custom fit phone case, stretch your chain to match your phone’s width. Check the fit often while crocheting to keep it accurate.
Remember, yarn weight and hook size can change your measurements. Always check your work against your phone for the perfect fit.
Starting Your Crochet Phone Case
Making your own phone pouch is fun. It’s a great way to start crocheting. First, you need to make a foundation chain. This guide will help you make a good base for your phone case.
Creating the Foundation Chain
To start your phone pouch, follow these steps:
- Start by making a slip knot on your crochet hook
- Determine your phone’s width to gauge the chain length
- Create 6-8 chain stitches depending on your desired fit
It’s important to keep your tension even. Stretch your foundation chain to match your phone’s width. A snug 6-chain works best for tight cases, while 7-8 chains provide a looser fit.
The First Row of Stitches
Now, let’s move on to the first row of stitches. Here’s how to do it:
- Insert hook into the second chain from the end
- Work a single crochet in each chain stitch
- Add two single crochet stitches in the last chain
Take your time and keep your tension even. This first row is key for your phone case. Remember, practice makes perfect in your crochet journey!
Increasing and Decreasing Techniques
Learning how to increase and decrease stitches is key for a perfect phone case. You need to know how to change your stitches to fit your phone just right.

When to Increase Stitches
Increases make your phone case fit snugly. Use them when:
- Forming the rounded bottom of the phone case
- Creating extra width for a more spacious design
- Adapting the case to unique phone shapes
To add stitches, do two single crochet in one stitch. This builds width and shape, great for the bottom and corners.
How to Decrease Stitches
Decreases help shape your phone case. They’re useful for:
- Creating a tapered top for the case
- Adjusting the fit around buttons or edges
- Correcting sizing mistakes
The single crochet two together (sc2tog) is the best way to decrease. Here’s how to do it:
| Step | Action |
|---|---|
| 1 | Insert hook into first stitch, pull up a loop |
| 2 | Insert hook into next stitch, pull up another loop |
| 3 | Yarn over and pull through all three loops |
Consistency and symmetry are the secrets to a great phone case. Practice these methods to make a case that fits your phone perfectly.
Adding a Closure to Your Case
Making the right phone case closure is key to keep your device safe and stylish. You can choose from old-school methods to new ones. This way, your crochet case will keep your phone safe and look great.
Button and Loop Method
The button loop closure is a timeless pick. It’s both useful and pretty. Here’s how to make it:
- Work single crochet stitches to the middle of your case
- Chain about 30 stitches to make the loop
- Slip stitch back into the original stitch
- Keep working slip stitches around the row
When picking a button, match it with your yarn’s color. Pro tip: Put the button in the case’s center for a balanced look.
Velcro Closure Alternative
Velcro is a fast and simple choice for your crochet case. Here’s how to use it:
- Buy small adhesive-backed Velcro dots
- Stick one Velcro piece inside the case flap
- Put the matching Velcro piece on the case’s front
- Make sure the pieces line up right when closed
Both button loop and Velcro closures have their perks. Your choice depends on what you like and how you’ll use your case.
Customizing Your Phone Case
Making a personalized phone case is super fun. Your crochet designs can make a simple cover into something special. It shows off your style.
Personalizing your phone case lets you get creative. You can make something truly special. It will be different from anything else out there.
Adding Decorative Elements
Make your phone case stand out with these ideas:
- Crochet cute animal faces with magic circle
- Use special stitch patterns for texture
- Add embroidered details or small charms
- Put beads or sequins for shine
Tip: Wait to add decorations until your case is done. This helps keep it looking good and sturdy.
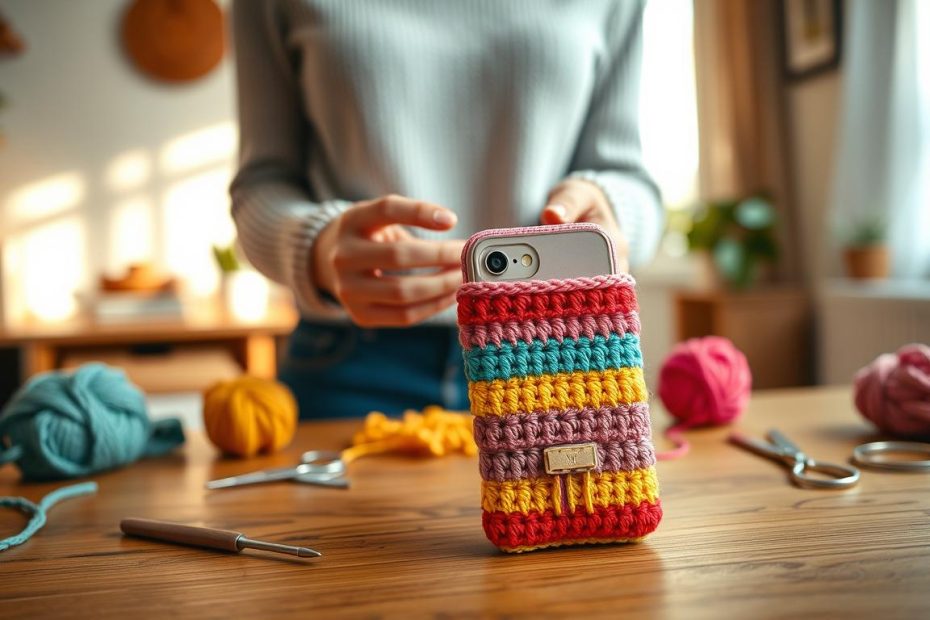
Color Combinations to Try
Choosing the right colors can change your case a lot. Try these:
- Classic Combinations: Navy and white, black and gold
- Seasonal Inspirations: Autumn oranges, winter whites, spring pastels
- Bold Statements: Rainbow stripes, monochromatic gradients
Your phone case shows your creativity. Feel free to try new colors and designs!
Finishing Touches
You’ve worked hard on your crochet phone case. Now, it’s time for the final touches. Finishing your project means making it look professional and lasting.
Weaving in Loose Ends
Loose yarn ends can make your case look messy. They might even unravel. Here’s how to weave them in neatly:
- Thread a darning needle with your yarn tail
- Work on the inside of the phone case
- Weave through 6-8 stitches in different directions
- Trim excess yarn carefully
Take your time with this step. Properly woven ends are nearly invisible. They keep your case together every day.
Blocking Your Finished Piece
Blocking makes your crochet look professional. Here’s a simple way to block:
- Dampen the phone case with water
- Gently shape to desired dimensions
- Lay flat to dry completely
- Optional: Use steam for acrylic yarns
With these steps, your phone case will look great. It will protect your device in style!
Troubleshooting Common Issues
Learning to fix crochet mistakes makes crafting fun. Everyone faces problems when making phone cases. But knowing how to solve these issues makes your projects look great.
Stitch tension and edge uniformity are common issues. Fixing mistakes is simple if you stay calm and keep practicing. This helps you make even stitches and clean edges.
Fixing Uneven Edges
Wavy edges come from uneven stitch counts. Count your stitches in each row carefully. Use stitch markers to mark the first and last stitches. This helps you avoid mistakes.
Dealing with Tension Challenges
Getting the right tension is key for a sturdy phone case. Too tight, and it’s stiff. Too loose, and it’s sloppy. Practice making uniform stitches by holding your yarn and hook the same way. Making small swatches helps you get it right.
Every crochet project is a chance to learn. With time, you’ll get better at fixing mistakes. Soon, you’ll make beautiful phone cases.