
Cold weather and early sunsets usually mean cooping up toddlers indoors with way too much energy. You can keep their hands busy without turning your living room into a war zone. Quick autumn crafts with leaves, pumpkins, and turkey themes do the trick every time.
Crafting burns off energy and builds real physical skills. The CDC’s child development guide points out that holding paintbrushes and squeezing glue builds fine motor strength and hand-eye control. These 20 fun November crafts for toddlers to spark creativity will keep your kids busy, build their hand strength, and give you some quiet moments together. A messy handprint turkey beats a clean room any day.
1. Bubble Wrap Indian Corn
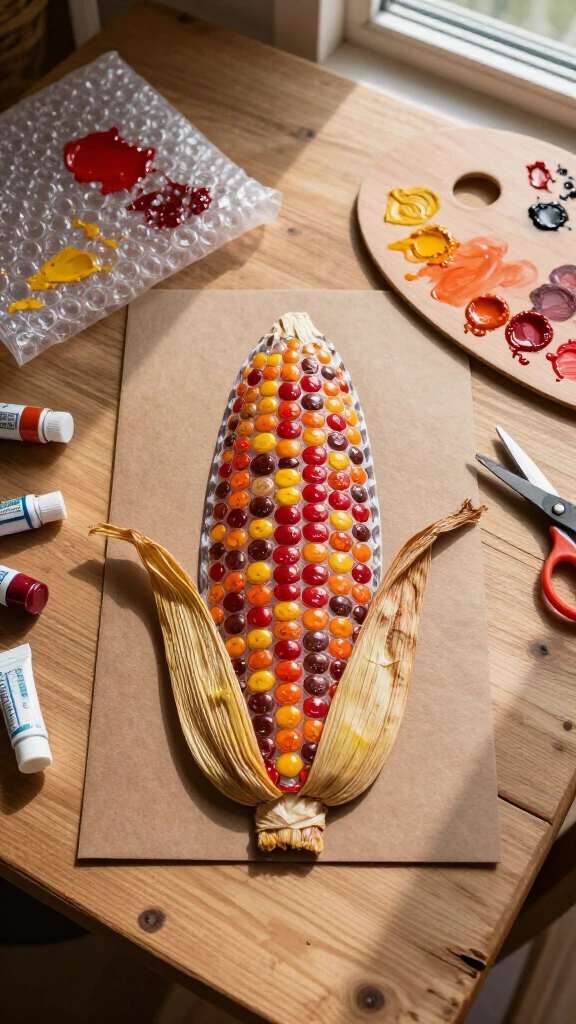
Save the bubble wrap from your shipping boxes. Cut brown or yellow cardstock into basic corn cob shapes. Have your toddler smear red, orange, and brown paint over a sheet of bubble wrap. Turn the paper cob over and press it firm into the paint. When you pull it up, you get a textured print that looks just like flint corn.
Kids love this because the pattern shows up right away. It gives them a great sensory feel without making a huge mess. Pro Tip: Glue real dried corn husks onto the top so they can feel the rough paper texture.
2. Clothespin Feather Turkey
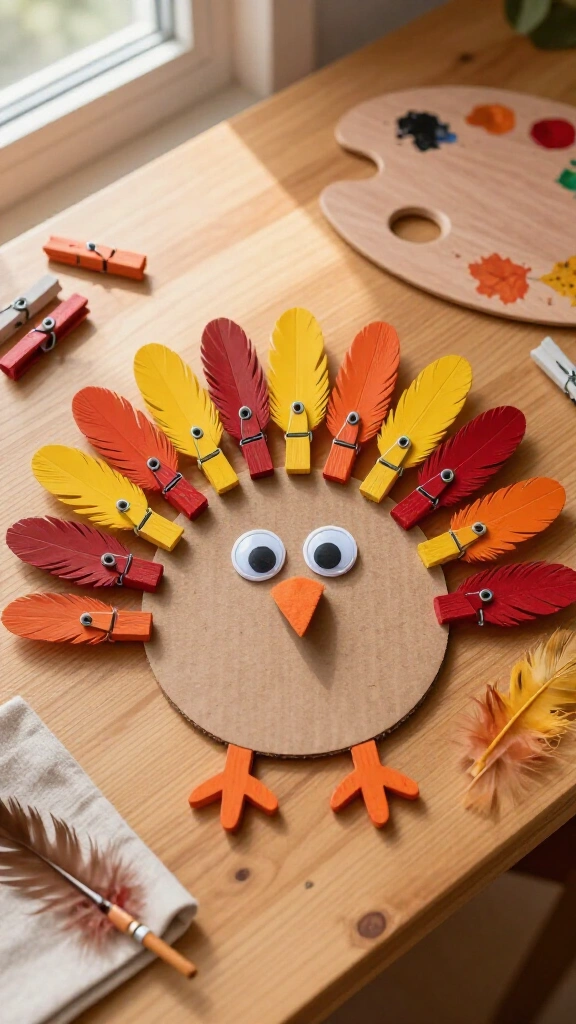
Squeezing clothespins takes work for little hands, which makes it great strength practice for thumbs and fingers. Cut a simple brown circle from stiff cardboard for the body. Paint wooden clothespins red, orange, and yellow ahead of time.
Show your child how to clip the clothespin feathers around the edge of the circle. Challenge them to match colors or count the feathers as they clip. If you want more projects that work on these skills, check out our collection of leaves arts and crafts for kids.
3. Pinecone Pumpkin Painting

Start this craft outside with a quick search for pinecones under the trees. Bring a handful inside, give your child a wide brush, and set out a tub of orange washable paint.
Let them coat the whole pinecone in orange paint. Twist a green pipe cleaner into a loop and tuck it into the top for a stem. You end up with a small pumpkin for your Thanksgiving table.
4. Leaf Impression Clay Ornaments
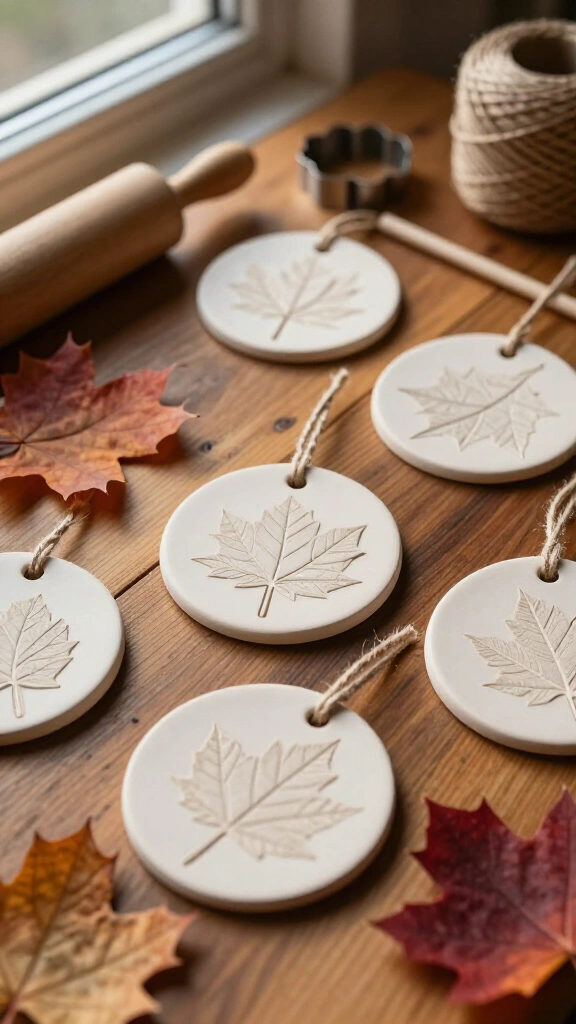
Flatten a piece of air-dry clay with a rolling pin. Have your child push dry leaves deep into the soft clay to leave clear vein prints. Cut circles around the patterns using a plastic cup or a round cookie cutter.
Poke a hole near the top with a drinking straw so you can hang the ornament later. After the clay dries overnight, thread a piece of twine through the hole. Take a look at our soft clay ideas if your kids want to try more sculpting projects.
5. Handprint Thanksgiving Tree
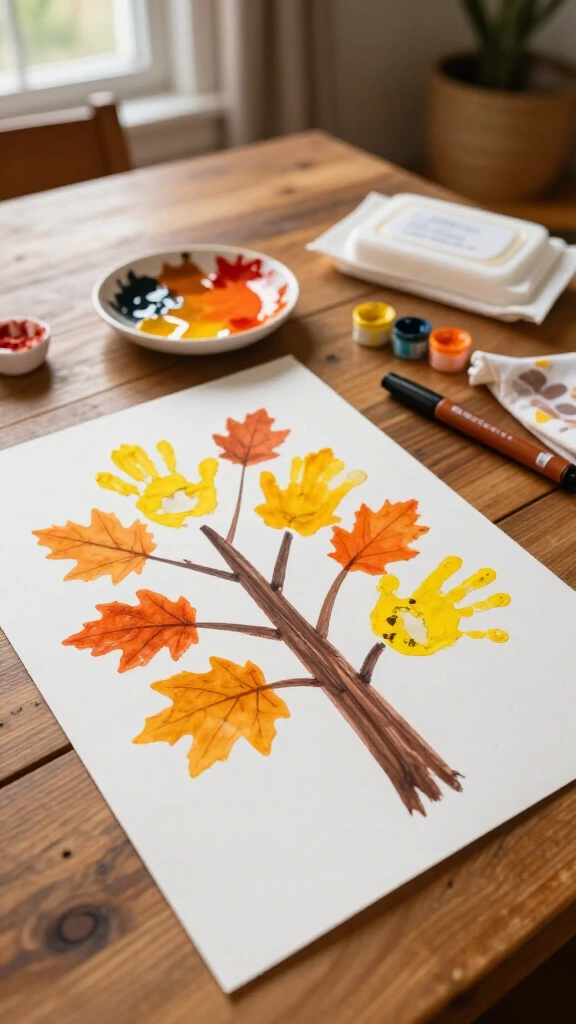
Draw a bare tree trunk onto thick paper using a brown marker. Coat your toddler’s palm in washable yellow or orange paint.
Press their painted hand around the branches to form leaves. Keep wet wipes or a damp washcloth right next to you so you can wipe their hand before they touch the walls. As the team at PBS KIDS for Parents notes, sitting down to create art together helps young kids feel connected while building confidence.
6. Cinnamon-Scented Dough Turkeys
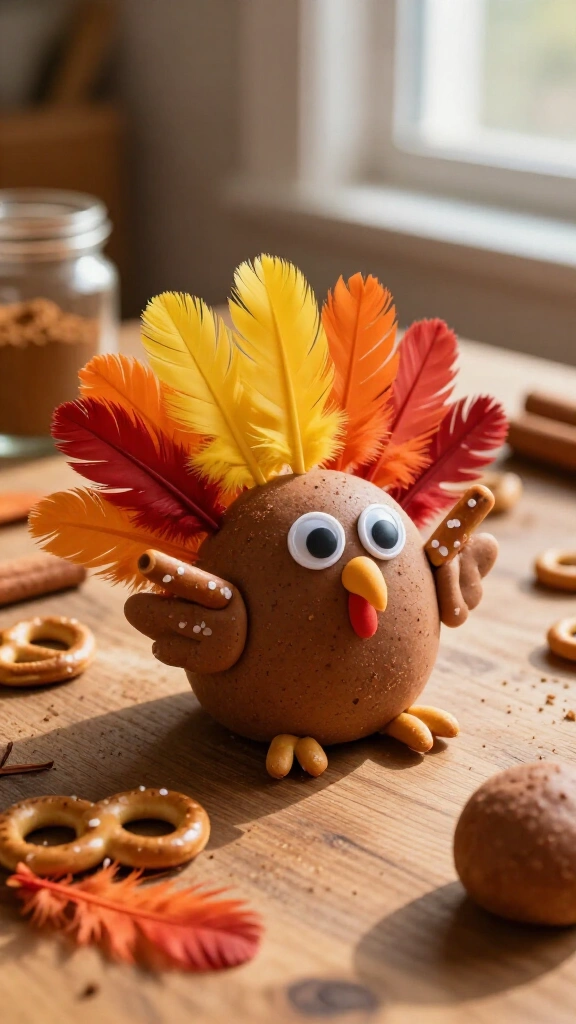
Mix two tablespoons of ground cinnamon into your favorite playdough recipe. The smell fills the kitchen fast. Hand your child a round ball of dough, a few craft feathers, plastic eyes, and pretzel sticks.
Let them push the feathers and pretzels into the dough to build a turkey. Why we like this craft: Kids can pull the pieces out, squash the dough, and start over as many times as they want.
7. Acorn Shaker Rattles
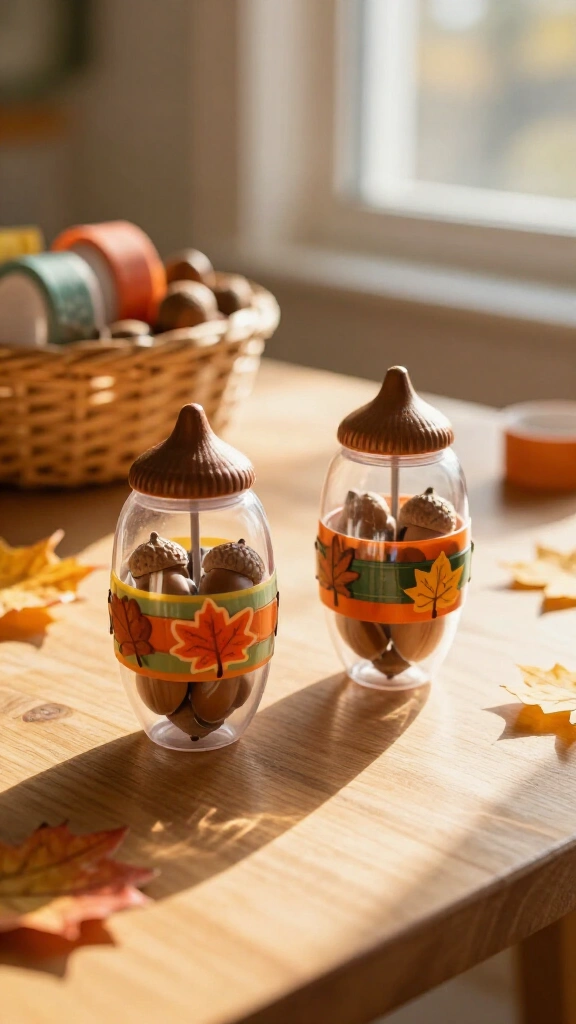
Collect clean acorns outside and drop a dozen into an empty plastic water bottle. Glue or tape the cap down tight so your toddler cannot open it.
Give your child fall stickers or colored tape to wrap around the bottle. Once they finish decorating, they have a sturdy rattle to shake along to music while learning basic rhythm.
8. Paper Bag Gratitude Puppets
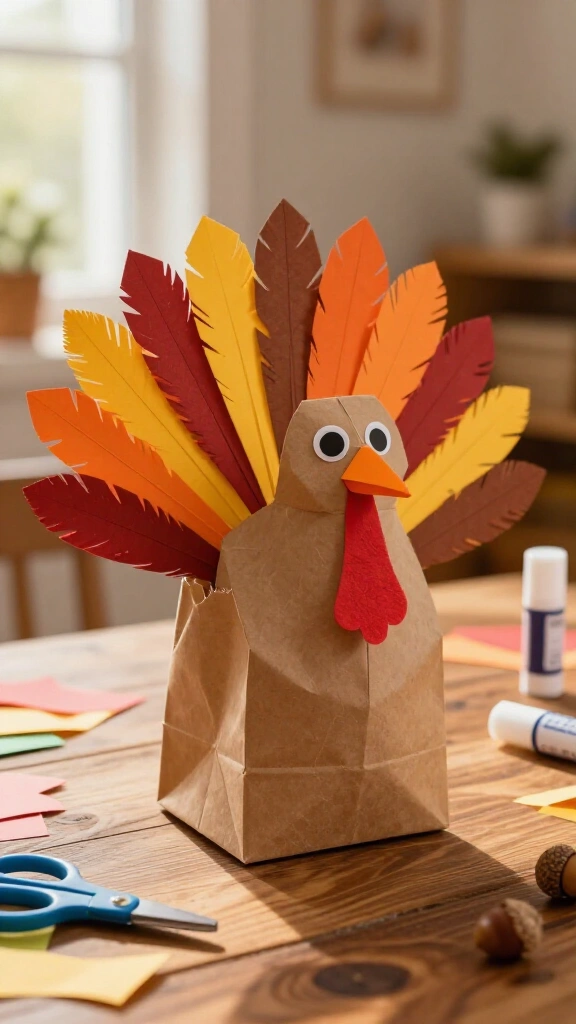
Turn a brown paper lunch bag into a turkey puppet. Glue paper eyes, an orange paper beak, and a red felt shape onto the folded flap. Glue paper feathers along the back of the bag.
Ask your child what makes them happy and write their exact answers on the puppet’s stomach. It gives you a sweet snapshot of how they think while introducing the idea of being thankful.
9. Coffee Filter Autumn Leaves
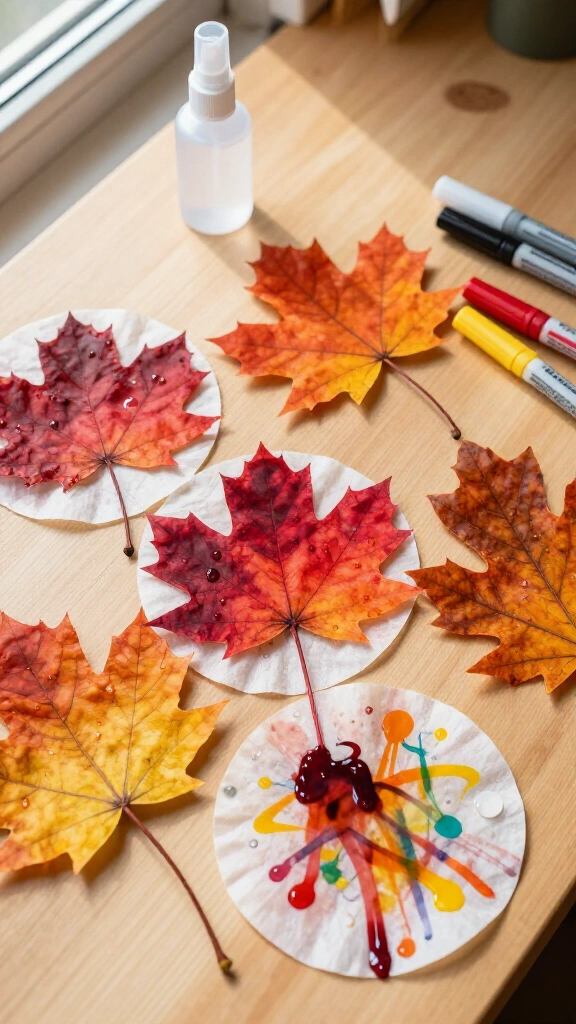
Flatten a few cheap coffee filters and let your child scribble all over them with red, yellow, and orange washable markers. Messy scribbles work best for this.
Spray the paper with a water bottle and watch the ink bleed across the filter. After it dries, cut the filter into a leaf shape. For more activities that blend colors like this, look at our rainbow art ideas for toddlers.
10. Apple Stamp Fall Trees
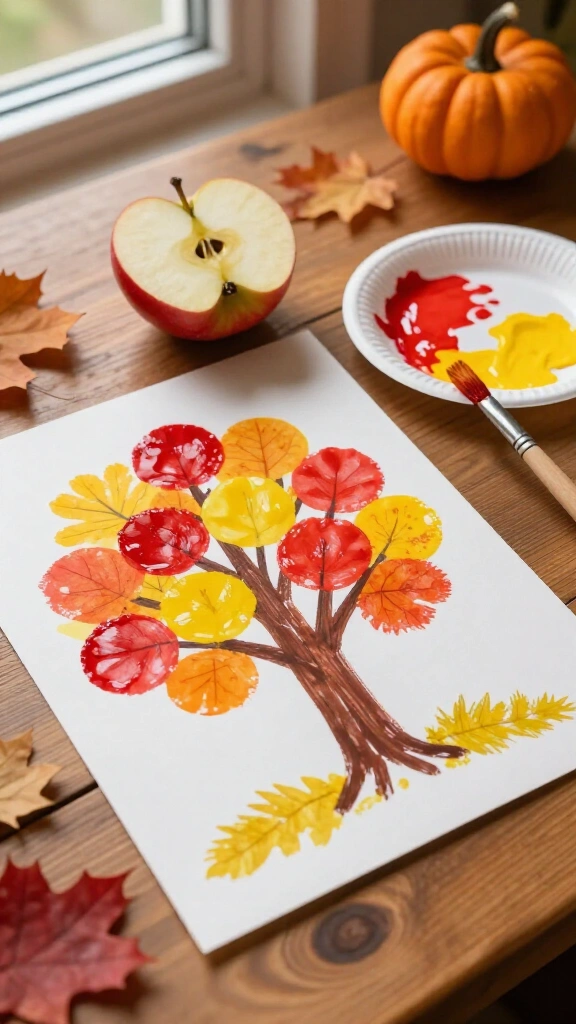
Slice an apple in half to make a natural stamp. Brush red or yellow tempera paint onto the flat side and let your toddler press it onto cardstock.
Stamp multiple circles across the page to form an entire orchard.
Pro-Tip for Easy Clean-Up:
Pour paint onto a paper plate. This lets your toddler dip the apple on their own without spilling cups of liquid paint.11. Yarn-Wrapped Cardboard Apples
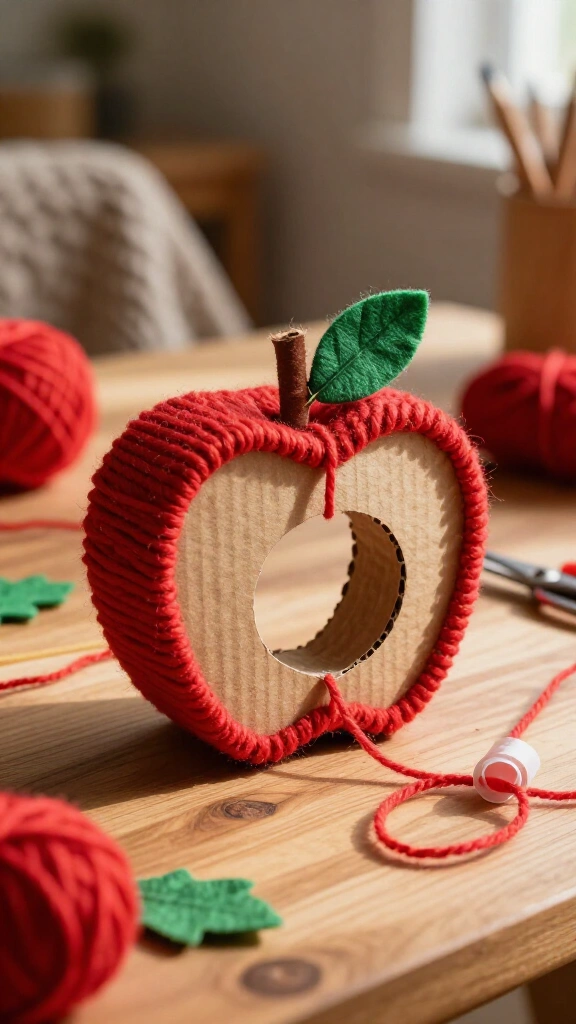
Cut an apple shape out of cardboard and cut a big hole in the middle to make a ring. Tie a long strand of red yarn to the frame. Wrap tape around the loose end of the yarn so it stays stiff like a needle.
Show your child how to pass the yarn through the hole and around the outer ring until it covers the cardboard. Threading yarn builds focus and finger control, and it keeps toddlers quiet on rainy afternoons.
12. Pumpkin Spice Sensory Slime
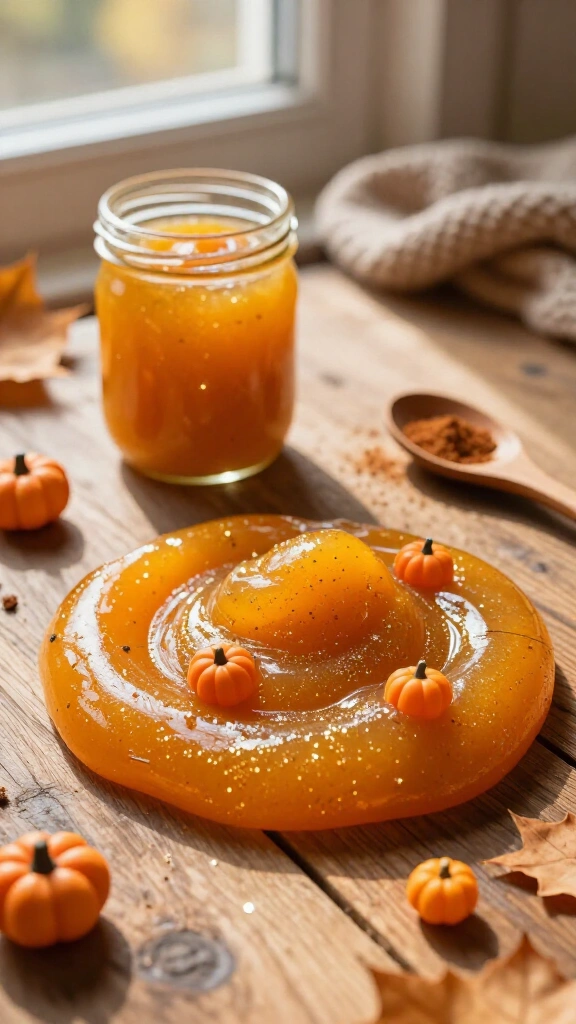
Mix liquid starch with orange glitter glue and a spoon of pumpkin pie spice. You get a soft, stretchy slime that smells like baking spices. Store it in a sealed jar to keep it soft for weeks.
Keep an eye on toddlers while they play so they do not try to eat it. You can drop plastic pumpkin beads into the slime so kids can dig them out with their fingers.
13. Fork-Painted Hedgehog

Skip the paintbrushes and hand your child a plastic fork. Draw a simple hedgehog shape on paper. Show your child how to dip the back of the fork into brown paint and press it down.
The fork tines make print marks that look like hedgehog quills. Draw a black circle for an eye and a nose to finish the creature.
14. Contact Paper Fall Leaf Suncatcher
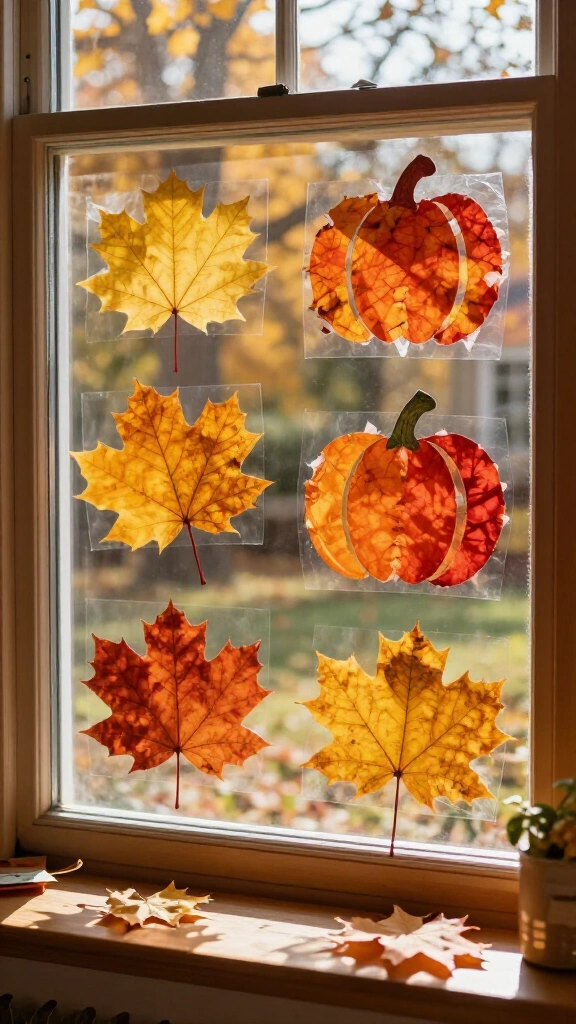
Tape clear contact paper to a table or window with the sticky side facing out. Tear up red, orange, and yellow tissue paper or gather real leaves from outside. Let your toddler push the leaves directly onto the sticky sheet.
Stick a second piece of clear contact paper over top to seal everything inside. Cut out pumpkin or leaf shapes and hang them on the window so light shines through the paper.
15. Cardboard Roll Owls
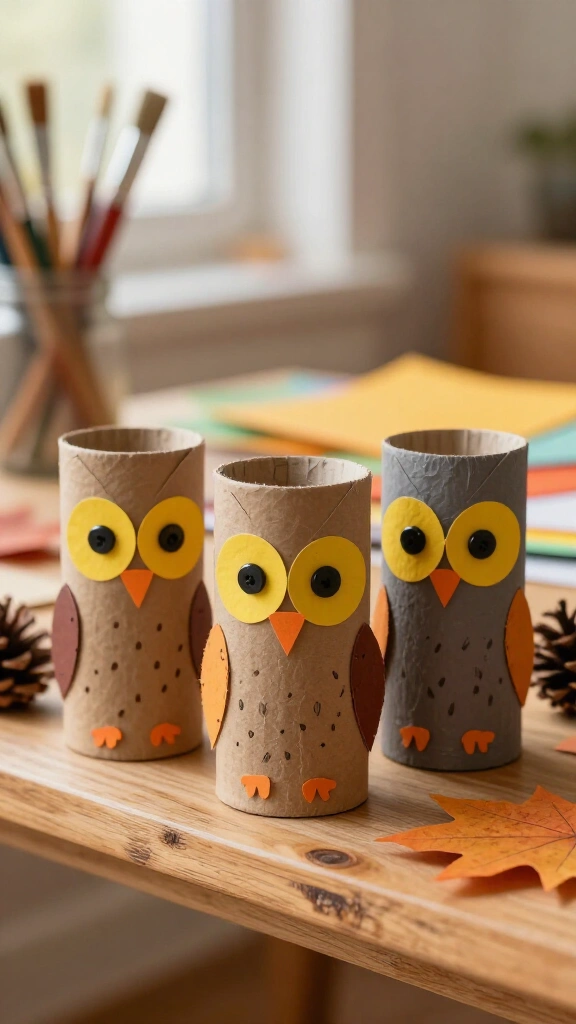
Save empty toilet paper rolls. Push the top edges of the cardboard tube downward to form pointed ears. Have your child paint the roll brown or grey.
Glue yellow paper circles with black buttons onto the roll to make owl eyes. Glue paper triangles on the front for a beak and wings. Set them up on a shelf when they dry.
16. Tissue Paper Cranberry Wreath
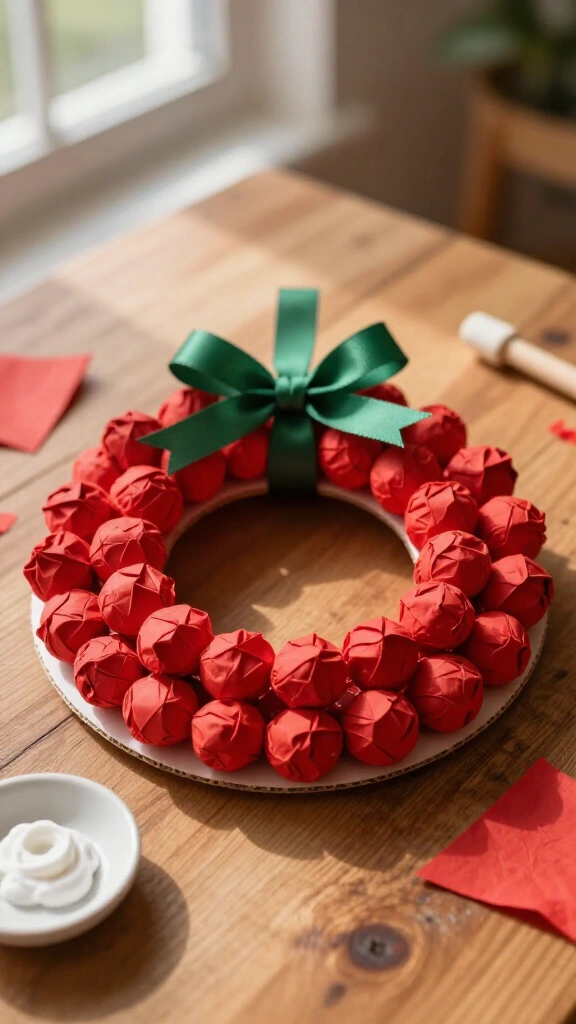
Cut the middle out of a paper plate to leave a ring. Hand your toddler red tissue paper squares and a tray of craft glue. Show them how to crush the paper into small red balls.
Dip each ball in glue and press it onto the plate until you cover the whole ring. Loop a piece of ribbon around the top so you can hang the wreath on a door.
17. Cardboard Feather Headband
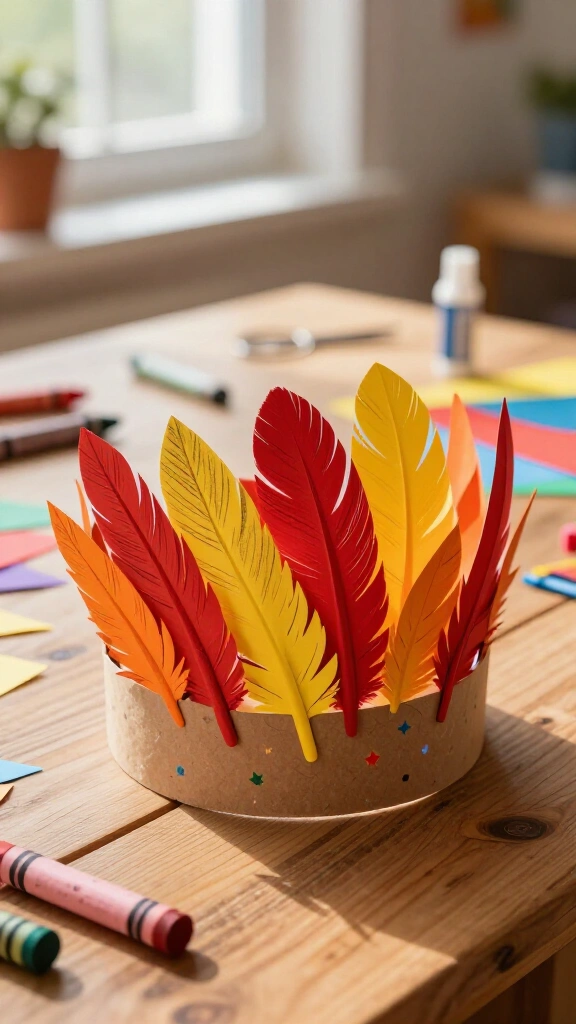
Cut a long strip of brown paper to fit your child’s head. Cut feather shapes out of red, yellow, and orange paper. Let your toddler draw on the feathers using crayons or stickers.
Glue the feathers along the inside of the band, then tape the ends together to make a hat. Most toddlers will wear their crown around the house for the rest of the day.
18. Sponge-Painted Fall Forest

Cut clean kitchen sponges into small squares. Dip the sponges into red, yellow, and brown paint, then stamp them across blue construction paper. The tiny holes in the sponge create textures that look like leafy trees.
Sponges are easy to grab, which works well for younger kids who struggle with thin paintbrushes. If you want more simple painting projects, take a look at our Christmas tree handprint crafts.
19. Button Pumpkin Patch
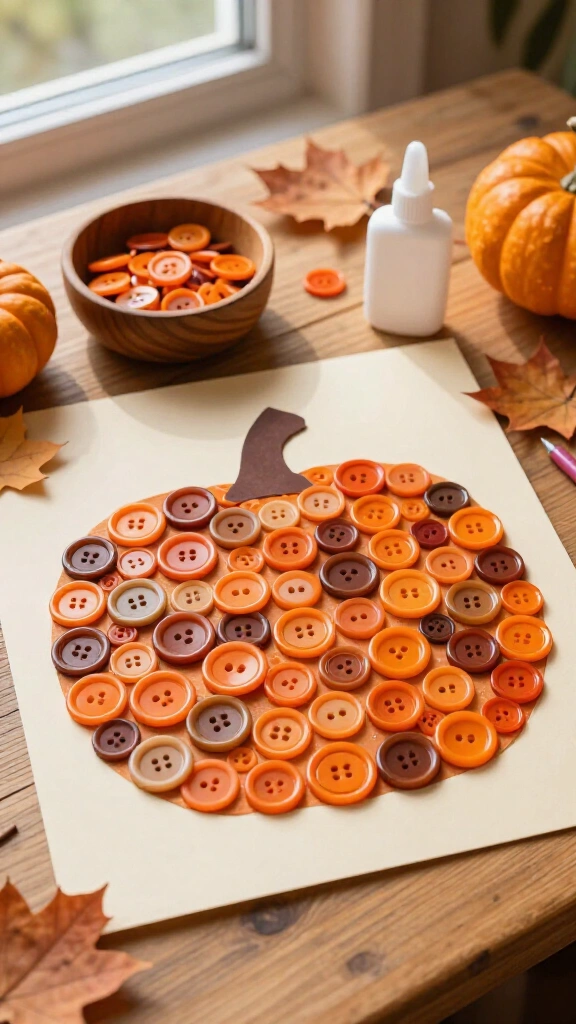
Draw pumpkin shapes on cardstock and coat the insides with craft glue. Give your child a container of orange buttons in different sizes. Have them place the buttons on the glue until the shape fills up.
The team at Good Housekeeping points out that sorting small objects helps kids recognize subtle differences in shape and size. Safety Note: Stay close by during button play so your child does not put small pieces in their mouth.
20. Handprint Turkey Keepsake Dish
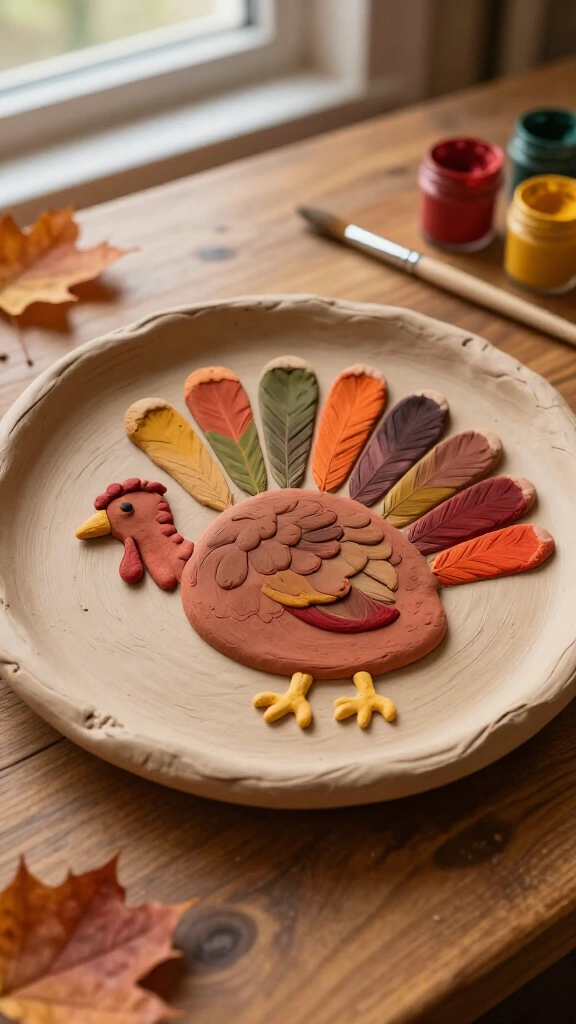
Roll out air-dry clay until it sits about half an inch thick. Press your toddler’s hand into the middle of the clay. Cut around the outline with a butter knife, leaving a small edge around the print.
Bend the edges up slightly to turn the print into a small tray. Let the clay cure for a few days, then paint the fingers like turkey feathers. Grandparents love receiving these as gifts.
Creative Takeaways for November Crafting
Crafting with young children works best when you focus on the fun rather than clean results. It gives kids a chance to feel new textures, see how colors mix, and sit down with you without distractions.
- Cover the area: Spread old newspapers or plastic tablecloths over the table before bringing out the paint.
- Focus on the process: Let your toddler stick feathers on backward or mix colors together. That is how they learn.
- Add dates to projects: Write the date on the back of handprint art to track how fast your child grows.
Grab your art supplies, turn on music, and spend time crafting together this November.