
Let’s be honest, the most precious ornaments on your tree aren’t the glittery baubles from a store. They’re the ones with tiny, paint-smeared fingerprints on the back. You know the ones. They hold a piece of a moment in time, a snapshot of a little hand that will never be that small again. But what if you could take that classic handprint craft and turn it into an entire forest of festive creativity? That’s where these 19 Christmas tree handprint ideas come in. Get ready to roll up your sleeves, embrace the beautiful mess, and create some heirlooms that you’ll treasure long after the tinsel has been packed away.
1. The Classic Green Handprint Tree

We have to start with the OG, the blueprint for all handprint tree crafts. This is the perfect starting point for toddlers and the young-at-heart. Press a green handprint onto paper or canvas with the fingers pointing down and the wrist as the trunk. The magic happens when you let your little artist loose with the decorations. Use finger paints, glitter glue, or even sticker gems to add colorful ornaments and a shiny star on top. It’s simple, timeless, and an absolute must-do for the baby’s first Christmas.
2. Salt Dough Handprint Tree Ornament

This craft gives you a tangible keepsake that you can hang on your tree year after year. Whip up a batch of salt dough, press your child’s hand firmly into it to create the tree shape, and bake it until hard. Once cooled, paint the handprint a festive green and the background a solid color. Don’t forget to poke a hole at the top for a ribbon before baking! This durable ornament becomes a beautiful record of their growth.
Pro-Tip for Perfection
To prevent bubbling, bake the dough at a low temperature for a longer time. A coat of mod podge after painting will seal it and give it a lovely sheen, preserving those tiny finger ridges for decades.
3. Glitterati Glam Tree

For the crafter who believes there’s no such thing as too much sparkle, this one’s for you. Create your handprint tree on dark cardstock using glue instead of paint. While the glue is still wet, have your child sprinkle emerald green glitter over the entire handprint. Shake off the excess and prepare to be dazzled. Add gold glitter for ornaments and a star. Is it messy? Absolutely. Is it worth it? 100%.
4. Footprint Trunk & Handprint Branches

Why stop at hands? Get the whole body involved! This adorable variation uses a brown footprint (heel at the bottom) to create the sturdy trunk of the tree. Then, layer green handprints above it, with the fingers splayed out to form the lush, full branches. It’s a full-body art project that results in a wonderfully dynamic and textured Christmas tree.
5. Christmas Light Handprint Tree

Turn those little fingers into a string of cheerful Christmas lights! Make a simple green handprint tree. Then, using a pencil eraser or a small brush tip, dip into various colors of paint and create small dots all along the outline of the handprint. Connect the dots with a black marker to create the “wire.” This idea is clever, colorful, and a fantastic way to practice fine motor skills.
6. Button Bonanza Tree
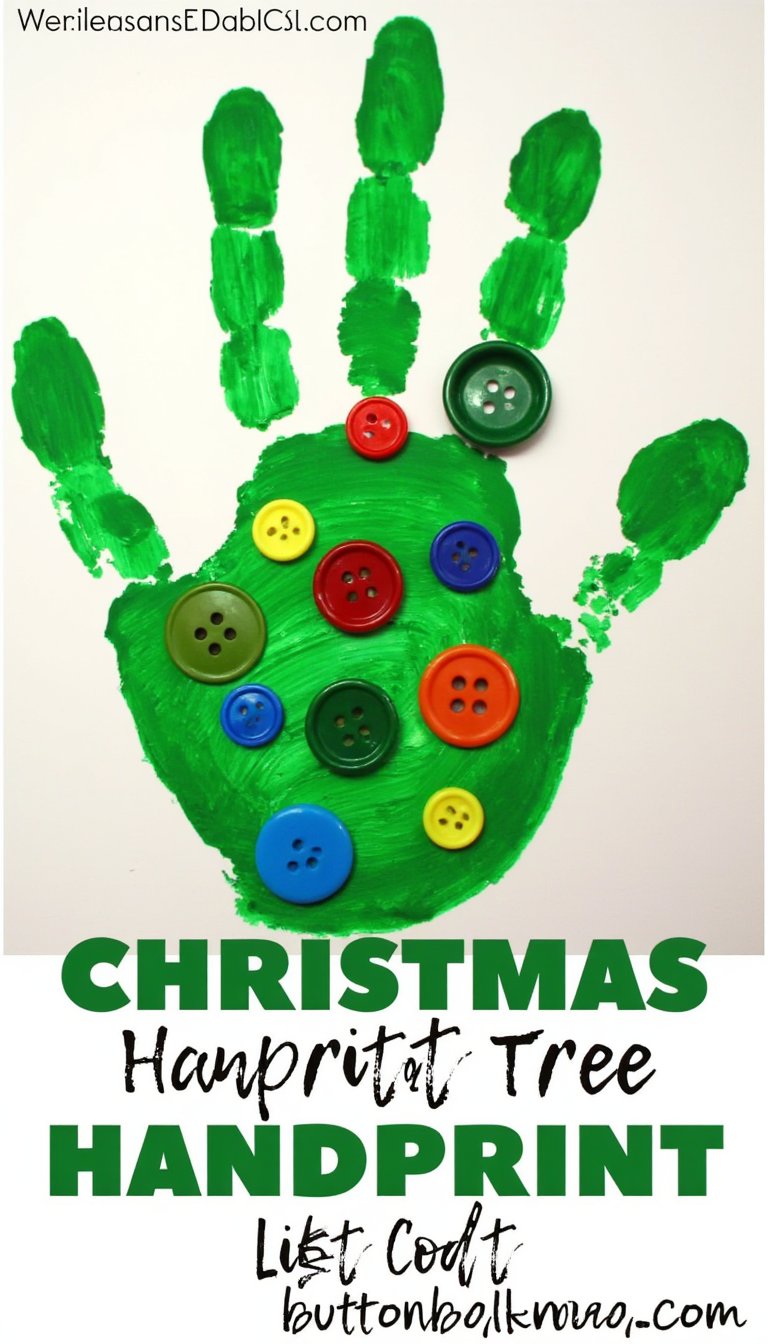
Raid your sewing kit or hit the craft store for a bag of assorted buttons. After painting a green handprint tree, use craft glue to adorn each finger-branch with colorful buttons as ornaments. This creates a fantastic tactile experience and a beautiful, textured piece of art. The mix of sizes and colors gives it a charming, vintage feel.
7. Popsicle Stick Frame Handprint Art

Elevate your handprint masterpiece by turning it into a ready-to-gift framed piece. Create your handprint tree on a sturdy piece of paper. Then, grab four jumbo popsicle sticks, paint them, and glue them together to form a square frame around the artwork. Hot glue a small loop of ribbon to the back for hanging. Grandparents, consider yourselves warned: you’re getting this for Christmas.
8. Reverse Canvas Handprint Tree

This technique creates a stunning, modern look. You’ll need a small canvas. Paint the entire canvas a solid color (navy blue or black works beautifully). Once dry, paint your child’s hand white and press it onto the canvas. The result is a negative space handprint. Then, carefully paint *inside* the white handprint with green to form the tree, leaving a crisp white outline. It’s a show-stopper.
9. Handprint Tree Gift Tags

Make your gift wrapping as special as the presents inside. Cut small rectangles out of cardstock or kraft paper. Create a tiny green handprint tree on each one. Punch a hole in the corner and thread some baker’s twine through it. Suddenly, every gift under the tree has a personal, handmade touch. It’s a small detail that makes a huge impact.
10. The “Oh Deer!” Forest Scene

Turn a single handprint tree into an entire winter wonderland. Create your tree on the right side of the paper. Then, use a brown thumbprint to make a reindeer’s body and a smaller fingertip for its head. Draw on little antlers and legs. Add some white paint splatters for snow in the background. This scene tells a story and is packed with creative fun.
11. Mosaic Tile Handprint Tree

This one is for those who love a more intricate, pixelated look. Instead of a solid paint handprint, have your child color a piece of paper completely with green crayon or marker. Then, cut that paper into tiny squares. Glue these squares onto a background paper in the shape of a handprint tree. It’s a labor of love that results in a stunning, unique piece of art.
12. Handprint Tree on a Wood Slice

Bring a rustic, natural element to your craft. You can find small, sanded wood slices at any craft store. Paint a simple handprint tree directly onto the wood using acrylic paint. The wood grain adds a beautiful, organic texture that you just can’t get on paper. Drill a small hole at the top, add twine, and you have a gorgeous, nature-inspired ornament.
13. Fingerprint Ornament Ball

This is a 3D twist on the classic. Take a plain, shatter-proof plastic ornament and remove the top. Have your child dip their hand in green paint and gently grip the ornament to leave a handprint. Once the green base is dry, use other colors to add fingerprint ornaments and a star. It’s a beautiful way to see their actual handprint from every angle.
14. The Family Forest

Why have one tree when you can have a grove? This is a perfect project for the whole family. Create a row of handprint trees on a large canvas or piece of poster board. Use different shades of green for each family member. You can even label the trunks with names and the year. It’s a beautiful representation of your family, all together on one page.
15. Puffy Paint Handprint Tree

Time to add some texture! Use puffy paint (the kind that comes in a squeeze bottle) to trace and fill in a handprint tree shape. You can do this on a shirt, an apron, or a canvas. When it dries, the paint raises, creating a fun, tactile tree that kids love to touch. It’s a sensory-friendly craft with awesome results.
16. Handprint Tree Card

Spread the holiday cheer with a card that’s made with love. Fold a piece of cardstock in half. On the front, create a beautiful handprint tree. Write a message like “Tis the Season!” or “Merry Christmas” inside. It’s more personal than any store-bought card and shows the recipient you took the time to create something just for them. 😊
17. Watercolor Resist Handprint Tree

This technique produces a magical, ethereal effect. Use a white crayon or a oil pastel to draw a handprint tree on white paper. It will be hard to see. Then, let your child use watercolor paints to wash color over the entire page. Like magic, the white handprint tree will resist the paint and appear! It’s a wow-worthy moment for any young artist.
18. Handprint Tree with Pom-Pom Ornaments
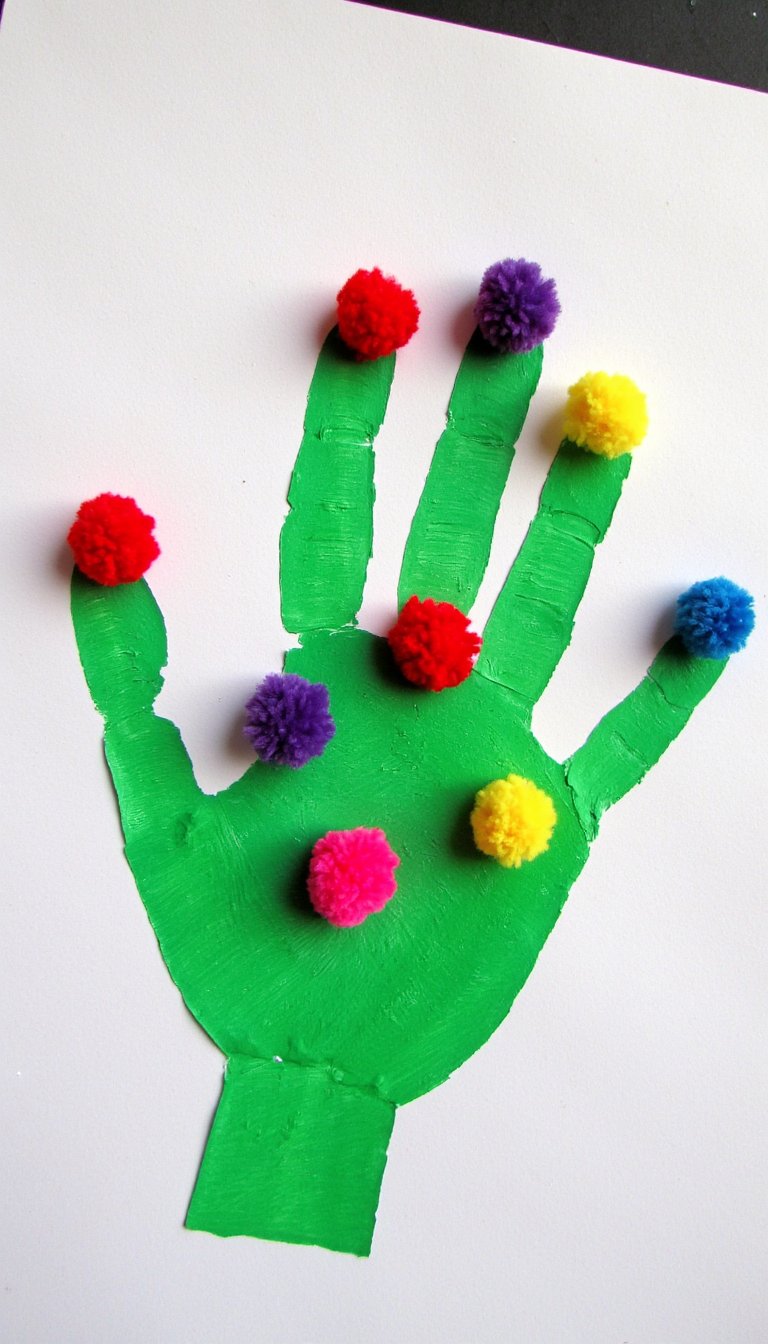
If you want maximum cuteness with minimum mess, this is your winner. Paint a simple green handprint tree. Then, give your child a bunch of small, colorful pom-poms and a bottle of glue. Let them glue the pom-poms onto the tree as decorations. It’s fantastic for developing those pincer grips, and the fluffy result is just adorable.
19. The Handprint Wreath

We’re bending the rules for our final entry, because sometimes a tree needs a wreath! Trace and cut out 4-5 green handprints. Arrange them in a circle with the wrists pointing inward and the fingers overlapping to form a beautiful, full wreath. Glue them down and add a red bow and some berry-like red fingerprints. It’s the perfect companion piece for your handprint tree gallery wall.
So there you have it—19 ways to turn a simple handprint into a holiday treasure. From the glitter-filled to the rustic, the simple to the elaborate, each of these crafts does more than just kill a rainy afternoon. They capture a moment. They freeze a tiny hand in time, creating a memory you can hold in your hands. This year, skip the stress of finding the “perfect” decoration. The most perfect one is the one you make together. Now, who’s ready to get a little messy?