
Halloween brings a special kind of magic to the kindergarten classroom. The crisp autumn air, the promise of sweet treats, and the chance to dress up spark endless imagination in five-year-olds. But let’s face it: as a teacher or parent, you do not want a craft session that requires a degree in structural engineering or leaves your room covered in permanent glitter. You need simple, engaging projects that tiny hands can actually manage on their own.
How do we balance festive fun with developmental growth? Simple. We focus on projects that build fine motor skills, encourage sensory play, and do not blow your supply budget. These projects use basic classroom staples like paper plates, glue sticks, and washable paint to create memorable keepsakes.
Get your glue sticks ready and clear off the craft tables. Here are fourteen kid-tested, teacher-approved Halloween crafts that your little ghouls will absolutely adore.
1. Paper Plate Jack-O’-Lanterns
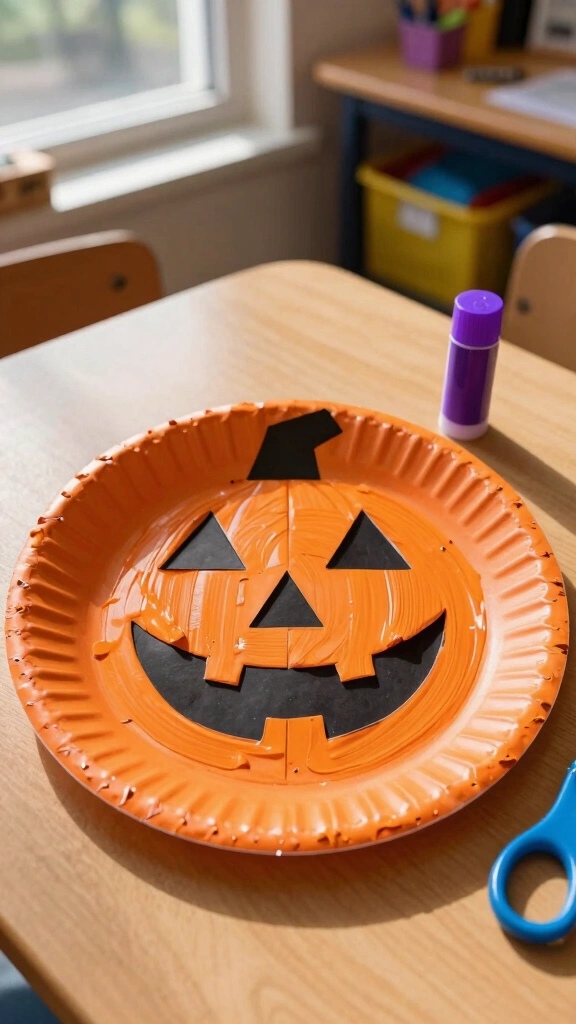
Nothing says Halloween quite like a classic orange pumpkin. For this project, kindergarteners paint a cheap paper plate with bright orange tempera paint. While the paint dries, children can cut simple geometric shapes out of black construction paper to build the face. This activity works wonders for their bilateral coordination as they hold the paper plate with one hand and paint with the other.
Pro-Tip for Easy Cleanup
Instead of messy liquid glue, have the kids use purple glue sticks to attach the eyes, nose, and mouth. The purple color helps them see exactly where they applied the adhesive, and it dries completely clear. You can also punch a hole in the top and tie a green pipe cleaner loop to create a stem and hanger.
2. Puffy Paint Cotton Ball Ghosts
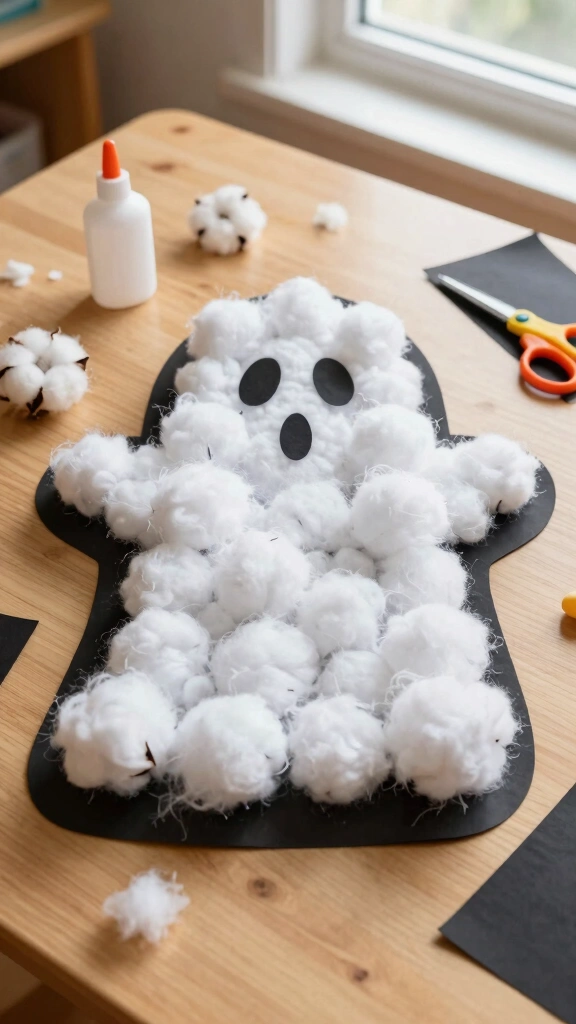
Do your kids love tactile, squishy crafts? This spooky ghost craft offers a fantastic sensory experience. Kids trace a basic ghost outline on black cardstock, cover the inside with liquid school glue, and press soft cotton balls into the sticky surface. Texture exploration plays a massive role in early childhood development, making this a win-win for sensory learning.
To finish the ghost, students glue two black paper circles onto the cotton balls for eyes. The contrasting black and white colors make these little spirits pop on your classroom bulletin board. Plus, pulling cotton balls apart slightly to make them fluffier helps strengthen those tiny finger muscles.
3. Cardboard Tube Mummies
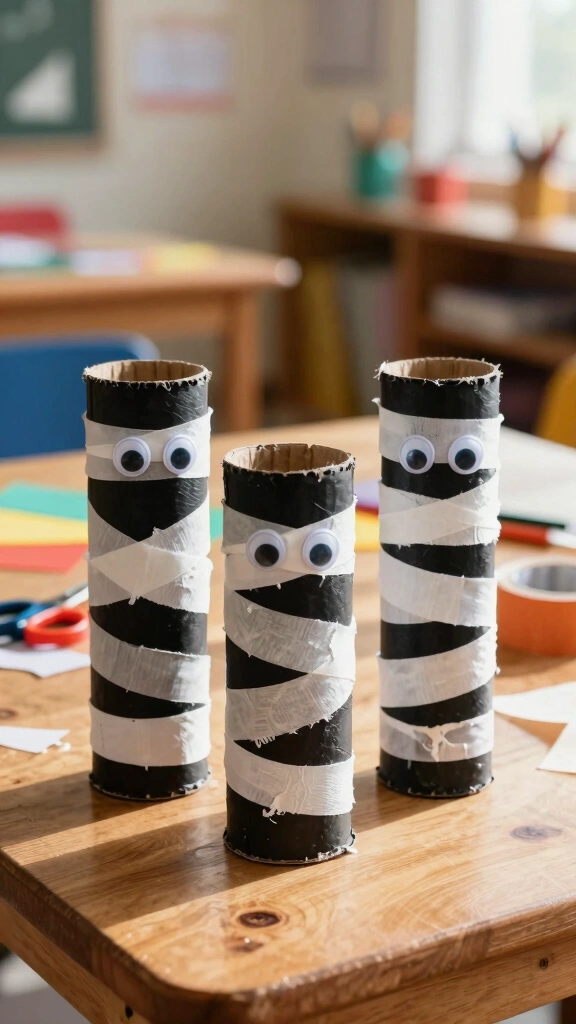
Do you have a mountain of empty toilet paper rolls hiding in your closet? Turn that recycling stash into adorable, wrap-around mummies. Kids paint the cardboard tubes black first, then wrap them in white masking tape or strips of crepe paper. Wrapping the tape around the tube builds spatial awareness and hand-eye coordination.
Leave a small gap in the wrapping near the top of the tube. Stick a pair of self-adhesive googly eyes in that gap so the mummy can peer out at the world. IMO, googly eyes make literally any craft ten times better! Kids can place these cute mummies on their desks to hold their pencils during the spooky season.
4. Egg Carton Bats

Give discarded egg cartons a second life as hanging nocturnal creatures. Cut paper egg cartons into three-cup sections, keeping the cups connected in a row. The middle cup acts as the bat’s body, while the two outer cups resemble pointed wings. Your students will paint the entire piece with black acrylic or tempera paint.
Hanging Your Bats
Once the paint dries, punch a small hole in the top of the middle cup. Thread a piece of black yarn through the hole so you can hang the bats from the ceiling. Glue on googly eyes and draw a tiny mouth with a white paint marker to complete the look.
5. Fine Motor Q-Tip Skeletons
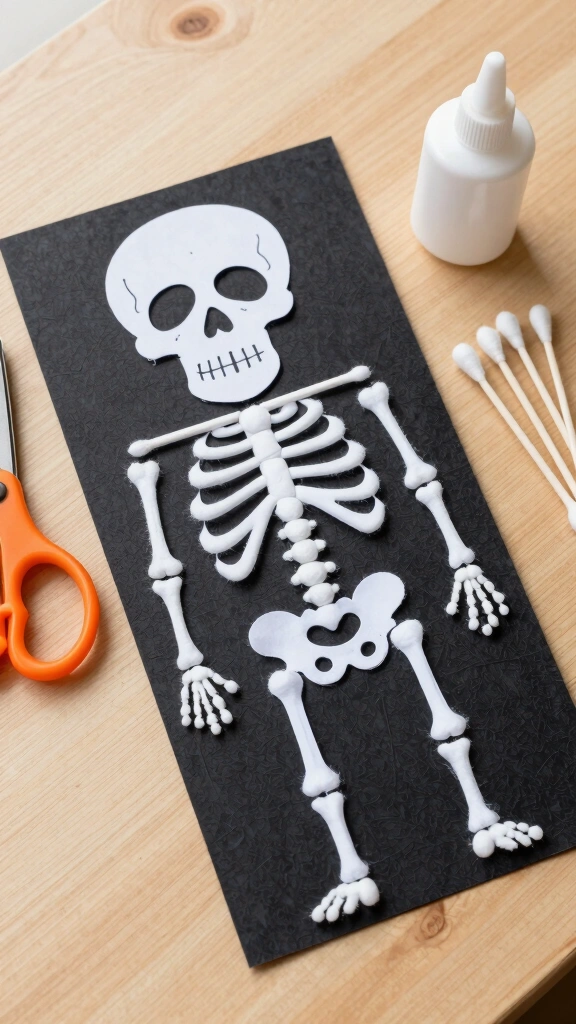
Are you looking for a craft that sneaks in a quick science lesson? This skeleton project teaches kids about the bones inside their bodies while they practice scissor skills. Students glue a white paper skull onto black construction paper, then arrange cotton swabs (Q-tips) underneath to represent the ribs, spine, arms, and legs.
- Materials needed: Black cardstock, white glue, Q-tips, scissors, and a paper skull template.
- Focus area: Fine motor control, pattern recognition, and basic human anatomy.
- Adjustment: Pre-cut some of the Q-tips into halves for the fingers and toes.
6. Watercolored Coffee Filter Monsters
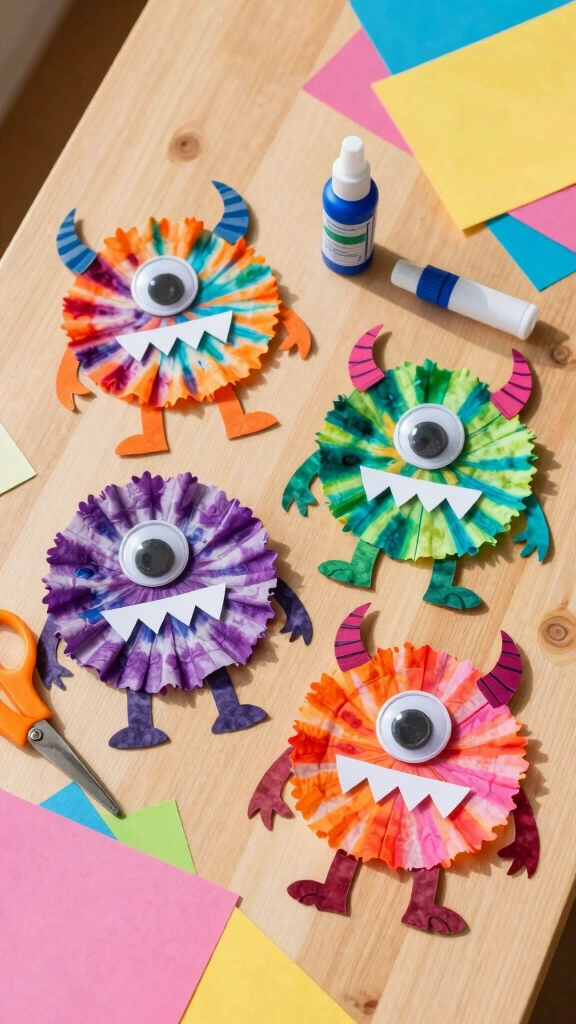
Watch science and art collide with these colorful, bleeding watercolor monsters. Kindergarteners color coffee filters with washable markers, then spray them with a fine mist of water. As the colors bleed and blend together, they create gorgeous, unpredictable tie-dye patterns. Once dry, these filters serve as the base for silly monsters.
Kids can cut out weird shapes for horns, teeth, and limbs from colored paper scraps. Glue the shapes and several mismatched googly eyes onto the dry coffee filter. Because every color blend looks different, no two monsters will look the same.
7. Handprint Spider Art

Parents cherish handprint art because kids grow up way too fast. To create this keepsake, paint your student’s palms and four fingers with black washable paint, leaving the thumb clean. Press one hand down on orange paper, then rotate the paper and press the other hand down with the palms overlapping. This technique creates a eight-legged spider body without a messy thumb print in the middle.
After the paint dries, add a big web in the background using a white crayon or silver glitter marker. Kids can add self-adhesive rhinestones or googly eyes to give their spider some personality. These make fantastic festive covers for October parent-teacher portfolios.
8. Paper Loop Witch Hats
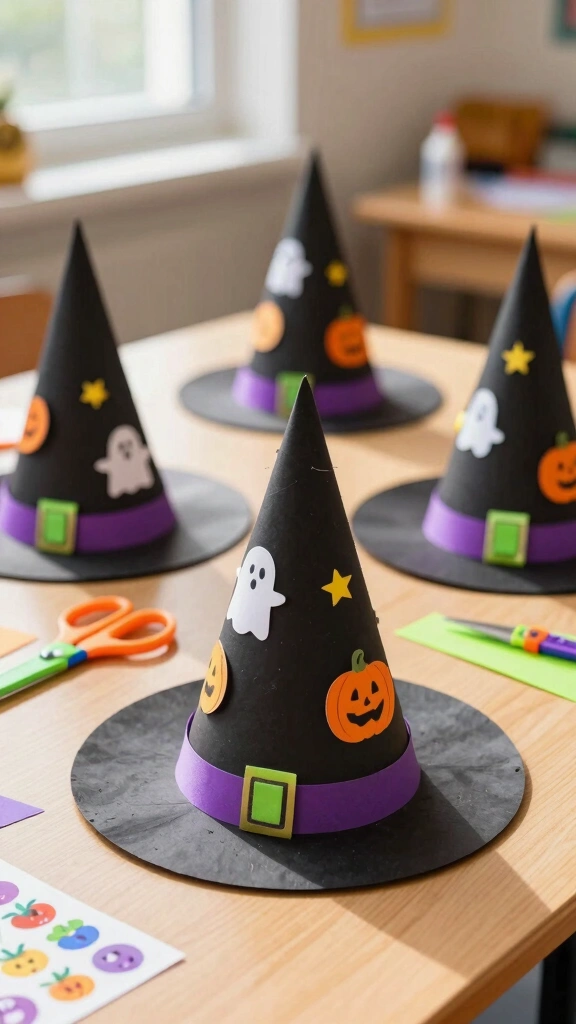
Practice three-dimensional construction with this fun, low-prep witch hat project. Cut strips of black construction paper, roll them into cones, and secure them with tape to create the hat’s crown. Glue the cone onto a larger black circle base to complete the classic witch hat shape. Now comes the best part: decoration!
Provide purple ribbons, green paper buckles, and Halloween-themed stickers. Kindergarteners love personalizing their hats with unique patterns and colors. You can tape these hats to paper headbands so the kids can wear their creations around the school during the class parade.
9. Paper Plate Spiderwebs

This craft double-duties as an excellent hand-eye coordination builder. Punch holes around the rim of a paper plate, then paint the plate a spooky color like deep purple or lime green. Tie a long piece of white yarn to one hole, wrap tape around the other end of the yarn to create a sturdy “needle,” and let your student weave the yarn through the holes.
The crisscrossing yarn creates a beautiful, chaotic web in the center of the plate. Add a plastic toy spider or a small paper spider to the web using a drop of glue. FYI: this weaving motion mimics sewing, which strengthens the pincer grasp needed for proper pencil holding.
10. Puffy Ghost Window Clings

Create translucent window decorations that capture the autumn sunlight. Mix equal parts of white shaving cream and liquid school glue to create a thick, puffy paint. Have the children paint ghost shapes onto clear plastic sheet protectors or parchment paper using this mixture. Let the shapes dry overnight.
Once dry, carefully peel the puffy ghosts off the plastic sheet. The dried glue-shaving cream mixture creates a flexible, rubbery texture that sticks naturally to glass windows without leaving a sticky residue. Draw little faces on the ghosts with a black permanent marker before sticking them up.
11. Leaf Monsters

Take your kindergarten class on an outdoor nature walk to collect fallen autumn leaves. Look for leaves of all shapes, sizes, and colors. Back in the classroom, press the leaves flat under heavy books for a few hours. Once flat, paint the leaves with acrylic paint or leave their natural colors exposed.
Glue the leaves onto paper and add googly eyes, pipe cleaner limbs, and paper mouths. This project teaches children to find art materials in the natural world. It also shows them how different textures interact, mixing crunchy, dry leaves with smooth paper and plastic eyes.
12. Paper Bag Monster Puppets
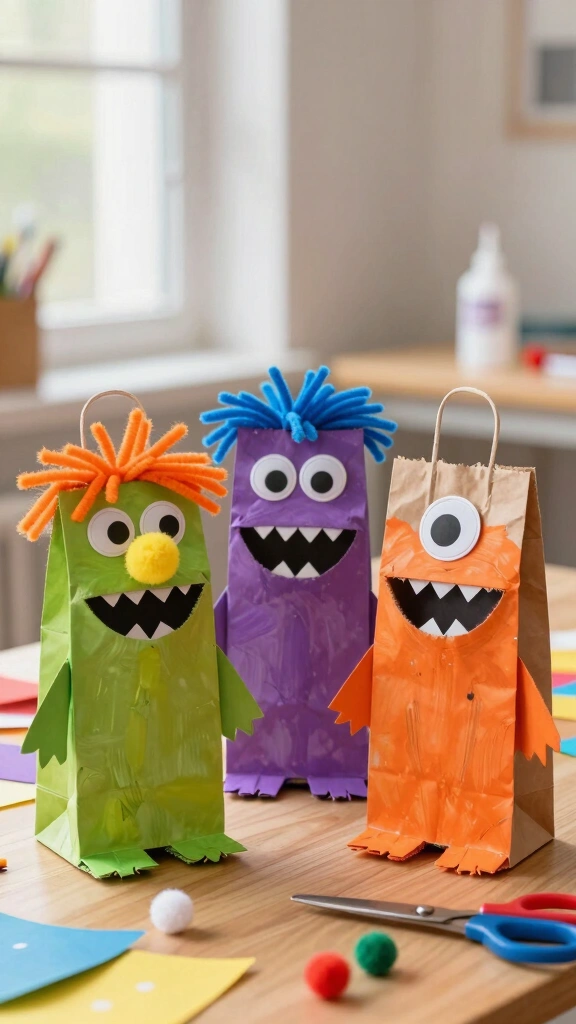
Encourage imaginative play and storytelling with simple brown paper lunch bag puppets. Have the children paint the bags their favorite colors, making sure to paint under the folded flap. The flap serves as the mouth, allowing the puppet to “talk” once the child slides their hand inside.
Provide yarn for hair, construction paper for sharp teeth, and pom-poms for noses. Kids love making their puppets look silly, scary, or friendly. Once the glue dries, host a mini puppet show where the monsters share their favorite Halloween jokes.
13. Yarn-Wrapped Pumpkins

Help kids develop their fine motor strength with yarn wrapping. Cut out pumpkin shapes from thick cardboard, then cut small notches around the edges to hold the yarn in place. Tape one end of orange yarn to the back of the cardboard pumpkin and show the kids how to wind the yarn around the shape, sliding it into the notches.
Wrapping the yarn builds concentration and determination as kids figure out how to cover the cardboard. Once they wrap the entire pumpkin, tuck the loose end of the yarn under a wrap and tape it down. Add a green felt leaf and a brown pipe cleaner stem to complete the look.
14. Bubble Wrap Painted Pumpkins

Got bubble wrap lying around from your recent online shopping deliveries? Do not throw it away! Tape a sheet of bubble wrap to a rolling pin, roll it in orange paint, and roll it across a white sheet of paper. The bubble wrap leaves a fun, bumpy texture that looks exactly like the rough skin of a real pumpkin.
Once the paint dries, help the kids trace a pumpkin shape on the patterned paper and cut it out. Glue a brown paper stem to the top. The unique texture makes these pumpkins stand out from ordinary flat paper crafts, and the kids will love the satisfying popping sound of the bubble wrap during setup.
Wrapping Up Your Spooky Craft Session
Crafting with kindergarteners does not have to feel overwhelming. By focusing on simple materials and open-ended projects, you allow your students to express their creativity while building essential motor skills. Remember, the goal of these activities is the process, not perfection. If a ghost has five eyes or a pumpkin turns out green, celebrate their unique artistic choices!
Which one of these crafts will you try first in your classroom? Gather your supplies, clear your tables, and enjoy making some spooktacular memories with your little ghouls this October.