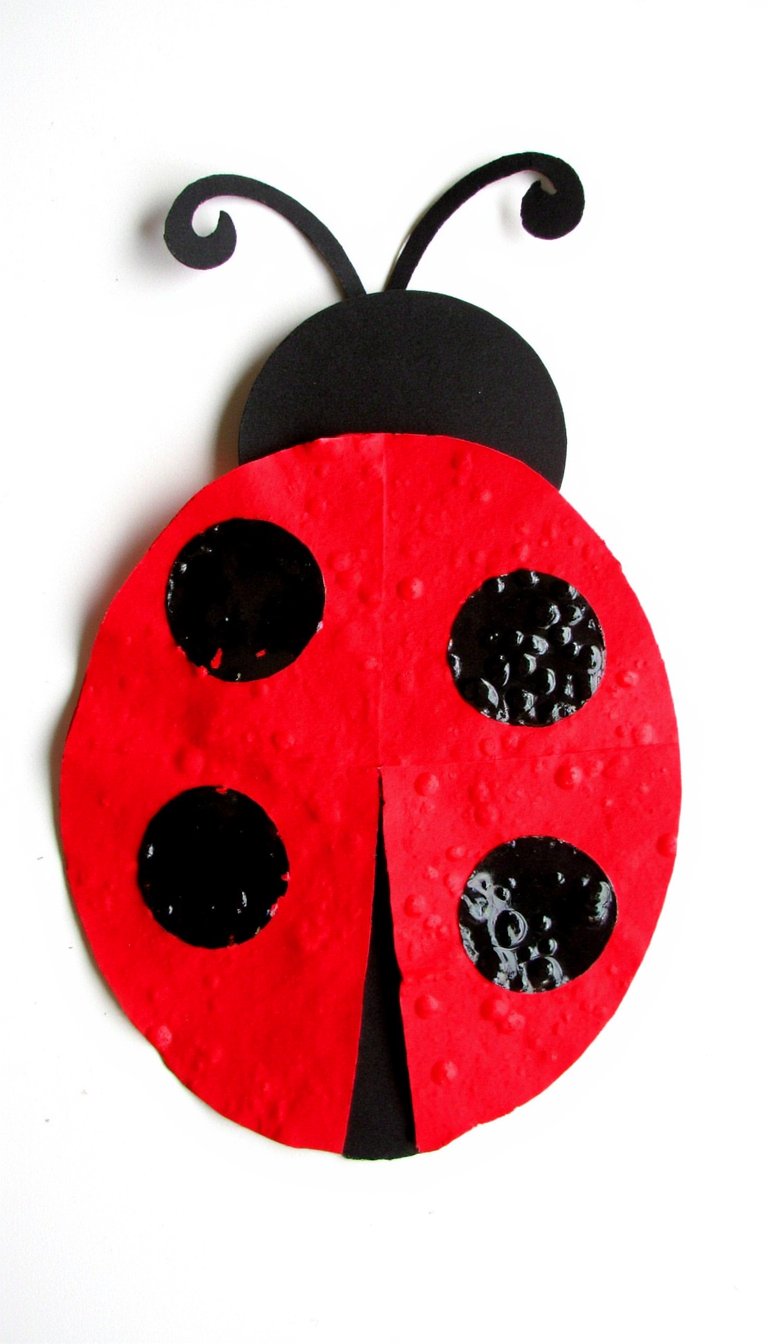
Let’s be honest, is there any creature that captures the magic of childhood quite like the ladybug? Those tiny red beetles with their perfect polka dots are like nature’s own little toys. If your preschooler is currently obsessed (or if you just need a seriously cute activity to fill an afternoon), you’ve landed in the right spot. I’ve scoured the crafty corners of the internet and my own memory bank of glue-stick disasters to bring you the ultimate list of ladybug crafts for preschool. These ideas are low-mess, high-fun, and designed for little hands to actually succeed at. Ready to get spotted? Let’s go.
1. Paper Plate Ladybug Classic
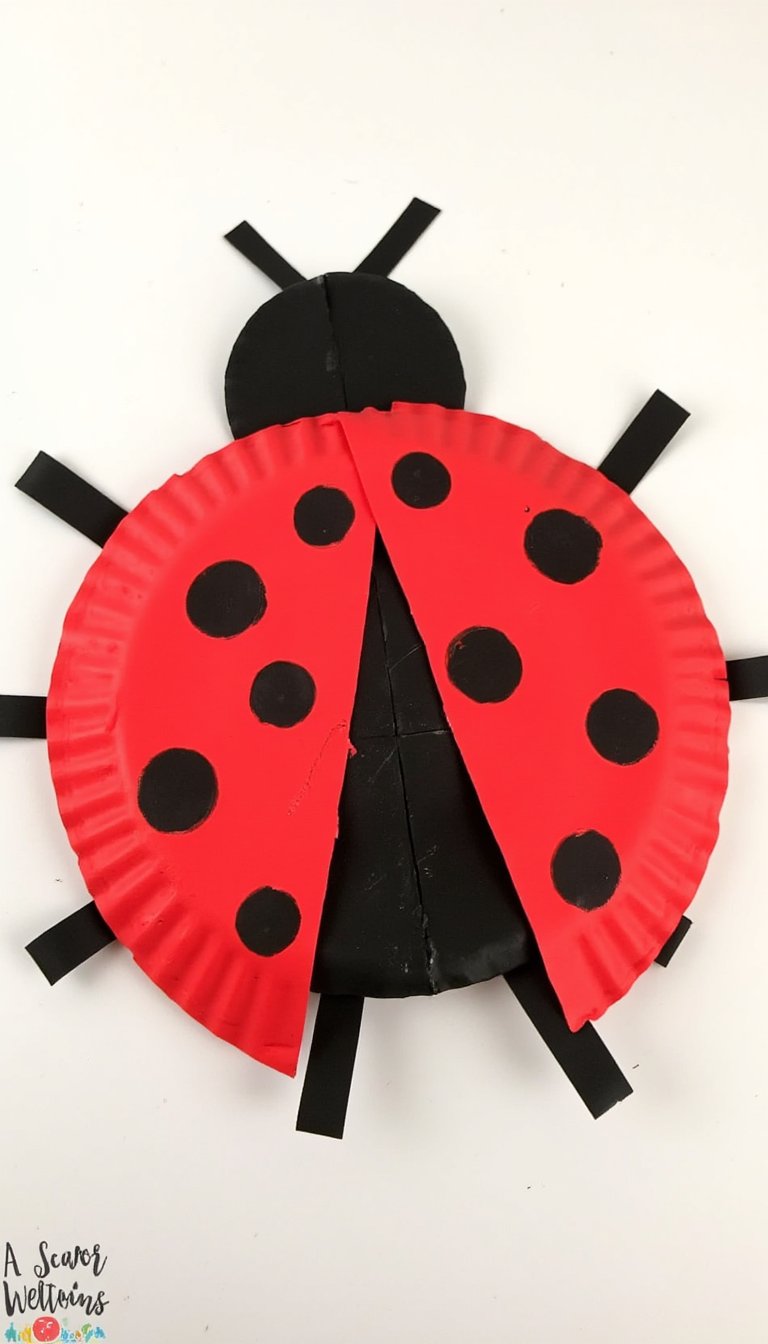
You can’t go wrong with a classic. This craft is the perfect starting point because you probably already have everything you need. Grab a paper plate, some red paint, and a black marker. Let your little one go to town painting the plate red. Once it’s dry, help them fold it in half—instant wings! They can draw on the head, legs, and those all-important black spots. It’s a fantastic way to talk about symmetry and basic insect anatomy. Plus, they make the cutest wall decorations for a spring-themed room.
2. Thumbprint Spot Invitation
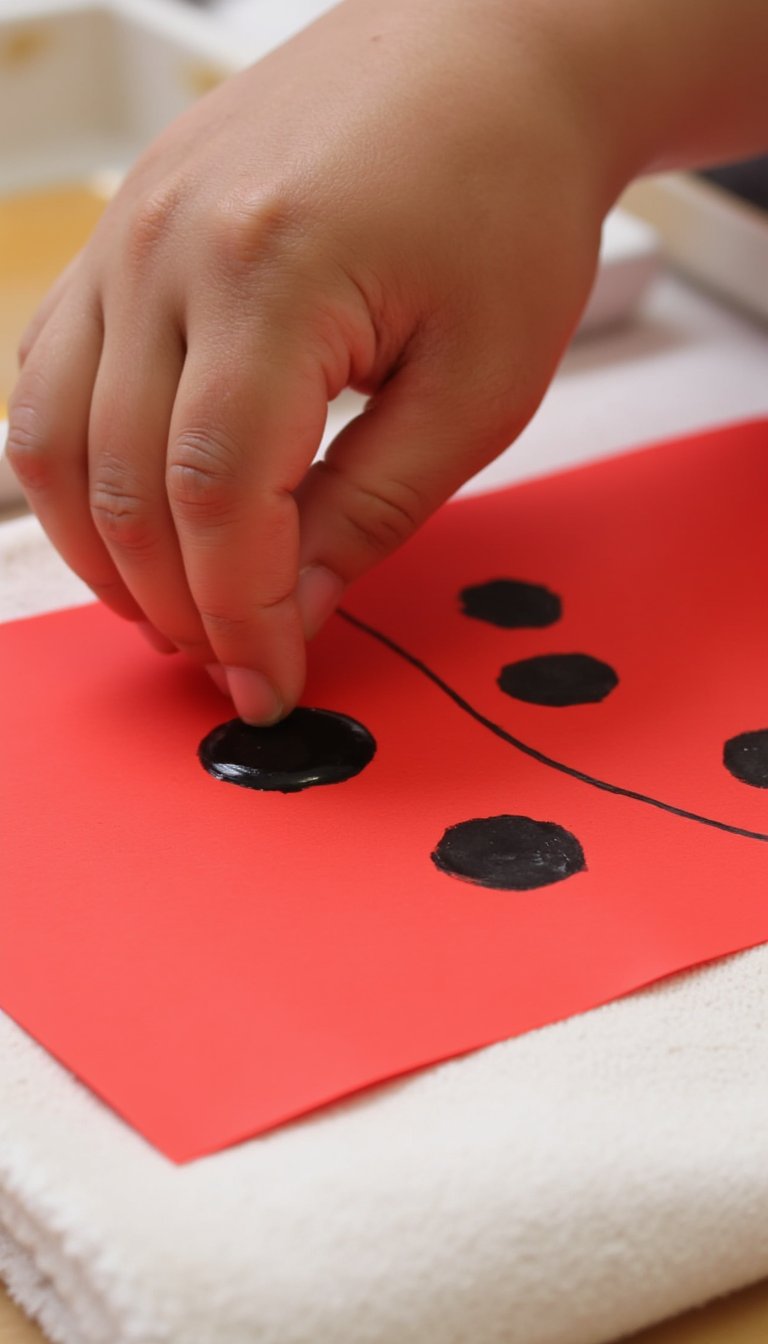
Minimal prep, maximum cuteness. This one is perfect for when you need a quick, contained activity. Simply draw or cut out a simple red ladybug body shape (just an oval with a head) on a piece of paper. Pour a little black washable paint onto a plate. Now, invite your preschooler to dip their thumb in the paint and press it onto the ladybug’s back to create the spots. It’s a wonderful sensory experience and doubles as a sweet keepsake. You’ll have their tiny thumbprint forever! Pro tip: Use a damp cloth nearby for easy clean-up.
3. Rock Pets Ladybug

Take the crafting outdoors! Go on a little adventure with your child to find the perfect smooth, oval-ish rock. Wash it, dry it, and then let the painting begin. Use acrylic paints for a vibrant, lasting finish. Paint the rock red, add a black head, and then dot on the spots with the end of a paintbrush. These ladybug rock pets are fantastic for imaginative play. They can live in the garden, guard a windowsill, or be part of a tiny bug city. They’re practically indestructible, which is always a win.
4. Egg Carton Creepy-Crawly
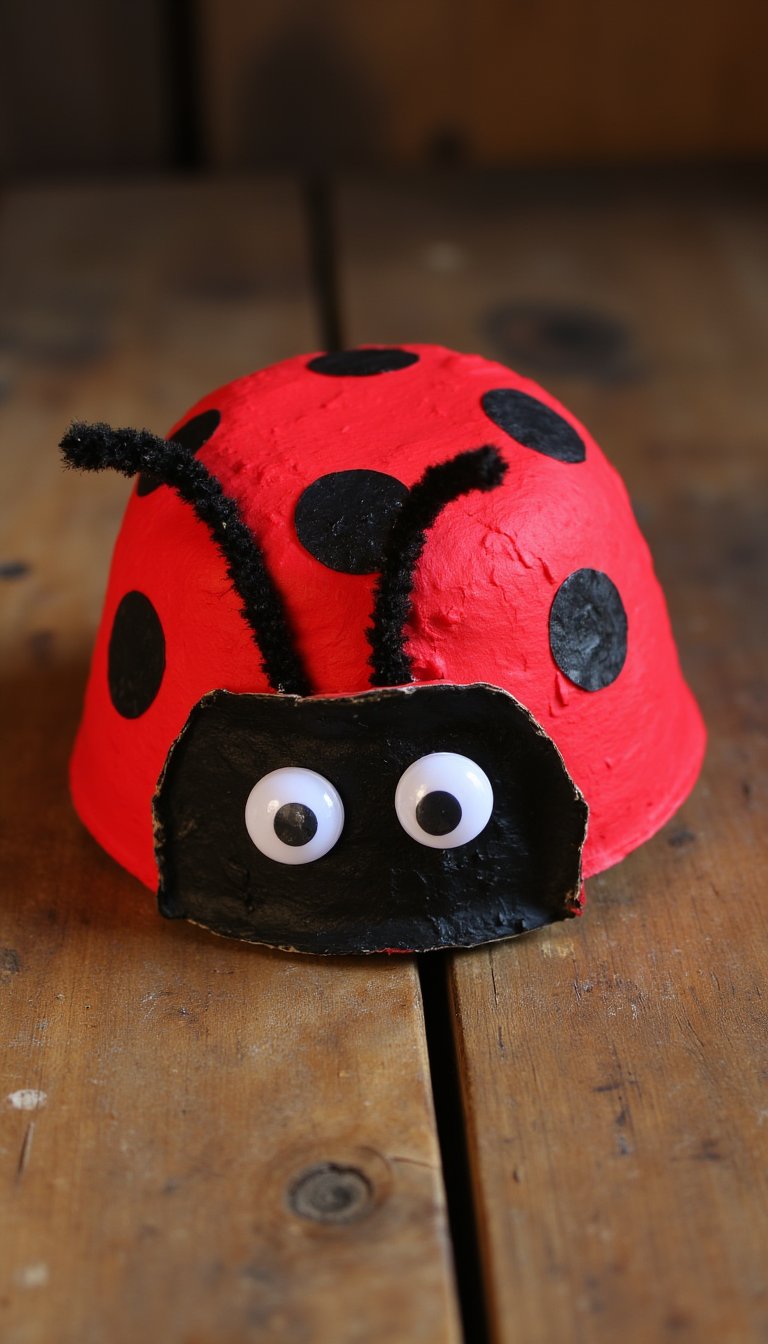
Upcycling at its finest! Cut a single cup from a cardboard egg carton. This bumpy shape is just begging to become a bug body. Paint it red, add pipe cleaner antennae (just poke two small holes in the top), and glue on googly eyes. For the spots, you can use black paint, stickers, or even punched-out black paper circles. This craft is wonderfully tactile and 3D. String a few together, and you’ve got a whole ladybug caterpillar train!
5. Ladybug Hat for Dramatic Play
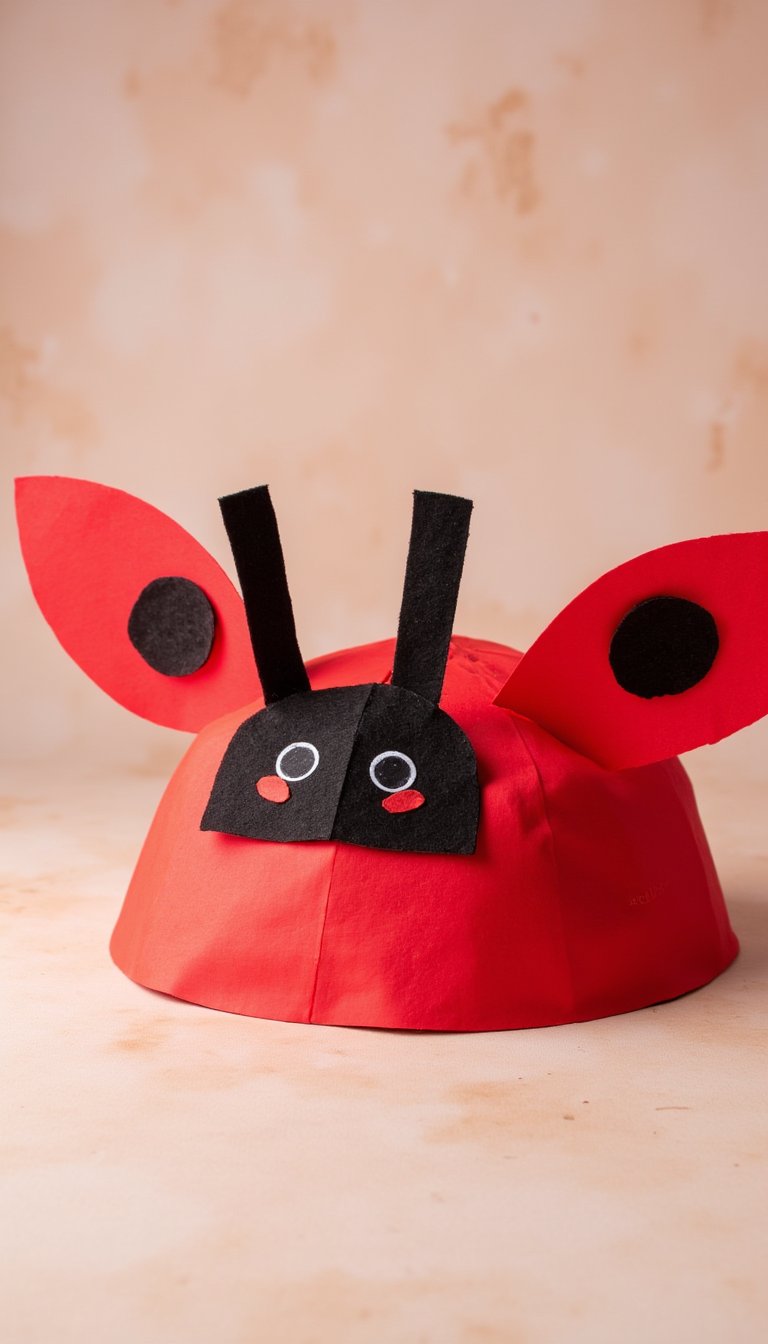
Turn your preschooler INTO the ladybug! This craft requires a bit more adult help but the payoff is huge. Take a simple red headband or make a band from construction paper. Then, cut out two large black circles and two slightly smaller red circles. Glue the red circles onto the black ones to create the wings, and then attach them to the headband so they stick up. Add a few black spots, and voilà! Instant transformation. This is a guaranteed hit for preschool dramatic play and makes for an adorable photo op.
6. Clothespin Fine Motor Friend

This craft sneaks in some fine motor skill practice, and kids won’t even notice they’re learning. Paint a wooden clothespin red. While it dries, cut a small black circle for the head and a larger black circle, then cut that larger circle in half to make two wings. Glue the head to the top of the clothespin’s “pinching” end. Glue the two half-circle wings to the sides. Add white dots for eyes and black spots on the wings. Now, your ladybug can clip onto everything—artwork, lunch bags, your shirt! It’s functional art.
7. Collage Ladybug with Tissue Paper

Hello, texture! For this craft, draw a simple ladybug outline on a sturdy piece of paper. Then, tear or cut red tissue paper into small pieces. Using a glue stick, let your child cover the ladybug’s body with the tissue paper, overlapping the pieces for a cool mosaic effect. They can use black construction paper for the head, spots, and legs. The crumpling and gluing of the tissue paper is excellent for developing those little hand muscles. The final result is beautifully tactile and unique every time.
8. Pinecone Garden Visitor

Another fantastic nature-meets-craft project. Find a pinecone that’s mostly closed—it will be the perfect lumpy body. Paint the tips of the scales red. Once dry, add tiny black spots with a fine brush or a marker. Glue on a small pom-pom or bead for the head and attach two pipe cleaner antennae. This ladybug craft feels so organic and looks adorable placed among potted plants or on a nature shelf. It connects the art activity back to the ladybug’s real outdoor home.
9. Paper Bowl Flying Bug

Similar to the paper plate, but with a deeper, bowl-like shape that feels more substantial. Use a red paper bowl (or paint a white one). Cut a large black semicircle from construction paper and glue it over the top half of the bowl to create the closed wings look. Add a black head at the rim, spots on the red part, and draw on a sweet face. You can even attach a piece of string to hang it from the ceiling. Watching these gently spin in the breeze is so satisfying.
10. Ladybug Crown for Royalty
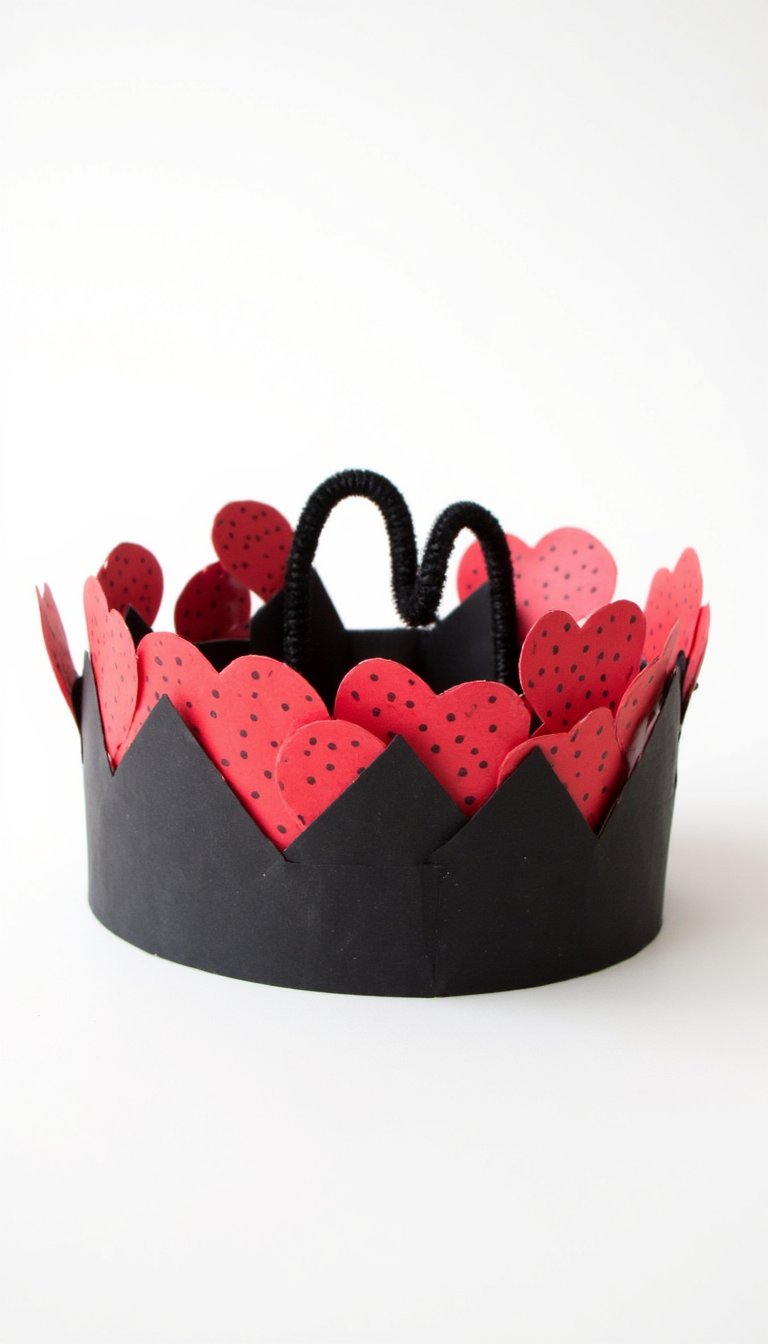
Every little bug needs a crown, right? Measure a strip of black construction paper to fit around your child’s head and staple it into a circle. Then, cut out several simple red heart shapes—when you flip them point-side down, they look just like ladybug wings! Let your preschooler decorate each heart-wing with black spots, then glue or staple them all around the crown. Add a few pipe cleaner antennae poking up from the front. Now you have a Ladybug King or Queen. Prepare for some regal buzzing around the living room.
11. Handprint Keepsake Ladybug

Warning: This one might make you a little emotional. Paint your child’s palm red and their fingers black. Press their hand firmly onto a piece of paper with the fingers together. The palm makes the red body, and the black fingers become the ladybug’s legs and head. After it dries, add black spots and antennae. It’s a perfect snapshot of how small their hands are right now. Frame it, gift it to grandparents, or keep it forever to remember these sweet, messy days.
12. Play Dough Stamp & Smash

Sometimes, crafts don’t need a permanent product. This is a pure sensory and process-based activity. Make or buy red play dough. Provide black pony beads or buttons for spots, and short pieces of black pipe cleaner for antennae. Show your child how to roll a ball for the body, flatten it, and add the details. The best part? They can smash it and start over a hundred times. It builds creativity without the pressure of a “finished” craft. It’s just fun.
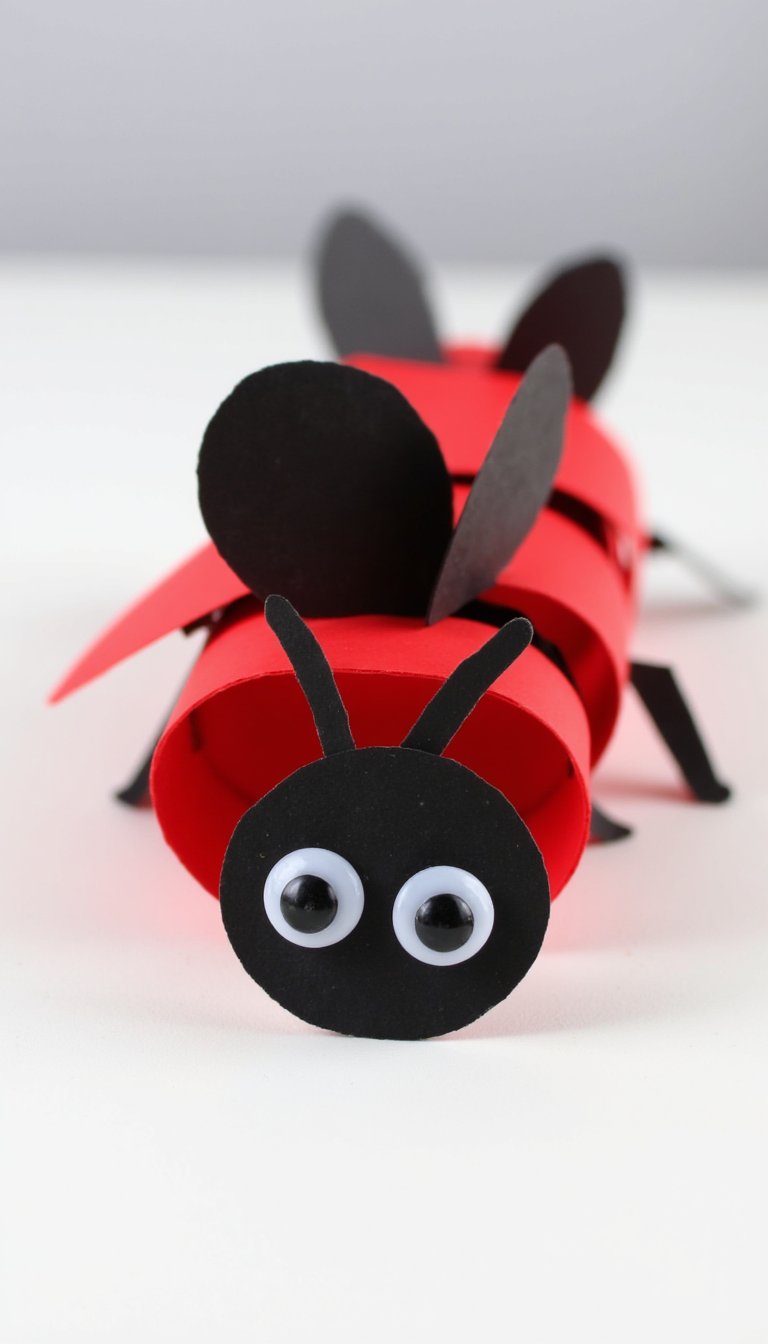
13. Toilet Paper Roll Tube Buddy

Don’t toss that tube! Flatten a toilet paper roll slightly and paint it red. Once dry, use a black marker to draw a line down the center (for closed wings), add spots, and draw a face on one end. You can also add accordion-folded black paper legs that tuck inside. These tube ladybugs stand up on their own and are great for storytelling. Make a whole family of them!
14. Leaf-Printed Ladybug Art
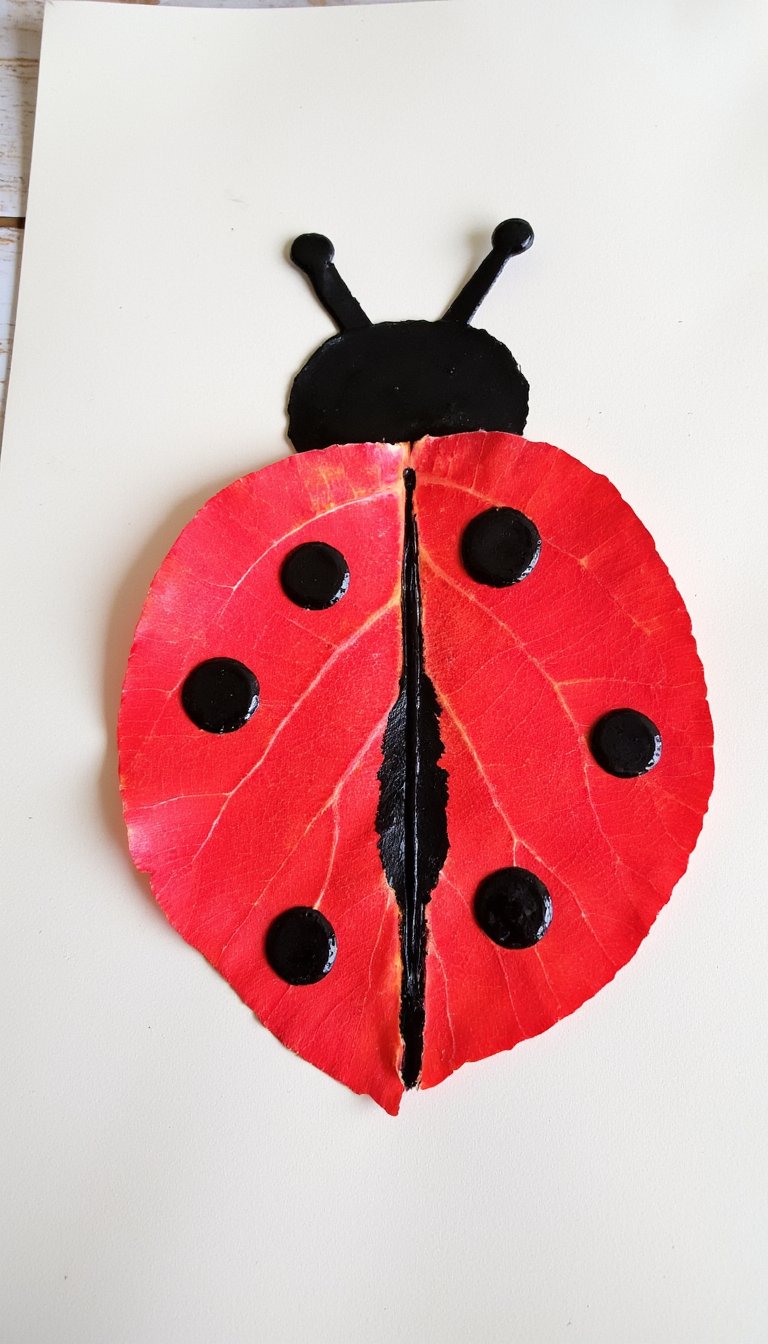
Combine a nature walk with art time. Find a sturdy leaf with a nice shape (like a maple or sycamore leaf). Paint the *back* of the leaf with red paint and press it onto paper to make a print. The veins create a beautiful wing-like texture. After the red print dries, use paint or markers to add a black head, spots, and legs. This activity teaches a simple printmaking technique and connects the ladybug to its natural leaf habitat. Each print is completely unique.
15. Paper Chain Caterpillar… That Turns into a Ladybug!
A two-for-one lifecycle lesson! Make a short paper chain using red and black construction paper strips. This is your caterpillar. Now, cut out two large black wings and glue them to the top link (the head). Add googly eyes and antennae. You can literally show how a caterpillar (the chain) transforms into a ladybug (with wings). It’s interactive, colorful, and a fantastic visual for teaching metamorphosis. Preschoolers love the “magic” of the change.
16. Bubble Wrap Printing Fun
Who doesn’t love popping bubble wrap? First, let your child paint a piece of bubble wrap (with small bubbles) entirely red. Then, press it onto a piece of paper to make a textured red print. While that masterpiece dries, they can pop away! Cut the dried print into a ladybug body shape, add black paper details, and glue it all together. The bubbly texture is so cool and engaging. This craft is all about the fun of the process.
17. Ladybug Sensory Bag

For a totally mess-free, calming experience, try a sensory bag. Fill a sturdy zip-top bag with clear hair gel or hand sanitizer. Add in some red glitter and a handful of small black pom-poms or beads. Seal it tightly (I recommend taping the seal for extra security). Let your child push the black “spots” around the red “body” with their fingers. It’s mesmerizing, great for building finger strength, and perfect for quiet time or on-the-go entertainment. No glue, no fuss, all fascination.
And there you have it—17 spots of pure crafting inspiration to keep your preschooler busy, learning, and creating. The best part about these ladybug crafts for preschool isn’t just the adorable final product (though that’s a nice bonus). It’s the time spent together, the conversations you have about colors and counting spots, and the proud smile on their face when they show off what they made. So, grab the red paint, embrace a little glitter (or maybe avoid it, I don’t judge ), and get ready for some seriously cute bug-based fun. Which one will you try first? Happy crafting!