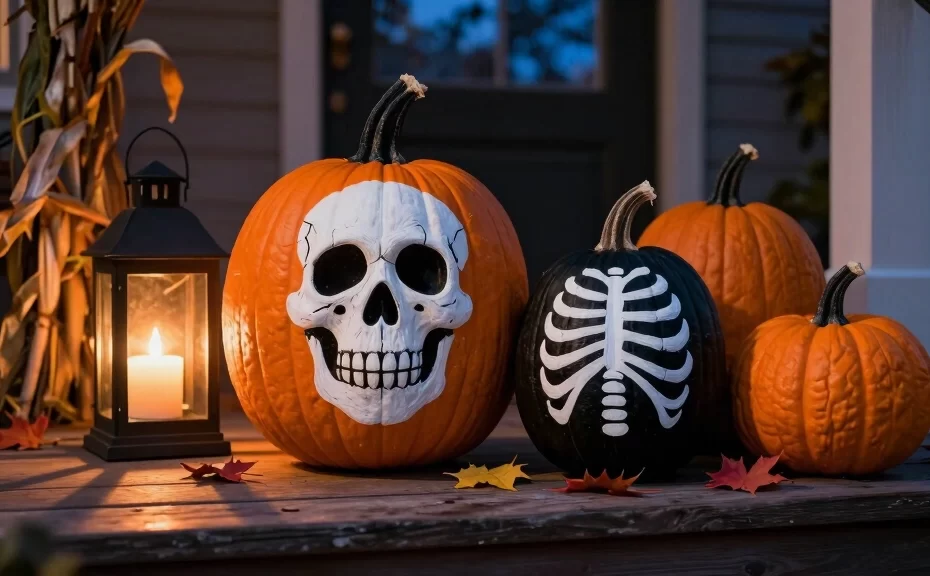
Are you tired of the messy cleanup that comes with carving pumpkins? You are not alone. Ditching the carving knives for paintbrushes keeps your porch clean and makes your Halloween decorations last twice as long. If you want to terrify the neighbors or just show off your creative side, skeleton designs offer the perfect mix of spooky and stylish.
Why skeletons, you ask? They represent the ultimate classic Halloween vibe, and they look incredibly striking against a bright orange or deep black background. In this guide, you will discover 15 creative skeleton pumpkin painting ideas that will elevate your doorstep game. Grab your acrylic paints, put on your favorite spooky playlist, and let’s get painting! 😉
1. The Ribcage Ridge Design

Have you ever noticed how the natural ridges of a pumpkin look exactly like human ribs? You can easily turn this natural texture into a spooky anatomy lesson. Paint the entire pumpkin matte black, let it dry, and then use white paint to trace the ridges as individual ribs. Add a bony spine right down the center to tie the whole look together.
Pro Painting Tip
Use a medium round brush with acrylic paint for this project. Keep your paint thick so it does not run down the grooves, which ensures your bony lines look sharp and clean.
2. The Neon Glow-in-the-Dark Skull

Who says Halloween decorations must be dark and dreary? You can make your front porch pop at night by painting a vibrant neon skeleton face. Start by painting a solid black skull silhouette, then layer bright neon green, pink, or orange paint over the top. Finish the design with a coat of glow-in-the-dark paint to scare trick-or-treaters after the sun goes down.
- Best Base Coat: Matte Black Spray Paint
- Accent Colors: Electric Lime, Neon Pink, and Radioactive Yellow
- Finish: Clear Acrylic Sealer
3. Dia de los Muertos Sugar Skull

Do you want to celebrate with vibrant colors and rich cultural traditions? A Dia de los Muertos sugar skull pumpkin brings gorgeous, intricate details to your Halloween display. Paint your pumpkin solid white first, then draw large black circles around the eyes. Fill in the face with colorful flower petals, dots, swirls, and spiderwebs using fine-tip paint pens.
This style allows you to show off your detailed brushwork. IMO, this is one of the most eye-catching designs you can display because the bright colors contrast beautifully with traditional dark Halloween decor.
4. The Skeleton Peeking Out
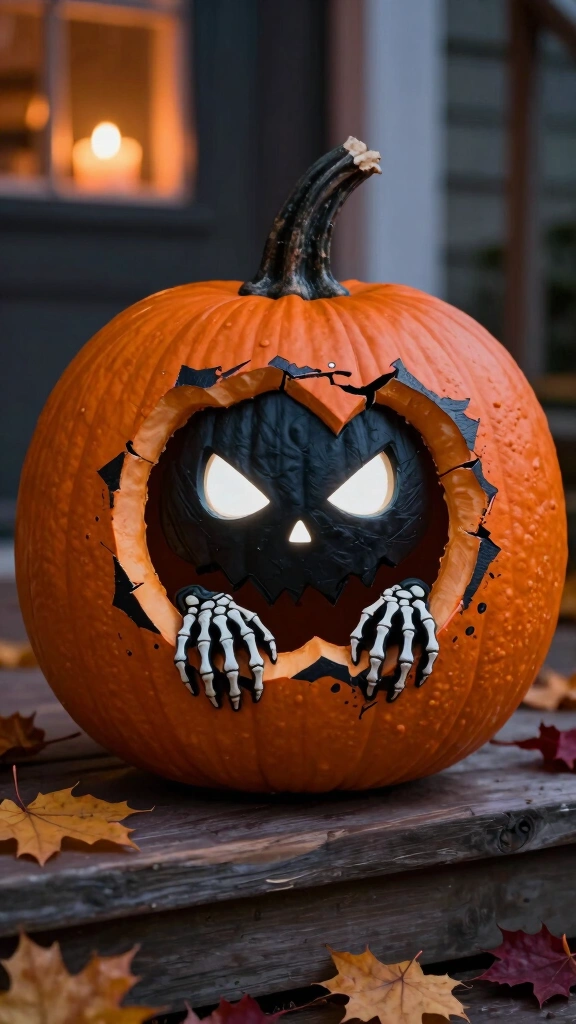
Create a fun optical illusion that makes it look like a tiny skeleton is trapped inside your pumpkin. Paint a jagged, dark crack across the middle of your pumpkin to look like broken shell pieces. Inside that dark space, paint two skeletal hands clawing their way out and a pair of glowing white eyes staring into the dark.
You can use dark gray paint around the edges of the “crack” to add depth and dimension. This shading technique creates a 3D effect that will make passersby stop and stare.
5. Dancing Skeleton Silhouettes
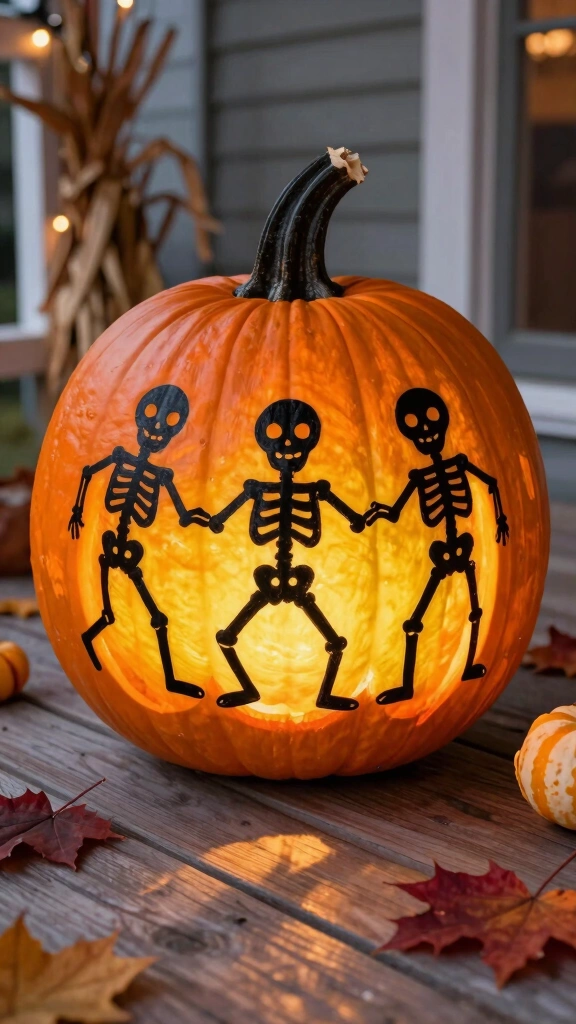
Bring some playful energy to your porch with a ring of dancing skeletons. Paint your pumpkin a warm, gradient sunset orange and yellow to resemble a glowing jack-o’-lantern. Once dry, use a black paint pen to draw simple, cartoonish skeleton figures dancing hand-in-hand all the way around the pumpkin.
Do you worry about drawing perfect skeletons? Do not stress! You can easily find free printable stencils online to trace the shapes before you start painting.
6. Pastel Pink Goth Skeleton
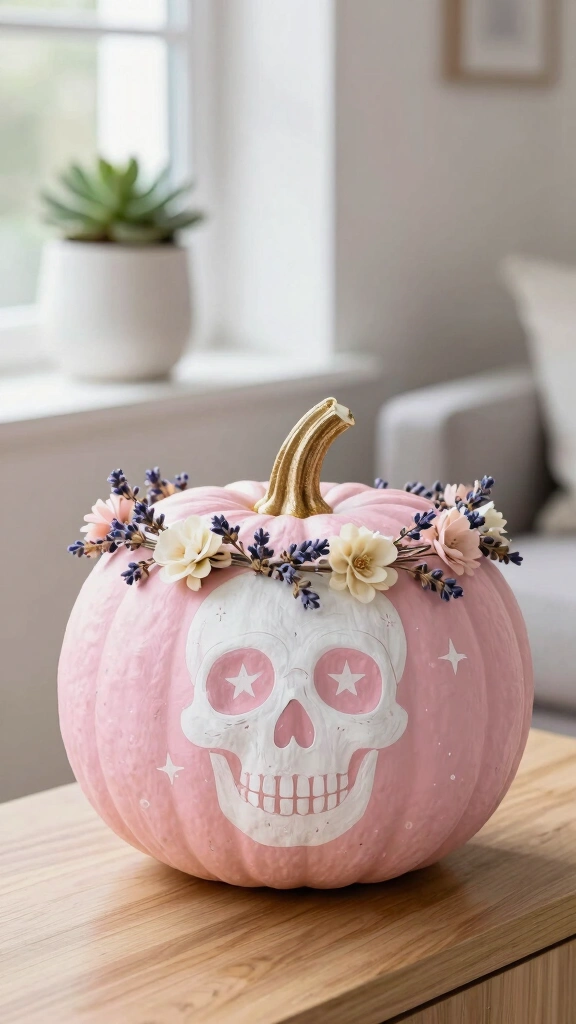
Are you looking for a modern, trendy aesthetic that stands out from the crowd? Ditch the traditional spooky colors and paint your pumpkin a soft pastel pink. Paint a classic white skull on the front, but add cute details like starry eyes or a tiny floral crown. This “pastel goth” look offers a chic and whimsical alternative to traditional horror themes.
This design fits perfectly in modern homes and apartments. You get all of the Halloween spirit without sacrificing your bright, clean home aesthetic.
7. The Jack Skellington Classic
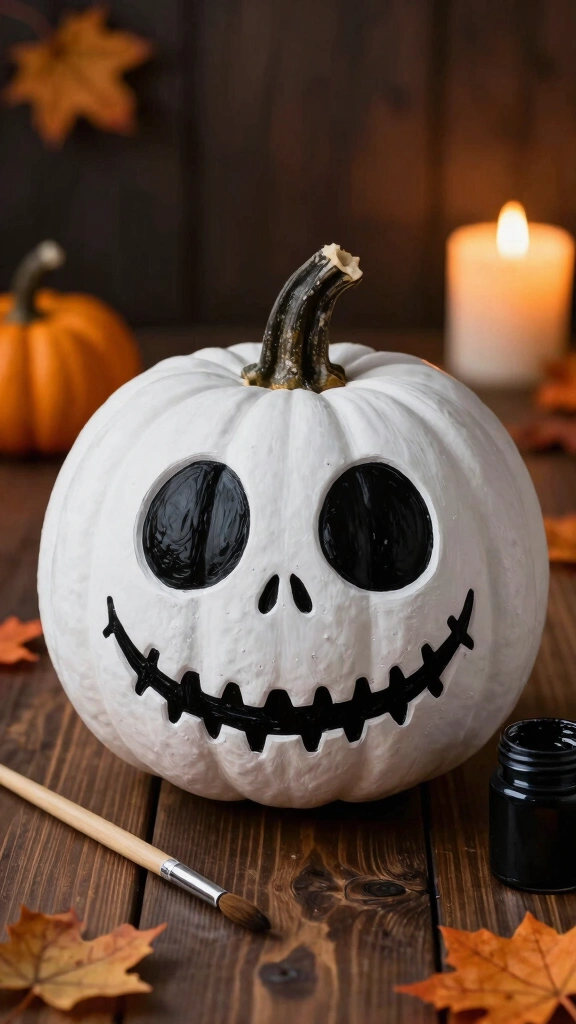
You cannot celebrate Halloween without honoring the Pumpkin King himself. This design is incredibly simple, making it perfect for kids and beginner painters. Paint the entire pumpkin stark white, let it dry, and then use black paint to draw Jack’s signature hollow eyes, tiny nostril slits, and stitched-up smile.
Materials Needed
You only need three basic items for this project: a real or foam white pumpkin, black acrylic paint, and a fine-tip detail brush. You will finish this iconic project in less than thirty minutes!
8. The Split-Face Skeleton
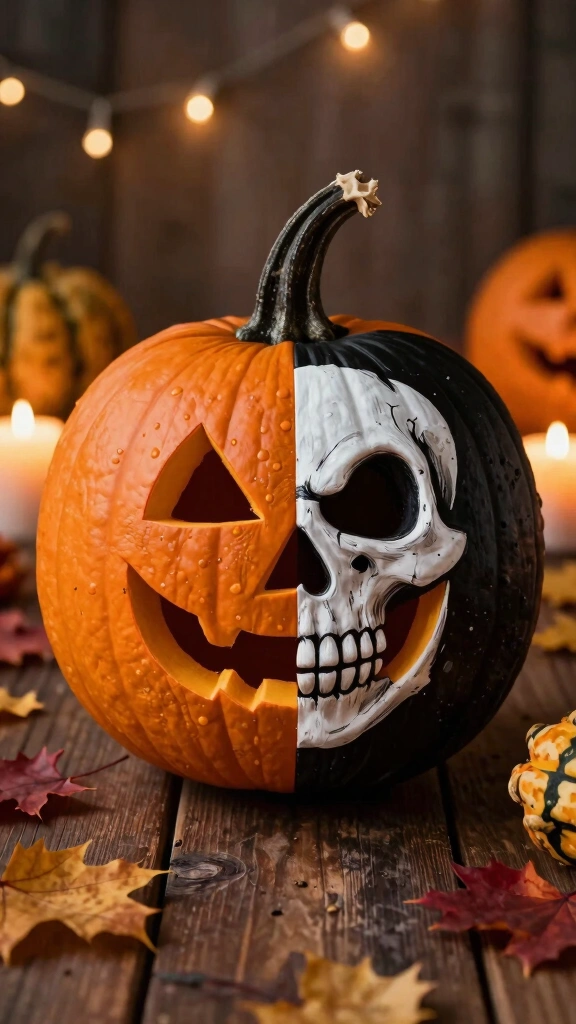
Why choose between a classic pumpkin look and a creepy skeleton when you can have both? Paint only one half of the pumpkin with a creepy, highly detailed white skull. Leave the other half as natural orange, or paint it to look like a friendly, smiling jack-o’-lantern. This half-and-half contrast symbolizes the playful and spooky sides of the holiday.
To make the split look seamless, use a piece of painter’s tape down the middle before you begin. Remove the tape slowly to reveal a perfectly straight dividing line.
9. Bony Hands Wrapping Around

This design uses the three-dimensional shape of the pumpkin to create a creepy, tactile effect. Paint the pumpkin a deep metallic purple or midnight blue. Then, paint long, bony skeleton fingers wrapping around the sides from the back, as if a creature is grabbing the pumpkin from behind.
Make sure you paint the knuckles and joints with extra detail. Adding tiny highlights of light gray or silver makes the bones look three-dimensional and realistic.
10. Vintage Anatomy Class Diagram

Do you love vintage home decor and dark academia? You can turn a faux white pumpkin into an antique medical illustration. Paint a highly detailed, anatomically correct skull on the front using thin, sketchy black ink lines. Add cursive labels pointing to different bones, like “frontal bone” or “mandible,” to mimic an old textbook page.
To get that aged, vintage look, lightly brush a watered-down brown paint or mod podge over the dry white surface. This creates a stained, parchment-like finish that looks incredibly authentic.
11. The Pirate Skeleton
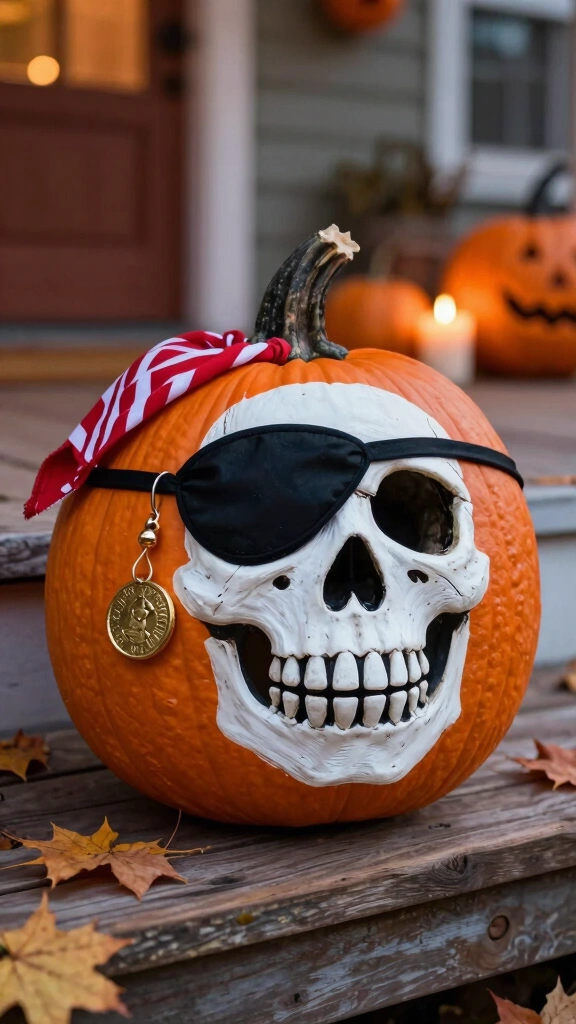
Ahoy, matey! Bring a touch of adventure to your doorstep by painting a swashbuckling pirate skull. Paint a white skull wearing a classic red and white striped bandana, complete with a dark black eyepatch. For an extra touch of fun, glue a plastic gold coin or a fake gold hoop earring directly onto the pumpkin.
Kids love this playful design. It is a fantastic weekend project that lets the whole family get creative with accessories.
12. Skeleton Drinking Pumpkin Spice Latte
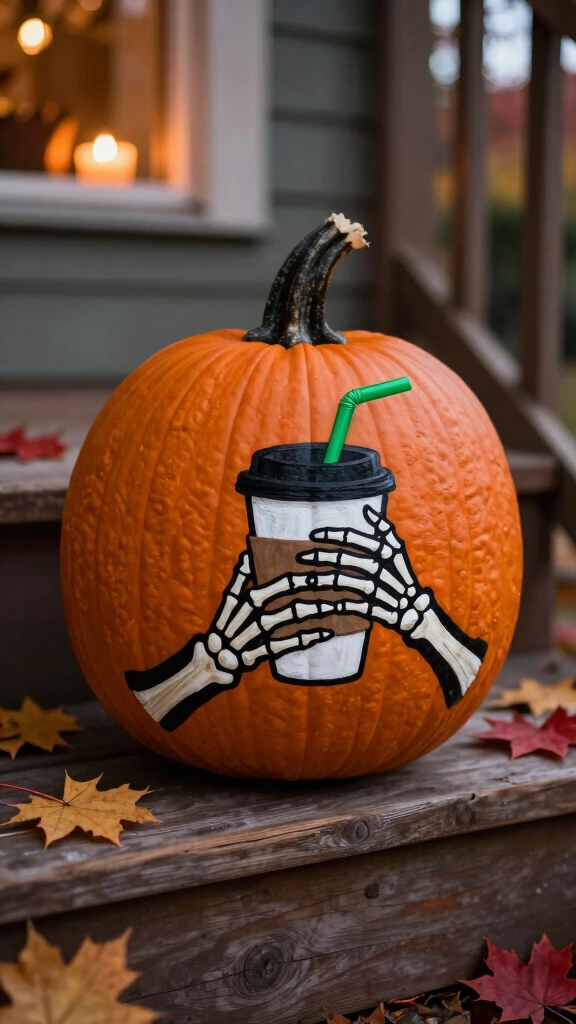
Show off your sense of humor with this trendy, self-aware skeleton design. Paint a skeleton bust on your pumpkin, but make sure one of its bony hands holds a painted coffee cup labeled “PSL.” This hilarious design poke fun at fall obsession culture and will definitely make your mail carrier laugh.
Use bright green for the coffee straw to add a fun pop of color. This design is, FYI, guaranteed to win any neighborhood pumpkin painting contest!
13. Glittery Glam Skull
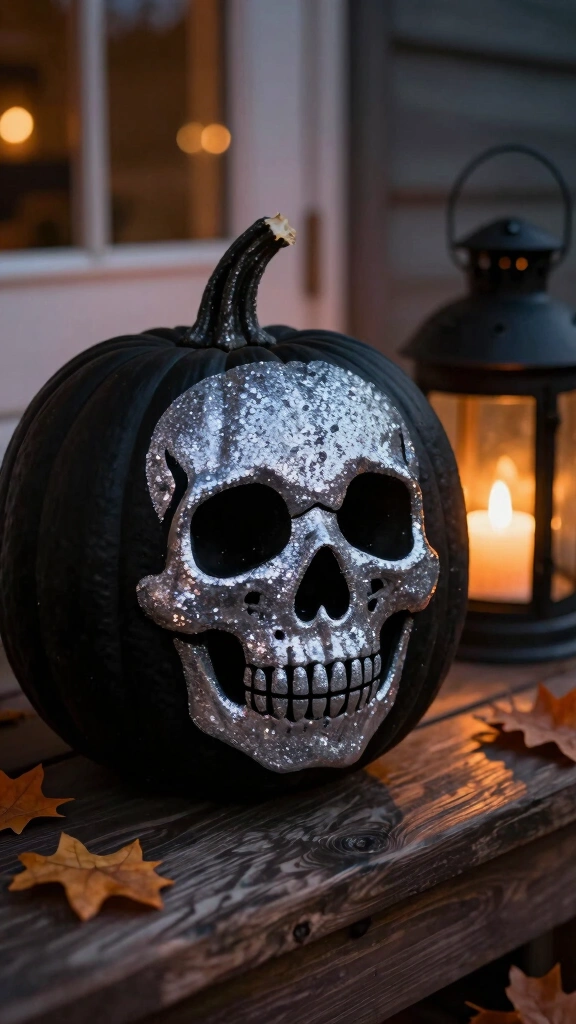
Who says Halloween cannot be fabulous? If you love all things sparkly, you need to try the glittery glam skull. Paint your pumpkin a sleek matte black, paint your skull silver, and then apply loose silver glitter over the wet paint. The glitter catches the light beautifully when you place a candle or porch light nearby.
To prevent a massive glitter mess on your floor, seal the dry pumpkin with a generous coat of clear glossy sealer spray. This locks the glitter in place permanently.
14. The Grim Reaper Portrait

Bring the ultimate symbol of death to your Halloween display with a Grim Reaper portrait. Paint a dark, flowing black hood that frames a creepy white skull face hiding in the shadows. Use shades of gray to create realistic folds in the fabric of the hood, making the figure look like it is emerging from the dark.
This design works best on taller, oblong pumpkins. The elongated shape naturally fits the proportions of a hooded figure.
15. The Creepy Skeleton Cat

We cannot forget our feline friends during the spooky season. Paint your pumpkin black and paint a stylized skeleton of a cat, complete with bony ribs, a long spine, and a cute little skull with pointed cat ears. This design offers a fun twist for pet lovers who want to keep things spooky yet adorable.
Add bright yellow or green paint to the cat’s eye sockets to make them stand out. It adds a eerie, supernatural glow that looks fantastic on a dark porch.
Wrapping Up Your Spooky Masterpieces
Now you have 15 amazing ideas to get your creative juices flowing this October. Pumpkin painting allows you to skip the messy carving process while still creating stunning, durable decorations. Which design will you paint first? Grab your brushes, select your favorite style, and start creating the coolest Halloween porch in town!