
You know that feeling when you need a little bit of magic? Not the rabbit-out-of-a-hat kind, but the quiet, beautiful kind that transforms a room or makes a gift unforgettable. That’s the power of a paper butterfly. They’re delicate, surprisingly easy to make, and they carry a whimsy that’s hard to beat. Forget the generic store-bought decor; we’re rolling up our sleeves and creating 15 stunning paper butterflies DIY projects that will have you feeling like a crafting wizard in no time. Let’s make something beautiful.
1. The Classic Origami Butterfly

We have to start with the OG, right? The traditional origami butterfly is the foundation of all paper butterfly crafts. It requires no glue, no scissors—just a square piece of paper and your two hands. The process of folding it is almost meditative.
Start with a 6×6 inch piece of origami paper for your first attempt. The key is making your creases sharp and precise. Once you master the basic folds, you’ll have a elegant, dimensional butterfly that stands on its own. It’s the perfect beginner-friendly project that looks incredibly sophisticated.
2. Coffee Filter Watercolor Wings

Want ethereal, soft wings that look like they were painted by a gentle breeze? Raid your kitchen for coffee filters. Their absorbent texture makes them perfect for watercolors or even food coloring. Dab on the colors and watch them bloom in beautiful, organic patterns.
Once dry, pinch the filter in the middle, secure it with a pipe cleaner or twist tie for the body and antennae, and fluff out the wings. This project is messy, fun, and yields uniquely gorgeous results every single time. Pro tip: use clothespins to hang them while they dry!
3. Intricate Quilled Butterfly Art
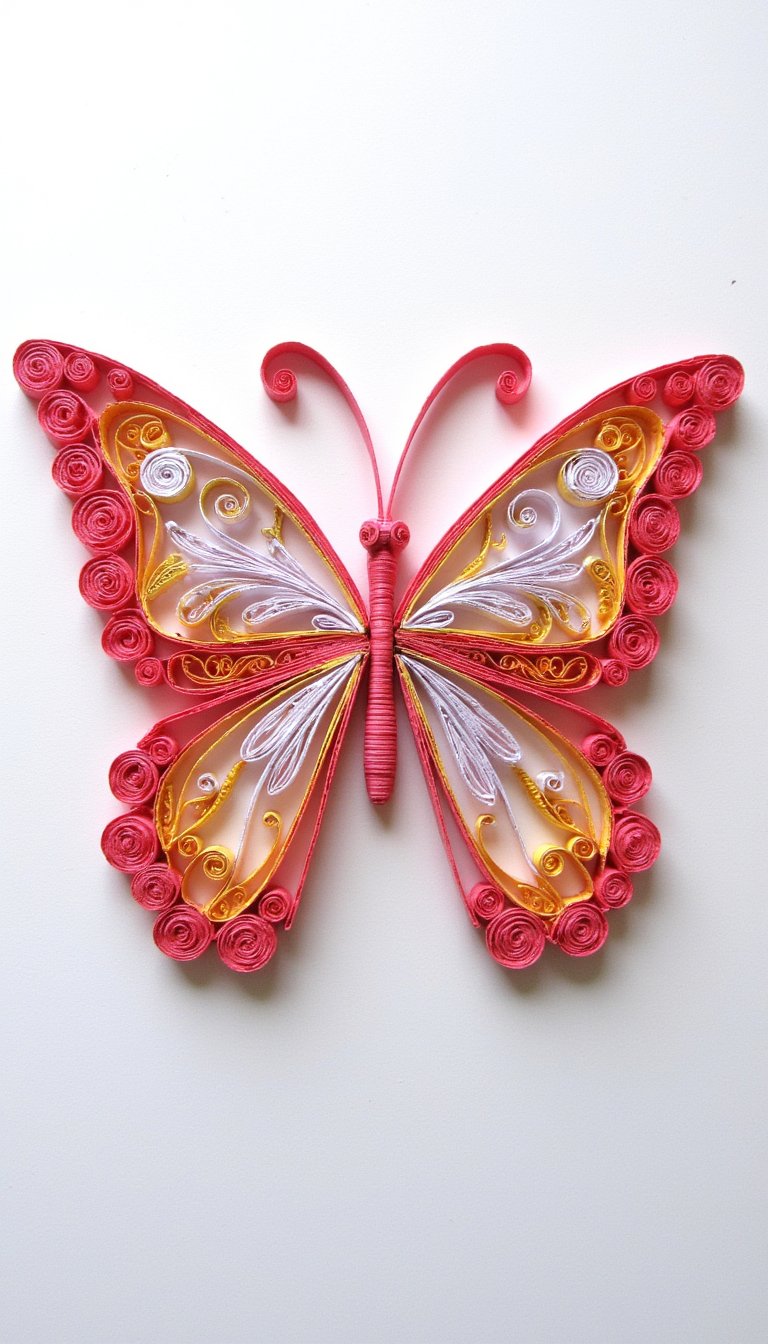
Ready to level up your paper craft game? Quilling involves rolling and shaping thin strips of paper to create detailed designs. For a butterfly, you can make tight coils for the body, teardrop shapes for the wings, and graceful scrolls for antennae.
You’ll need a quilling tool, paper strips, and glue. Arrange your shapes on a card or in a shadow box for a stunning piece of wall art. The level of detail you can achieve is breathtaking, making this one of the most impressive paper butterflies DIY techniques.
4. Giant Wall Decal Butterflies

Go big or go home, as they say. Transform a blank wall with a swarm of oversized paper butterflies. Use colorful cardstock or even pages from old books or maps for a vintage look. Sketch or print a simple butterfly template, cut it out, and use removable adhesive putty to stick them to the wall.
You can create a mesmerizing flight path or a beautiful cluster above a headboard. This is a renter-friendly, high-impact decor idea that takes an afternoon but feels like a full room makeover.
5. Recycled Book Page Monarch

Give a worn-out novel a beautiful second life. The subtle text on book pages creates a wonderfully vintage and literary feel. Cut out butterfly shapes from the pages using a craft knife or detailed scissors.
For a Monarch butterfly effect, use a bit of orange watercolor or ink to tint the wing edges. Mount them on a canvas, arrange them in a frame, or string them together for a mobile. It’s a craft that’s both eco-chic and deeply personal.
6. 3D Layered Cardstock Butterfly

This technique adds incredible depth and realism. Cut out multiple identical butterfly shapes from heavy cardstock in coordinating colors. Use small foam adhesive dots or rolled-up bits of tape to layer them, stacking from largest on the bottom to smallest on top.
Slightly offset each layer or bend the wings upward for a dynamic, lifelike effect. This is a show-stopping technique for handmade cards, scrapbook pages, or as a standalone ornament.
7. Simple Accordion-Fold Butterfly

If you can fold a fan, you can make this butterfly. It’s that easy. Take two small rectangles of paper (about 2×4 inches) and fold them into tight accordion pleats. Pinch each accordion in the center and secure with wire or string.
Join the two pieces together to form four wings, then fluff them out. Add a bead for the head and some wire for antennae. The charm here is in the textured wings—perfect for kids’ crafts or a quick party decoration.
8. Delicate Vellum & Stitch Butterflies
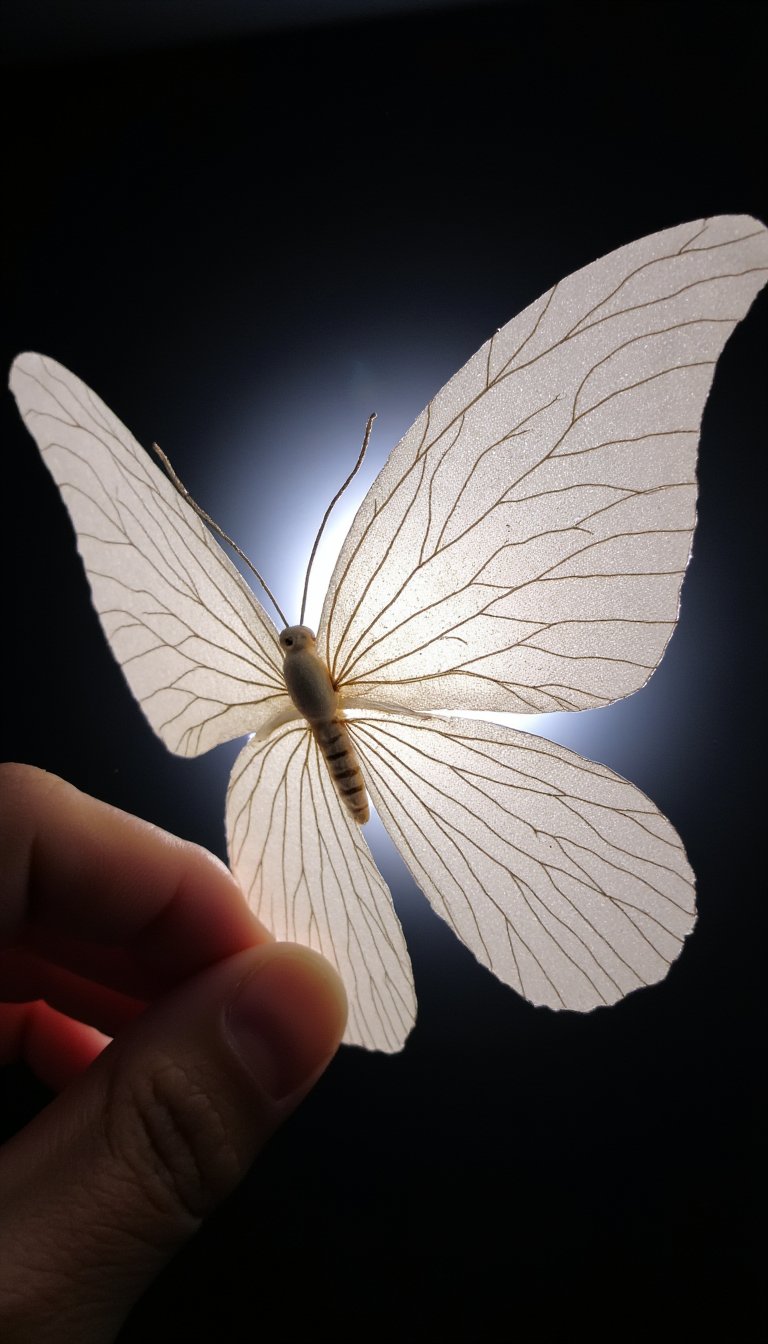
Vellum paper has a beautiful translucent quality, like real butterfly wings. Trace a butterfly outline onto vellum and use a needle to poke holes along the veins of the wings. Then, “draw” with thread by stitching through the holes.
You can use white thread on white vellum for a subtle effect, or colorful embroidery floss for a bold statement. Tape the thread ends on the back. When you hold it up to the light, the effect is absolutely magical. ✨
9. Punchy Gift Topper Butterflies

Elevate your gift-wrapping game instantly. Use a butterfly-shaped craft punch on pretty scrapbooking paper, metallic cardstock, or even leftover wrapping paper. Punch out a handful of little butterflies.
Attach them to your gift box with double-sided tape, letting some wings pop up for a 3D effect. String a few along the ribbon, or use them as a decorative seal. It’s a five-minute upgrade that makes your gift look thoughtfully curated.
10. Paper Butterfly Garland

Why have one butterfly when you can have a whole flutter? A garland is one of the most versatile paper butterflies DIY projects. Make a bunch of butterflies using any of the folding or cutting methods here.
Then, simply string them along a piece of twine, fishing line, or ribbon. You can space them evenly or cluster them. Drape it over a mirror, across a mantle, or above a window for an instant dose of whimsy that works for any season.
11. Butterfly Confetti for Celebrations

Swap out boring round confetti for something spectacular. Use a small butterfly punch or die-cut machine to create dozens of tiny paper butterflies from tissue paper or lightweight colored paper.
Toss them on tables for a wedding or baby shower, fill clear balloons with them, or put them in a “confetti cannon” for a gender reveal. It’s a detail that guests will remember and talk about long after the party ends.
12. Pressed-Flower Wing Embellishment
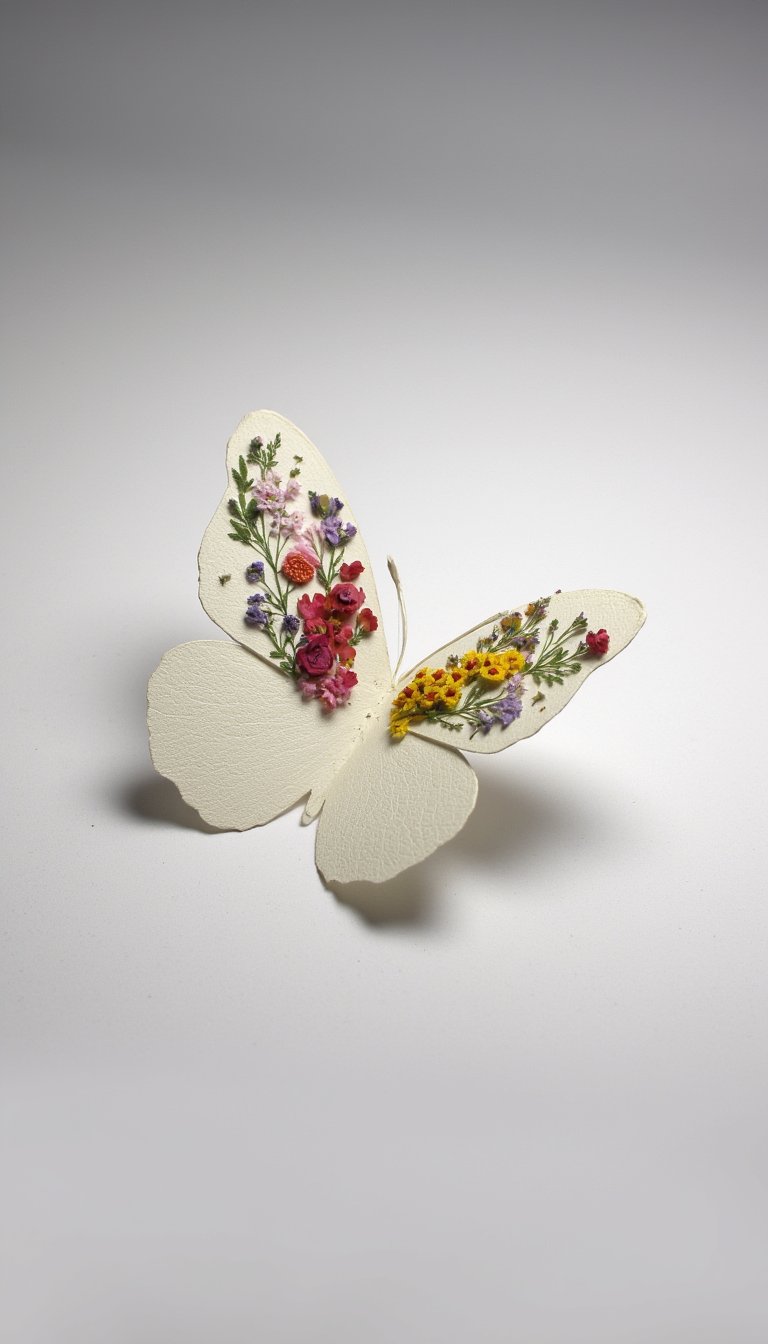
Combine two natural beauties into one. Create a simple paper butterfly shape with plain or lightly colored wings. Then, use mod podge to carefully adhere tiny pressed flowers or leaves onto the wings.
The result is a breathtaking, botanical-inspired piece that looks like it flew out of a fairy tale. Seal it with another layer of glue for protection. This makes an exquisite piece of art or a very special card.
13. Kinetic Hanging Mobile
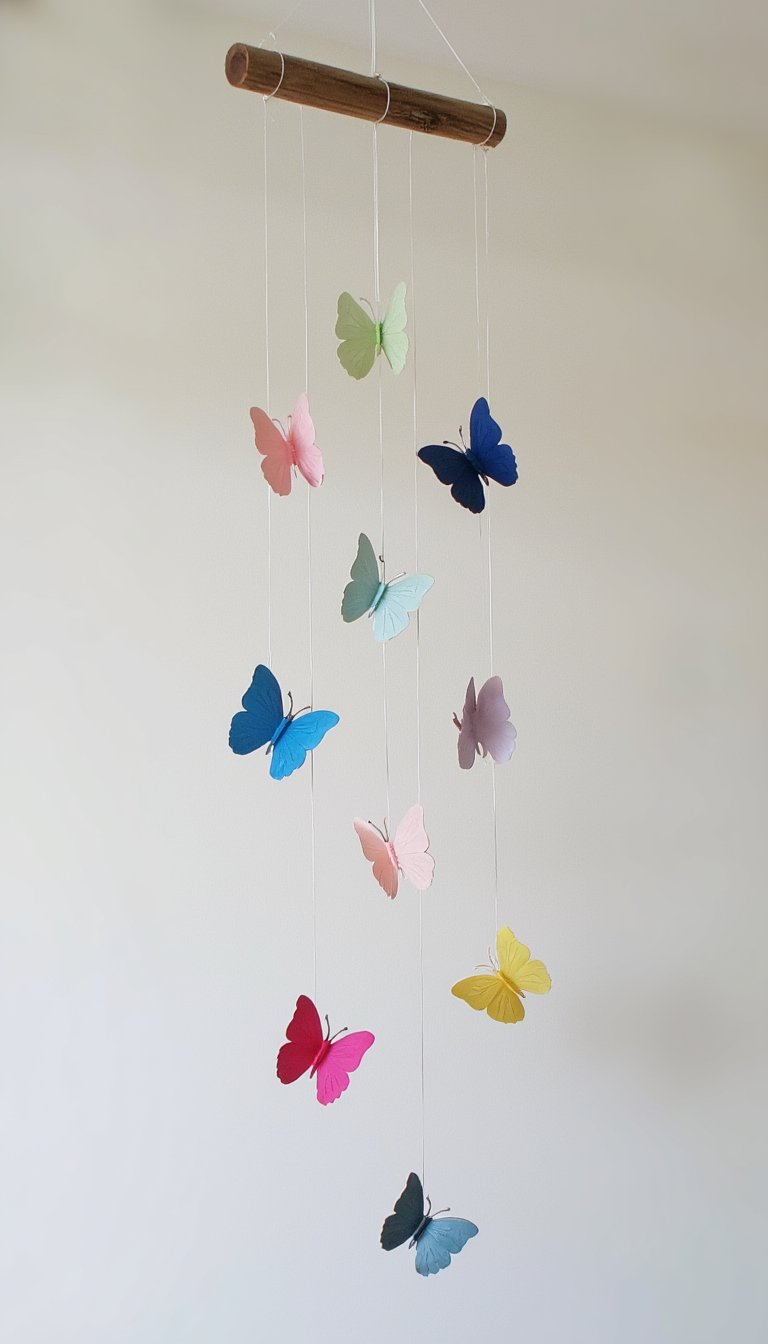
Bring movement into your craft. Create butterflies of various sizes and colors. Attach them to different lengths of clear nylon thread or thin wire. Suspend these threads from embroidery hoops, branches, or a simple wooden dowel.
Hang your mobile near a window or a vent where the air currents will make your paper butterflies gently spin and dance. Watching it is weirdly calming—trust me on this.
14. Metallic Foil & Sharpie Art

For a modern, glamorous twist, start with black cardstock. Cut out your butterfly shape. Then, use a metallic gold or silver Sharpie to draw intricate patterns, dots, and lines on the wings.
You can also use adhesive-backed foil paper for parts of the wings. The contrast of the dark background and shiny metallic details is ultra-chic and surprisingly easy to achieve. It’s perfect for holiday decor or adding a luxe touch.
15. The “No-Cut” Folded Napkin Butterfly

Okay, this one is a party trick. You can impress your dinner guests with a beautiful paper napkin butterfly in under a minute. Start with a stiff, square paper napkin. Fold it into a simple accordion, pinch the center, and fan out the wings.
Secure the middle with a twist tie or bit of string, and you have an instant, elegant table decoration. It’s proof that you don’t need fancy tools to create something delightful. Sometimes the best crafts are the simplest.
And there you have it—15 paths to creating your own little swarm of paper beauty. From the zen-like fold of origami to the free-spirited splash of coffee filter watercolors, each of these paper butterflies DIY projects offers a different kind of creative satisfaction. The real magic isn’t just in the finished product; it’s in the quiet focus of making something with your hands. So, grab some paper, make a little mess, and let your creativity take flight. What will you decorate first?