November brings chilly breezes, early sunsets, and a sudden urge to nest under cozy blankets. If you have an energetic preschooler, that quiet blanket time lasts about forty seconds before someone starts jumping on the couch. When cold weather cuts your outdoor time short, the kitchen table turns into your best spot for afternoon activities.
November gives you plenty of natural materials and themes, like fallen leaves, turkeys, acorns, and thankfulness. Simple crafts pass the time on rainy days while helping young kids practice basic motor skills. For more holiday activities, read our guide to thankful crafts for kids to celebrate gratitude this season.
Grab a few glue sticks, lay down some old newspaper, and try these 15 simple November crafts with your preschooler.
1. Pinecone turkey with feather tails
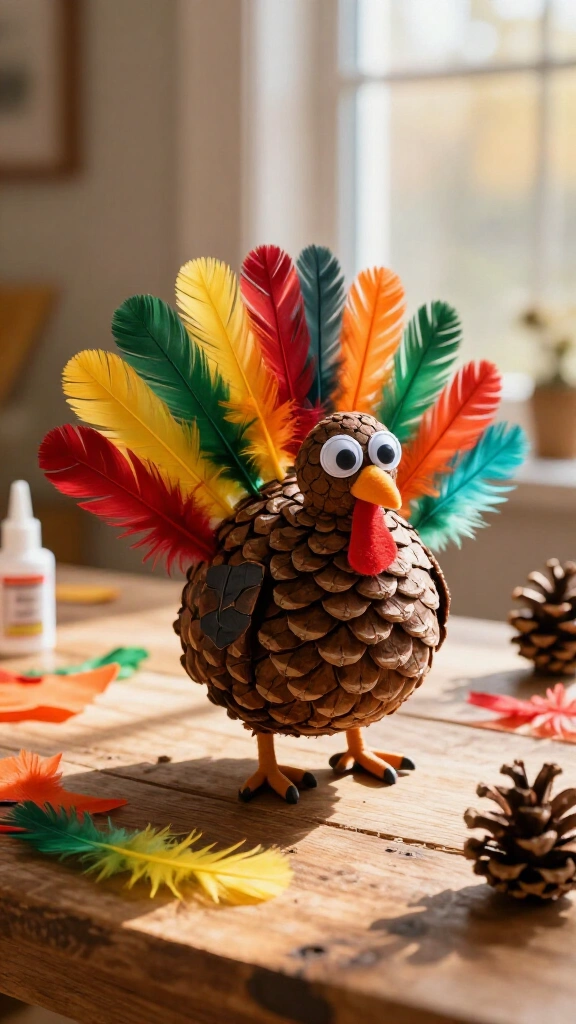
Turn pinecones from your afternoon walk into simple table decorations. Kids enjoy picking out pinecones in the yard, which makes setting up half the fun.
What You Need:
- Pinecones (cleaned and dry)
- Multi-colored craft feathers
- Googly eyes and orange felt scraps
- Tacky craft glue or liquid school glue
Your child tucks colorful feathers between the back scales of the pinecone. Glue two googly eyes and a small felt beak onto the front. Pro tip: Tacky glue holds the eyes onto rough pinecone surfaces much better than standard school glue. This quick craft helps build finger strength in small hands.
2. Paper plate pumpkin pie slices
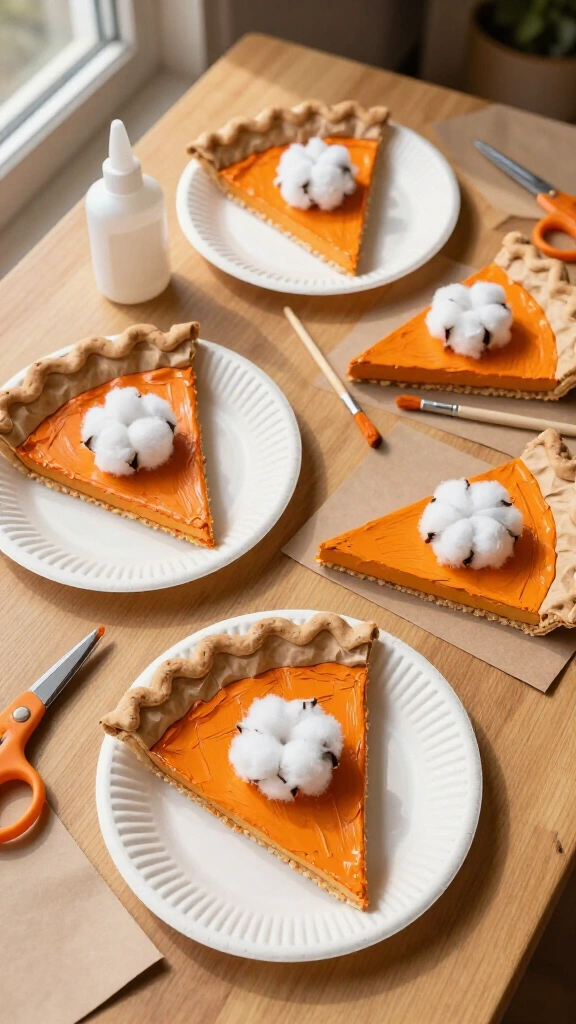
Kids can make their own pretend pie slices using simple paper supplies.
Cut standard paper plates into six triangular wedges. Ask your child to paint the center of each triangle orange using washable tempera paint. Glue a thin strip of brown construction paper along the curved top edge to form the pie crust.
To finish the craft, let your child glue a white cotton ball in the center to look like whipped cream. This simple project gives kids a hands-on activity without any kitchen mess.
3. Handprint gratitude tree
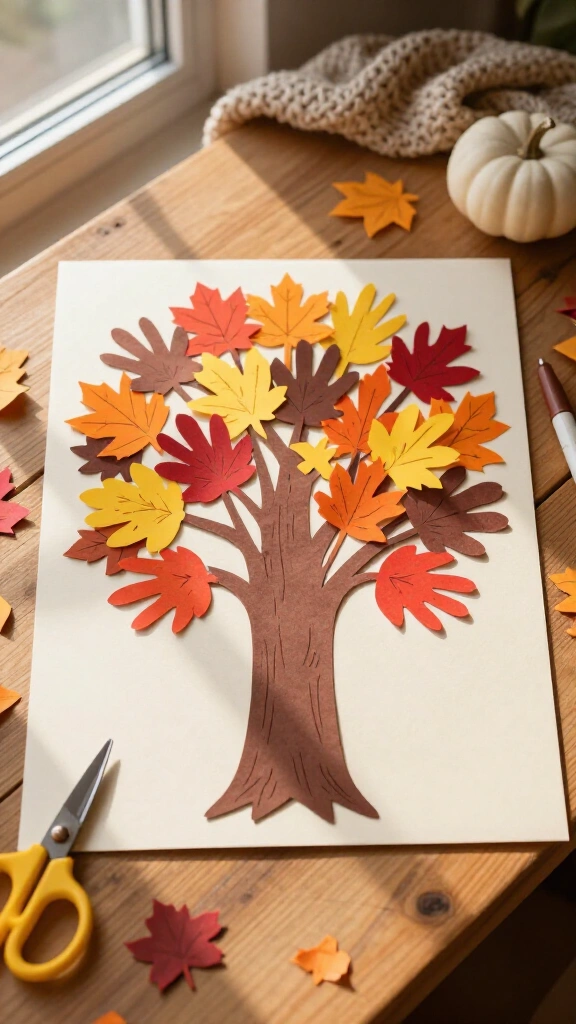
This handprint project records your child’s hand size while introducing the concept of thankfulness.
Draw a basic bare tree trunk on a large piece of cardstock. Trace your child’s hand onto red, yellow, orange, and brown paper, then cut out the shapes. Guidelines from the CDC note that supervised scissor practice builds important hand-eye coordination in preschoolers.
4. Bubble wrap stamped Indian corn
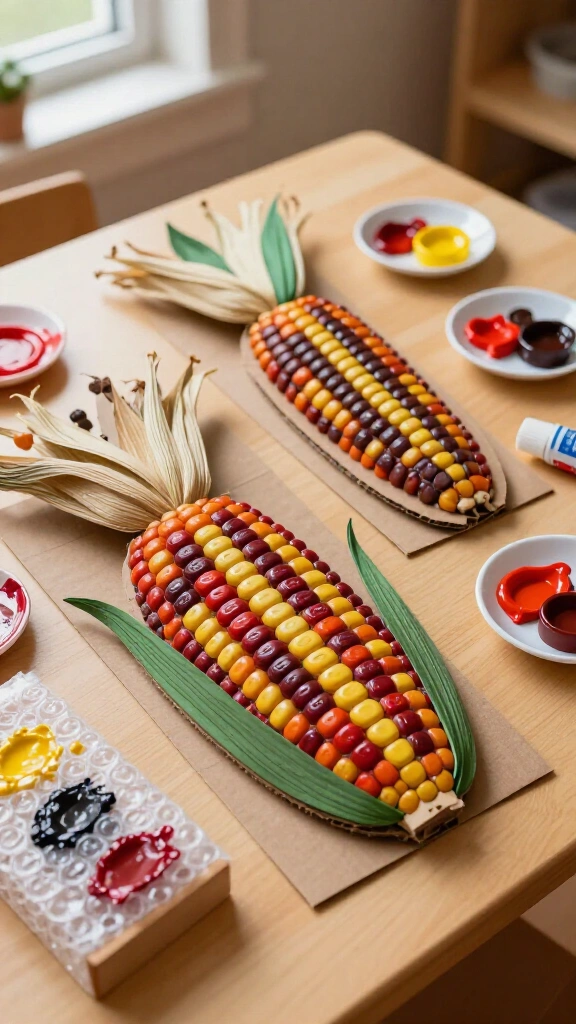
Save extra bubble wrap from holiday packages to use as a simple printing tool for kids.
Cut heavy cardboard into corn cob shapes. Wrap a piece of small bubble wrap around a wooden block or your child’s hand. Show them how to dip the bubble wrap into red, yellow, and brown paint, then stamp it onto the cardboard cobs.
The stamped pattern looks like real corn kernels. Once the paint dries, glue real corn husks or green paper leaves to the top to finish the craft.
5. Cardboard roll woodland squirrels
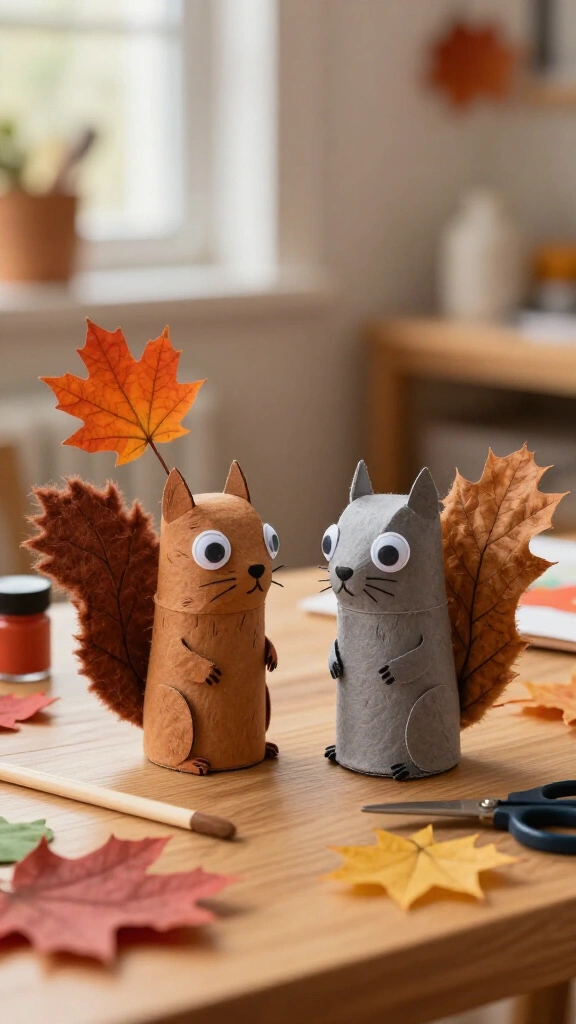
Empty toilet paper tubes make simple bases for small woodland animal crafts.
Have your child paint a paper tube brown or grey. While the paint dries, cut a bushy tail shape out of felt or construction paper. You can also use real fallen leaves for the tail.
Glue googly eyes to the front, draw a nose with a marker, and attach the tail to the back. Kids can use the finished craft as a simple puppet for pretend play.
6. Tissue paper leaf suncatchers
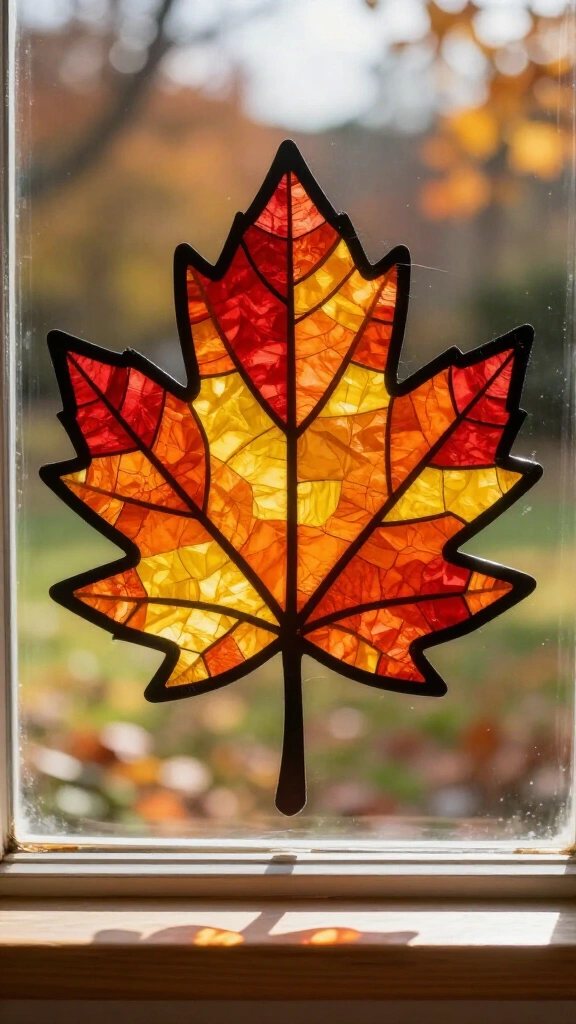
These simple paper suncatchers brighten up windows on cloudy autumn days.
Cut a leaf shape out of black construction paper, leaving the center hollow like a frame. Press the paper frame onto a piece of clear contact paper. Let your child cover the inner space with small squares of red, orange, and yellow tissue paper.
Cover the project with a second sheet of contact paper, trim the edges, and tape it to a window. Sunlight shines through the colored tissue paper to create a stained-glass effect.
7. Acorn guy finger puppets
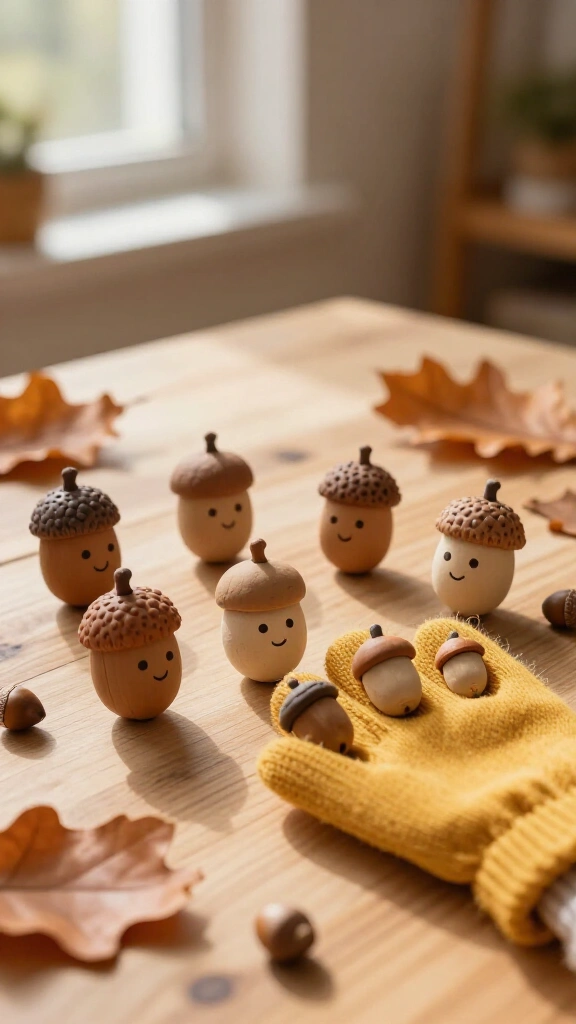
Acorn caps from your yard work well for tiny finger puppets and quiet play.
Collect clean acorn caps outdoors. Help your child roll small balls of playdough or modeling clay to fit under each cap to form a head. You can also glue painted acorn caps onto the fingertips of inexpensive knit gloves.
Draw small faces onto the clay or glove tips using a fine marker. Your child can use these character caps to put on simple puppet shows. If you want more hands-on activities, read our guide to educational crafts for preschoolers to practice practical skills through play.
8. Coffee filter bleeding-color turkeys
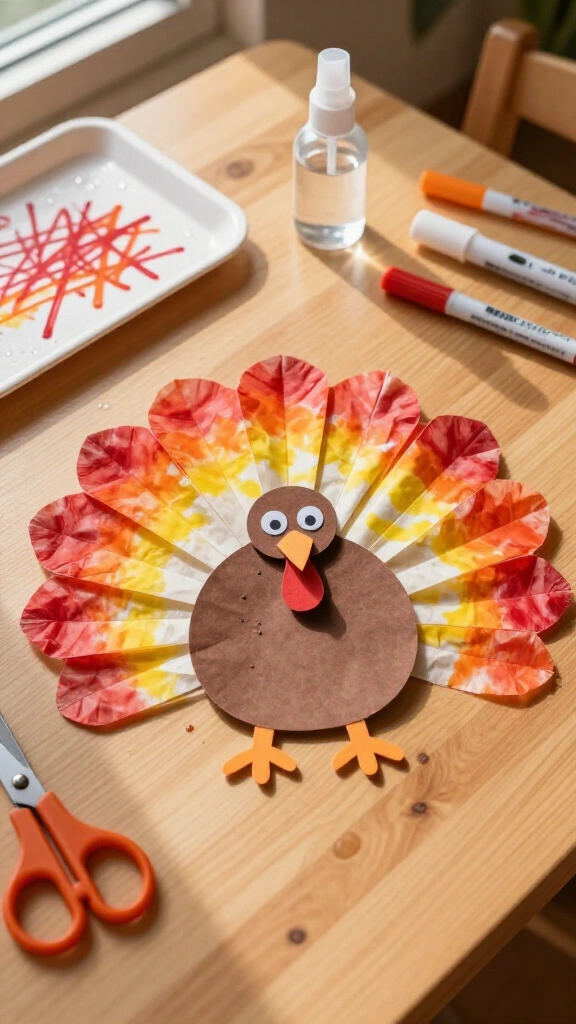
This project combines a basic water experiment with a simple holiday craft.
Give your child a white paper coffee filter and red, orange, and yellow washable markers. Let them scribble across the paper. Place the filter on a tray and hand your child a small spray bottle filled with water.
When they spray the paper, the marker ink spreads and mixes across the filter. After the paper dries, fold it into a fan shape for turkey feathers and glue a brown paper body to the center.
9. Paper bag autumn owl puppets
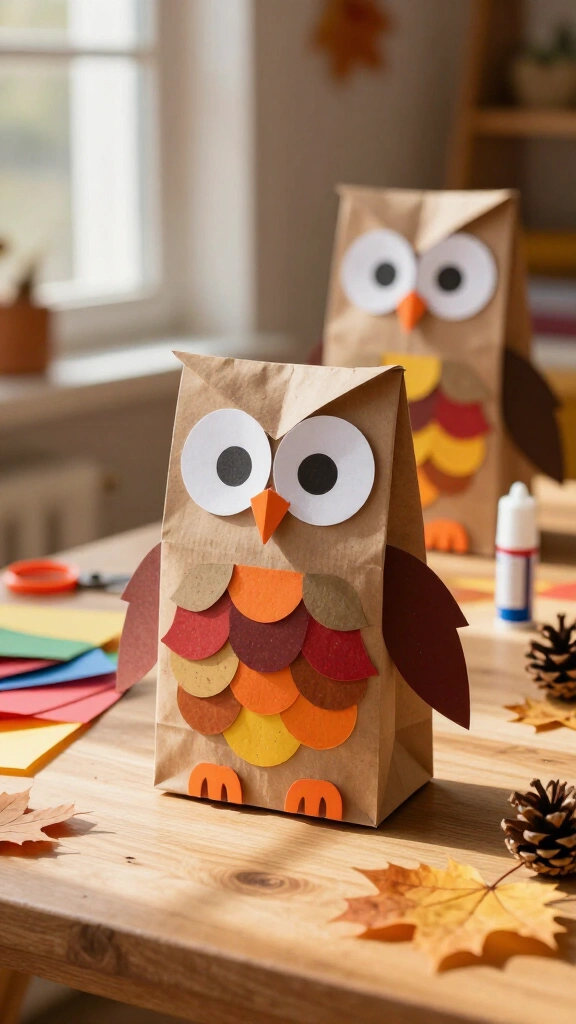
Standard paper lunch bags convert easily into forest owl puppets in less than twenty minutes.
Keep the paper bag folded flat with the bottom flap pointing up. Have your child paint the bag or glue paper circles across the front to form feathers. Glue two large white paper circles with black centers onto the top flap for eyes.
Add an orange paper triangle for the beak and paper wings on each side. Place a hand inside the bottom opening to operate the puppet.
10. Popsicle stick scarecrow heads
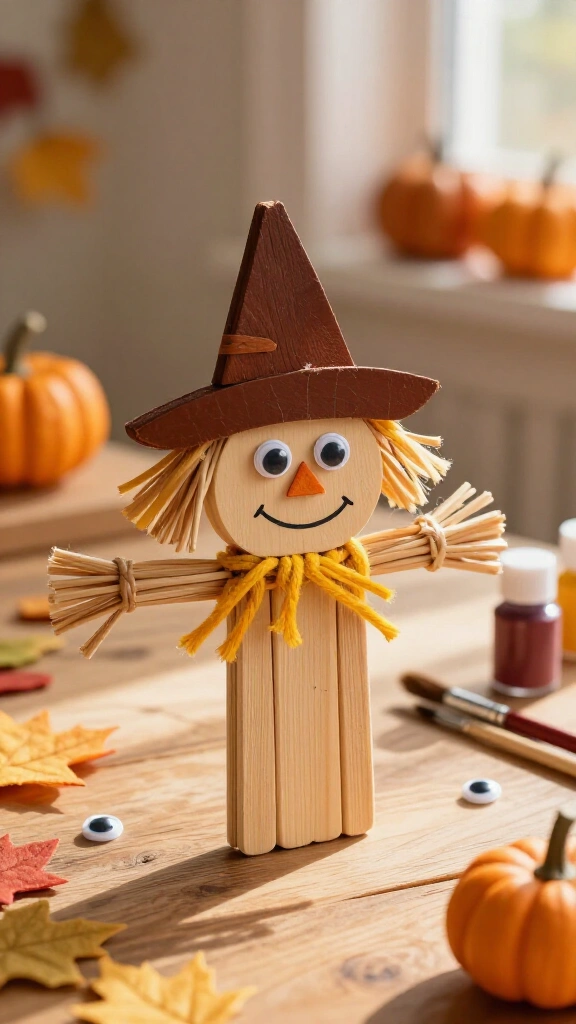
Craft sticks make sturdy bases for simple scarecrow decorations.
Line up seven craft sticks side by side. Glue an eighth stick diagonally across the back to hold them together. Paint the lower section beige for the scarecrow face and paint the top section black or brown for the hat rim.
Glue on googly eyes, a felt triangle for the nose, and draw a stitched mouth with a marker. For the final detail: glue short pieces of yellow yarn or raffia under the hat brim for straw hair.
11. Air-dry clay leaf imprints

Pressing real leaves into clay leaves detailed vein impressions that kids can paint after they dry.
Roll a small piece of air-dry clay into a flat disk about a quarter-inch thick. Help your child press a fresh leaf, vein side down, firmly into the clay. Pull the leaf back slowly to show the pattern left behind.
Let the clay harden for 24 to 48 hours. Once dry, your child can paint the imprint using acrylic paints. For projects with depth, check out our guide to 3D paper crafts for practical home art ideas.
12. Yarn-wrapped cardboard apples
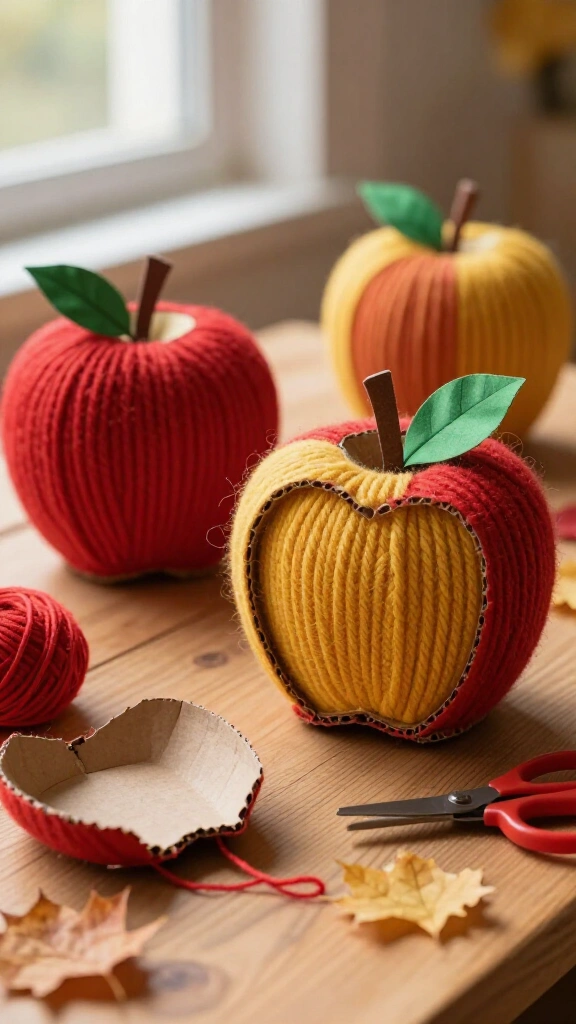
Wrapping yarn around cardboard helps young children strengthen their hand muscles and practice coordination.
Cut cardboard into an apple shape with a small hole in the middle. Tie a length of red, green, or yellow yarn around the frame. Hand the yarn to your child so they can wrap it around the cardboard shape repeatedly.
Any wrapping pattern works. Overlapping layers add texture to the finished shape. Secure the loose yarn end inside the wraps and glue a green paper leaf near the top stem.
13. Paper strip harvest corn
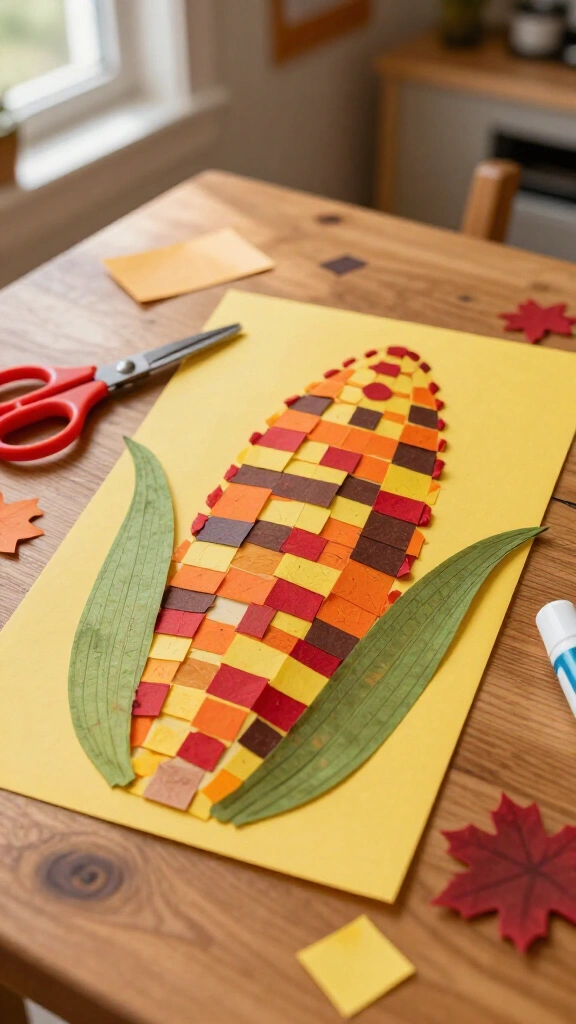
This simple collage project gives children practice with scissors and glue placement.
Cut a cob shape out of yellow cardstock. Cut thin strips of red, orange, brown, and yellow paper into small square pieces. If your child can use safety scissors, let them cut the paper strips into squares.
Spread glue across the cardstock cob, then have your child place the paper squares over the adhesive. Hang the finished paper corn on the refrigerator or a display board.
14. Button-stamped tree branch art
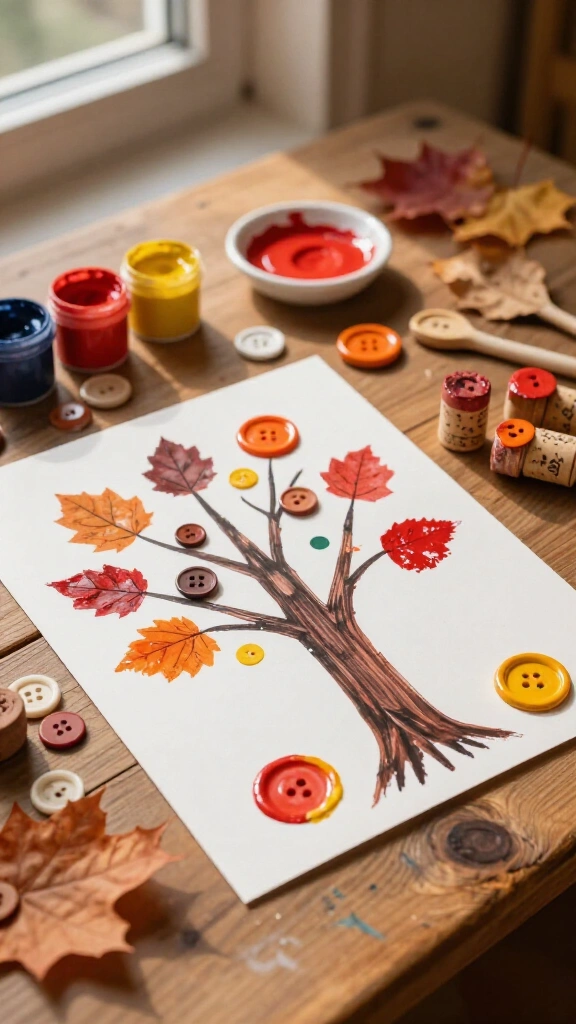
Loose buttons make simple stamps for printing autumn leaves onto paper.
Draw a bare tree trunk with branches on cardstock. Glue large flat buttons onto wine corks or wooden pegs to make easy handles for small hands. You can also view tips on PBS Parents about turning household items into crafting tools.
Dip the flat face of the button into red, orange, or yellow paint, then let your child stamp leaves onto the tree branches. The round button marks create a clear patterned leaf effect on the page.
15. Fluffy cotton ball woodland hedgehog
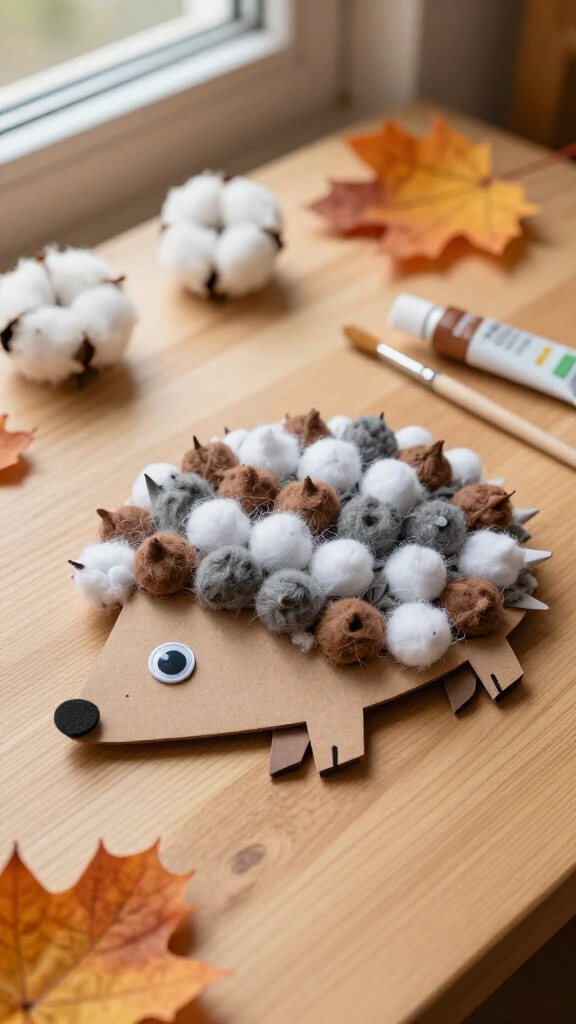
Cotton balls give this paper hedgehog craft a soft, raised texture.
Cut a simple teardrop shape out of brown cardstock for the hedgehog body. Ask your preschooler to dip cotton balls into brown or grey washable paint, then press them onto the cardstock to form the quills.
Draw a nose on the pointed snout and glue a googly eye near the front. The finished paper craft works well as a simple homemade card or gift.
Make November crafting simple and stress-free
Crafting with young children works best when you focus on the process rather than a flawless finished product. Uneven paper cuts, stray paint dots, and sticky fingers are all part of working with preschoolers.
Use a rimmed tray to keep paint spills contained, keep wet rags nearby, and let your child direct their own project. Which of these simple November crafts will you set up first?