
Remember that magical feeling of unwrapping a box of ornaments, each one a tiny, glittering memory? Now imagine creating that magic with your kids, filling your tree with stories and laughter instead of just store-bought baubles. These aren’t just crafts; they’re future heirlooms. So, grab the glue gun and some glitter (I know, I know, but it’s worth it), and let’s make some memories that will outlast the pine needles vacuumed out of the carpet in July.
1. Salt Dough Handprint Ornaments

This is the ultimate classic for a reason. It perfectly captures that tiny hand size you swear changes overnight. The recipe is simple: mix one part salt, two parts flour, and one part water. Roll it out, press those little hands in, and use a straw to poke a hole for the ribbon.
The Secret to Perfection
Bake them at a very low temperature (around 200°F) for a few hours until they’re completely hard. This prevents puffing and bubbling. Once they’re cool, let the kids go wild with acrylic paint and a layer of sealant to make them last for years.
2. Cinnamon Stick Bundles

These ornaments look like you bought them from a fancy craft fair, but they are deceptively simple. Gather a small bundle of cinnamon sticks. Tie them together tightly with some rustic jute twine or a pretty ribbon.
The best part? They make your whole tree smell incredible. It’s like a festive potpourri that doubles as decor. Add a small pinecone or a faux berry sprig for an extra touch of woodland charm.
3. Popsicle Stick Snowflakes

Got a giant box of popsicle sticks taking up space in the craft closet? It’s time to put them to work. Glue the sticks into classic snowflake shapes—a simple asterisk is a great start. Let the kids unleash their inner artists with white and silver paint, or go full glam with glitter glue.
No two snowflakes are alike, and that’s the whole point. These are fantastic for developing fine motor skills and understanding basic geometry. Who knew learning could be so sparkly?
4. Puzzle Piece Friends

Got a puzzle with missing pieces? Don’t throw it out! Upcycle those lonely pieces into adorable little reindeer or angels. For a reindeer, glue a brown puzzle piece to a smaller tan one for the face, then add googly eyes, a red pom-pom nose, and pipe cleaner antlers.
It’s a fantastic way to talk about recycling and creativity. Plus, kids get a kick out of turning something “broken” into something brand new and wonderful.
5. Fingerprint Light Bulb Ornaments

This one is pure, unadulterated cuteness. Take a simple plastic or shatterproof bulb ornament and carefully unscrew the top. Using washable paint, have your child dip their finger and make little fingerprints all over the outside of the bulb.
Once the paint dries, use a fine-tip marker to turn those fingerprints into tiny penguins, snowmen, or reindeer. It’s a personalized masterpiece that celebrates the very tools that make the mess—their little fingers!
6. Beaded Pipe Cleaner Candy Canes

This is the perfect ornament for little hands that are still mastering their dexterity. Give them a red and white pipe cleaner and a bowl of red and white tri-beads. They simply thread the beads onto the pipe cleaner in whatever pattern they like.
Then, twist the end into a candy cane hook. It’s that easy. They get to practice their patterns and colors, and you get a cute, unbreakable ornament. Win-win.
7. Pinecone Owls
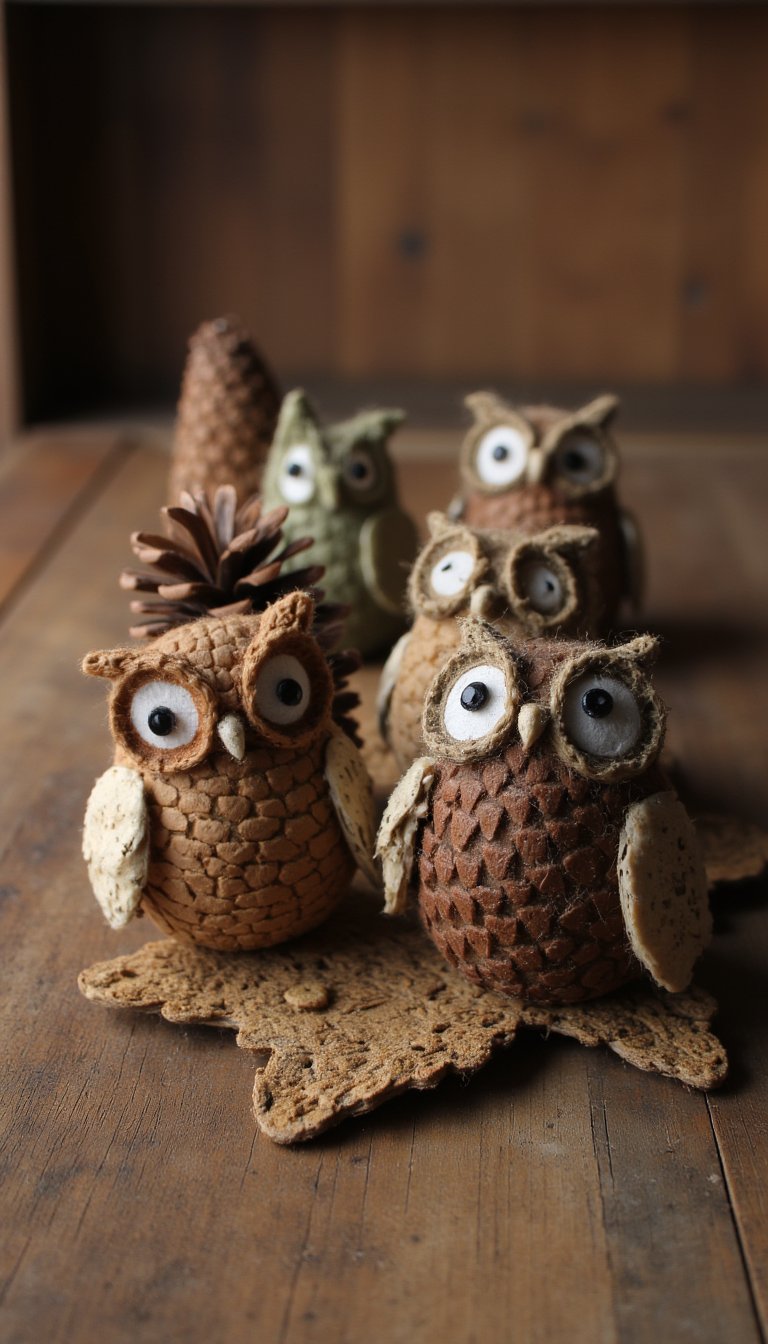
Next time you’re on a walk, gather some pinecones. Once they’re clean and dry, they transform into the fluffiest little owl bodies. Glue on some felt circles for eyes and a diamond-shaped piece of felt for a beak.
You can even add tiny feather wings for extra flair. These little guys have so much personality and add a wonderful natural element to your tree.
8. Clothespin Reindeer

This one is a throwback for a reason—it’s just too charming. Use the old-fashioned wooden spring clothespins. Glue a small red pom-pom on one end for the nose and two googly eyes above it.
Take a small brown pipe cleaner, twist it into antler shapes, and glue it right into the clip part of the clothespin. The clip makes it incredibly easy to hang on any branch. Simple, adorable, and practically foolproof.
9. Dried Orange Slices

These bring a gorgeous, rustic, and natural vibe to your tree. Thinly slice a navel orange and pat the slices dry. Bake them on a low heat (200°F) for a few hours until they’re dried out, flipping them halfway through.
They smell amazing while they bake and for years to come. String a ribbon through them for a simple, beautiful ornament that looks like it came straight from a cozy cottage core dream.
10. LEGO Minifigure Ornaments

Got a LEGO fanatic in the house? This one will be their favorite. Simply hot glue a small loop of ribbon to the top of a LEGO minifigure’s head. That’s it. You now have an instant ornament featuring their favorite character.
It’s a brilliant way to merge their everyday play with holiday traditions. Just make sure you use a minifigure you’re okay with permanently dedicating to the Christmas cause!
11. Melted Bead Sun Catchers

This one requires adult supervision but the “wow” factor is off the charts. Have kids arrange plastic pony beads in metal or silicone cookie cutters placed on a baking sheet. Make sure they don’t fill the cookie cutter to the top.
Bake them according to the bead instructions (usually around 400°F for 15-20 minutes) until melted. Once cooled, they pop out as solid, colorful shapes. Drill a small hole, add a hook, and watch them glow when the tree lights hit them.
12. Paper Plate Angels

Turn a simple, cheap paper plate into a heavenly host. Cut the plate into a triangle for the body and a small circle from the rim for the head. Decorate with markers, glitter, and yarn for hair.
You can even use a small doily for the wings for an extra fancy touch. This is a great group activity if you have a lot of kids to entertain—the supplies are minimal, but the creativity is maximal.
13. Button Christmas Trees

Dig through your button jar or grab a cheap mixed bag from the craft store. Draw a simple Christmas tree shape on a piece of cardstock or a small wood slice. Then, let the kids glue green buttons of all sizes onto the shape to fill it in.
They can add a yellow or star-shaped button on top and a few colorful buttons as “baubles.” It’s a great textural ornament that adds a lovely, vintage feel.
14. Toilet Paper Roll Snowmen

Don’t toss those cardboard tubes! Flatten one and cut it into three equal sections to form the snowman’s body. Paint them white or cover them with cotton balls glued on.
Then, decorate with drawn-on faces, a tiny pipe cleaner scarf, and a little hat made from felt. It’s upcycling at its most festive and a fantastic lesson in giving everyday items a new life.
15. Photo Ornaments in Mason Jar Lids

This one will tug at your heartstrings. Take a standard mason jar lid and cut a circle of cardstock to fit inside. Glue a favorite small photo of your child (or the whole family) onto the cardstock.
You can then hot glue a ribbon loop to the top for hanging. If you want to get fancy, fill the lid with clear-drying glue or resin to create a glossy, sealed dome over the photo. It’s a beautiful way to document how they’ve grown each year.
16. Glittery Cardboard Shapes

Cardboard from a cereal box is the perfect weight for this. Cut out simple shapes like stars, trees, or bells. Let the kids paint the shapes with a layer of glue and then sprinkle glitter over them.
Tap off the excess, let them dry, and you have a stunning, lightweight ornament. Pro tip: Do this over a large baking sheet to contain the glitter-pocalypse. You’re welcome.
17. Yarn-Wrapped Ornaments

This is a super calming and satisfying craft. Cut simple shapes like stars or hearts from thick cardboard. Notch the edges slightly to help the yarn stay in place.
Then, let the kids wrap colorful yarn around and around the shape until the cardboard disappears. It creates a beautiful, textural, and modern-looking ornament that’s also great for building those fine motor skills.
18. Painted Wood Slice Ornaments

You can find bags of small, thin wood slices at any craft store, and they are a perfect blank canvas. Give the kids some acrylic paints and let them create their own mini-masterpieces.
They can paint a snowman, a reindeer, a simple pattern, or just their name and the year. Drill a small hole in the top and string some twine through it for a rustic, charming finish.
19. Mitten Ornaments from Old Sweaters
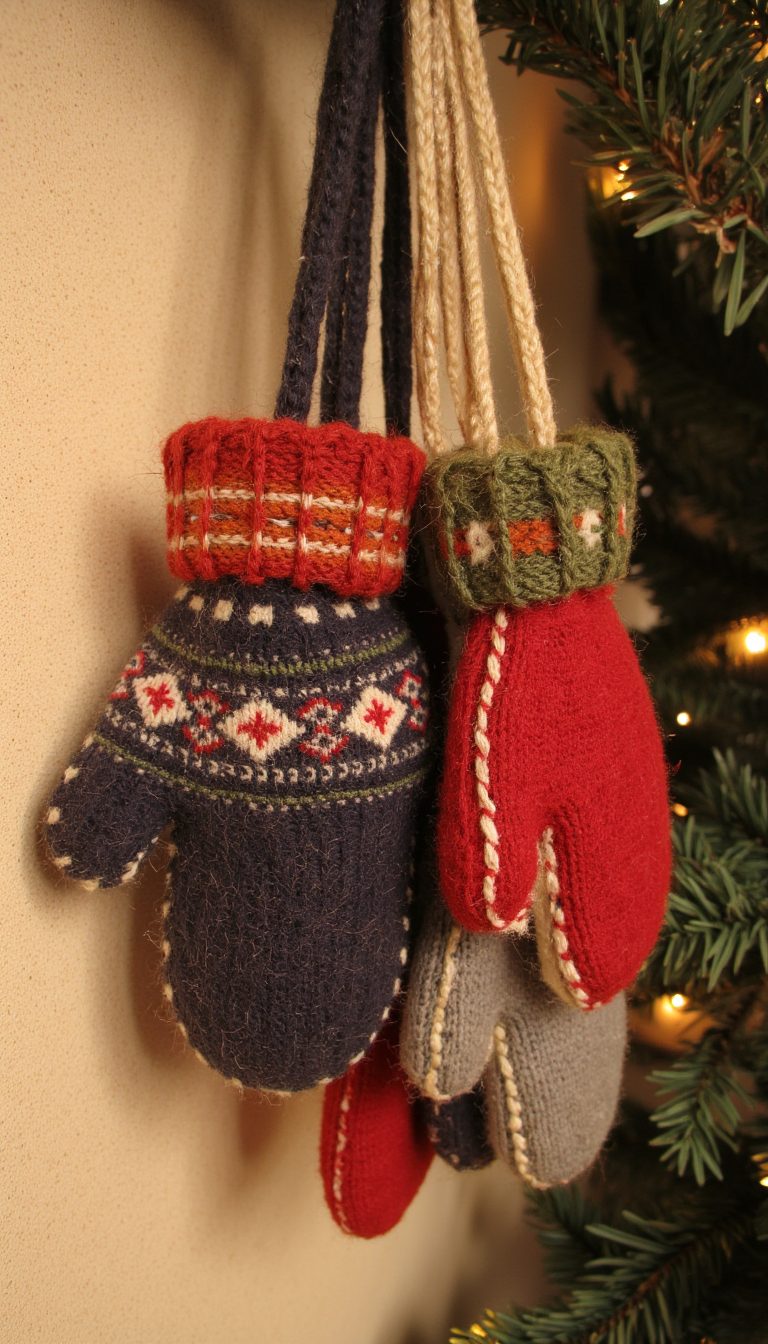
Got an old, felted wool sweater that’s seen better days? Give it a new purpose. Trace a small mitten shape onto the sweater and cut out two pieces per ornament.
Use fabric glue or a simple stitch to connect the front and back, leaving the top open. Stuff it lightly with a bit of cotton ball, add a string for hanging, and you have the coziest, most nostalgic ornament on the tree.
So there you have it—19 ways to turn an afternoon of potential boredom into a treasure trove of family memories. The best part? When you unpack these homemade ornaments year after year, you won’t just see a reindeer made from a clothespin. You’ll remember the concentrated look on your child’s face as they glued on the googly eyes. You’ll remember the laughter, the (contained) mess, and the pure joy of creating something together. That’s the real magic of the season, and it’s something you can’t buy in a store. Now go make some magic.