
Let’s be real. You could grab a generic flag tee from the store, but where’s the fun in that? This year, your shirt shouldn’t just show your American spirit—it should shout it from the rooftops (or at least from the lawn chair by the grill). I’ve scoured the craft universe to bring you 21 wildly creative, surprisingly easy, and absolutely unforgettable DIY 4th of July shirts. No fancy skills required, just a willingness to get a little messy and have a whole lot of fun.
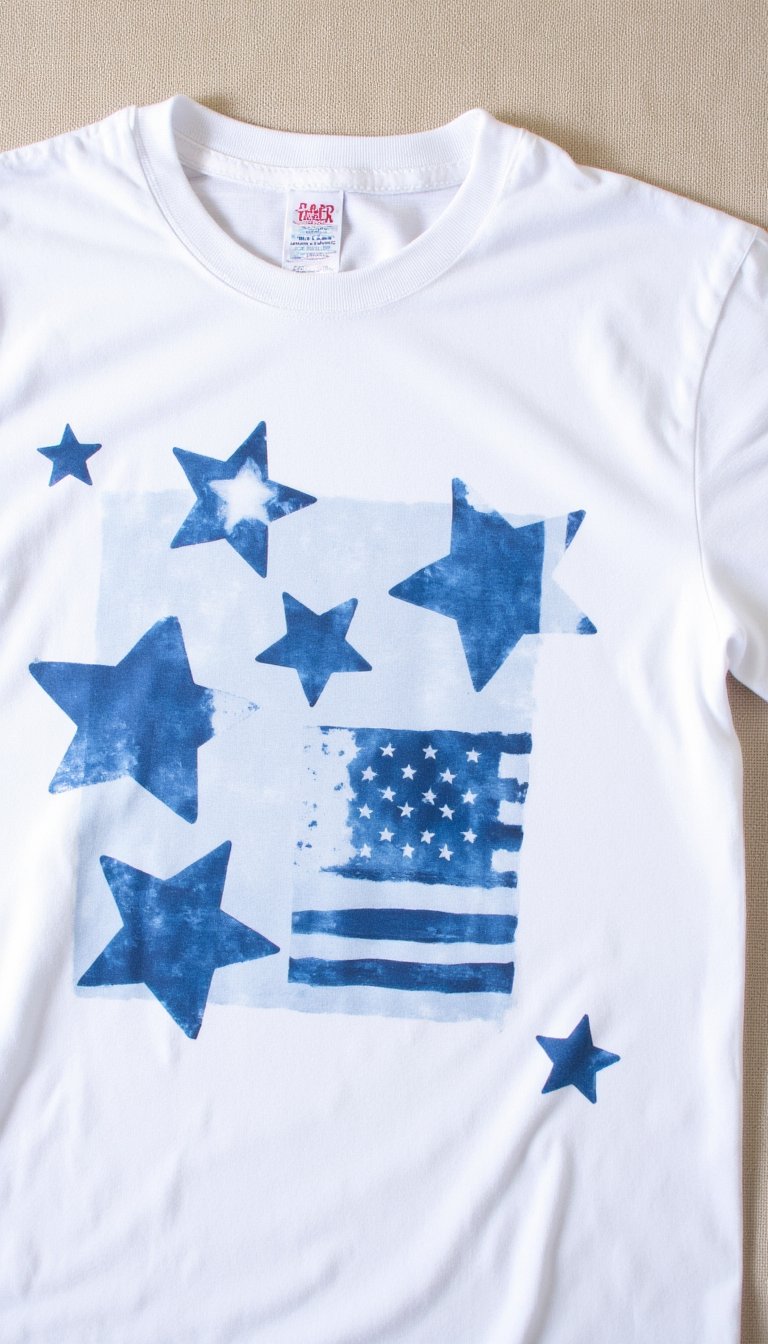
1. The Classic Bleached Star Shirt

This technique gives you that perfect, vintage-worn look without the vintage price tag. Grab a dark cotton tee (navy is perfect), a star stencil, and a spray bottle filled with half water, half bleach. Lay the stencil down, spritz lightly, and watch the magic happen. Pro tip: do this outside and let it sit for a few minutes before rinsing. The result is a cool, distressed star that looks like it’s been through a hundred firework shows.
2. Splatter Paint Fireworks Tee
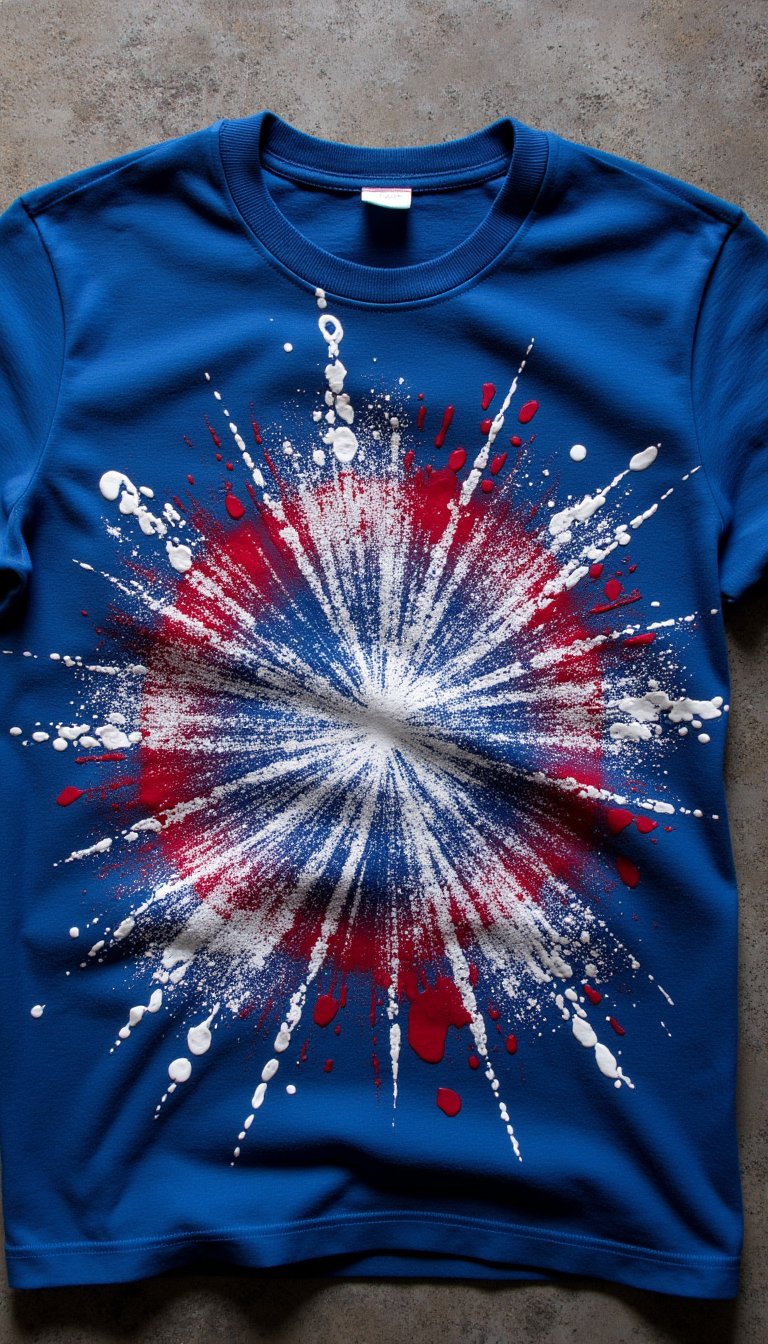
Channel your inner Jackson Pollock! Lay a white or light blue shirt flat on a protected surface. Thin some fabric paint with a tiny bit of water, dip an old toothbrush, and flick your wrist over the shirt. Use red, white, and blue for the classic effect. It’s messy, it’s chaotic, and it perfectly captures the explosive joy of fireworks. This is one of the most forgiving DIY 4th of July shirts you can make.
3. “Made in the USA” with Fabric Markers
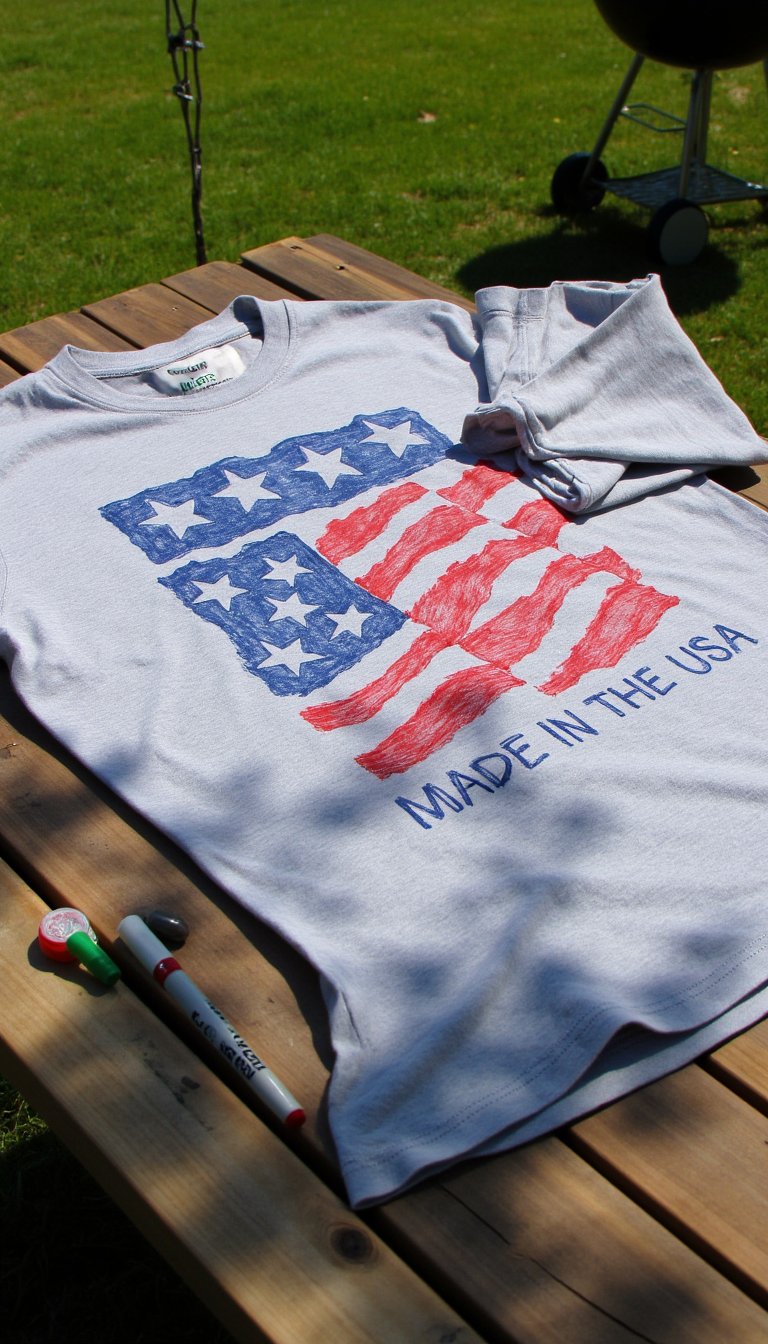
Simple, bold, and proud. For this idea, you just need a steady hand and some opaque fabric markers. Sketch out a classic “Made in the USA” slogan with a star or two. You can go for a retro script or a clean, modern block font. The beauty is in the customization—add your name, your city, or the year. It’s a statement piece you’ll wear long after the last sparkler fizzles.
4. Patriotic Tie-Dye Galaxy

Move over, rainbow swirls. Create a patriotic galaxy shirt using the “scrunch” or “ice dye” method. Twist and scrunch a damp white shirt, then sprinkle red and blue powdered dye over it. The dye creates deep, space-like blends and bursts of color. When you unravel it, you’ll have a universe of stars and stripes on your chest. It’s uniquely yours every single time.
5. Handprint Flag Shirt for Kids
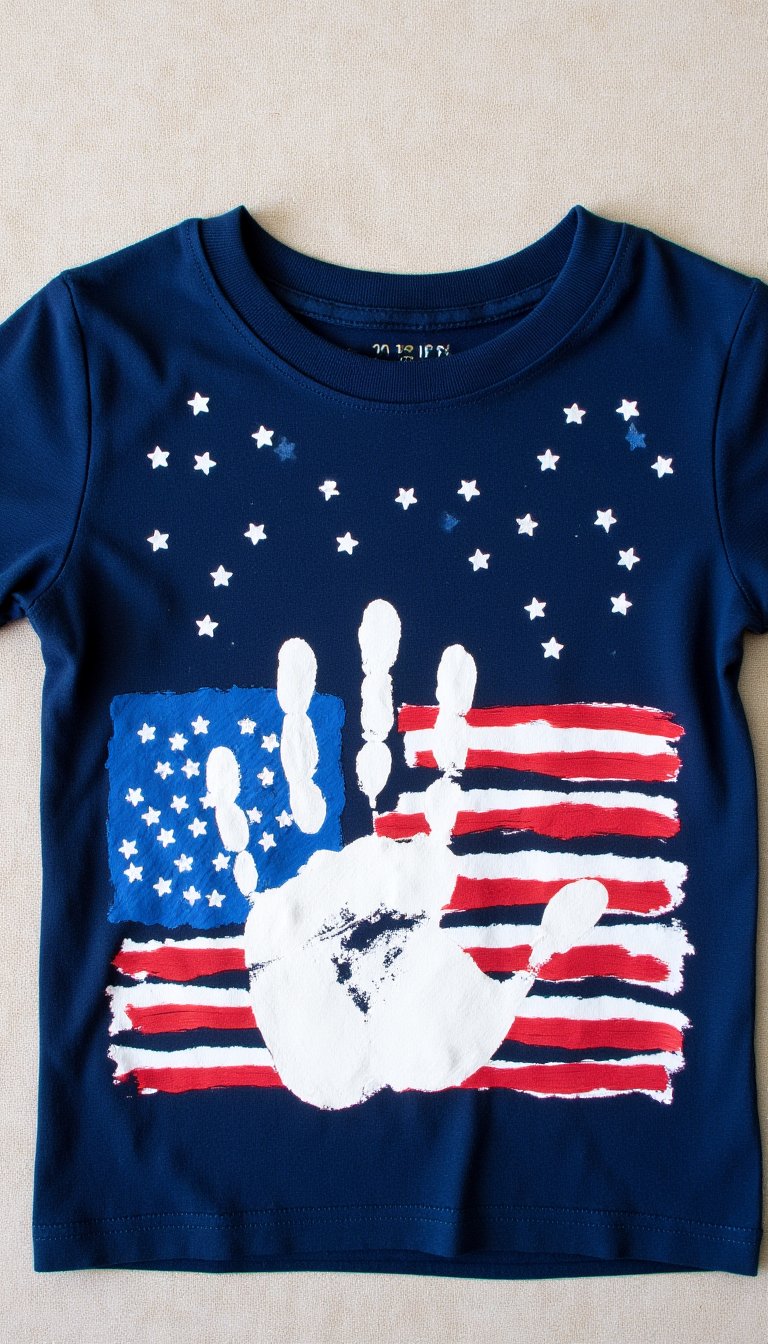
Get the little ones involved for a keepsake you’ll treasure. Use white fabric paint for handprints to create the stripes of the flag on a blue shirt. Then, use a brush or fingertip to add white stars in the blue “field” above the prints. Messy? Absolutely. Adorable? Without a doubt. It captures a moment in time far better than any store-bought outfit.
6. Iron-On Vinyl State Pride Shirt
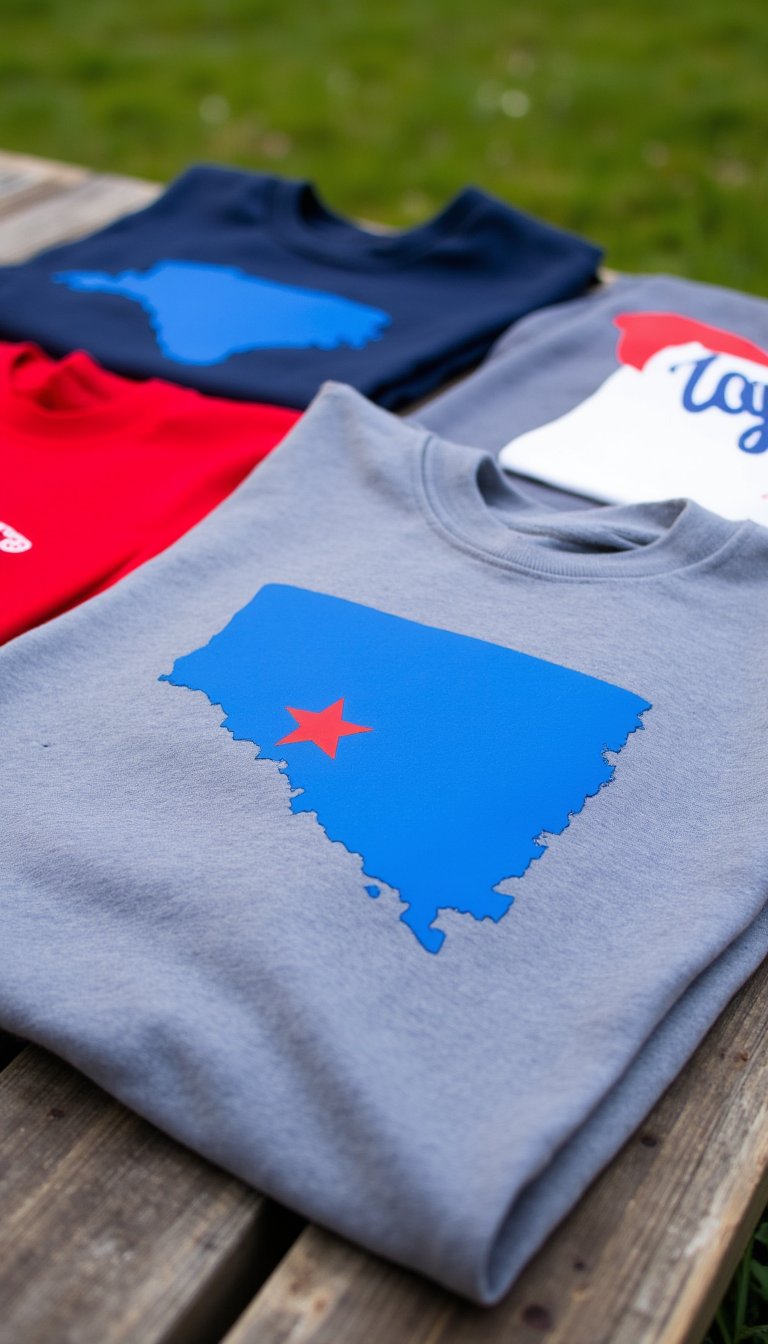
Show love for your home state and the USA. Use a cutting machine (or pre-cut shapes) to create a silhouette of your state from red or blue iron-on vinyl. Place it on a shirt, then add a small star where your hometown would be. Finish with a “Proud American” phrase underneath. It’s clean, professional-looking, and deeply personal.
7. Glitter “Boom” Shirt
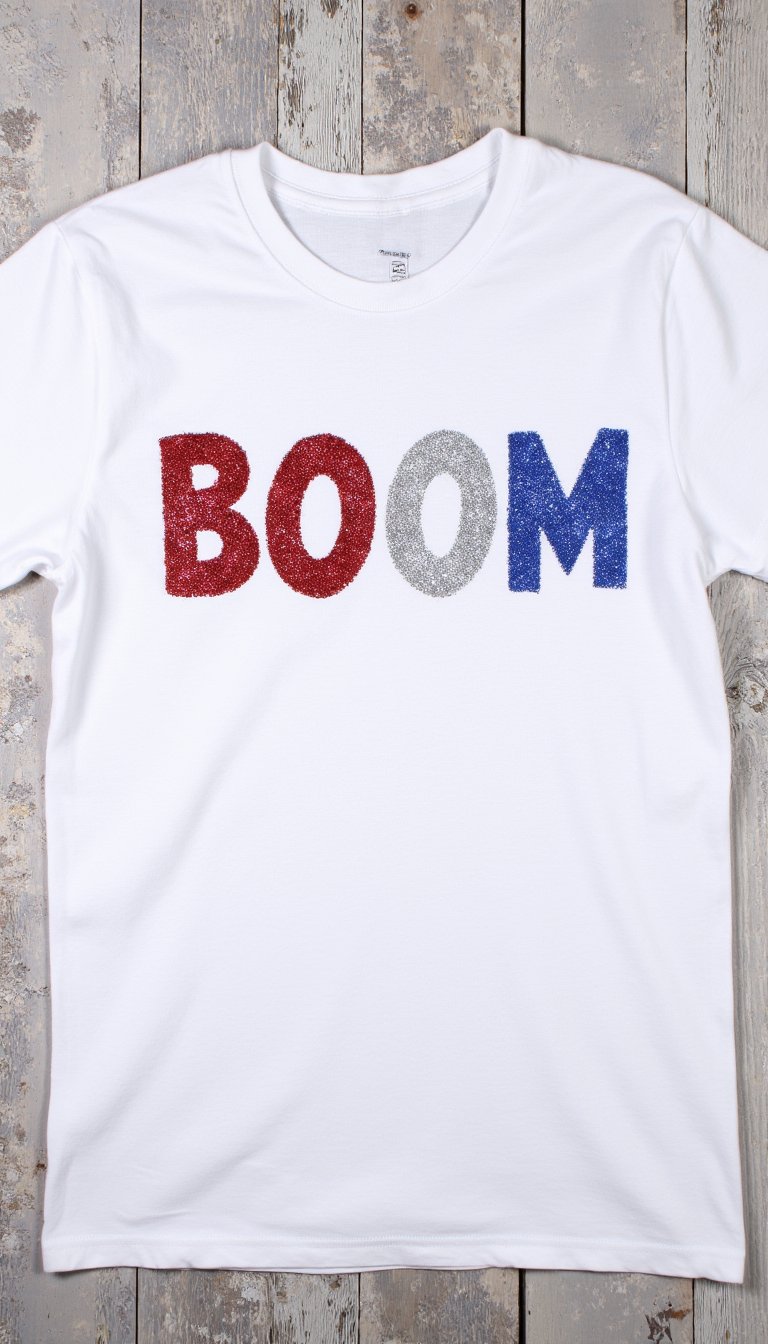
Because everything is better with glitter. Use puffy paint or fabric glue to write a fun word like “BOOM,” “POP,” or “USA” on your shirt. Immediately pour chunky red, silver, and blue glitter over the wet glue. Shake off the excess and let it dry completely. You’ll literally be sparkling from the picnic to the fireworks show.
8. Reverse Appliqué Flag Tank
This looks intricate but is easier than you think. Take a blue tank top and pin a piece of white fabric behind the area where you want the stars. Then, pin a piece of striped fabric below it for the stripes. Carefully cut star shapes *through* the blue tank top layer only, revealing the white underneath. Use a tight zigzag stitch to secure the edges. The result is a gorgeous, textured flag.
9. Liberty Bell Cracked Texture Tee
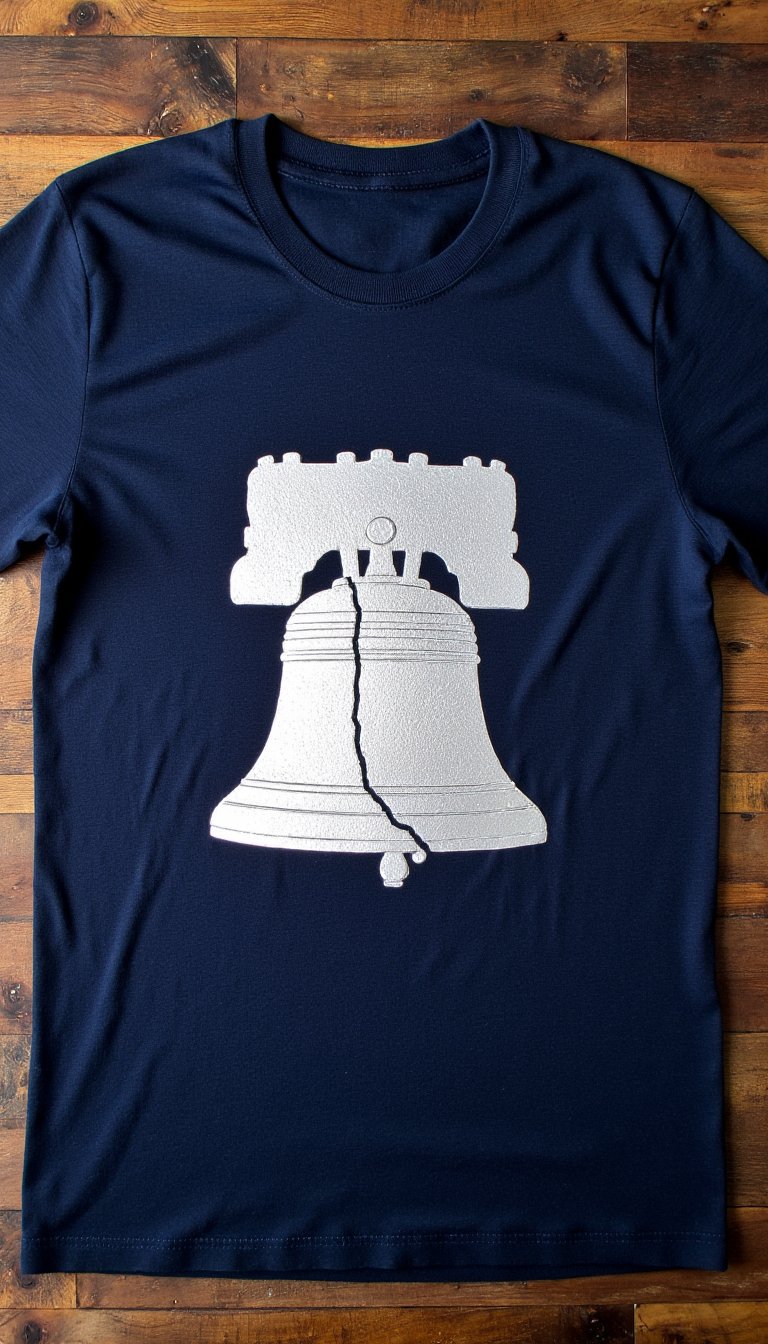
A clever nod to history. Find a simple Liberty Bell graphic online and use it as a stencil. Paint the bell in metallic silver fabric paint. Here’s the fun part: once it’s dry, use a thin black paint pen to draw the famous crack. Add the phrase “Let Freedom Ring” in a classic font underneath. It’s a witty, educational twist on DIY 4th of July shirts.
10. Pom-Pom Fringe Banner Shirt
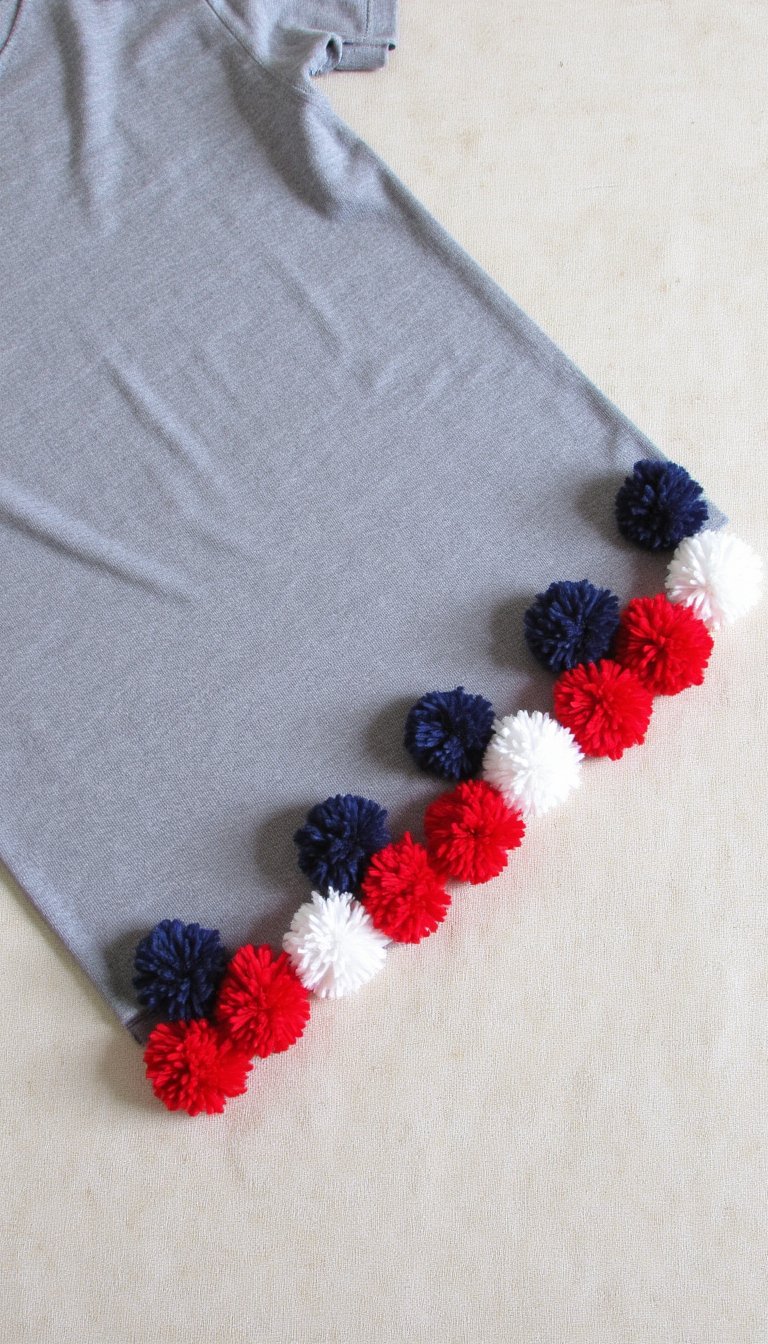
This one is all about texture and movement. Sew or fabric-glue a line of small red, white, and blue pom-poms along the neckline or the bottom hem of a solid tee. It creates a playful, celebratory bunting effect. Perfect for adding a 3D pop to your outfit without any drawing skills required. Just try not to get distracted playing with the pom-poms all day.
11. Sun-Print with Patriotic Shapes
Let the sun do the work! Buy sun-sensitive fabric paint or dye. Arrange star-shaped cookies cutters, stripes of tape, or even real leaves and flowers in a flag pattern on a damp, painted shirt. Leave it in direct sunlight for the time specified on the dye bottle. Rinse, and you’ll have a beautiful, ethereal print. It’s like magic, but with science.
12. “These Colors Don’t Run” Athletic Shirt
A must for the cornhole champion or backyard football MVP. Use a sleek, moisture-wicking athletic tee. Apply iron-on letters for the classic phrase “These Colors Don’t Run” on the back. On the front, add a small, simplified flag or eagle. It’s functional, fierce, and shows your competitive spirit is as strong as your patriotic spirit.
13. Embroidery Hoop Art Shirt
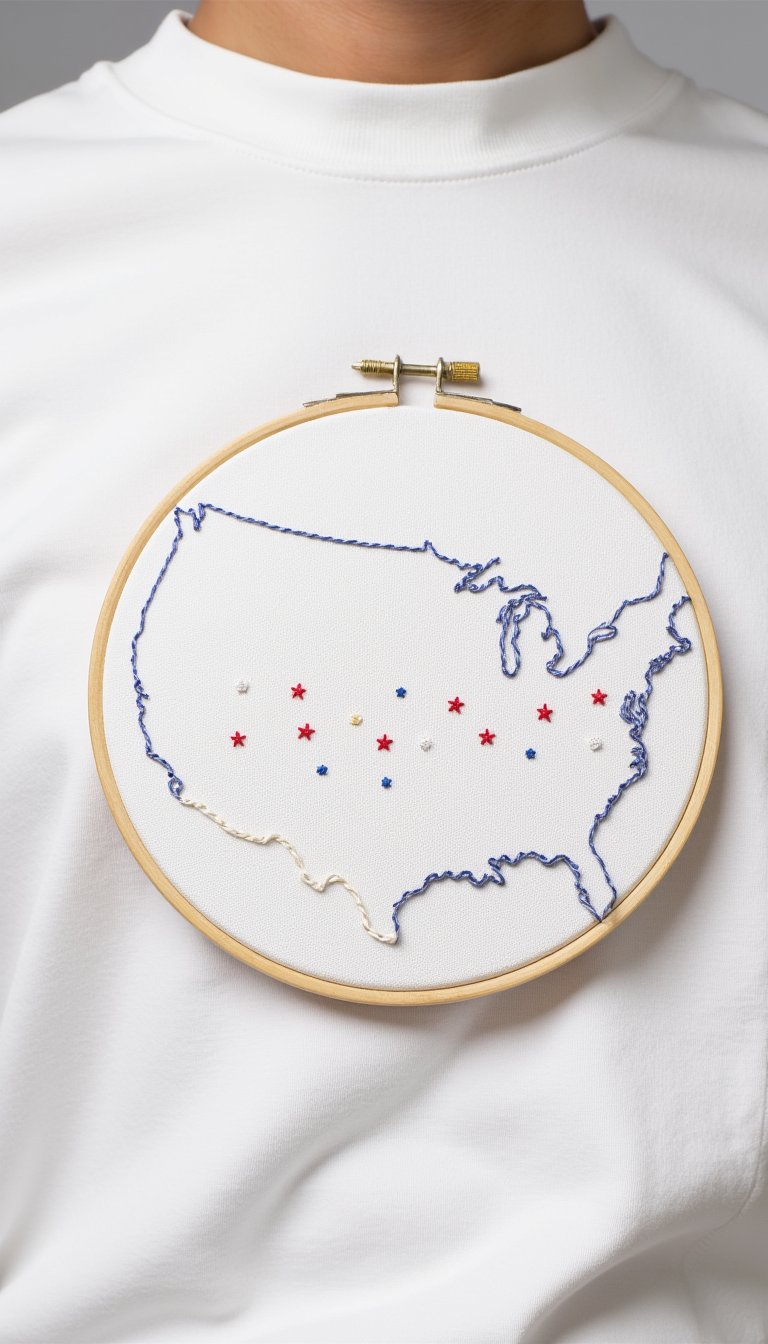
For a delicate, handcrafted look, try simple embroidery. Use a small embroidery hoop to stabilize the fabric on a tee. Stitch a simple outline of the USA, a single star, or the year “1776” using red, white, and blue thread. Even basic backstitch or running stitch looks incredible. This project is portable and perfect for crafting while watching the parade.
14. Comic Book Style “POW!” Tee
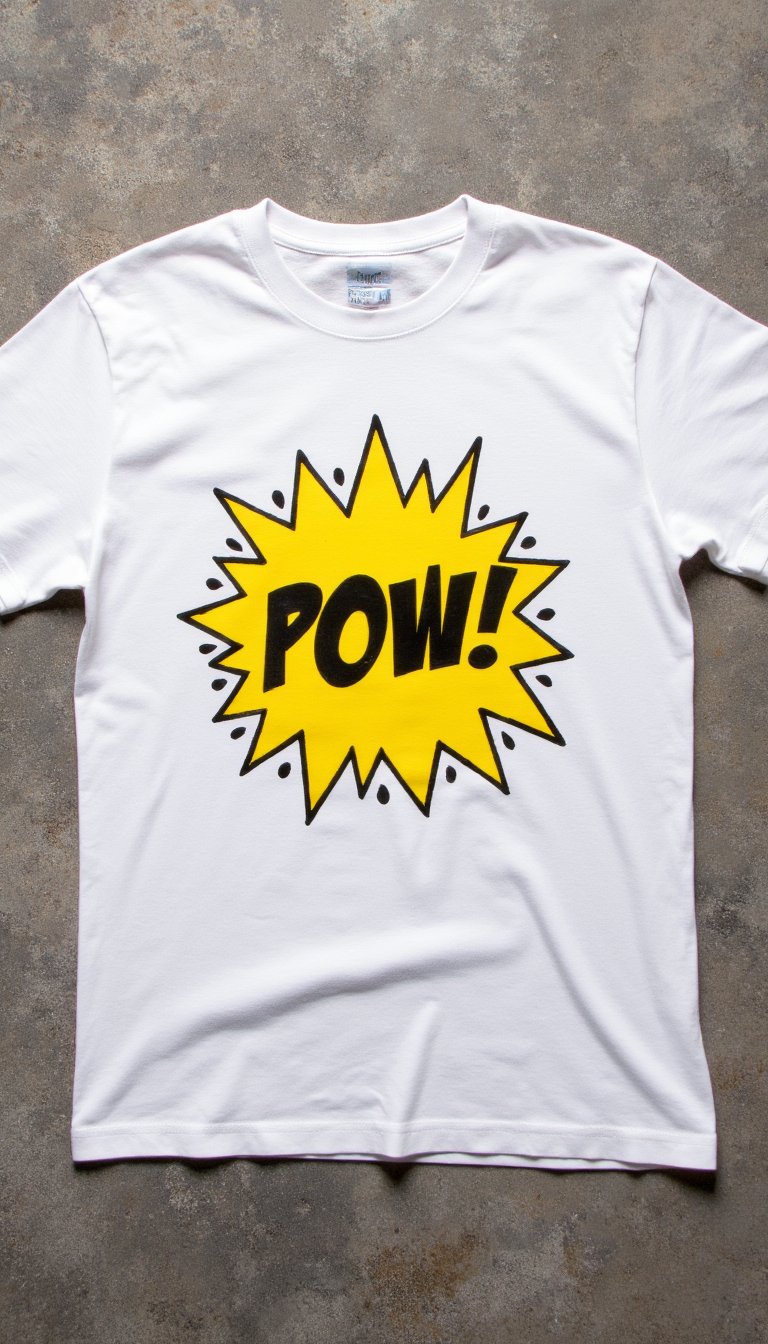
Celebrate the “fireworks” of classic superhero comics. Paint a bright yellow starburst shape on your shirt. Inside it, use bold black fabric paint to write a comic book sound effect like “POW!”, “BANG!”, or “KABOOM!”. Outline everything in black for that classic pop-art feel. It’s bold, graphic, and seriously cool.
15. Dip-Dye Ombre Shirt
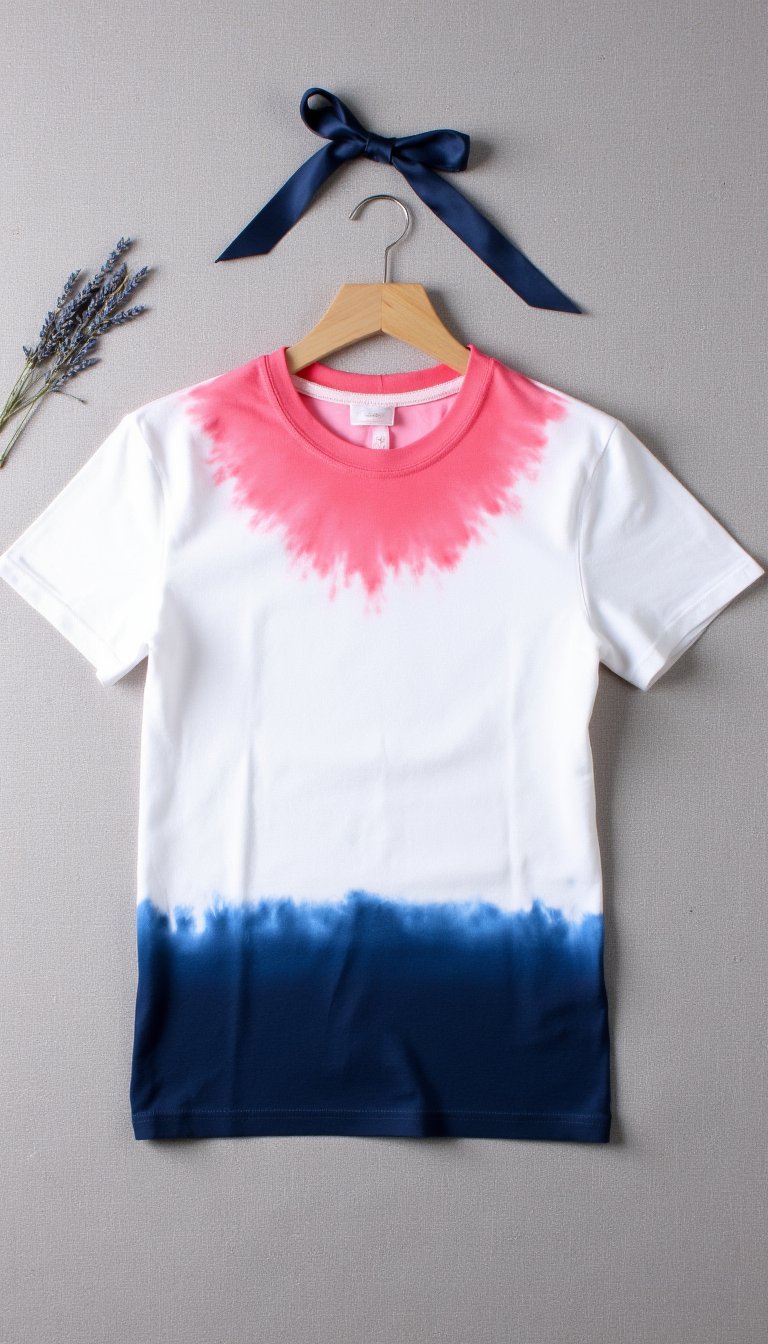
Elegant and effortless. Start with a white shirt. Mix fabric dye baths in red and blue. Dip the bottom third of the shirt in the blue dye, and the top third in the red dye, leaving a white band in the middle where they (hopefully) won’t quite meet. The blend creates a beautiful ombre effect that screams summer sophistication.
16. Pet Portrait Patriotic Shirt
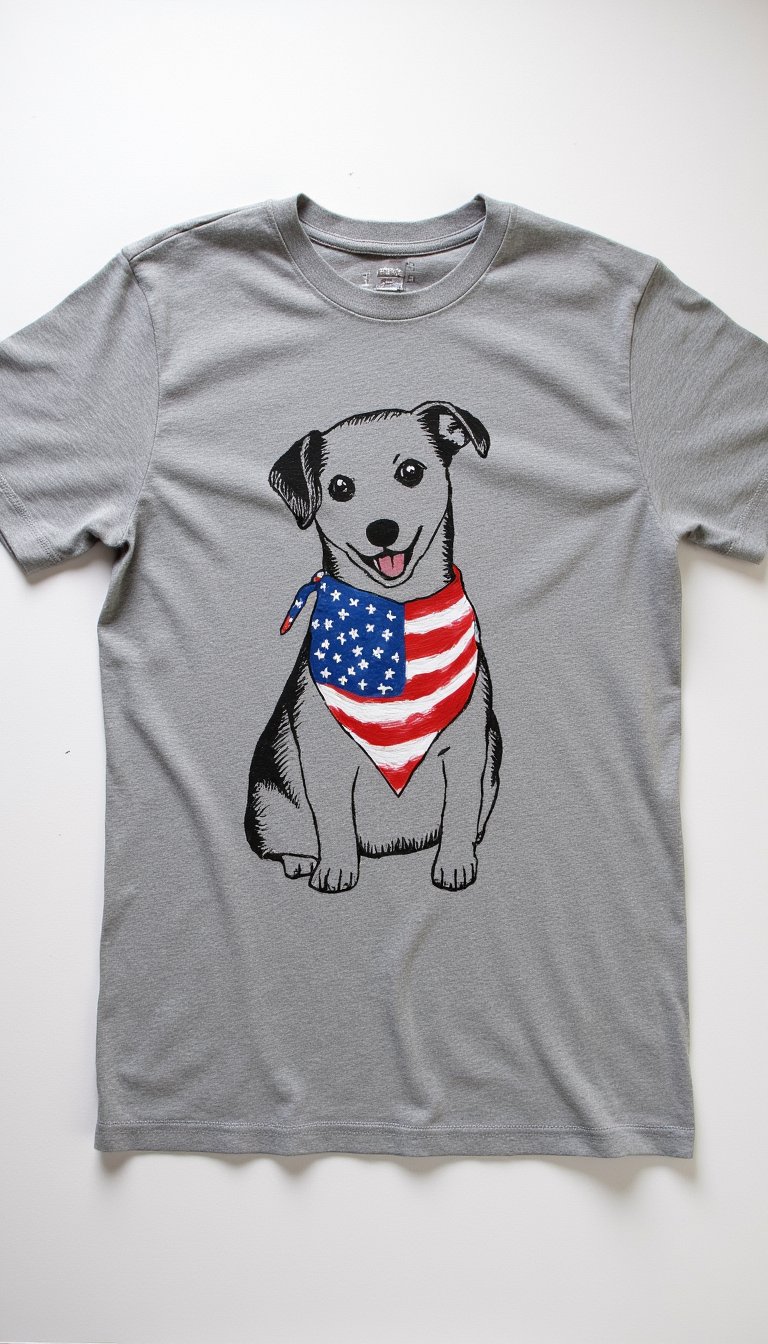
Include your furry family member! Start with a digital photo of your pet. Use an app to simplify it into a black-and-white outline. Transfer this to an iron-on transfer sheet and press it onto a shirt. Then, hand-paint a tiny American flag bandana on them or a festive hat. Unreasonably cute? You bet. Conversation starter? Guaranteed.
17. Stenciled Firecracker String
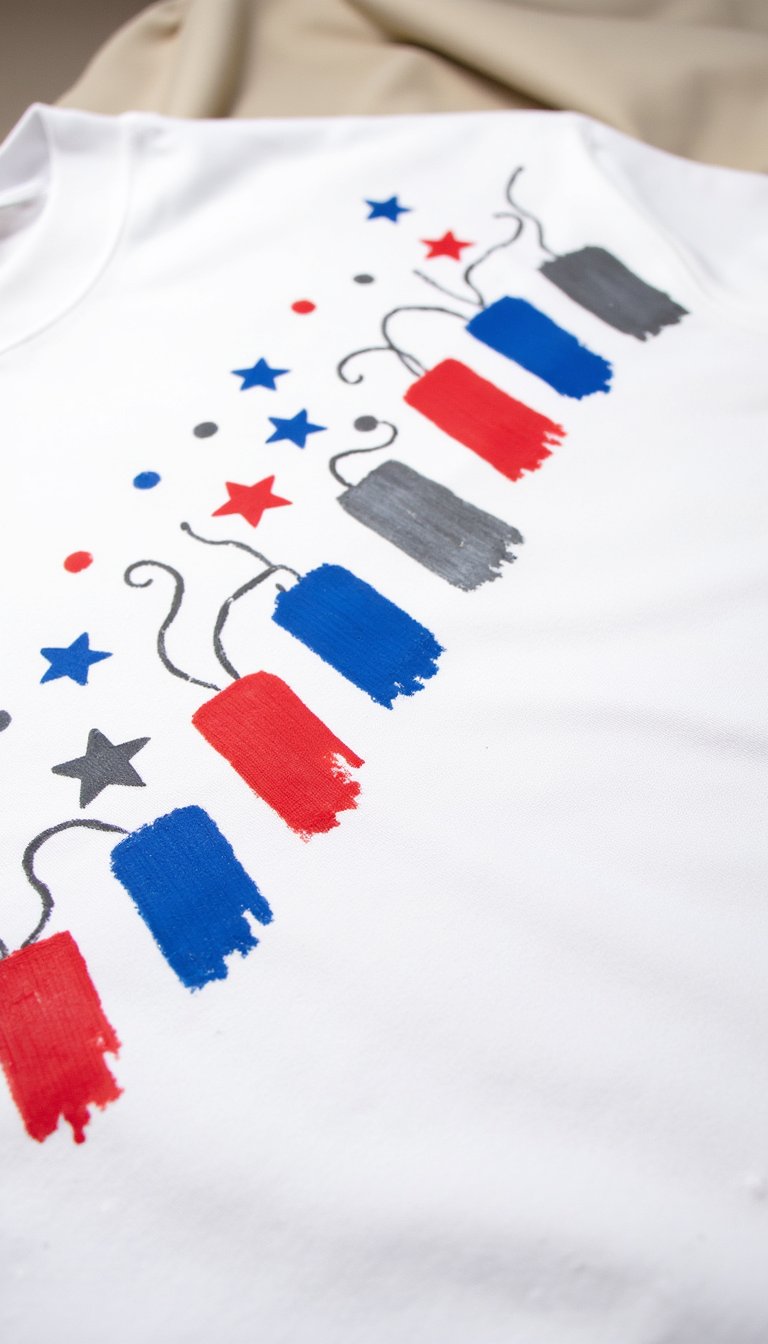
Create a dynamic diagonal line of firecrackers across your shirt. Use a cylindrical object and a star stencil. Paint the “body” of the firecracker in red or blue, then stencil a white or silver star on it. Add a curling “fuse” with a paint pen. It creates a sense of motion and is a playful alternative to the standard flag.
18. Vintage Postcard Transfer Shirt

Find a high-contrast image of a vintage 4th of July postcard or advertisement. Print it reversed onto a specialty transfer paper for dark fabrics. Iron it onto a navy or heather grey tee. The slightly faded, retro look is instantly cool and feels like you’re wearing a piece of history. Plus, it’s a five-minute project with maximum impact.
19. Puffy Paint Fireworks on Denim
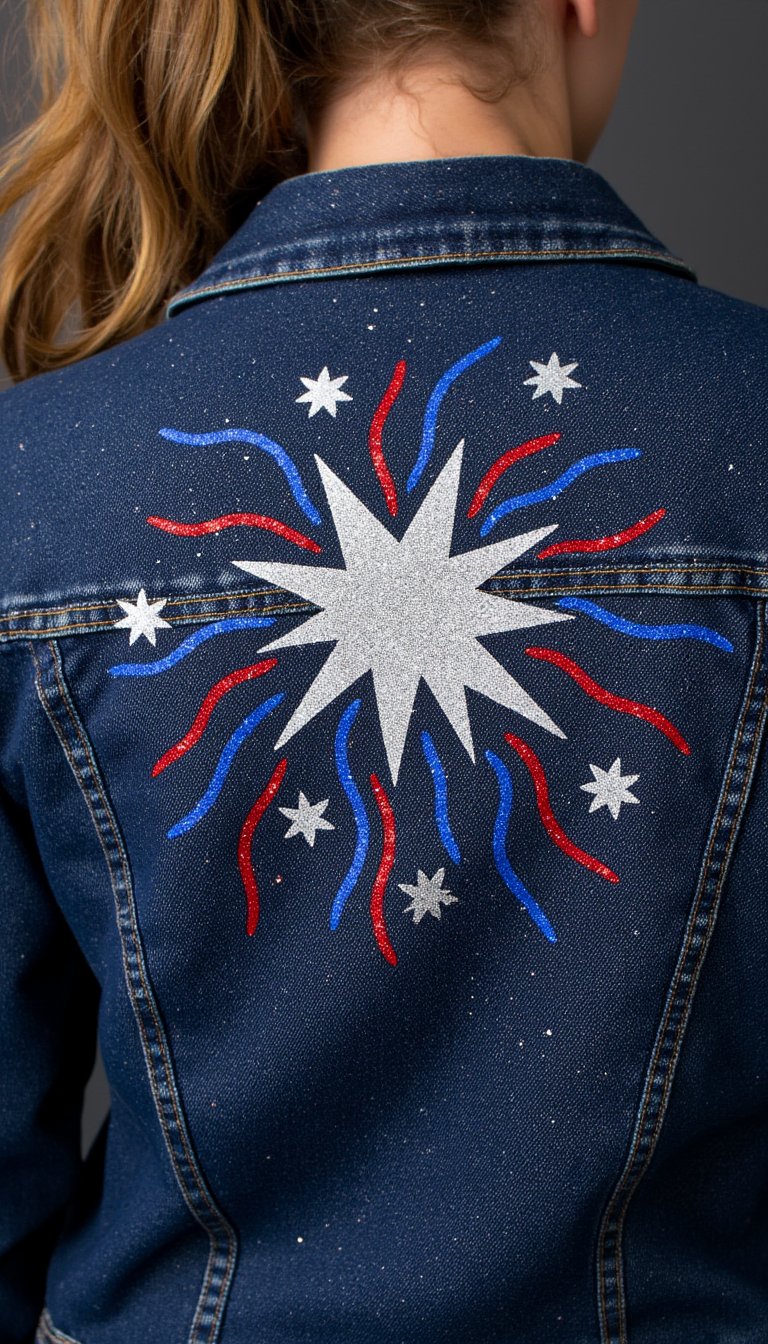
Don’t limit yourself to t-shirts! Grab a denim jacket or chambray shirt. Use metallic silver, red, and blue puffy paint to draw detailed firework bursts on the back or sleeve. The puffy paint adds amazing texture that catches the light. It’s the perfect layer for when the summer night gets a little chilly.
20. “Land of the Free” Script with Florals
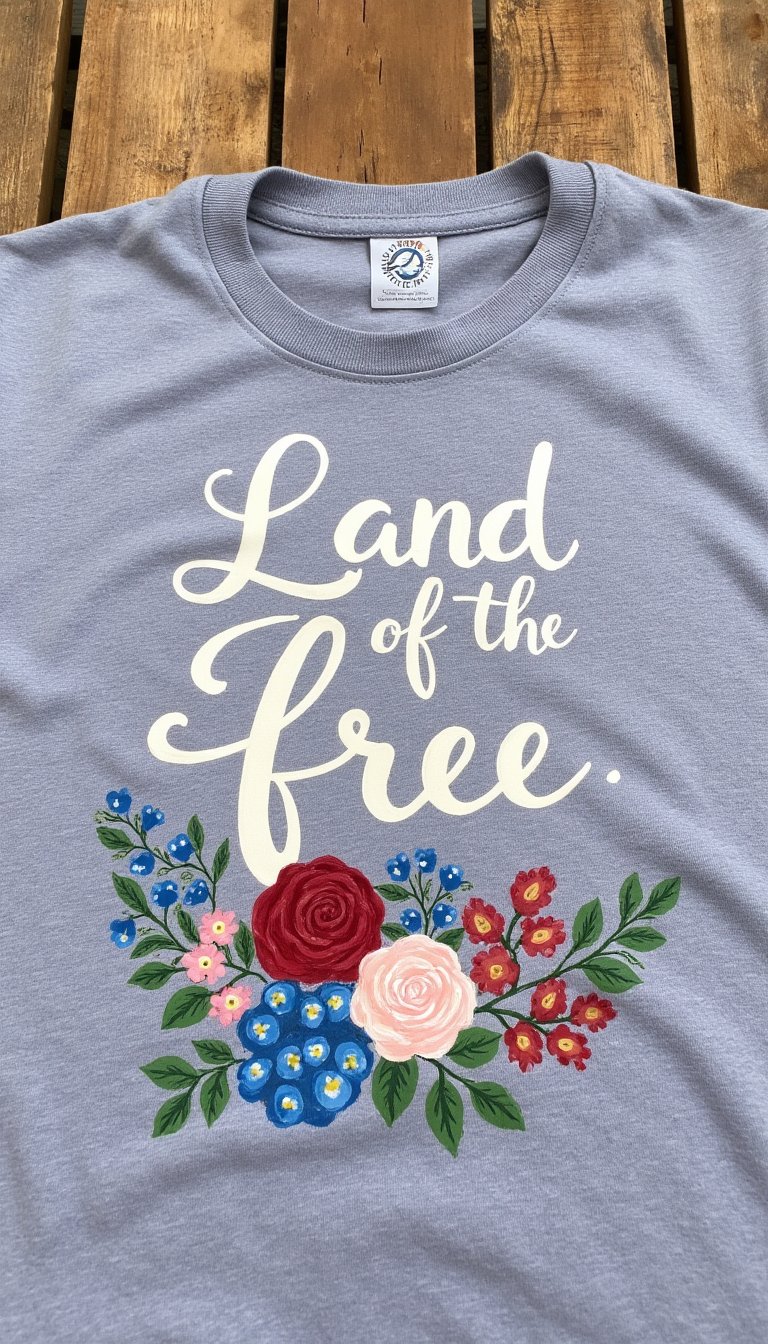
Combine delicate beauty with bold sentiment. Use a lovely script font to write “Land of the Free” across the chest. Then, with a fine brush, add tiny blue forget-me-nots and red roses intertwining with the letters. This design proves DIY 4th of July shirts can be soft and stunning, not just bold and graphic.
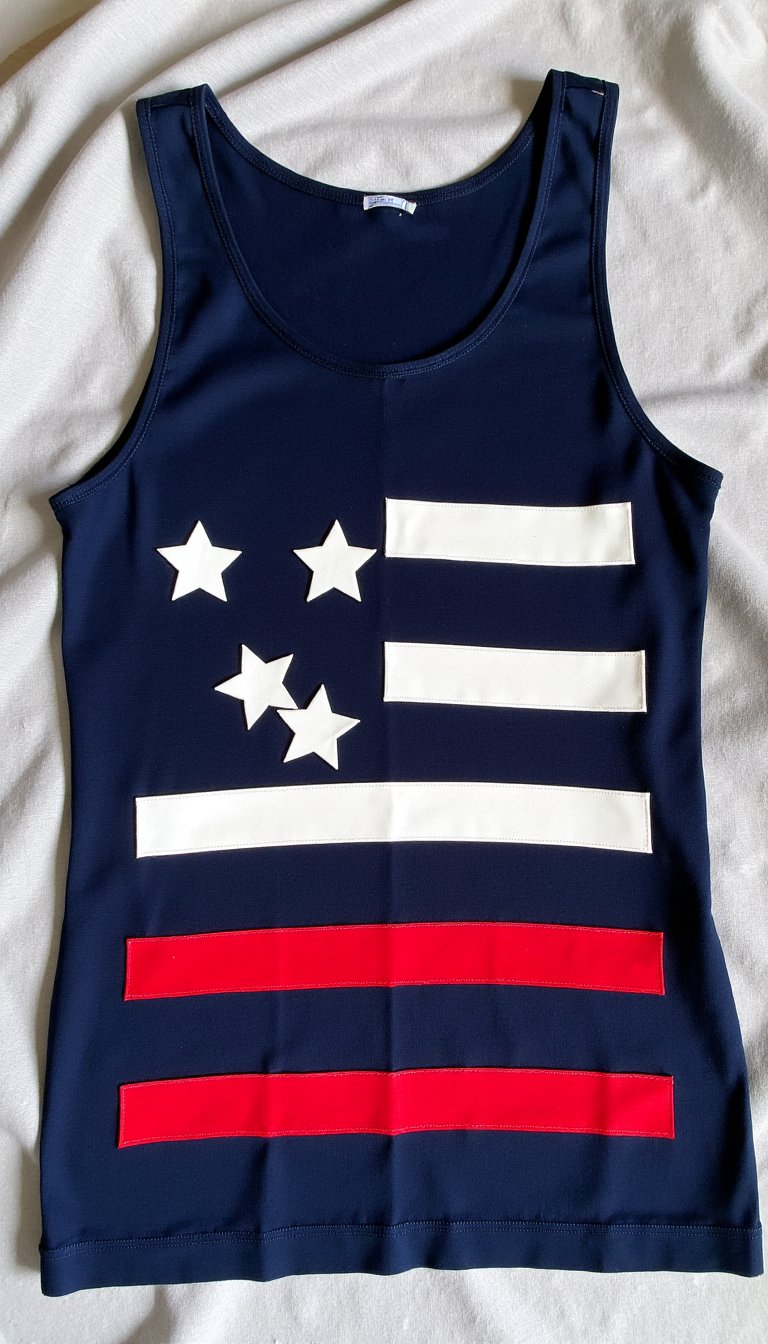
21. Group Theme: USA Trifecta Tanks
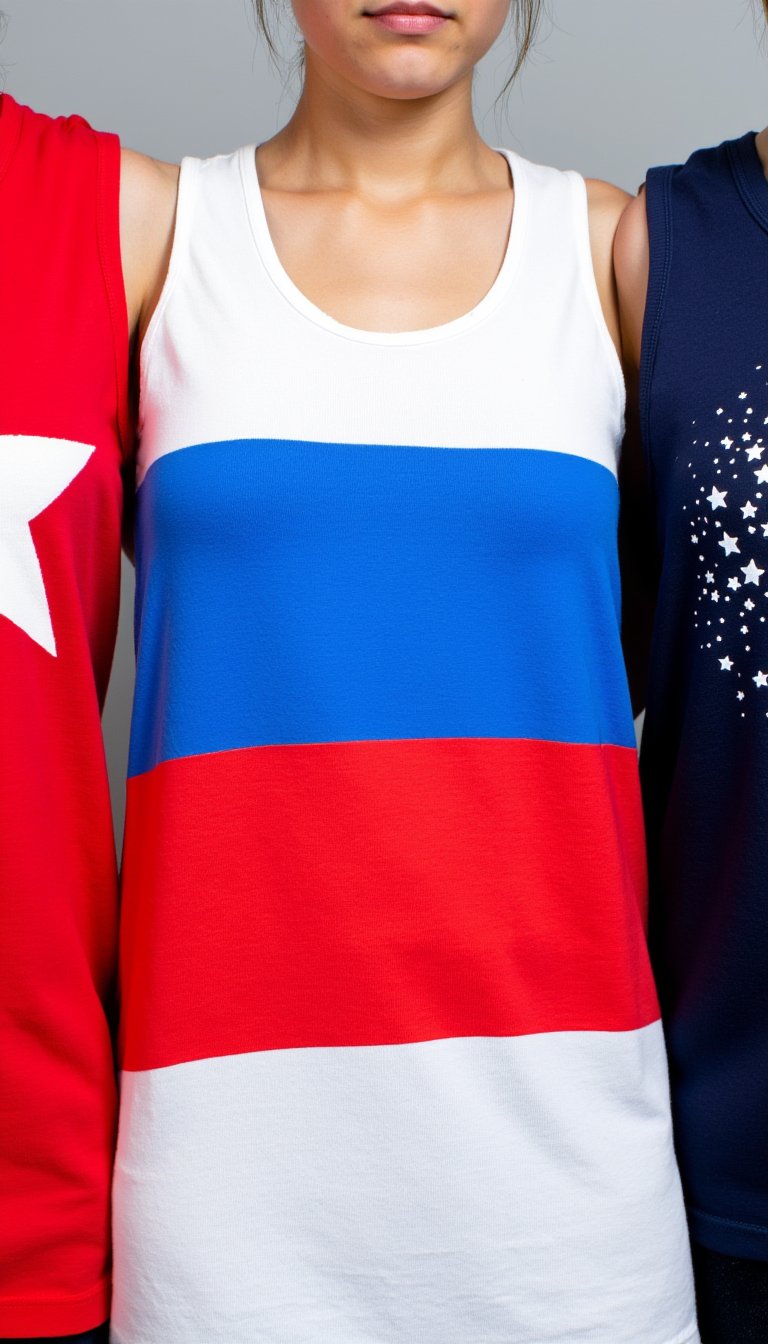
Coordinate with your crew. Get three solid tanks: one red, one white, and one blue. Each person decorates their shirt with a single, large emblem. The “Red” shirt gets a big white star. The “White” shirt gets a bold red and blue stripes design. The “Blue” shirt gets a cluster of white stars. When you stand together, you form the ultimate living flag. Squad goals achieved.
So, which of these 21 DIY 4th of July shirts will you tackle first? Whether you go for the messy glory of the splatter paint or the precise beauty of the embroidery, remember that the best part isn’t just the final product—it’s the fun you have making it. This Independence Day, your creativity is your ultimate freedom. Now grab a shirt, claim your spot at the kitchen table (protected by plenty of newspaper, of course), and make something amazing. Happy crafting, and happy 4th!