
Ever wondered why your outdoor lights look more like dim fireflies than brilliant beacons? You bought them to make your garden glow, but now they just look sad, dusty, and neglected. Solar panels need direct sunlight to charge, which means a thin layer of dirt acts like a blackout curtain. Let’s fix that today using simple household items that you probably already have in your pantry.
How often should you perform this chore? Ideally, a quick cleanup once a month keeps your yard looking stellar. If you neglect them, the battery life drops, and the plastic lenses oxidize until they look permanently foggy. Grab your cleaning bucket, and let’s restore that warm, welcoming glow to your pathways.
1. The Classic Soap and Water Scrub

A simple bucket of warm water and mild dish soap works wonders for general maintenance. This combination gently cuts through dirt, pollen, and bird droppings without damaging the delicate components. You only need a few drops of soap to create a gentle, effective cleaning solution.
What You Need for This Method
- Warm water
- Mild dish soap (avoid harsh detergents)
- Two microfiber cloths (one for washing, one for drying)
Dip your cloth into the soapy water and wring it out until it is damp but not dripping. Gently wipe the solar panel and the surrounding housing to lift away surface grime. Dry the surface immediately with your second cloth to prevent water spots from forming in the sun.
2. Vinegar Spray for Cloudy Lenses

Did hard water leave ugly white spots on your light covers? Mineral buildup from sprinklers easily ruins the look of your garden lights. Fortunately, white vinegar tackles these deposits like a absolute champ.
Natural Acid Power
Mix equal parts white vinegar and warm water in a spray bottle. Spray the solution onto the cloudy lens, let it sit for a minute, and wipe it clean with a soft cloth. FYI: The acetic acid in vinegar dissolves calcium and magnesium deposits without damaging the plastic lens. IMO, this is the cheapest and most effective natural glass cleaner in your pantry! 😉
3. Baking Soda Paste for Stubborn Grime

Sometimes rain and dirt combine to create a baked-on crust on your panels. Water alone won’t budge this stubborn, baked-on layer. You need a mild abrasive that will lift the dirt without scratching the protective coating.
How to Apply the Paste
- Mix two tablespoons of baking soda with a few drops of water to form a thick paste.
- Smear the paste over the dirty solar panel using your fingers.
- Rub gently in circular motions with a damp microfiber cloth.
- Rinse the area thoroughly with clean water.
This method strips away the grimiest layers without leaving scratches. Always wipe away every trace of baking soda residue to prevent a white film from blocking the sunlight.
4. Toothpaste Polish for Scratched Plastics

Do your solar light lenses look dull, foggy, or scratched? Standard white paste toothpaste (not the gel kind) contains micro-abrasives that polish plastic beautifully. It works similarly to a headlight restoration kit but costs pennies.
Restoring Clarity
Dab a pea-sized amount of toothpaste onto the cloudy lens. Buff the surface with a clean, dry cloth using firm, circular pressure for about one minute. Rinse the toothpaste away with a damp rag, and you will notice an instant boost in light output.
5. Clear Nail Polish for Restoring Sun-Damaged Panels

Sun exposure eventually degrades the plastic coating over solar cells, leaving them cloudy and rough. You can temporarily repair this oxidation with clear nail polish. First, clean the panel surface thoroughly with soapy water and let it dry.
Sealing the Surface
Paint a thin, even layer of clear nail polish over the solar panel. The polish fills in the microscopic cracks and restores clarity so sunlight can penetrate the cells again. This quick hack works like magic to revive old, dying lights before you decide to throw them away.
6. Rubbing Alcohol for Sticky Sap and Residue

Did you place your lights under pine trees or maples? Sticky tree sap and bug splatter bond tightly to solar surfaces and resist standard soap. You need a solvent that dissolves these sticky bonds instantly.
Dissolving Sticky Messes
Pour a small amount of isopropyl rubbing alcohol onto a cotton ball. Press it against the sticky sap for ten seconds to soften it, then wipe it away. Alcohol evaporates quickly, leaving a streak-free shine on the glass panel.
7. Microfiber Dusting for Quick Maintenance

You do not always need a deep clean to keep your lights working. A quick weekly dusting prevents heavy buildup from forming in the first place. Keep a dry microfiber cloth in your gardening bin for easy access.
The Power of Static Electricity
Walk around your yard and give each solar panel a swift wipe-down with the dry cloth. Microfiber fibers carry a positive charge that pulls dust and pollen away from the surface instead of pushing it around. It takes less than five minutes but pays off in consistent nightly performance.
8. Magic Eraser for Tough Scuffs

Lawn mowers and weed eaters love to kick up dirt and leave dark scuff marks on light stakes. A melamine foam sponge, commonly known as a Magic Eraser, removes these marks easily. Wet the sponge and squeeze out the excess water before rubbing.
Micro-Scrubbing Technology
Rub the sponge gently over the plastic or metal poles to lift grass stains and scuffs. Do not use melamine foam on the solar panels or clear lenses, as it can dull the shiny finish. Keep it strictly on the structural stakes and housings.
9. Dishwasher Soap Soak for Removable Globes
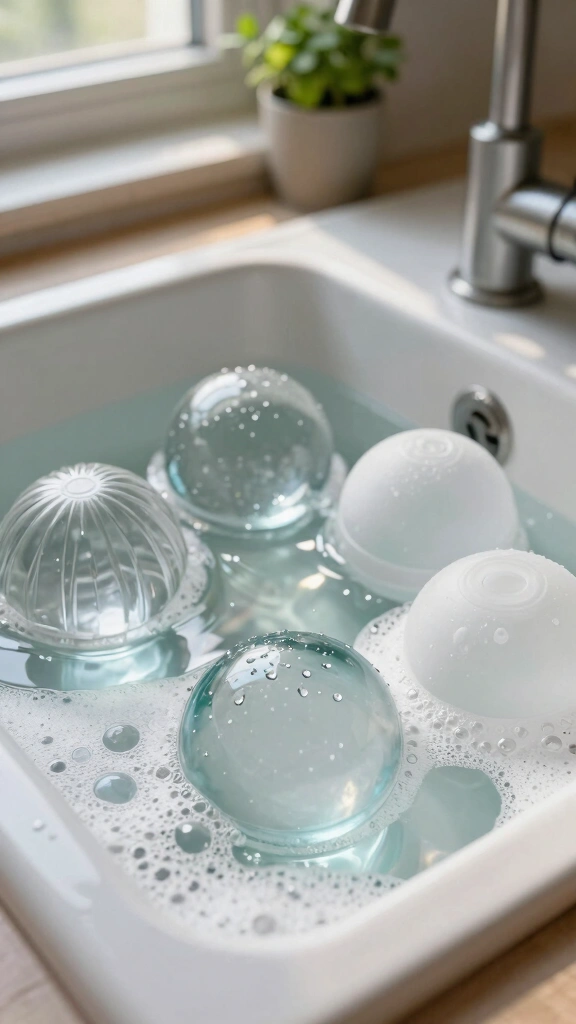
Many solar pathway lights feature removable glass or plastic globes. If yours disassemble easily, take advantage of this design feature. You can wash multiple globes at once with minimal effort.
Hands-Off Cleaning
Fill your sink with warm water and add a tablespoon of liquid dishwasher detergent. Soak the globes for 15 minutes to loosen dirt inside the crevices. Rinse them with clean water and let them air dry completely before reassembling the lights.
10. Lemon Juice Acid Wash for Mineral Deposits

Do you prefer natural ingredients over store-bought chemicals? Lemon juice offers a high concentration of citric acid that breaks down hard water stains. It is safe for the environment and works quickly.
Eco-Friendly Cleaning
Cut a fresh lemon in half and rub the exposed fruit directly onto the cloudy solar panel. Let the acidic juice sit for five minutes, then rinse it off with clean water. This safe method will not harm your surrounding lawn, soil, or delicate flower beds.
11. WD-40 Wipe Down for Weather Protection

Moisture and metal do not get along, especially in damp morning lawns. Prevent rust on the metal screws and battery connectors of your lights with a quick protective coat. WD-40 acts as a shield against moisture.
Water Displacement Barrier
Spray a small amount of WD-40 onto a clean rag and wipe the metal parts. Avoid spraying the solar panel directly, as the oily residue will attract dust and pollen. Keep the application limited to the screws, joints, and metal poles.
12. Compressed Air for Internal Dust and Bugs

Have you noticed tiny bugs or fine dust inside the light housing? Small insects love to crawl inside these warm fixtures to escape the weather. Unscrew the cover to access the interior chamber.
Protecting the Circuitry
Use a can of compressed air to blow out the debris. A quick blast of dry air clears out the space without introducing moisture to the delicate wiring. Keep the nozzle a few inches away to avoid damaging the internal electronics.
13. Fine-Grit Sandpaper for Severe Oxidation

When your solar panels look completely white and chalky, normal cleaners will not help. You must physically sand away the dead, oxidized plastic layer to reach the clear plastic beneath. This is your last resort before replacing the light.
The Restoration Process
Use wet 2000-grit sandpaper and gently sand the surface in circular motions, keeping the panel wet. Wipe away the slurry frequently to check your progress. Follow up with a coat of clear nail polish to seal the freshly sanded plastic.
Keep the Lights On!
Clean solar yard lights work better, last longer, and make your home look beautiful. You do not need expensive specialty products to keep them in top shape. Regular maintenance using household staples like vinegar, soap, and baking soda ensures your garden stays bright every single night. Spend a few minutes this weekend cleaning your lights, and enjoy a brighter yard tonight!