
Most people toss beer and soda caps directly into the trash without a second thought. Millions of these metal and plastic pieces pile up in landfills every year, according to EPA recycling statistics. Yet these sturdy little discs work exceptionally well as building blocks for home decor and jewelry.
Grab a glue gun, find a pair of pliers, and start saving those caps. These 29 practical DIY projects show you how to turn everyday kitchen waste into durable, handmade goods for your home.
1. Vintage Photo Magnets

Turn metal beer caps into tiny picture frames for your fridge. Punch out 1-inch circular photos, press them into the hollow side of each cap, and seal the images with clear Mod Podge or craft resin. Glue a strong neodymium magnet to the back so you can stick family snapshots right onto the refrigerator door.
2. Epoxy Resin Drink Coasters

Preserve your favorite craft brewery lids inside clear epoxy discs. Set the caps face up inside circular silicone molds, then pour mixed two-part resin across the top. Once the resin cures, you have heat-resistant drink coasters ready for your coffee table or home bar.
3. Whimsical Outdoor Wind Chimes

Punch holes through the centers of assorted metal lids with a hammer and a nail. String the caps along heavy fishing line or jewelry wire, placing glass beads between each piece. Hang several strands from a wooden dowel on your porch so the metal discs chime softly whenever the wind blows.
4. Mosaic Bistro Tabletop

Revamp an old patio table by laying out a geometric pattern with hundreds of metal caps. Glue each cap down with construction adhesive, then press dark tile grout into the spaces between them. Pour a layer of high-gloss resin over the top to create a flat, waterproof surface for outdoor drinks.
5. Adorable Garden Ladybugs

Coat metal caps in bright red acrylic paint, then dab on black spots with a detail brush. Glue these finished bugs onto wooden craft sticks to create plant stakes, or place them directly into your potted succulents. If you want more insect ideas, explore our collection of ladybug crafts for preschool.
6. Tiny Succulent Garden Planters
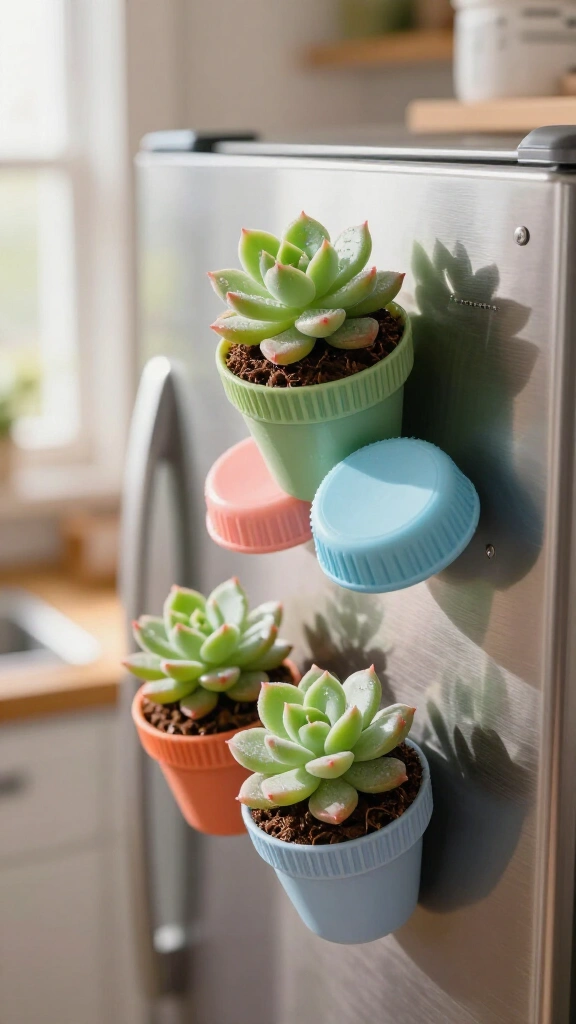
Deep plastic bottle caps work well as tiny starter pots for small succulent cuttings. Fill each cap with a spoonful of potting soil, tuck in a small succulent rosette, and glue a magnet to the side. Stick a few on your fridge or metal desk lamp for a touch of live greenery.
7. Retro Wall Clock

Turn a flat wooden circle and a basic clock kit into a custom wall clock. Fasten 12 different soda caps around the edge to mark the hours, then mount the clock hands in the center. The finished clock brings a clean, retro look to a workshop, kitchen, or game room.
8. Rustic Autumn Wreath

Layer bronze, gold, and amber metal lids onto a flat floral wreath ring. Overlap the caps closely so they resemble metallic fish scales. Add a simple burlap loop at the top and hang the wreath on your front door for autumn decor.
9. Scented Soy Tealight Candles

Melt leftover soy wax, mix in a few drops of lavender essential oil, and center a pre-waxed wick inside clean metal caps. Pour the liquid wax into the caps and let it cool completely. These compact candles make neat pocket tealights or simple party favors.
10. Dangle Drop Earrings
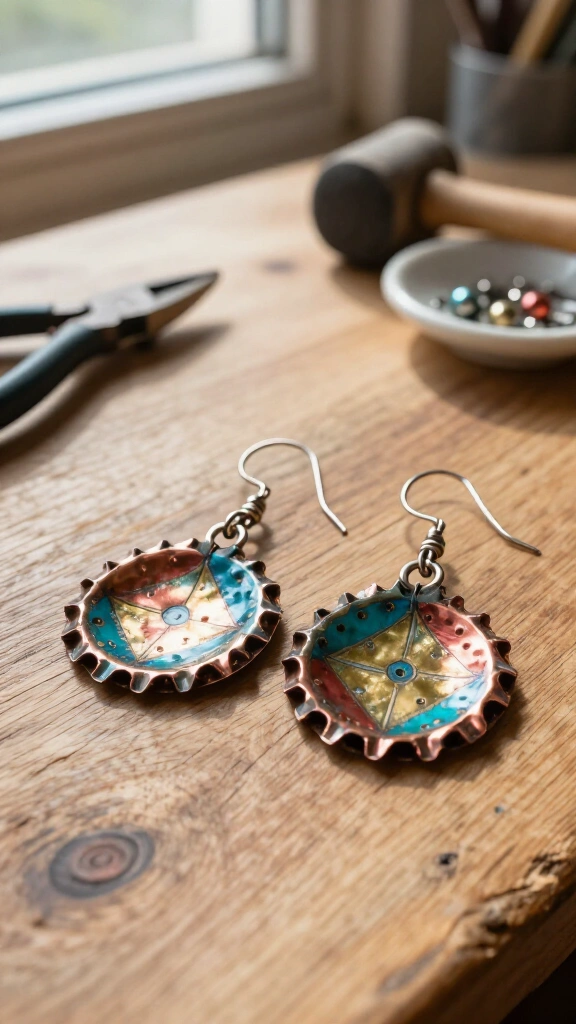
Flatten bottle caps with a rubber mallet to create flared, ruffled discs. Punch a small hole near the top edge, slide a jump ring through, and attach earring hooks. You can find more detailed hardware tips on the Instructables DIY community to build your jewelry-making skills.
11. Travel-Sized Tic-Tac-Toe

Turn an empty mint tin into a travel game board by drawing a grid on the inside lid. Paint five caps with an “X” and five with an “O” using acrylic paint. Store the pieces right inside the closed tin so children can play games during long road trips.
12. Scalloped Accent Mirror Frame

Glue a round mirror onto a wider plywood base, then build out concentric rows of metal caps around the glass border. The ridged edges form a textured sunburst pattern that adds visual interest to a hallway or entryway wall.
13. Rainbow Flower Wall Art

Sort plastic bottle caps by color to create flower bouquets on stretched canvas. Arrange six or seven matching caps around a contrasting center disc to form flower petals, then paint green stems underneath. Take a look at our roundup of rainbow crafts that spark joy for more colorful craft ideas.
14. Pin Cushion Finger Rings

Fill a small pouch of cotton fabric with batting, tie it into a tight ball, and glue it inside an upturned metal cap. Attach an adjustable blank ring base to the bottom with E6000 adhesive. Wear the finished ring on your finger while hand sewing so you always have a place to stick pins.
15. Buzzing Garden Bee Markers

Paint yellow plastic caps with black stripes, glue on googly eyes, and shape white pipe cleaners into tiny wings. Glue each bee to a wooden dowel rod and plant them in your garden beds to label your herbs. For more insect projects, browse these buzz-worthy bee crafts.
16. Geometric Serving Tray

Line the bottom of a wooden tray with an orderly pattern of vintage bottle caps. Arrange the caps in stripes, checkerboards, or random color mixes, then glue them flat. Pour a coat of self-leveling clear glaze over the tray floor to create a smooth, spill-proof serving surface.
17. Classroom Rhythm Castanets

Cut a 1-inch by 6-inch strip of thick cardboard and fold it in half. Glue a metal bottle cap to the inside of each end so the metal rims face each other. When children squeeze the cardboard shut, the caps click together like castanets for simple music lessons.
18. Vintage Photo Locket Pendants
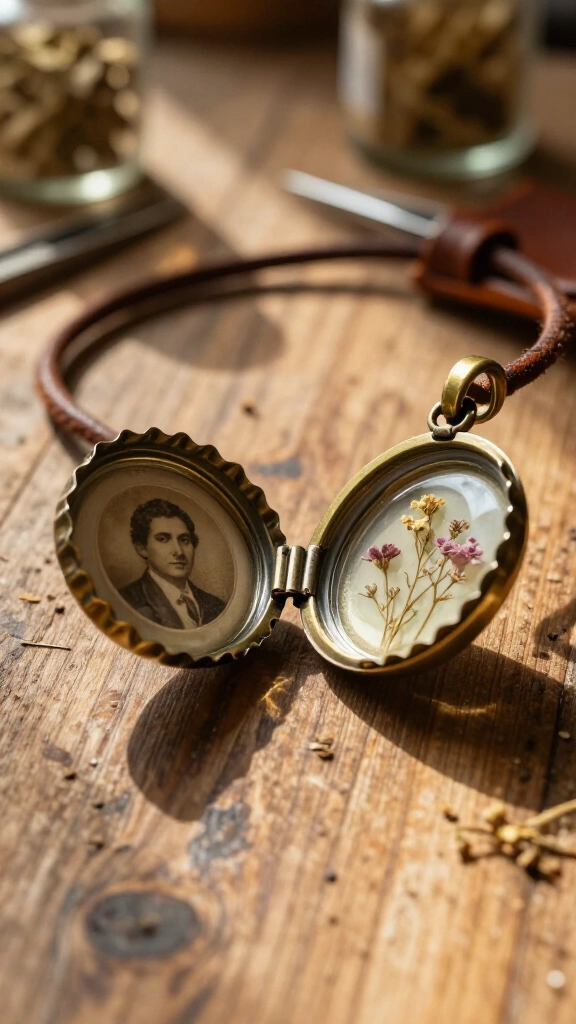
Join two matching metal caps together with a small brass craft hinge and super glue. Glue small photos or dried flowers inside both halves and seal them under clear craft glaze. Add a jewelry bail and a leather cord to turn the piece into a folding keepsake pendant.
19. Festive Christmas Tree Baubles

Glue three metal caps together in a vertical line, paint them white, and dot on black coal eyes and buttons to make a snowman. Loop a ribbon through the top cap to hang it from your Christmas tree. Check out Martha Stewart craft tutorials for more holiday decorating ideas.
20. Chunky Cabochon Keychains

Glue a circle of decorative scrapbook paper inside a clean metal cap, then cover it with a clear glass cabochon dome. Drill a small hole through the rim, attach a split keyring, and clip on a leather tassel for a quick handmade gift.
21. Flexible Toy Caterpillar

Drill holes through the centers of 20 to 30 plastic soda caps. Thread a piece of elastic cord through the entire stack and knot both ends securely. The connected caps bend, twist, and wiggle freely without coming apart during playtime.
22. Hanging Bird Feeder Accent

Build a simple wooden platform feeder and line the outside edges with overlapping metal caps. The caps protect the wood rim from rain and add a splash of color to your yard while birds stop to feed.
23. Industrial Steampunk Medallions

Spray metal bottle caps with black primer, then lightly brush them with copper or bronze metallic paint. Glue small watch gears and washers inside the rim with strong craft adhesive. Attach a safety pin to the back to fasten the medallion onto a jacket or backpack.
24. Heat-Resistant Kitchen Trivet

Arrange metal bottle caps in a tight hexagonal pattern on a thick cork trivet base. Glue each cap down with heat-resistant silicone adhesive. The metal surfaces and cork backing absorb heat safely, protecting your countertops and dining tables from hot pots.
25. Kids’ Stamping Tools

Cut stars, hearts, and triangles out of thick craft foam with scissors. Glue each shape onto the flat top of a plastic juice cap to create easy-to-grip stamp handles for small hands. Kids can dip the foam into washable paint to stamp designs onto cards and drawing paper.
26. Kitchen Island Backsplash Panels

Tile a kitchen island or home bar front using hundreds of collected beer caps. Stick the caps onto fiberglass tile backing sheets, then apply them to the wall with thinset mortar. Fill the gaps between the caps with dark grout to create a custom pub-style backsplash.
27. Beaded Doorway Curtains

Drill small holes in opposite sides of colorful plastic caps, then link them into long chains with metal jump rings. Arrange the colors into stripes or geometric blocks across multiple strands. Mount the finished chains to a wooden rod to create a casual doorway curtain.
28. Shimmering Fish Scale Art

Sketch a large fish onto a piece of scrap wood, then nail or glue metal caps across the body in overlapping rows. The crimped metal edges look just like real scales. Hang the finished wood panel in a garage, patio area, or bathroom.
29. Pinback Statement Badges

Glue magazine clippings, band graphics, or printed quotes inside clean metal caps. Seal the artwork with a layer of clear dimensional glaze, then glue a pin clasp to the back. Fasten these badges to backpacks, tote bags, or denim jackets.
Quick tips for crafting with bottle caps:
- Wash thoroughly: Soak used caps in warm soapy water and let them dry completely to remove sticky soda residue and smells.
- Flatten safely: Place caps between two scrap pieces of wood before striking them with a hammer so you do not dent or scratch the printed logos.
- Use the right glue: Pick strong adhesives like E6000 or two-part epoxy when bonding slick metal to wood, glass, or plastic.
Do not throw away used bottle caps after opening your next beverage. A small pile of metal or plastic lids gives you plenty of raw materials for practical home projects, jewelry, and games. Pick a project from this list, gather your tools, and put your collection to good use.