You know that feeling when you have a beautiful piece of cardstock in your hands? It’s too nice to just write on, but you’re not sure what to make. Sound familiar? Forget complicated crafts that need a million tools. We’re diving into 15 cardstock crafts DIY projects that prove this humble material is a powerhouse of creativity. From home decor that looks store-bought to gifts that will genuinely wow your friends, get ready to see your paper stash in a whole new light.
1. The Statement Paper Vase
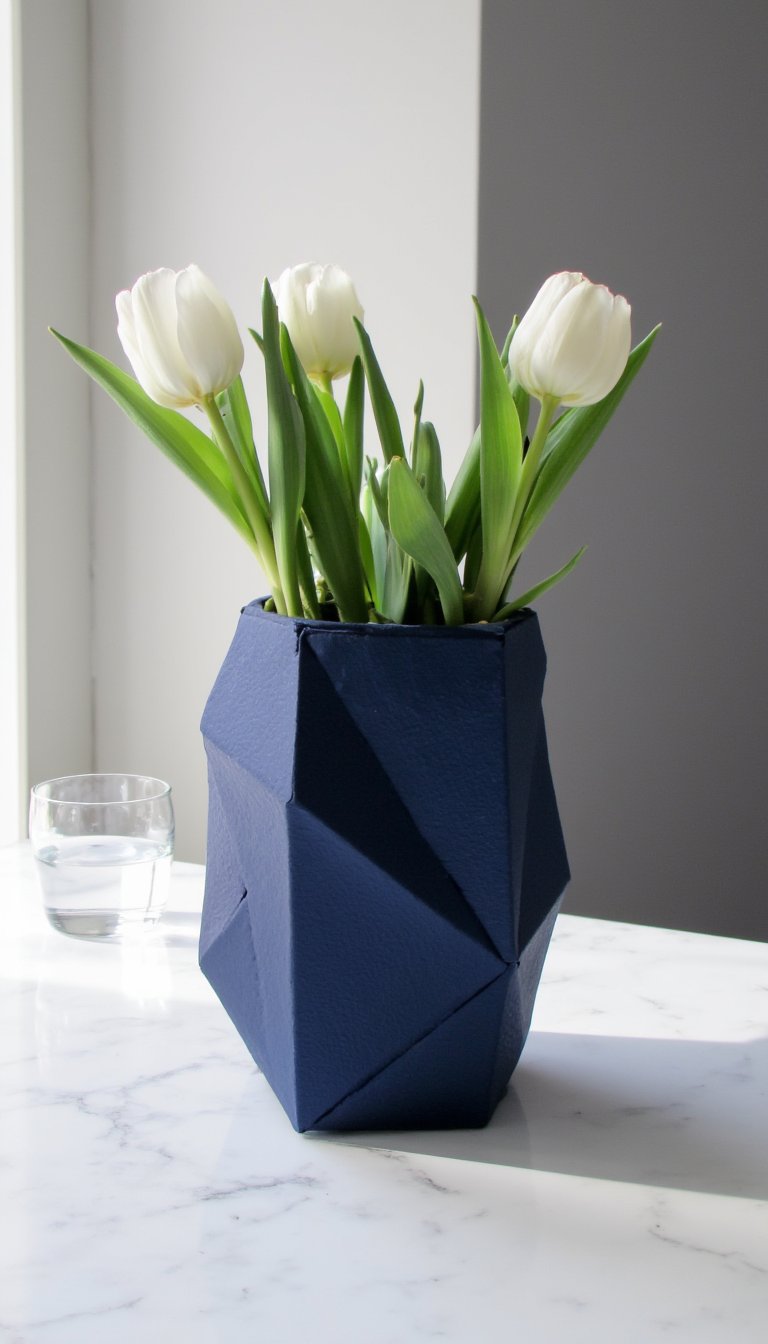
Who says vases need to be glass or ceramic? Roll, fold, or layer strips of heavyweight cardstock to create a stunning geometric vase. The trick is using a thick, textured cardstock that can hold its shape. Secure your structure with a strong craft glue or hot glue.
Pop a small glass or plastic cup inside to hold water and real flowers, or simply use it as a chic holder for dried botanicals. This project is a perfect way to add a custom, modern touch to any shelf or table. Plus, you can match it to your room’s color scheme perfectly.
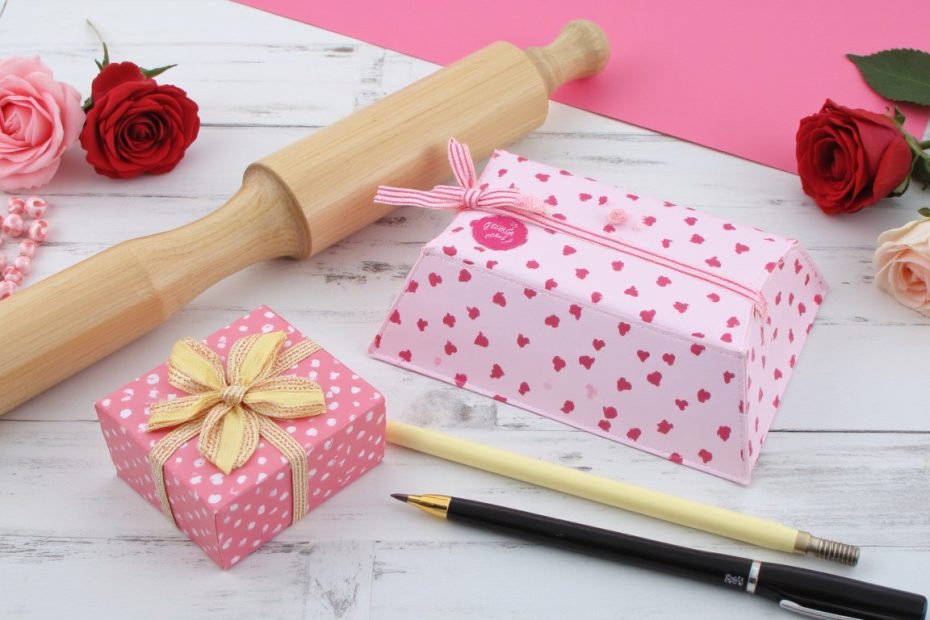
2. Custom Gift Card Holders
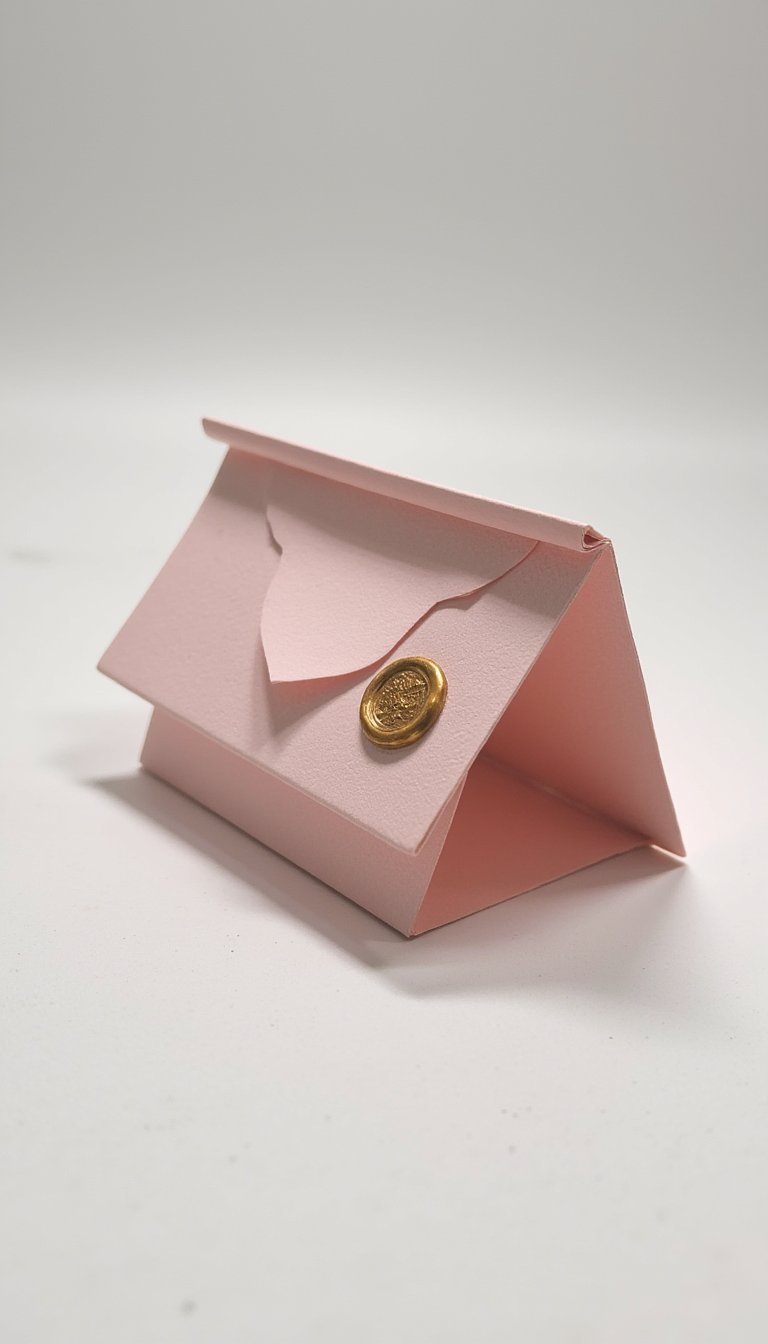
Stop tucking gift cards into boring envelopes. A handmade cardstock holder turns the presentation into part of the gift. Create a simple sleeve with a peek-a-boo window, or get fancy with a folded box design that has a little tag to pull the card out.
This is one of those quick cardstock crafts that has maximum impact. Decorate with stamped sentiments, a wax seal, or a snippet of ribbon. The recipient will appreciate the extra thought, and you’ll use up those beautiful paper scraps.
3. Layered Wall Art
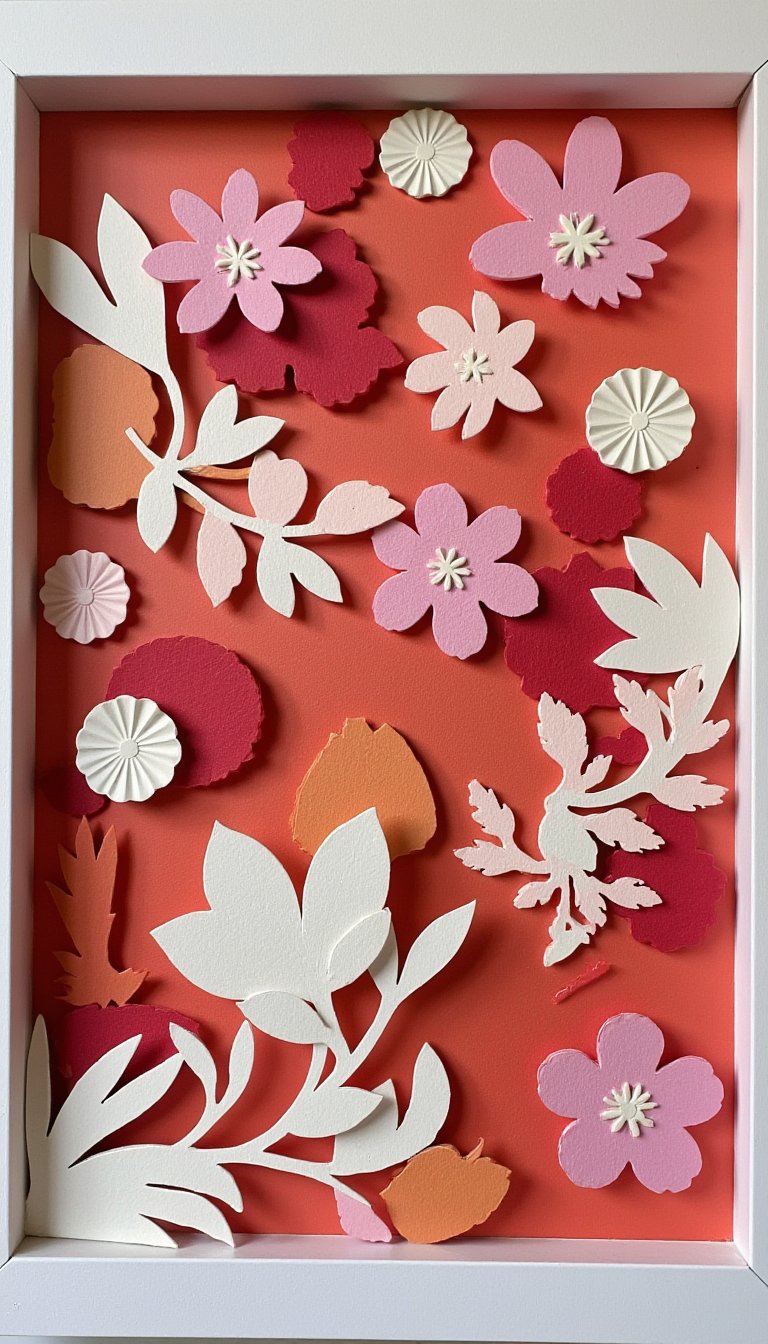
Think of this as paper quilling’s chic cousin. Cut out simple, repeated shapes—like leaves, circles, or mountains—from coordinating colors of cardstock. Use foam adhesive dots to layer them onto a solid cardstock background, creating beautiful depth and shadow.
Frame your finished piece in a deep-set shadow box for a professional look. This project lets you play with color theory and composition, and it’s surprisingly meditative. The result is a piece of art that looks anything but DIY.
4. Durable & Pretty Coasters
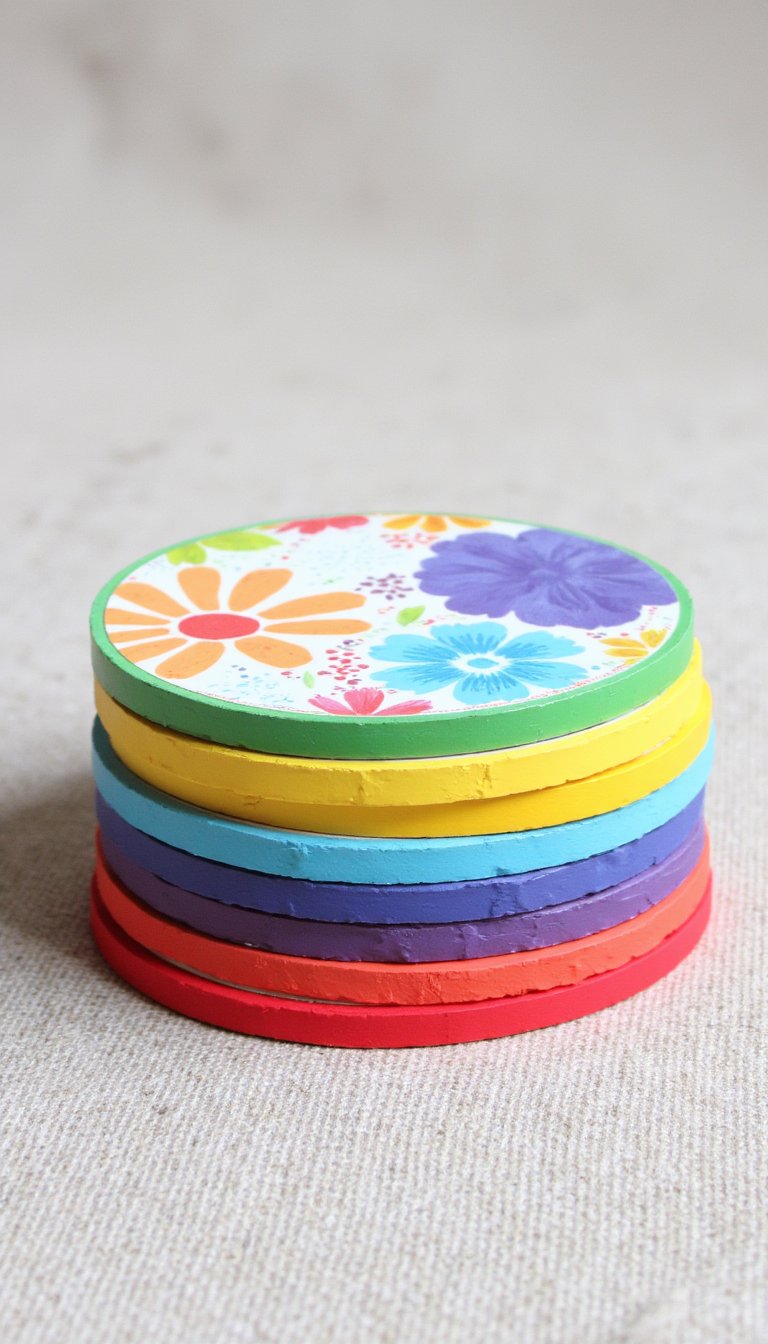
Yes, paper coasters can actually work! The secret is waterproofing. Cut cardstock into squares or circles, decorate them with stamped patterns or painted edges, and then laminate them or apply several thin, even coats of decoupage sealer on both sides.
For extra stability, glue two or three layers of cardstock together before sealing. They’re perfect for protecting surfaces from cold drink condensation and are a fantastic, personalized housewarming gift. Just remind guests they’re for cold drinks only!
5. Mini Party Piñatas
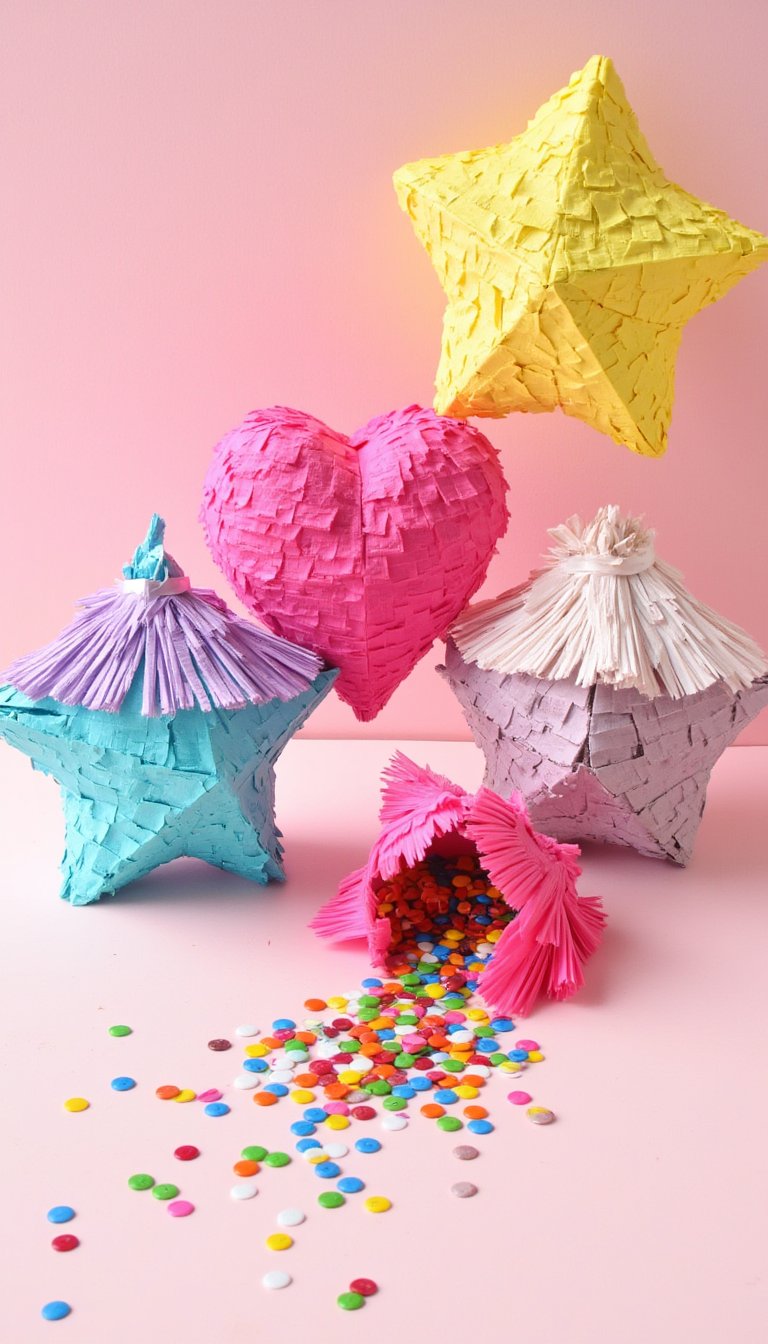
These aren’t the giant, bat-swinging kind. Create adorable mini piñatas as party favors, cake toppers, or place settings. Form a small shape (like a star, heart, or even a taco) using two identical cardstock cutouts and a connecting strip of paper for the sides.
Fill them with tiny candies, confetti, or a little toy before sealing them up. Add a fringe tissue paper top for the classic look. They’re an instant hit at birthdays, baby showers, or just because. Who doesn’t love a surprise they can smash?
6. Elegant Paper Jewelry
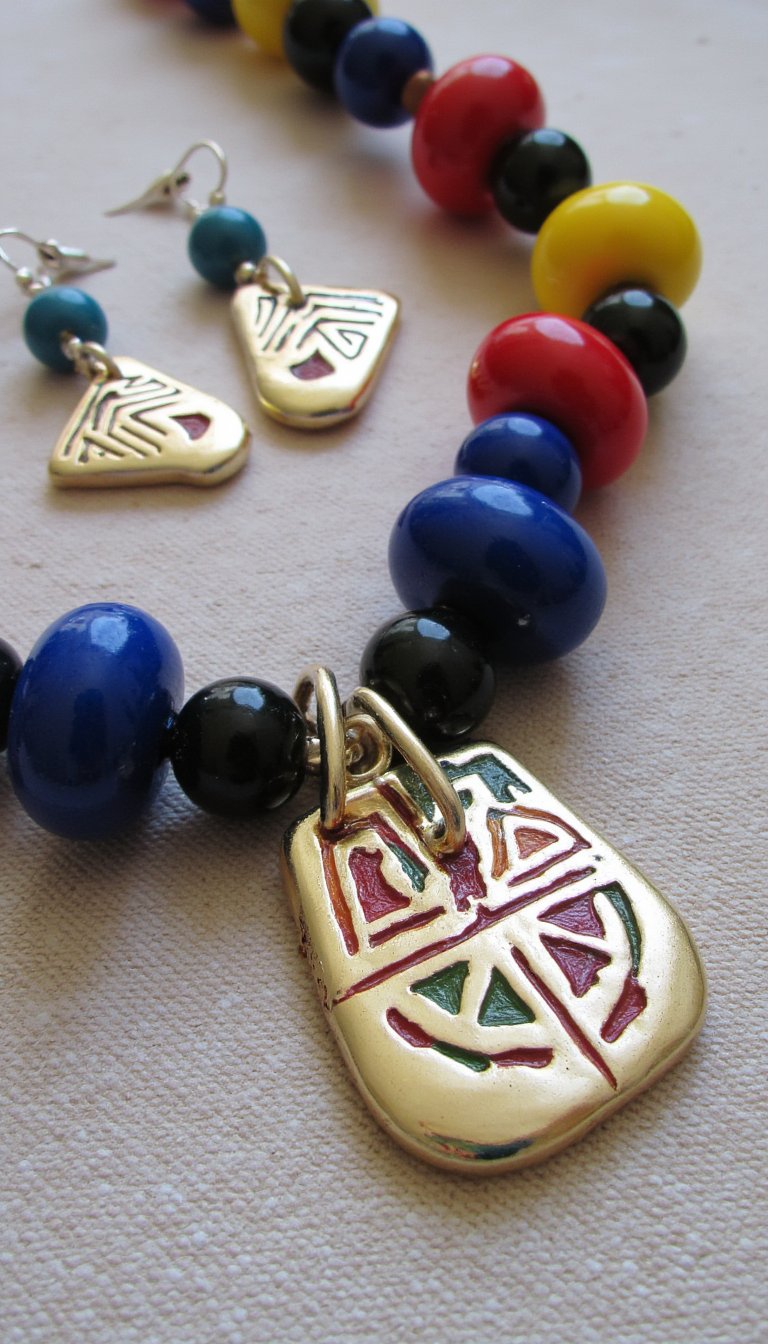
Rolled paper beads are just the beginning. Use a hole punch to create uniform cardstock circles, then stack and glue them into chunky, colorful beads. Seal them with a glossy mod podge for durability and a lacquered finish.
You can also cut intricate pendant shapes and laminate them between clear adhesive sheets to make durable statement necklaces or earrings. This is where your metallic and glitter cardstock really gets to shine. Lightweight, unique, and a total conversation starter.
7. A Customizable Desk Organizer
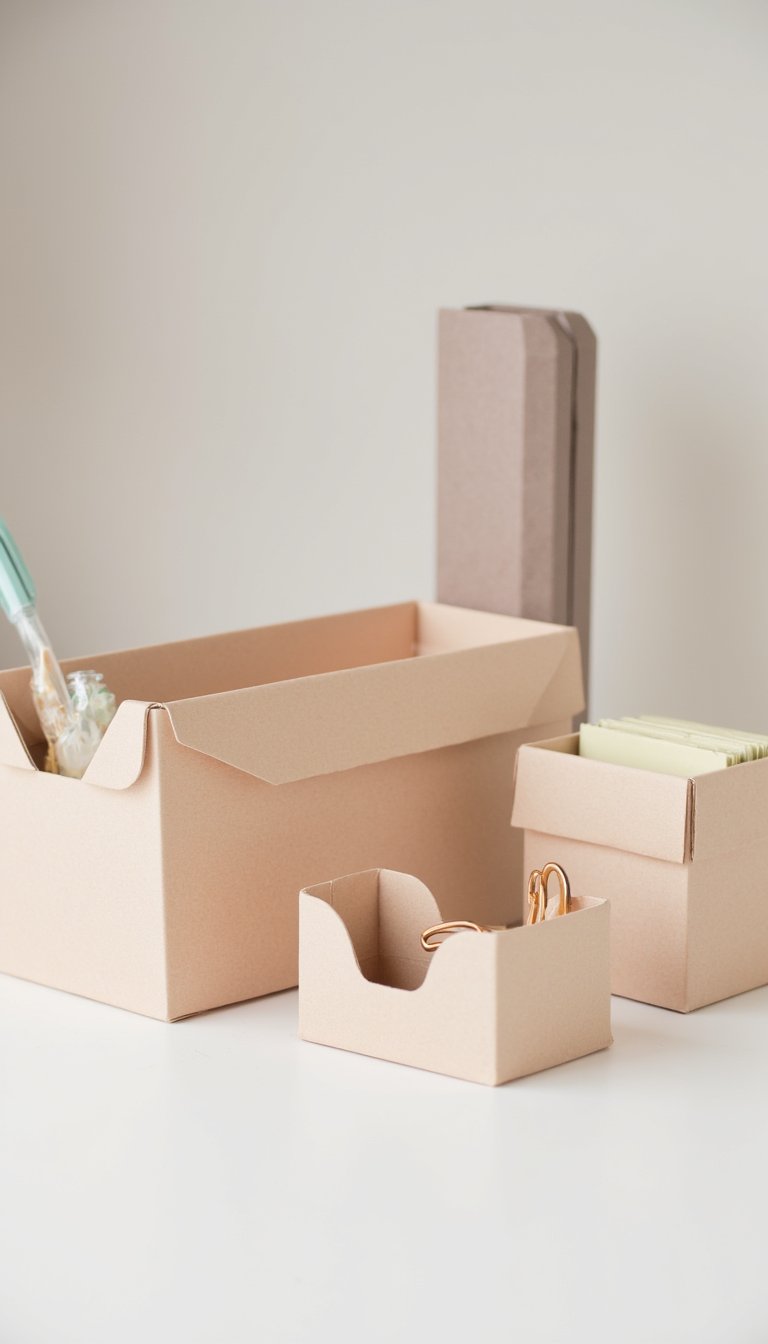
Tame your desk chaos with a modular system you design yourself. Create simple, open-top boxes in various sizes from cardstock. Use a ruler and scoring tool for crisp, professional folds.
You can leave them plain for a minimalist look, or cover them in patterned paper. Arrange them side-by-side or stack them to hold pens, paper clips, notebooks, and your phone. It’s functional, it’s free (if you use supplies you already have), and it beats any plastic organizer from the store.
8. Shadow Box Greeting Cards
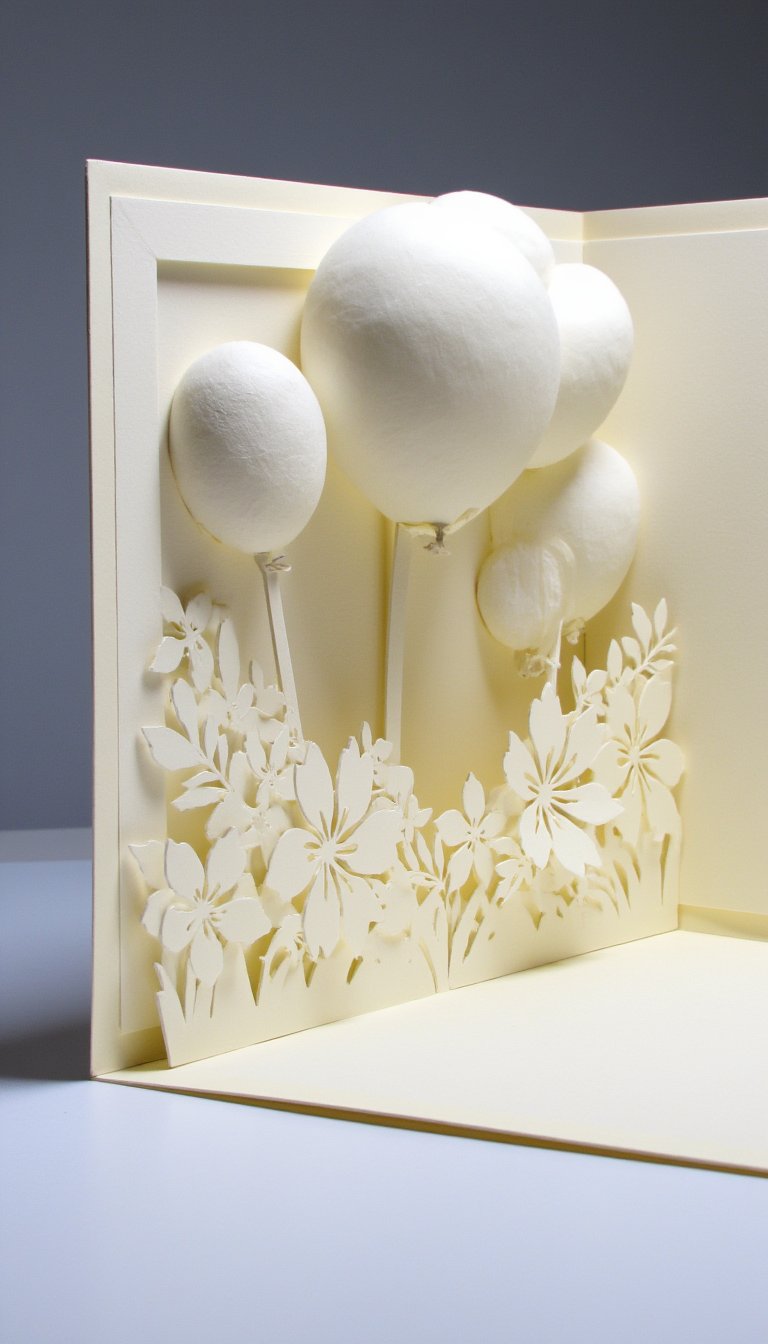
Take your card-making game to the next level. Instead of a flat card, create a multi-layered scene inside a deep-fold cardstock base. Cut out elements like balloons, flowers, or a tiny city skyline, and elevate them with foam tape at different heights.
When the recipient opens it, they get a wonderful 3D surprise. This is one of the more advanced cardstock crafts DIY projects, but the “wow” factor is absolutely worth the extra time. It’s a keepsake card they won’t throw away.
9. Festive Paper Garland Flags
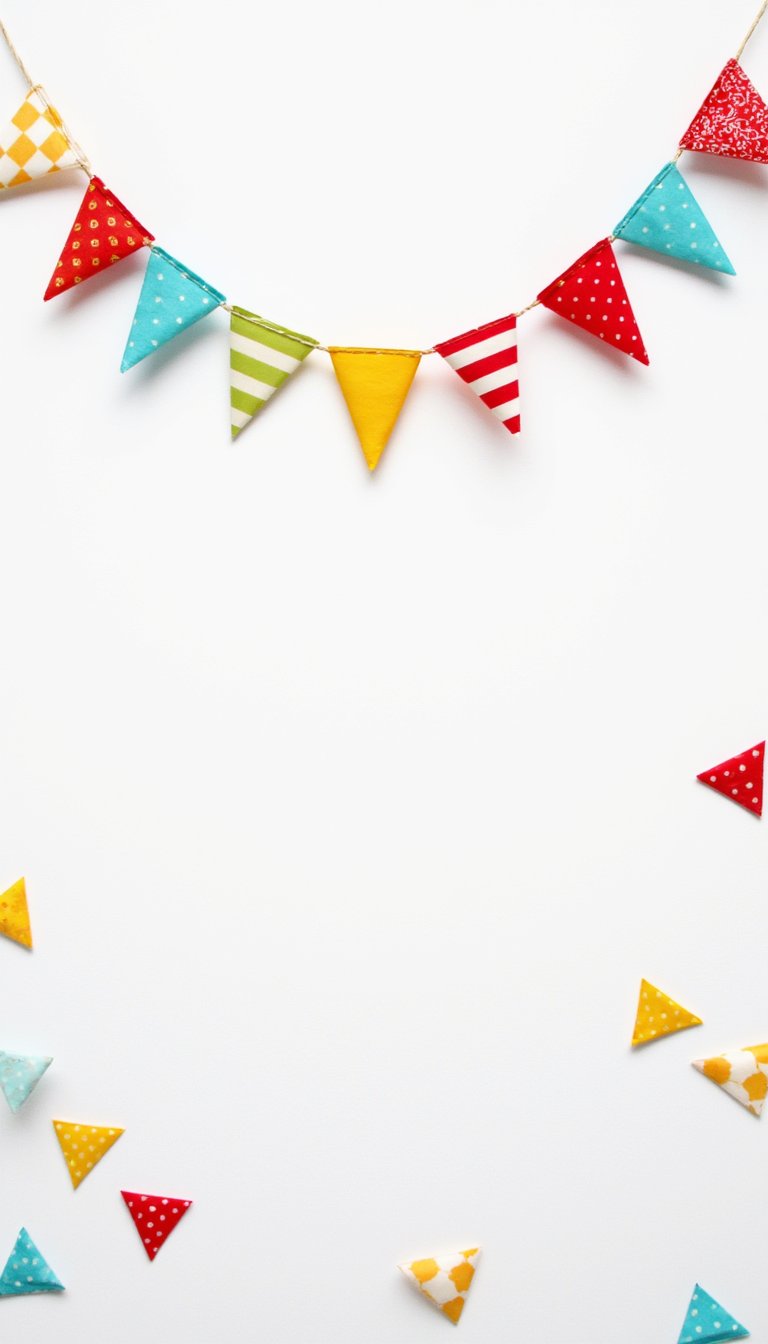
Move over, boring paper chains. Triangle banners (aka bunting) are the ultimate quick-decor solution. Cut a ton of triangles from a mix of cardstock patterns and colors. Fold over the top edge and string them onto twine, ribbon, or yarn, using glue or tape to secure.
In under an hour, you can make garlands for a birthday, holiday, wedding, or just to brighten up a nursery. They store flat and are reusable. Simple, effective, and endlessly customizable.
10. Stencils for Every Surface
Why buy flimsy plastic stencils? Draw or print a design onto cardstock and use a craft knife to carefully cut it out. You now have a durable, custom stencil.
Use it with paint on walls, fabric, or wood signs. Use it with spray adhesive and glitter on a gift bag. The possibilities are endless. A thick, coated cardstock works best here, as it can withstand a few uses and won’t warp easily from moisture.
11. Playful Puppet Theater
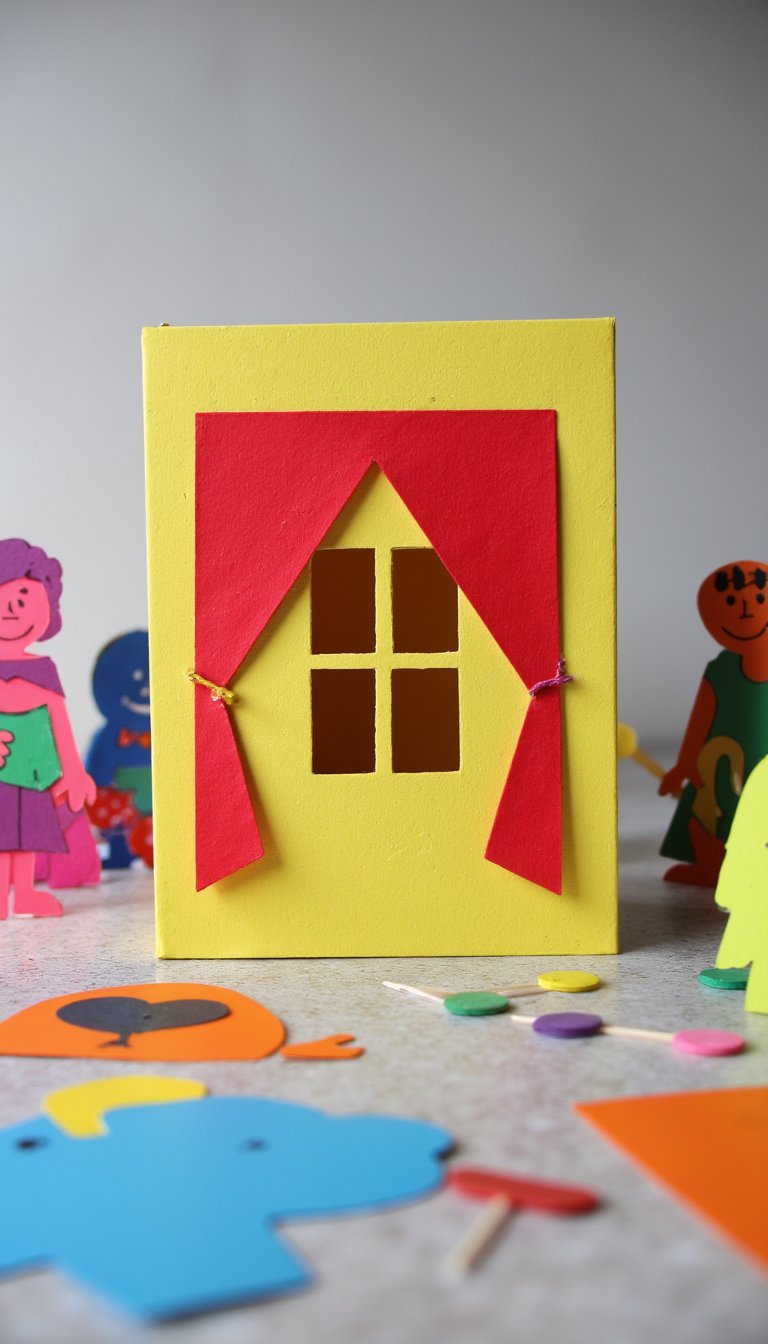
Spark hours of imaginative play with a simple DIY theater. Use a large piece of cardstock or a flattened box as the stage. Cut out a window and decorate the front with paint or more paper to look like curtains.
Then, create characters on popsicle sticks using cardstock cutouts. This project is a fantastic rainy-day activity to do *with* kids. They can help decorate and then put on a show. It’s craft and playtime rolled into one.
12. Sophisticated Place Cards & Menus
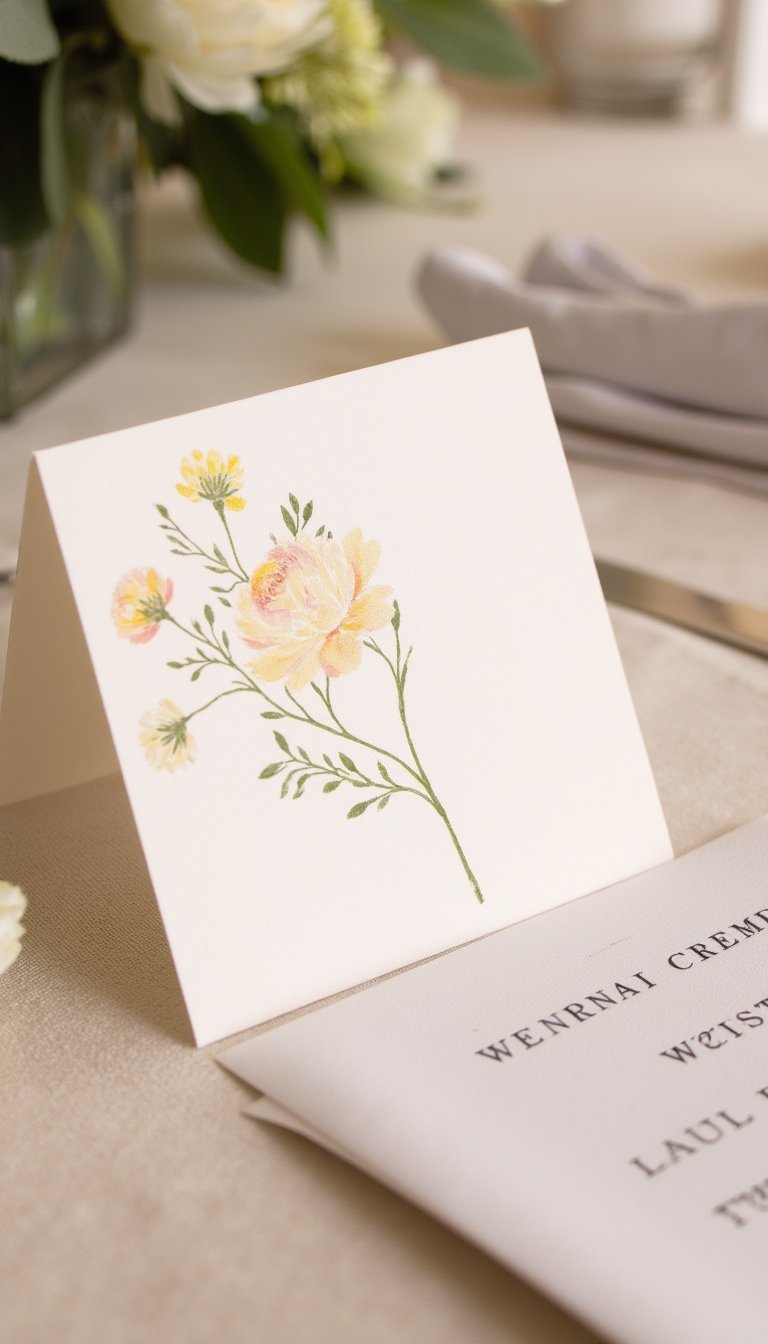
Elevate your next dinner party instantly. A simple tent-fold cardstock place card feels special. Add calligraphy, a stamped name, or a small pressed flower sealed with tape.
For a menu, use a larger, elegant piece of cardstock. This is where you can really lean into textures like linen, pearlized, or kraft cardstock. It shows your guests you went the extra mile, and it’s one of the easiest ways to create a cohesive tablescape.
13. Quilled Paper Monogram
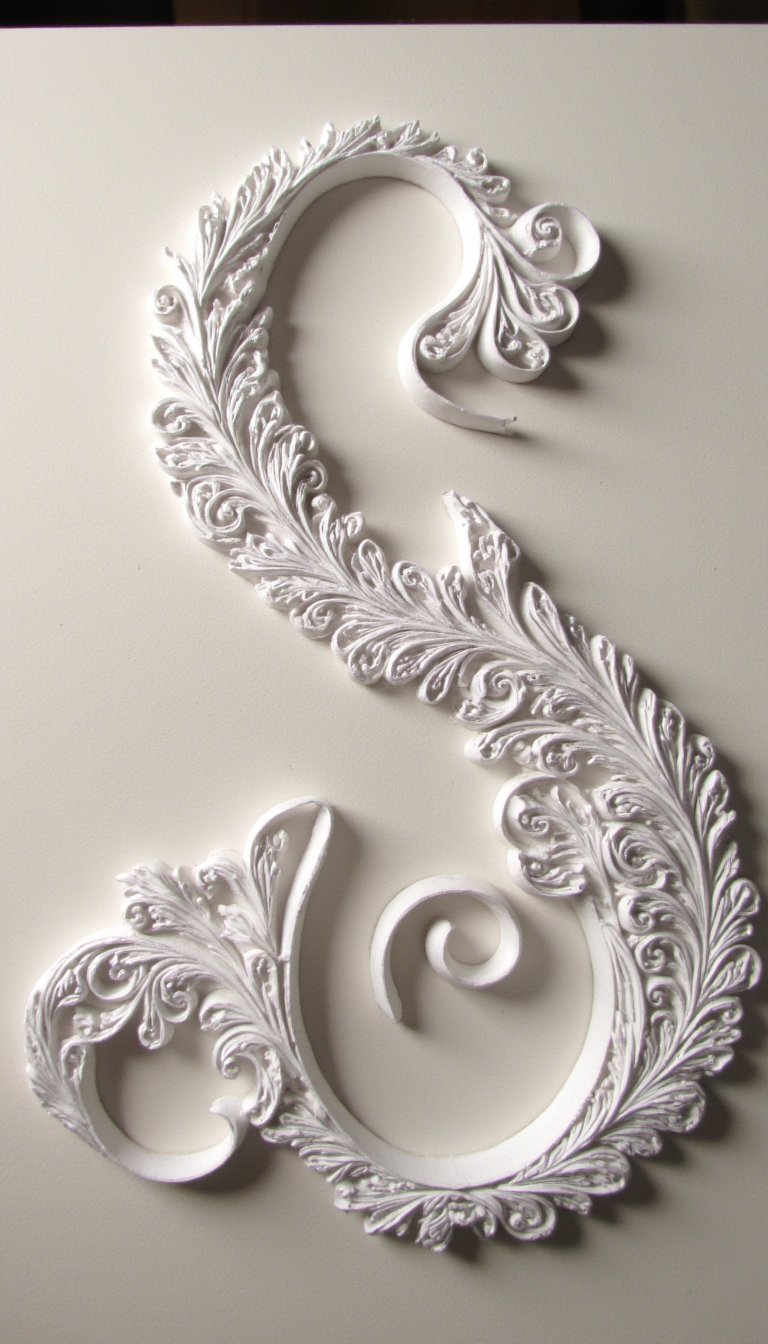
Paper quilling creates stunning texture with simple strips. Outline a large initial (print a font you love) on a cardstock background. Then, roll, shape, and glue narrow strips of cardstock to fill in the design.
You can make it tight and uniform or loose and organic. The 3D effect is gorgeous and makes for incredible personalized wall art or a meaningful gift for a wedding or new home. It’s surprisingly relaxing, too.
14. A Mini Blooming Succulent Garden
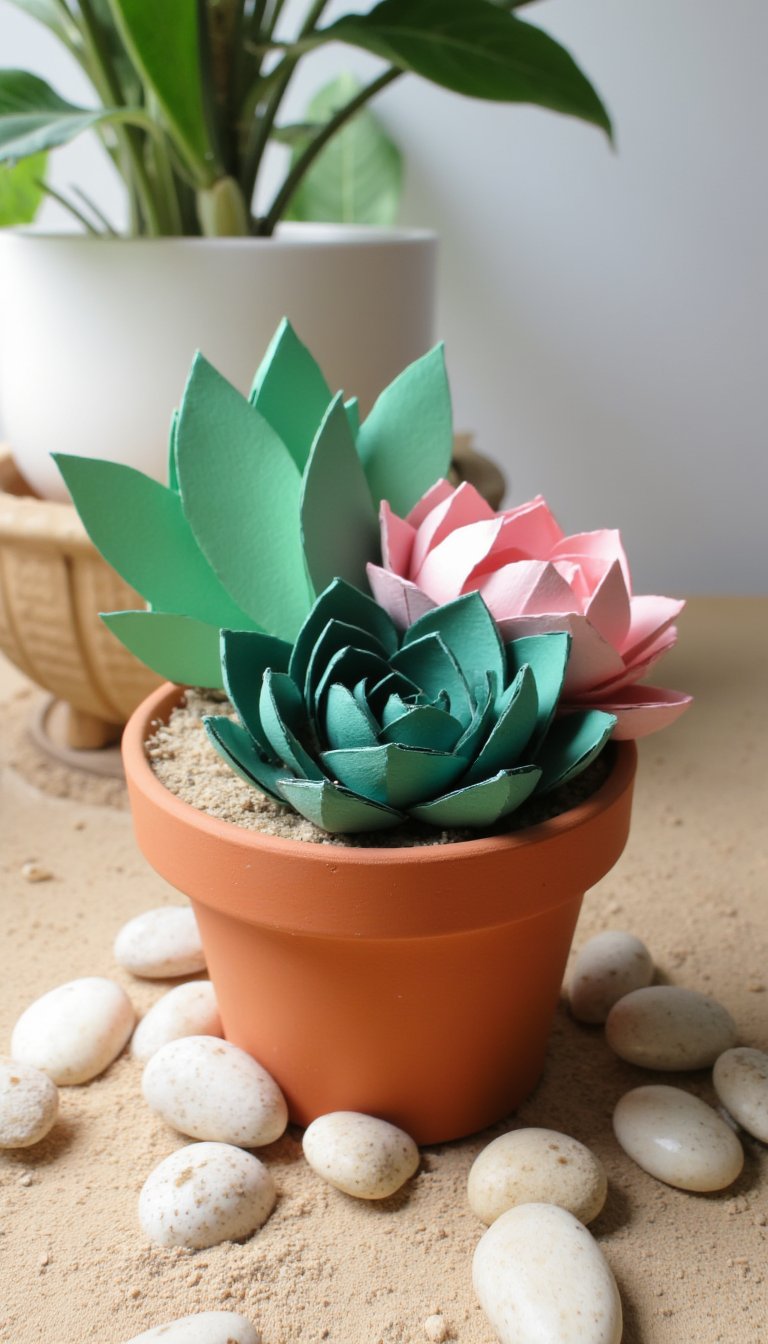
For those of us who can’t keep real plants alive, this is the perfect solution. Search for a “3D paper succulent” template online. Cut the pieces from various shades of green and blush cardstock, then assemble the layered petals and leaves.
Plant your paper succulents in a small pot filled with sand, pebbles, or moss. They look adorable on a desk, shelf, or as a centerpiece, and they require zero watering. A little bit of nature, none of the guilt.
15. DIY Puzzle for Kids
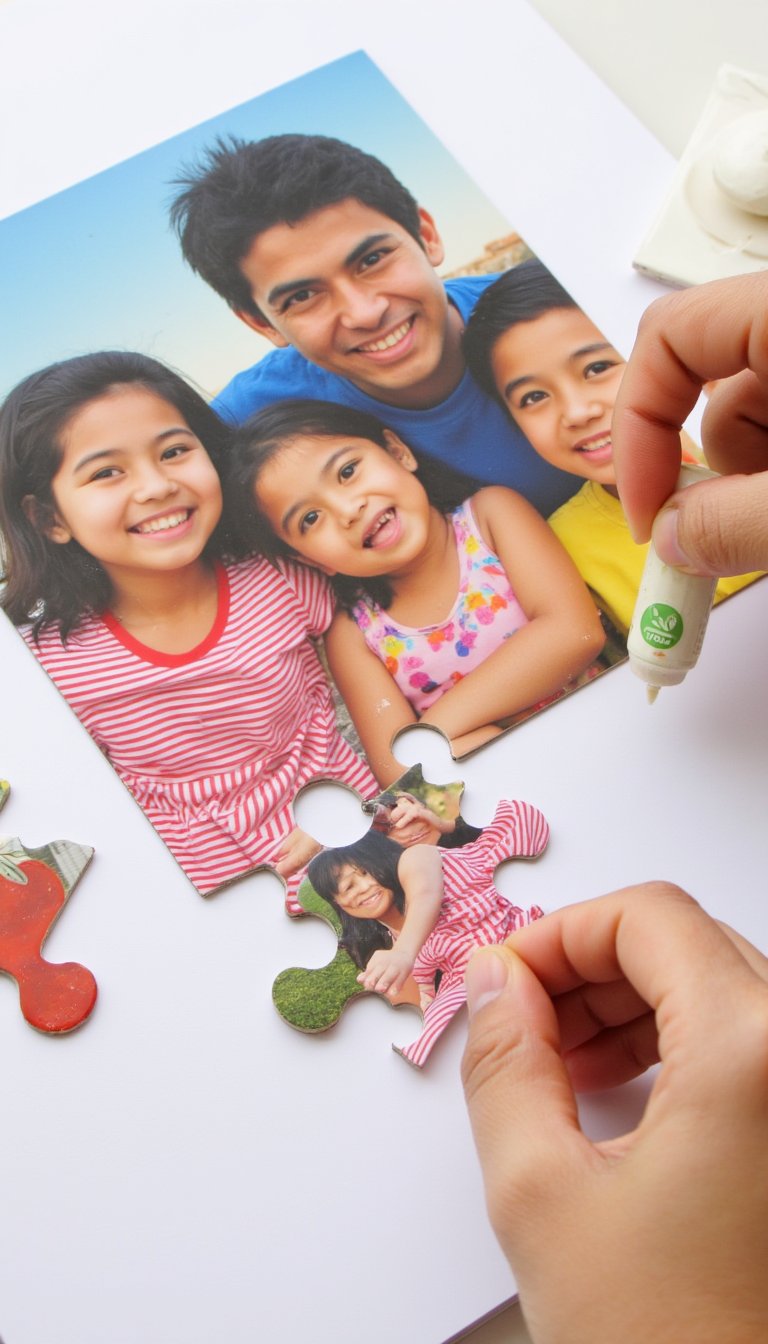
Turn your child’s artwork or a favorite family photo into a fun puzzle. Glue the picture securely onto a rigid piece of cardstock. Once dry, use a pencil to draw puzzle piece shapes on the back, then carefully cut them out with scissors or a craft knife.
For younger kids, draw simple, large pieces. For older kids, make it more complex. Store the pieces in a handmade cardstock envelope. It’s personalized, it recycles artwork, and it builds problem-solving skills. Win-win-win.
See? I told you that pack of cardstock was a goldmine. From the practical magic of coasters and organizers to the pure joy of mini piñatas and puppet shows, these 15 cardstock crafts DIY ideas prove you don’t need fancy supplies to make something amazing. You just need a little inspiration and the willingness to play.
The best part? There’s no wrong way to do this. So grab that paper, make a mess, and create something that makes you smile. Your next favorite craft is literally sitting in your supply drawer right now. What are you waiting for? 😉