Tell me if this sounds familiar: It’s summer, your schedule is wide open, and after the first glorious week of freedom… you’re already a little bored. Scrolling through your phone is losing its charm, and you’re craving something to do. Something that doesn’t feel like homework, but still gives you that awesome sense of “Hey, I made that!” We’ve all been there. That’s where this list comes in. Ditch the doomscrolling and tap into your creative side with these 28 summer crafts for teens that are actually cool, surprisingly satisfying, and perfect for filling those long, sunny days. Let’s turn that “I’m bored” into “Check out what I made!”
1. Tie-Dye 2.0: Ice Dyeing

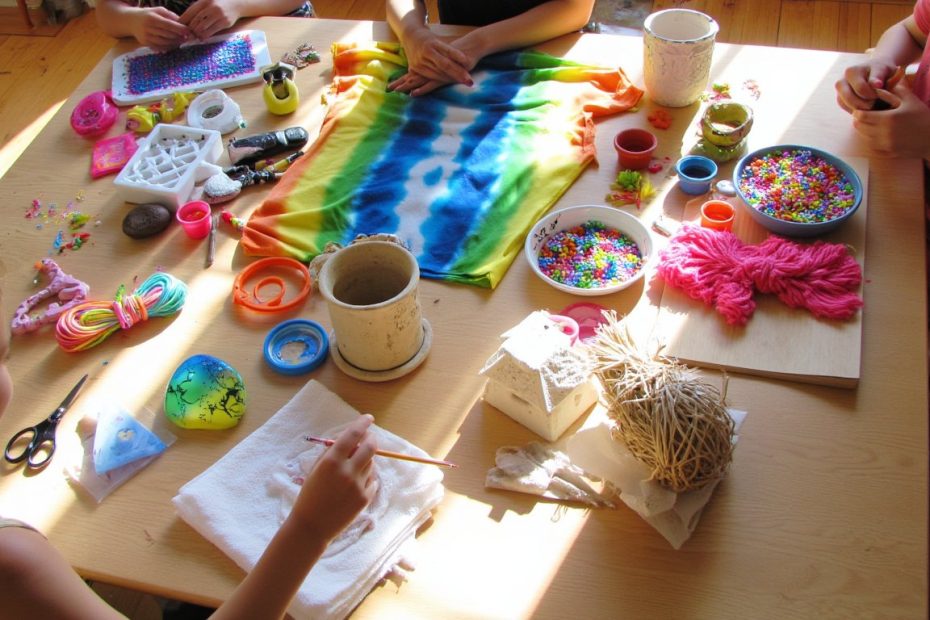
Forget the messy squeeze bottles. Ice dyeing is the cooler, more sophisticated cousin of traditional tie-dye, and it creates stunning, watercolor-like effects. The process is simple but the results look pro. You’ll scrunch or fold a damp cotton item (a tee, sweats, or a tote bag), pile ice on top, then sprinkle powdered dye over the ice. As the ice melts, it carries the dye into the fabric in beautiful, unpredictable ways. The slow-motion magic is half the fun. It’s a perfect, low-effort craft for a hot day that ends with a totally unique wearable masterpiece.
2. DIY Resin Jewelry with Pressed Flowers

Capture a little piece of summer forever. This craft lets you turn those pretty flowers from the garden or a walk into elegant, glossy jewelry. You’ll need a two-part resin kit, some silicone molds (geometric shapes are a great start), and your pressed botanicals. The key is meticulous mixing and patience—follow the instructions to the letter to avoid sticky results. Once you pour the resin and carefully place your flowers, you just have to wait for the magic to happen. The result? A necklace or pair of earrings that’s a genuine conversation starter.
3. Custom Embroidered Denim Jacket

Give an old denim jacket (or thrift store find) a major personality transplant. This isn’t your grandma’s embroidery. Think bold line art, funny phrases, floral vines on the collar, or even pop culture references. Grab some embroidery floss, a few needles, and a water-soluble pen to sketch your design. Start with something small on the pocket. The best part? There’s no right or wrong. Every stitch adds character. It’s a project you can pick up and put down all summer, adding to it whenever inspiration strikes.
4. Galaxy-in-a-Bottle Sensory Jars

Yes, they’re trending everywhere, and for good reason. They’re mesmerizing, easy to make, and make killer room decor. Grab a clear vase or mason jar, some clear glue or hair gel, warm water, glitter (lots of it!), and a dash of food coloring or liquid watercolor. Layer different colors and glitter densities to create a cosmic nebula effect. Drop in a few star-shaped sequins or tiny charms before sealing the lid shut with super glue. Shake it up and watch your personal galaxy swirl. It’s oddly relaxing and seriously satisfying.
5. Bleach-Patterned Black Tees

This craft has a cool, rebellious edge and requires minimal supplies: a black cotton t-shirt and a bottle of bleach. Lay your shirt flat outside or in a very well-ventilated area. Use a spray bottle filled with a 50/50 bleach-water mix to create splatter effects, or use stencils (cut from cardboard or contact paper) for sharp designs like constellations or your initials. Watch as the black fabric transforms to rust-orange and then lightens. Rinse it thoroughly to stop the bleaching process. You get an edgy, one-of-a-kind graphic tee in minutes.
6. Woven Wall Hanging

Bring some boho-chic texture to your bedroom wall. You don’t need a fancy loom—a sturdy stick from the backyard, a fork, or even a piece of cardboard will work. Warp your “loom” with some sturdy cotton yarn, then start weaving with different textures: chunky wool roving, ribbon, feathers, or beads. Play with colors and patterns. It’s all about tactile experimentation. This craft is super meditative; you can get lost in the simple over-under rhythm while binge-watching your favorite show.
7. Personalized Sublimation Tumblers

If you’ve seen those super colorful, seamless patterned water bottles and wondered “how?”, the answer is sublimation. You need a special coating-friendly tumbler and sublimation paper. Design your pattern on a computer (Canva is great for this) with your name, favorite lyrics, or a cool abstract pattern. Print it on the sublimation paper with sublimation ink, wrap it around the tumbler, and secure it with heat tape. Then, the transformative step: using a heat press or even a specialized convection oven to transfer the ink permanently. The result is a professional-looking, custom drinkware that won’t peel.
8. Stamped Clay Jewelry Dishes

These are perfect for holding your everyday rings and earrings, and they make thoughtful handmade gifts. Use air-dry or oven-bake polymer clay. Roll it out, cut it into a simple shape (circle, square, or a cute cloud), and then press texture into it. You can use rubber stamps, the end of a paintbrush, lace, or even leaves from outside to create beautiful impressions. Bake or let it dry, then paint with acrylics or simply leave it raw for a minimalist look. Seal it with a clear varnish for durability.
9. “Stained Glass” with Tissue Paper & Glue

Create the look of sunlight through colored glass without any of the danger or cost. Draw a design on a piece of clear contact paper—a geometric mandala, a simple flower, or an abstract shape works great. Stick the contact paper (sticky side up) to a window for stability. Then, tear or cut colored tissue paper and layer the pieces onto the sticky surface, leaving gaps between colors. Once filled, seal it with another layer of contact paper. Trim the edges and hang it in a sunny window to see it glow with summer light.
10. Upcycled Band Tee Pillow

Got an old concert tee that doesn’t fit anymore but you can’t bear to part with? Give it a second life as a throw pillow. It’s a shockingly easy sewing project, even for beginners. Simply cut two squares from the front and back of the shirt (making sure your favorite graphic is centered), place them right sides together, and sew around three and a half edges. Turn it right-side out, stuff it with a pillow form or old batting, and hand-stitch the opening closed. Instant room decor that holds all your concert memories.
11. DIY Batik Art with Glue Sticks

Batik is a traditional wax-resist dyeing technique, but we’re simplifying it with a tool you already own: a hot glue gun. Draw your design directly onto plain cotton fabric (stretched in an embroidery hoop) with the cool, dried glue from the gun. The glue acts as your resist. Once your design is set, paint over the entire fabric with watery acrylics or fabric dye. The paint will color the fabric but bead off the glue lines. After the paint dries, you peel off the glue lines to reveal crisp, negative-space designs. So clever, right?
12. Macramé Plant Hangers

Bring the 70s back and give your plant babies a stylish new home. Macramé is just fancy knot-tying, and once you learn the basic square knot and spiral knot, you can create endless variations. All you need is a wooden ring or dowel for the top and a whole lot of cotton cord. There are tons of free tutorials online for different patterns. Hang your finished creation near a window and pop a small potted plant inside. It adds instant life and texture to any corner of your room.
13. Painted Rock Critters

This one is pure, simple fun. Go on a hunt for smooth, interestingly shaped rocks. Wash and dry them thoroughly, then let your imagination run wild with acrylic paints. Turn a round rock into a ladybug, a long one into a sleepy cat, or a bumpy one into a funny little monster. Add googly eyes for extra personality. You can keep them as desk buddies, use them as paperweights, or even hide them around your neighborhood for others to find as a random act of colorful kindness.
14. Melted Bead Sun Catchers

Remember those plastic pony beads from childhood? They have a fantastic second act. Arrange them in a single layer in a metal or heat-safe cookie cutter (or a foil ring) on a parchment-lined baking sheet. Pop them in a preheated oven (around 400°F) for 15-20 minutes until they just melt together. Let them cool completely—this is crucial! Once hardened, you’ll have a solid, colorful sun catcher. Poke a hole in the top before it fully hardens or glue on a loop. The translucent colors are gorgeous when the sun hits them.
15. No-Sew Fleece Tie Blanket

The ultimate cozy project for when you’re dreaming of cooler nights. You just need two pieces of fleece fabric, usually cut to the same size. Lay them wrong sides together, cut strips about 1-inch wide and 3-4 inches deep all around the edges, then simply tie the top and bottom strips together in double knots. That’s it. No needle, no thread, just tying. In under an hour, you have a super soft, personalized blanket for movie nights, camping, or dorm life. Pro tip: use your favorite team’s colors or a fun pattern mix.
16. Decoupage Photo Storage Boxes

Organize your stuff in style. Grab a plain wooden or cardboard box from a craft store. Then, raid old magazines, print out photos, or use decorative napkins with patterns you love. Tear or cut the paper, then use Mod Podge (a glue-sealer-finisher all in one) to adhere the pieces to the box in a cool collage. Layer them, overlap them, create a theme. Once covered, seal the whole box with more Mod Podge. It dries clear and leaves a protective coat. Now you have a unique box for trinkets, memories, or art supplies.
17. DIY Wire-Wrapped Crystal Pendants

This craft feels like a mix of art and alchemy. You’ll need some inexpensive craft wire (copper or silver tone) and a tumbled crystal or stone with a interesting shape. The idea is to create a “cage” of wire that holds the stone securely while also looking like an intentional, decorative web. It takes a little practice to get the tension right, but there’s something magical about holding a piece of the earth you’ve artfully wrapped yourself. Add a jump ring and a chain, and you’ve got a powerful little accessory.
18. Marbled Paper with Shaving Cream

The process is ridiculously fun and the results are stunningly professional. Spray a layer of shaving cream (the cheap, foamy kind) onto a tray. Drop dots of liquid food coloring or acrylic ink onto the cream, then swirl them with a toothpick. Press a piece of cardstock gently onto the surface, lift, and use a scraper (an old gift card works) to wipe off the shaving cream. Underneath, you’ll reveal incredible marbled patterns. Let it dry. Use this paper for journal covers, gift tags, or framed art. It’s messy, sensory, and awesome.
19. Etched Glassware

Transform plain dollar-store glassware (mugs, jars, vases) into personalized, permanent art. You need etching cream, which is a chemical that frosts glass, and some adhesive vinyl. Cut a design or your initials out of the vinyl with scissors or a Cricut, stick it onto the clean glass, then apply a thick layer of etching cream over the exposed area. Wait the recommended time, rinse, and peel off the vinyl. The revealed design will be permanently frosted onto the glass. It looks sleek, modern, and is totally dishwasher safe.
20. Friendship Bracelets with Embroidery Floss

A classic summer craft that’s having a major renaissance. The simple knotting technique is easy to learn but offers endless complexity in patterns and colors. Pick a color palette that matches your vibe—pastels for a soft look, neon for a 90s throwback, or your school colors. You can make them wide or thin, with letters or chevrons. Best of all, it’s a super portable craft. Take it to the park, the beach, or a friend’s house. Making one for a friend is basically the ultimate summer token.
21. Painted Terracotta Pot Herb Garden

Combine crafting with a bit of green-thumb action. Get some small terracotta pots and paint them with acrylics. You can go for simple solid colors, intricate patterns, or even paint little faces on them. Once they’re dry and sealed (use an outdoor sealant if they’ll live outside), plant some easy-growing herbs like basil, mint, or cilantro. You’ve now created a functional, cute windowsill garden. Plus, you can literally taste the fruits (or herbs) of your labor all season long.
22. DIY Stenciled Canvas Tote Bag

Say no to boring reusable bags. Grab a plain canvas tote and some fabric paint or acrylics mixed with fabric medium. Create or buy a stencil of a cool design—a retro sun, a bold phrase, an abstract shape. Tape the stencil securely to the bag and use a stencil brush or sponge to dab the paint on. The key is to use a dry dabbing technique to prevent paint from bleeding under the stencil. Let it dry completely, then heat-set it with an iron. Now you have a grocery bag that’s actually a statement piece.
23. Polymer Clay Charms & Keychains

This is where you can let your inner miniaturist run wild. Polymer clay (like Sculpey) is moldable, bakeable, and paintable. Make tiny foods, cartoon characters, adorable animals, or abstract shapes. Use a toothpick to add details and holes for jump rings. Bake them according to the package instructions, let them cool, and then paint them with fine brushes. Attach them to keychain rings, necklace bails, or earring posts. It’s incredibly satisfying to create a tiny, perfect world from a block of clay.
24. Yarn-Wrapped Bottles or Jars

This is the definition of a mindless, zen craft. Clean an empty glass bottle or jar. Put a dot of hot glue at the base to secure the end of a ball of yarn. Then, just start wrapping. Keep the wraps tight and close together, adding dabs of glue every so often to keep it secure. You can switch colors for stripes or do an ombré effect by using two shades together. Once covered, you have a stylish vase, pencil holder, or decorative object. The texture is fantastic, and it recycles something you’d normally toss.
25. Sharpie Tile Coasters

A quick, cheap, and wildly customizable project. Buy a pack of plain white ceramic tiles from a hardware store. Clean them with rubbing alcohol to remove any oils. Then, draw directly on them with oil-based Sharpie markers. Create mandalas, quote lyrics, doodle patterns—anything goes. The oil-based ink won’t wash off with water. Once your design is done, bake the tiles in the oven at 350°F for 30 minutes to set the ink permanently. Glue some felt pads on the bottom, and you have a set of coasters that reflect your personal style.
26. Beaded Wind Chimes

Create music for your patio or bedroom window. Find an interesting base: a driftwood piece, a metal hoop, or even a bent wire coat hanger. Cut varying lengths of fishing line or strong thread. String beads, charms, old keys, or seashells onto each line, securing them with knots. Attach multiple strands to your base at different points. When the wind catches it, you’ll get a gentle, soothing clatter. It’s a craft that engages both sight and sound, and you can make it as colorful or minimalist as you want.
27. Pallet Wood Photo Display

A little bit rustic, a little bit industrial, totally cool. Get a small piece of pallet wood (sanded smooth to avoid splinters). Stain or paint it if you like. Attach clips, clothespins, or even just some decorative tape along the front. You can now easily clip and display photos, postcards, ticket stubs, or polaroids. It’s a dynamic, ever-changing piece of wall art that showcases your favorite memories. No more sticky tac on the walls—this is the organized, aesthetic way to show off your summer adventures.
28. DIY Scented Candles in Unique Containers

Craft your own cozy atmosphere. You’ll need soy wax flakes, wicks, fragrance oils, and a heat-safe container. Think outside the jar: use a pretty teacup, a hollowed-out citrus rind (for a natural look), or a small ceramic bowl. Secure the wick, melt the wax in a double boiler, stir in your scent, and carefully pour. The hardest part is waiting for it to set. Making your own allows you to customize the scent strength and create a perfect gift or a little luxury for yourself. Light it and feel instantly accomplished.
So, there you have it—28 ways to kick boredom to the curb and make this summer one you can literally hold in your hands. The best part? None of these require you to be a “crafty person.” They just require a little curiosity and the willingness to try. Whether you’re making a statement jacket, a glowing sun catcher, or a candle that smells like your favorite memory, each project is a chance to unplug, express yourself, and end up with something uniquely yours. So pick one that speaks to you, gather your supplies, and get creating. Your amazing summer project is waiting.