
Remember the pure, simple joy of unfolding a paper snowflake as a kid? That moment of suspense, followed by the reveal of a lacy, one-of-a-kind creation? It’s a magic that never gets old. But what if you’ve only ever made the same basic, six-pointed flake? Friend, you are in for a treat. We’re about to level up your winter crafting game with 17 stunning ways to make paper snowflakes, from classic cuts to designs that will genuinely make you say, “Wait, that’s PAPER?”
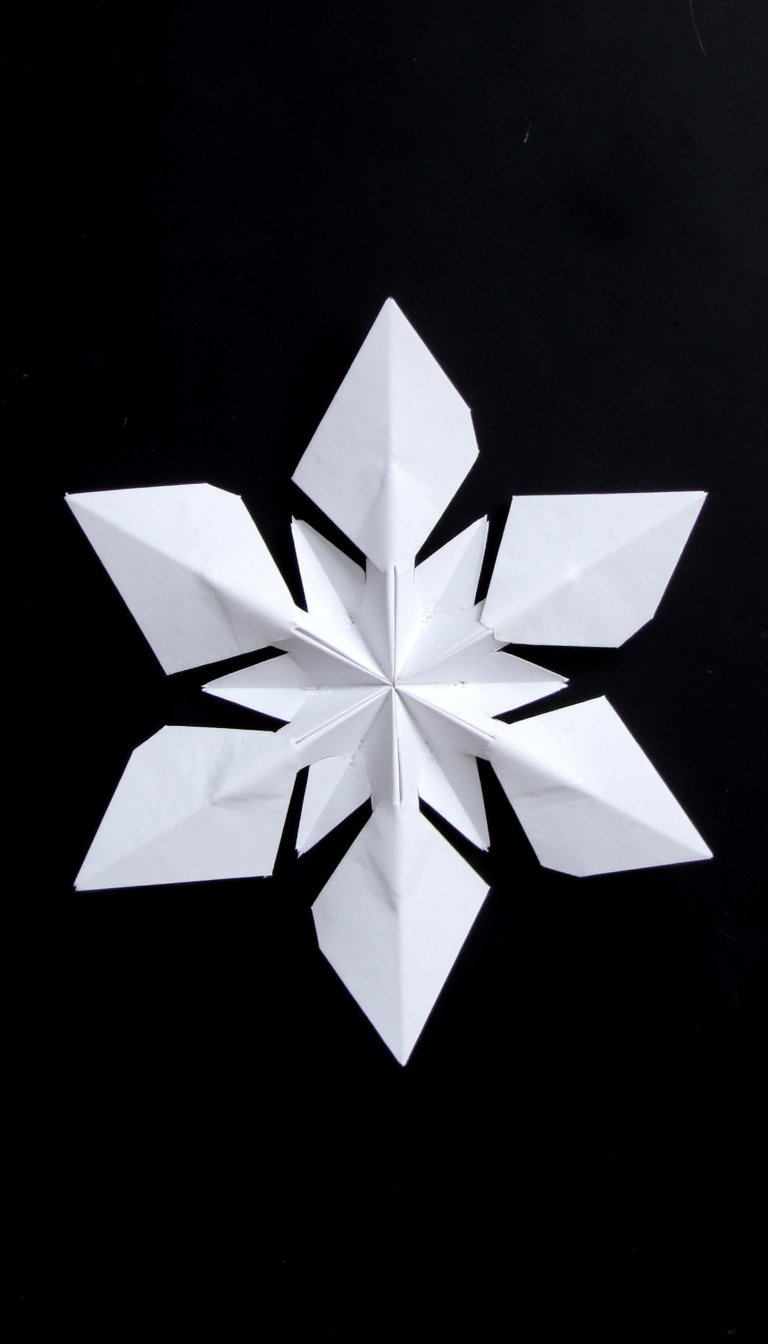
1. The Perfect Classic Snowflake

Let’s start with the foundation. This is the method you probably learned in school, but we’re going to perfect it. The secret to a beautiful, symmetrical snowflake lies in a precise fold. You’ll need a standard 8.5″ x 11″ piece of paper. First, fold one corner to the opposite edge to form a triangle, then trim off the excess rectangle. What you have left is a perfect square, folded into a triangle. Fold that triangle in half again, then into thirds. Yes, thirds! It feels tricky, but getting this fold right is what separates a wobbly mess from a geometric marvel.
2. The Giant Statement Snowflake
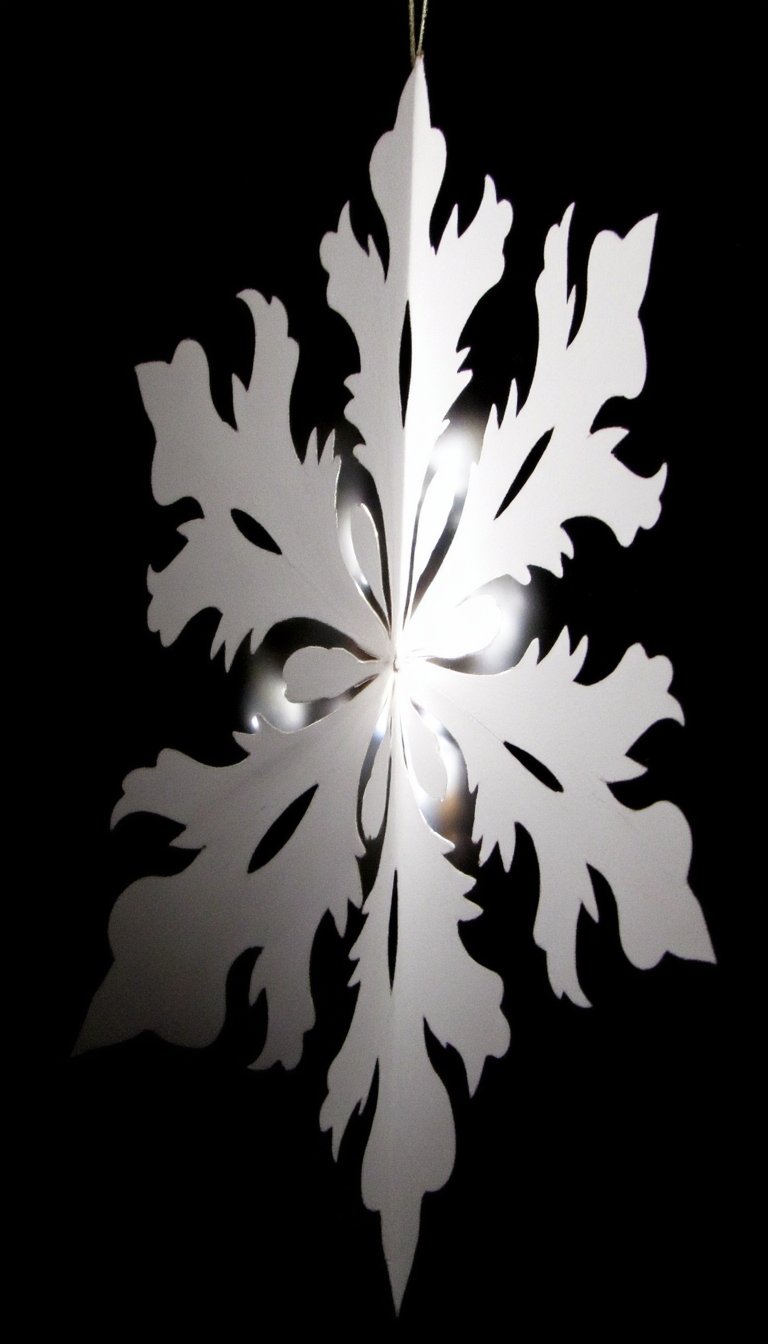
Why think small? For this showstopper, ditch the printer paper and grab a sheet of 12×12 scrapbook paper. Follow the same folding technique as the classic snowflake, but on a grander scale. The larger surface area lets you carve out bigger, more dramatic shapes. Think long, elegant slits and deep curves. This is the snowflake you hang in the center of your window or from the ceiling. It commands attention and catches the light beautifully, casting stunning shadows across the room.
3. The Delicate Doily Snowflake

Want a snowflake with intricate, lace-like details? The key is your tool. Put down the standard school scissors and pick up a pair of fine-tip craft scissors or even a hobby knife. With a sharper, more precise point, you can punch tiny holes, create fine lines, and cut delicate patterns that mimic the look of a vintage doily. This style requires a steady hand and patience, but the result is an unbelievably elegant and fragile-looking flake. It’s pure crafting magic.
4. The Quilled 3D Snowflake

Ready to add some serious dimension? This technique combines cutting with paper quilling. You’ll create several identical classic snowflakes first. Then, using a quilling tool or a toothpick, you’ll roll the individual arms of each flake inward. Once you have a set of curled flakes, you stack and glue them together at the centers, offsetting each layer. The final product is a breathtaking, multi-layered 3D snowflake that looks incredibly complex but is just a series of simple steps repeated.
5. The Coffee Filter Snowflake

Don’t have any paper? Raid your kitchen cupboard. Basket-style coffee filters are the secret weapon for soft, beautiful snowflakes. They are already round and much thinner than printer paper, making them incredibly easy for little hands to cut. The porous texture also gives the snowflakes a soft, almost fuzzy appearance, reminiscent of frost on a windowpane. They’re perfect for a quick, no-fuss crafting session with kids, and you can even watercolor them for a pop of color!
6. The Geometric Starburst Snowflake
For those who love clean, modern lines, this design is for you. Instead of the traditional curved cuts, focus on sharp angles and straight lines. Use a ruler and a pencil to lightly draw triangles, diamonds, and zig-zags before you cut. The goal is to create a pattern that looks more like a starburst or a crystal than soft, falling snow. This style proves that snowflakes don’t have to be frilly to be stunning. They add a sharp, contemporary edge to your holiday decor.
7. The Character Snowflake

Who says a snowflake can’t have a face? This is a hilarious and creative twist. As you’re designing your cuts, plan for a simple silhouette—like a snowman, a reindeer, or a Christmas tree—to appear in the very center of the flake. The character’s shape is formed by the negative space you leave uncut, while the arms of the snowflake radiate out from it. It’s a fantastic puzzle for your brain and always gets a delighted reaction when you unfold it. Talk about a conversation starter!
8. The Metallic Glam Snowflake

Turn your living room into a winter wonderland ballroom. For this, you need paper with some serious shine. Metallic origami paper or foil gift wrap works perfectly. The reflective surface catches every bit of light, making your snowflakes glimmer and sparkle. Cutting through foil can be a bit different, so go slowly. The payoff is a dazzling, elegant decoration that looks far more expensive than it is. Pair these with some white fairy lights for a truly glamorous effect.
9. The “Stained Glass” Snowflake

Bring a rainbow of color to your windows. Create your snowflake from white printer paper or cardstock, but here’s the trick: cut out larger openings in your design. Then, use clear tape to affix pieces of colored tissue paper or cellophane over the holes on the back. When you hang it in a window, the sun shines through the colorful “panes,” creating a beautiful stained-glass effect. It’s a simple way to add a vibrant, cheerful glow to a gloomy winter day.
10. The Snowflake Garland

Why stop at one? Create a flurry! Make a dozen or more snowflakes in varying sizes and styles. Then, using a needle and some sturdy thread or fishing line, carefully string them together. The key is to vary the distances between them and let them twist and turn freely. Drape this garland over your mantel, across a doorway, or down a banister. The layered effect creates a sense of movement, as if the snowflakes are caught mid-fall.
11. The Layered Color Snowflake
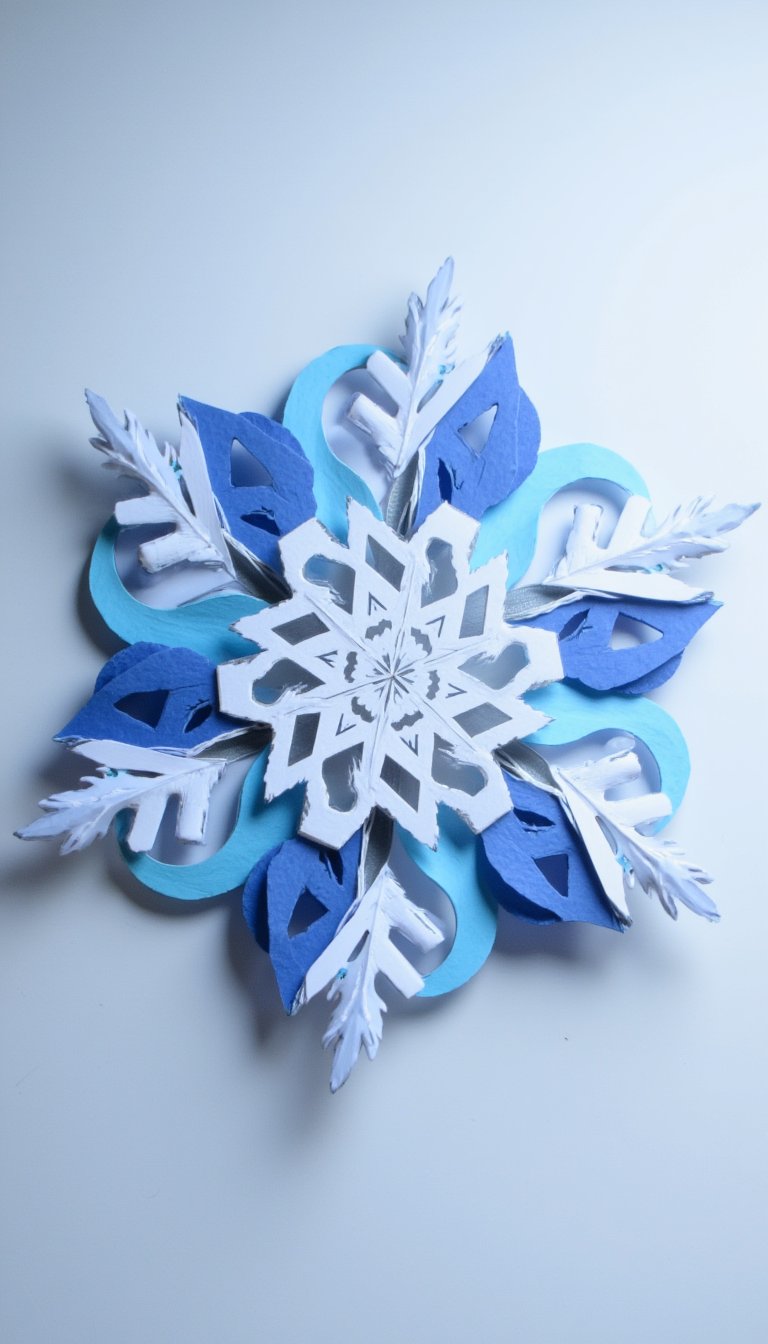
This is another 3D technique, but with a colorful twist. Cut two or three identical snowflakes from different colored papers—think classic white, a light blue, and a silver. Lightly spray the colored ones with adhesive or dab a bit of glue in the center, then stack them on top of each other, slightly rotating each layer so the patterns peek through. The result is a beautiful, dimensional color gradient that adds incredible depth and visual interest.
12. The Snowflake Ornament

Your tree deserves some handmade love, too. For this, use a slightly heavier paper like cardstock so it holds its shape. After cutting your flake, carefully punch a small hole at the tip of one of the arms. Thread a loop of ribbon, string, or a sparkly pipe cleaner through the hole. You can even give it a quick spritz with hairspray and a dusting of glitter while it’s still damp for extra sparkle. Now you have a personalized, lightweight ornament with a story.
13. The Embossed Snowflake

Add texture without any mess. Once your snowflake is cut and unfolded, place it on a soft surface like a foam mat or a stack of towels. Then, using a ballpoint pen that has run out of ink (or an actual embossing stylus), trace over the key lines of your design, pressing firmly. This will indent the paper, raising the design on the other side and creating a subtle, sophisticated texture. It’s a tiny detail that makes a huge difference, giving your flake a custom, artisan feel.
14. The Scribble-Cut “Messy” Snowflake

Embrace the chaos! This one is incredibly freeing, especially if you’re a perfectionist. Instead of carefully planning your shapes, just start cutting. Make wild scribbles, random holes, and weird shapes. Don’t think, just cut. When you unfold it, you’ll be amazed at the unique, abstract art you’ve created. It’s a great reminder that there are no mistakes in paper snowflakes, only happy accidents. Every single one will be a surprise.
15. The Book Page Snowflake

Give old books a beautiful second life. Pages from a worn-out paperback or an old dictionary have a wonderful, vintage look. The paper is thin and easy to cut, and the text adds a layer of visual texture and story. Can you imagine a snowflake made from a page of “A Christmas Carol”? It instantly becomes a literary-themed decoration full of charm and nostalgia. It’s the perfect craft for a book lover’s holiday.
16. The Snowflake Mobile

Create your own indoor snowfall. Take an embroidery hoop, a few twigs tied together, or even a wire coat hanger bent into a circle. Using different lengths of clear fishing line, hang an assortment of your favorite snowflakes from the frame. Then, hang the frame itself from the ceiling. The snowflakes will gently drift and spin with the air currents in the room, creating a dynamic, mesmerizing display. It’s a living piece of art.
17. The Glitter Bomb Snowflake

Go big on the sparkle. For this final, fabulous flake, you have to fully commit. After cutting your snowflake, brush a thin layer of glue (a glue stick works well for less mess) over the entire surface. Then, while it’s still tacky, liberally sprinkle glitter over it. Shake off the excess and let it dry completely. Is it messy? Maybe a little. Is it worth it? Absolutely. This snowflake will catch the light from every angle, creating a dazzling, festive centerpiece that screams celebration.
And there you have it—17 ways to turn a simple piece of paper into a winter wonderland. From the perfectly classic to the wildly creative, each method offers its own unique kind of magic. The real beauty of this craft? It costs almost nothing, but the payoff in cozy, creative satisfaction is huge. So, what are you waiting for? Grab some paper, find your favorite scissors, and make it snow indoors. Your inner child (and your Instagram feed) will thank you.