Are you tired of waiting in long post office lines? What if you could print USPS shipping labels at home? This could save you a lot of time.
Printing USPS labels at home is key for those who want to make shipping easier. The United States Postal Service has online tools that make it simple to print labels.
This guide will show you how to print USPS labels at home. You’ll learn about the right equipment and software options. You’ll get tips to make your shipping process smoother.
Key Takeaways
- Home USPS label printing saves time and reduces post office visits
- Basic equipment includes a computer and compatible printer
- Free and paid software options are available for label creation
- USPS Click-N-Ship® provides a user-friendly online platform
- Proper label printing requires attention to formatting and paper selection
Why Print USPS Labels at Home?
Printing USPS labels at home is a big change for shipping. It makes things easier and faster than going to the post office.
There are many good things about printing your own labels:
- Save a lot of time by skipping long lines
- Make labels whenever you want, day or night
- Save money on gas and help the planet
- Get the right postage without any mistakes
Both businesses and people can make shipping easier by using online tools. Printing labels at home lets you ship packages whenever you like.
| Shipping Method | Time Saved | Cost Efficiency |
|---|---|---|
| Post Office Visit | 30-60 minutes | Standard Rates |
| Home Label Printing | 5-10 minutes | Potential Discounts |
Using online tools for printing USPS labels gives you more control. It makes shipping less stressful and helps you manage your time better.
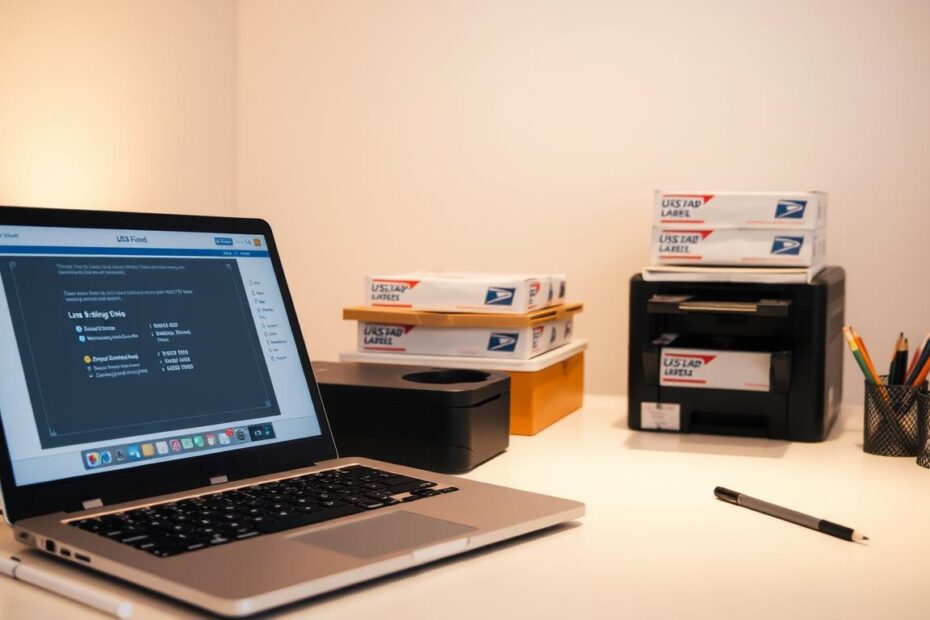
Equipment You’ll Need
To make professional shipping labels at home, you need some important tools. First, pick the right printer and accessories. This will help you make labels easily.
For printing USPS shipping labels, you have two main choices:
- Laser Printers: Great for clear barcode printing
- Inkjet Printers: Good for when you need to print labels sometimes
The USPS says your printer should make at least 600 dots-per-inch (DPI) labels. This makes sure they are clear and can be scanned.
Here’s what you’ll need for your home label setup:
- A good printer
- Shipping label paper
- A digital postal scale
- A computer with internet
Label paper comes in different sizes for different needs:
| Label Size | Best Used For |
|---|---|
| 4×6 inches | Packages and parcels |
| 8.5×11 inches | Multiple labels or standard printer paper |
Get a reliable digital scale for accurate package weight. Wrong weight can cause shipping problems and extra fees.
Choosing the Right Software
Choosing the right usps label printing software is key. It makes your shipping smooth and fast. The software you pick affects how well you can make labels at home.
USPS has many label printing options for different needs. The main choices are:
- USPS Click-N-Ship (free official service)
- Third-party shipping platforms
- Online label generators
When picking usps label printing software, think about these things:
- How easy it is to use
- If it works with your systems
- Its cost
- If it works with your printer
Now, let’s look at some popular shipping software:
| Software | Cost | Features |
|---|---|---|
| USPS Click-N-Ship | Free | Basic label printing, limited carrier options |
| Pirate Ship | Free | Multiple carrier support, discounted rates |
| ShipStation | Paid subscription | Advanced tracking, batch processing |
Pro tip: Always check if your software meets USPS label printing needs. This helps avoid shipping problems.
Setting Up Your Printer

Getting your printer ready for USPS labels is key. It makes sure your labels look great every time.
Before you print USPS labels at home, check these important printer needs:
- Confirm printer connectivity (USB or wireless)
- Verify printer compatibility with label printing
- Check ink or toner levels
- Ensure proper paper or label alignment
When setting up for USPS labels at home, you have two main paper choices:
- Plain white printer paper – Cheap and easy to find
- Self-adhesive pre-formatted labels – Looks professional and easy to use
Your printer settings are very important for label quality. Adjust settings for your label type. Focus on:
- Paper size
- Print quality
- Label orientation
Pro tip: Always do a test print. This makes sure your labels are clear and can be scanned before you ship.
Creating Your Shipping Label
Printing USPS labels online is now easy with digital tools. Start by picking the right usps label maker for you. The steps are simple and anyone can learn them fast.
To print USPS labels online, you need some basic info:
- Complete recipient address
- Package weight
- Shipping dimensions
- Preferred shipping service
Online shipping sites have easy-to-use tools for making labels. USPS Click-N-Ship is a favorite for many. It helps you through each step, making sure your details are right.
When making your label, check the address carefully. Right addresses help your package get to its destination without trouble. Most tools have address checks to help you.
Think about your package when choosing a shipping method:
- Package weight
- Delivery speed needed
- How far it’s going
- How much you want to spend
Pro tip: Keep often-used addresses in your online label platform. This makes shipping easier and saves time.
Printing Your Label

Printing USPS shipping labels at home needs care and precision. The right steps make sure your labels are good for USPS and scan well at post offices.
Before you print, pick the standard 4×6 inch label size. USPS likes this size. It’s easy to read and works well with most printers.
- Check printer settings before printing
- Use high-quality label paper
- Perform a test print to verify alignment
- Inspect label for clarity and sharpness
For great usps label printing, follow these important steps:
- Adjust print quality to the highest resolution
- Ensure printer ink or toner is fresh
- Verify label paper is correctly loaded
- Preview the label before final printing
Pro tip: Always do a test print on regular paper first. This checks if the size and position are right. It helps avoid mistakes and saves time and money.
Your label should be clear and sharp. It should not have smudges or faded spots. These steps help make sure your label looks professional every time.
Affixing Your Shipping Label
After printing your USPS label, the next step is to attach it right. Where you put the label can affect how fast it gets to its destination.
Here are some key tips for printing USPS shipping labels:
- Choose a clean, flat surface on your package
- Position the label where it’s easily visible
- Avoid placing the label on package seams or edges
- Ensure no part of the label wraps around package corners
It’s also key to keep your label safe during shipping. Use strong, clear tape to cover the whole label. Avoid covering barcodes or tracking information.
| Label Placement Tip | Recommended Action |
|---|---|
| Surface Selection | Smooth, flat package area |
| Barcode Visibility | Completely unobstructed |
| Tape Coverage | Clear tape over entire label |
By using these tips, you’ll make sure your packages get to their destinations fast and without any delays.
Keeping Track of Your Shipments
Tracking your shipments is very important when you print USPS labels at home. Your label has a special tracking number. This number lets you follow your package from the beginning to the end.
When you use usps label printing software, you find many ways to track your shipments well:
- Use the USPS website tracking tool
- Download mobile tracking apps
- Set up email or text notifications
- Check tracking through shipping software
Tracking numbers give you updates on your package’s location. These digital markers help you stay informed about delivery progress. They make sure you know when your shipment will arrive.
Experts say it’s good to keep a record of your shipments. This helps you:
- Track shipping expenses
- Verify delivery confirmations
- Manage customer communications
- Prepare accurate financial records
Most usps label printing software has tracking features. These features make it easy to watch many shipments at once. Using these tools helps make your shipping smoother and avoids tracking problems.
Common Questions About USPS Labels
When you start printing USPS labels, you might have questions. Knowing how to print USPS labels online can make shipping easier. It can also help you avoid problems.
Label Validity and Expiration
USPS shipping labels have different valid times. Most labels have a “ship by” date you need to remember.
- Priority Mail labels are usually valid for 30 days
- First-Class Package labels are active for 7-14 days
- Certain services might be valid for up to one year
Handling Label Mistakes
Mistakes can happen when printing USPS labels. If you find an error, you have a few options:
- Cancel the label through your shipping platform
- Make a new label with the right info
- Call USPS customer support for help
Reprinting and Environmental Considerations
When you need to reprint labels, use draft mode to save ink. Many online tools let you reprint labels without extra cost.
| Label Type | Reprint Cost | Ink Conservation |
|---|---|---|
| Standard Shipping | Free | Use draft settings |
| Priority Mail | Free | Grayscale printing |
Understanding these key points about printing USPS labels online helps you ship better. You’ll face fewer challenges and do it more efficiently.
Final Thoughts on Home Printing USPS Labels
Printing USPS labels at home has changed how we ship things. It saves a lot of time and cuts down on trips to the post office. With the right tools, you can make shipping easier and more in control.
Knowing how to print USPS labels at home is key. Today’s tech makes it easy. You can make professional labels fast and right.
Once you get the hang of it, shipping will be much better. Getting used to different software will make you more confident. Always check the latest postal rules and use good printing gear for smooth shipping.
Choosing home label printing means you’re using a modern way to ship. It saves time, lowers stress, and gives you more control. Try out different ways and find what works best for you.