
Okay, be honest. How many times have you scrolled through social media, seen someone’s incredible clay creation, and thought, “I could never do that”? I’ve been there. The beautiful jewelry, the quirky trinket dishes, the impossibly cute figurines—they feel like magic. But what if I told you that magic is just a lump of clay and a bit of guidance away? We’re throwing that intimidation out the window. This list isn’t about perfect, gallery-ready art on your first try. It’s about the pure, messy, satisfying joy of making something with your hands. So, grab your favorite beverage, and let’s explore 13 clay projects that will turn that “I can’t” into a “What’s next?”
1. Simple Statement Earrings: Lightweight & Boho-Chic

Let’s start with wearables, because who doesn’t love instant gratification? Polymer clay is your best friend here. Roll out a slab and use small cookie cutters (think geometric shapes, moons, or abstract blobs) to create your pieces. The real fun is in texture: press lace, a textured screen, or even the bottom of a sneaker into the clay before baking. After baking and sanding, a coat of glossy varnish makes them look professionally fired. Pro tip: Use clay-dedicated earring posts and super glue for a secure, lightweight finish. You’ll have a unique pair ready in under an hour.
2. Marbled Clay Coasters: Functional Kitchen Art

Your coffee mug deserves a throne. Marbling clay is one of the most satisfying techniques in the book. Take small chunks of two or three complementary colors of polymer clay (white, gold, and navy is a classic combo) and barely knead them together. You want swirls, not a uniform mud color. Roll this marbled log into a slab and cut out circles or squares. Bake according to package instructions. For durability, especially with hot cups, consider a layer of resin on top after baking. This is a perfect beginner project with a stunning, high-end result.
3. Personalized Stamp & Ring Dish
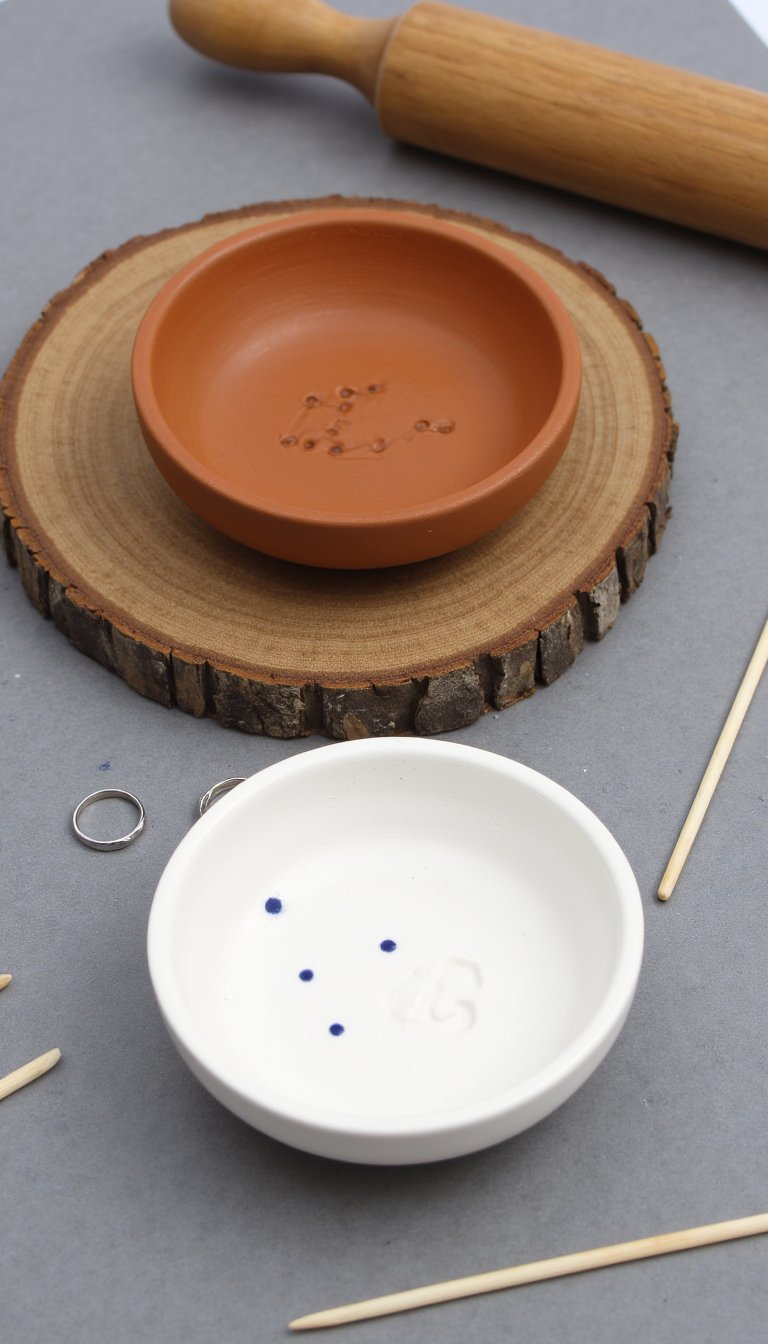
This project solves two problems: lost rings and boring desk accessories. Use an air-dry clay like terracotta or white for this. Form a small, thick pinch pot or press clay into a real dish as a mold. Now, the personal touch: carve initials, a simple constellation, or your favorite tiny symbol into the bottom of the dish before it dries. You can use a toothpick or the back of a clay tool. Once dry, paint the carved areas with acrylic paint for a pop of contrast. It’s useful, personal, and ridiculously charming.
4. Miniature Succulent Pot Friends

Not blessed with a green thumb? Create some eternally perky clay plants instead. Sculpt tiny, cartoonish succulents or cacti from polymer clay in vibrant greens. For the pots, roll a small clay ball and gently press your thumb into the center. Add little faces, stripes, or dots to the pots with contrasting clay. Bake your tiny garden. These make utterly delightful gifts, desk buddies, or cake toppers. The scale is so small that any imperfections just add to their handmade personality.
5. Textured Wall Hanging or Pendant
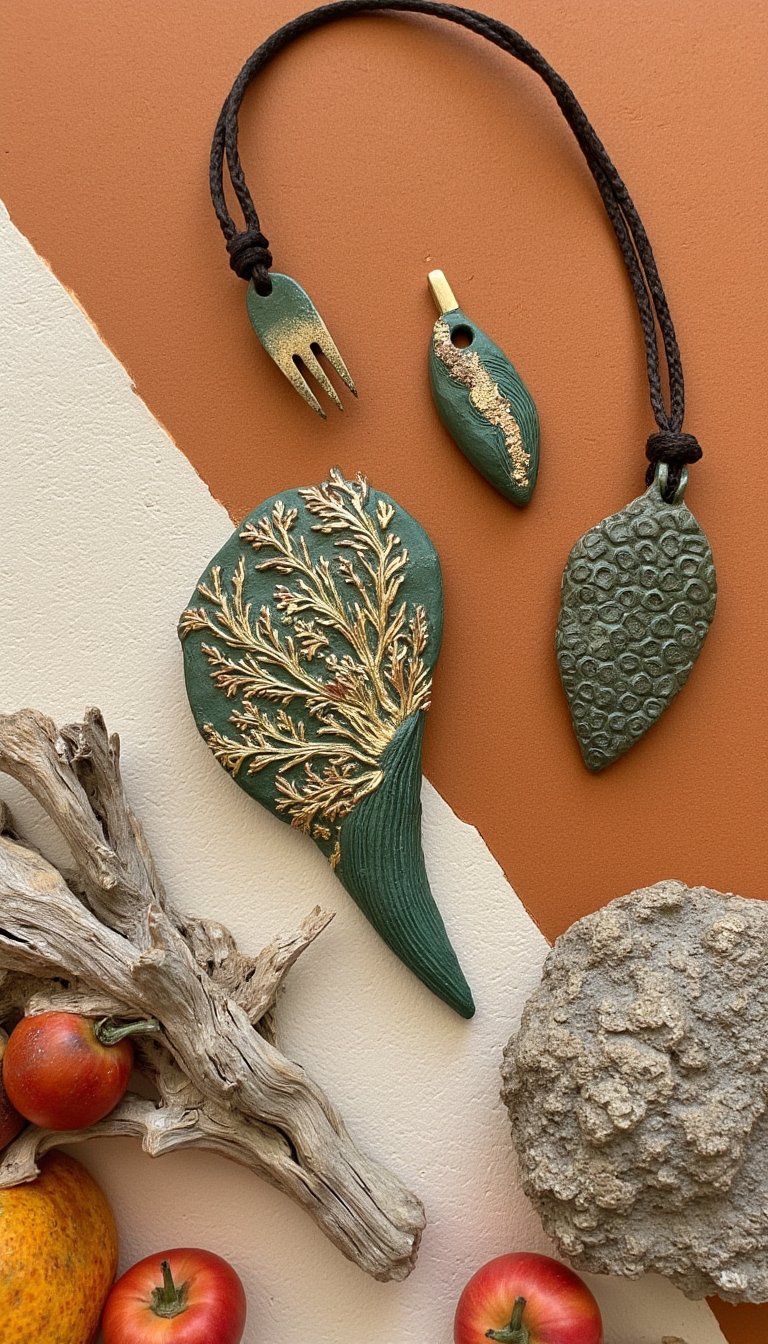
Think macro jewelry for your wall. Roll out a slab of polymer or air-dry clay into an organic, asymmetrical shape. Now, go wild with texture tools. A fork for lines, a garlic press for “hair,” bubble wrap, leaves—anything goes. Cut a small hole at the top for hanging. After curing, use acrylic paints and dry-brushing techniques to highlight all those beautiful textures you created. Hang it from a leather cord or a piece of driftwood. Instant boho wall art.
6. Clay “Stained Glass” Sun Catchers

This idea plays with transparency. You’ll need translucent polymer clay. Create a frame by rolling out a snake of colored clay and forming it into a circle, heart, or star shape. Fill the center with thinly rolled sheets of translucent clay. Here’s the trick: embed tiny pieces of colored clay, glitter, or even shaved pastel chalk inside the translucent layer. When baked, light will shine through, creating a gorgeous stained-glass effect. Just wait for the magic hour sunlight to hit it.
7. Custom Push Pins & Thumbtacks

Organize your corkboard in style. Take tiny amounts of polymer clay and form them into berries, little clouds, stars, or simple spheres. Before baking, firmly press a standard metal thumbtack into the back, leaving the point exposed. Bake. Now, pinning up your to-do list feels a little more festive. It’s a fantastic way to use up every last scrap of clay, and you can make a whole set in one baking session.
8. Embossed Clay Bookmark

For the bookworms. Roll out a long, thin rectangle of polymer clay. Use rubber stamps with meaningful words (“read,” “dream,” a favorite quote) or press delicate jewelry pieces into the clay to create an embossed design. Keep it elegant. Trim the edges neatly, make a decorative cutout at the top, and bake. A delicate coat of metallic wax or paint rubbed over the raised areas makes the design pop. It’s a durable and thoughtful handmade gift.
9. Faux Sea Glass & Stone Magnets

Bring the beach to your fridge. To make faux sea glass, condition translucent polymer clay with a tiny, tiny bit of turquoise, seafoam, or white clay. Don’t mix it completely. Form into irregular, worn-looking shapes and sand the edges aggressively after baking for that tumbled-by-the-ocean feel. For stones, roll solid colors into organic shapes and add subtle speckles with a contrasting color. Glue a strong magnet to the back. Simple, beautiful, and endlessly useful.
10. Hollow Bead Necklace with Alcohol Inks

Level up your jewelry game. Create hollow beads by wrapping clay around a aluminum foil core (this makes them light and saves clay). Seal the seams. Now, the alchemy: before baking, add drops of alcohol ink to the surface. The inks will spread and marble in mesmerizing ways. You can also roll the beads in mica powder for a metallic sheen. Bake, string them on a cord, and prepare for compliments. Each bead is a one-of-a-kind miniature painting.
11. Whimsical Animal Keychains

Give your keys a personality. Think simple silhouettes: a fat little whale, a smiling ghost, a grumpy cat face. Sculpt your character from polymer clay, keeping it chunky and cute. The key to a good keychain is structure: firmly embed a small metal key ring loop into the clay at the top before baking. After baking, you can add fine details with paint pens. This is where you can really let your silly side out. Who wouldn’t want a grumpy potato guarding their house keys?
12. Modern Clay Napkin Rings

Elevate your next dinner party in minutes. Roll out a clay snake thick enough to hold a napkin. Form it into a ring, but don’t just close the circle—overlap the ends and blend them seamlessly. Add minimal decoration: a thin contrasting stripe wrapped around, or press a single, elegant leaf into the side. Using air-dry clay is perfect for this larger item. They’re a conversation starter that says, “I’m fancy, but I also make things.”
13. A “Caned” Clay Pen or Pencil

Let’s tackle a classic polymer clay technique: the cane. It sounds complex, but start simple. Make a log of one color, then wrap it in a sheet of a contrasting color. Slice thin discs off this simple cane. Now, cover a plain pen or mechanical pencil barrel with a sheet of clay and carefully arrange the slices on the surface like polka dots or a mosaic. Roll smooth, bake (remove the pen insert first!), and seal. You now own the coolest writing instrument in the room. The sense of accomplishment is real.
See? I told you that magic was just some rolled-out clay and a bit of curiosity. The beauty of these 13 clay ideas and tutorials is that they aren’t a finish line; they’re a starting point. Each one teaches you a fundamental skill—texturing, marbling, sculpting, caning—that you can mix, match, and completely mess up as you find your own style. The goal isn’t perfection. It’s the happy silence that falls over you when you’re focused on creating. It’s the pride of saying, “Yeah, I made that.” So, which one are you trying first? Your new favorite hobby is waiting.