Let’s be honest: scrolling through endless jewelry sites, everything starts to look the same. Ever wish you could wear something that truly felt like you? Something that sparked a conversation and made you say, “Oh, I made these”? That magic is waiting in a humble block of clay. I’m about to show you 19 stunning, totally doable clay earrings DIY ideas that will turn you from a curious beginner into a clay-obsessed artist. No fancy studio needed—just your hands, some inspiration, and maybe your kitchen oven. Ready to get your hands creatively dirty?
1. The Classic Marbled Swirl

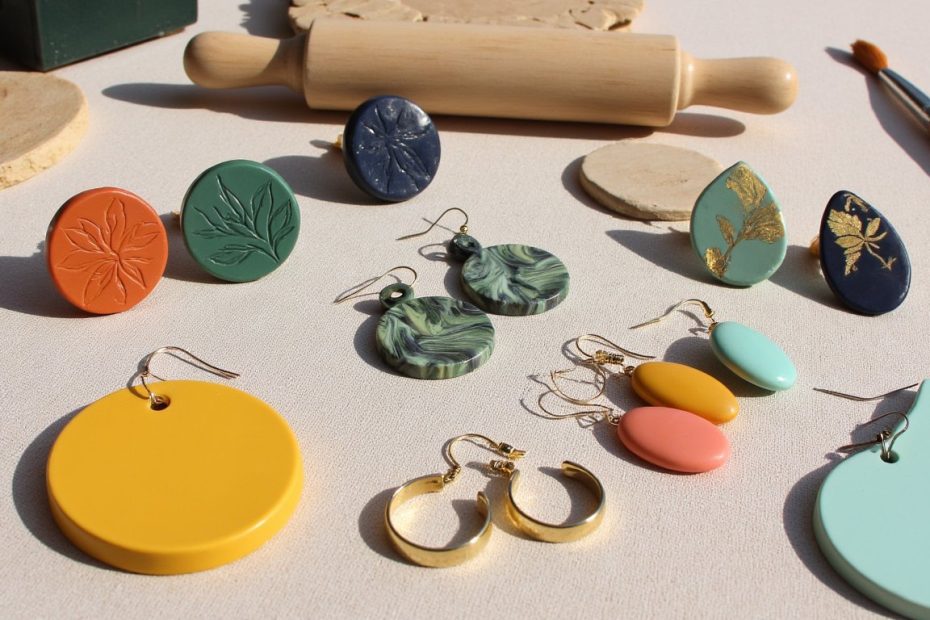
This is where the addiction starts. Grab two or three colors of polymer clay and roll them into simple logs. Twist them together, fold, and twist again until you get those gorgeous, hypnotic swirls. Roll it flat and cut out your shapes—circles, teardrops, you name it. The best part? No two pairs will ever be identical. It’s the perfect beginner project that looks incredibly sophisticated.
2. Textured Press with Nature

Why buy texture plates when you have a whole garden? Press a real leaf (vein-side down) into a slab of clay, gently peel it back, and behold the intricate fossil-like imprint. You can leave it raw for an organic feel or brush metallic wax over the high points to make the texture pop. It’s literally wearable art from your backyard.
3. Faux Turquoise Slabs

Love the look of expensive turquoise but not the price? Mix a bit of white and aqua blue clay, but don’t blend it completely. You want streaks. Then, press in tiny flecks of black clay or use a pen tip to create those iconic “spiderweb” matrix lines. Cut into rugged, asymmetrical shapes for a boho-chic statement that fools everyone.
4. Minimalist Geometric Studs
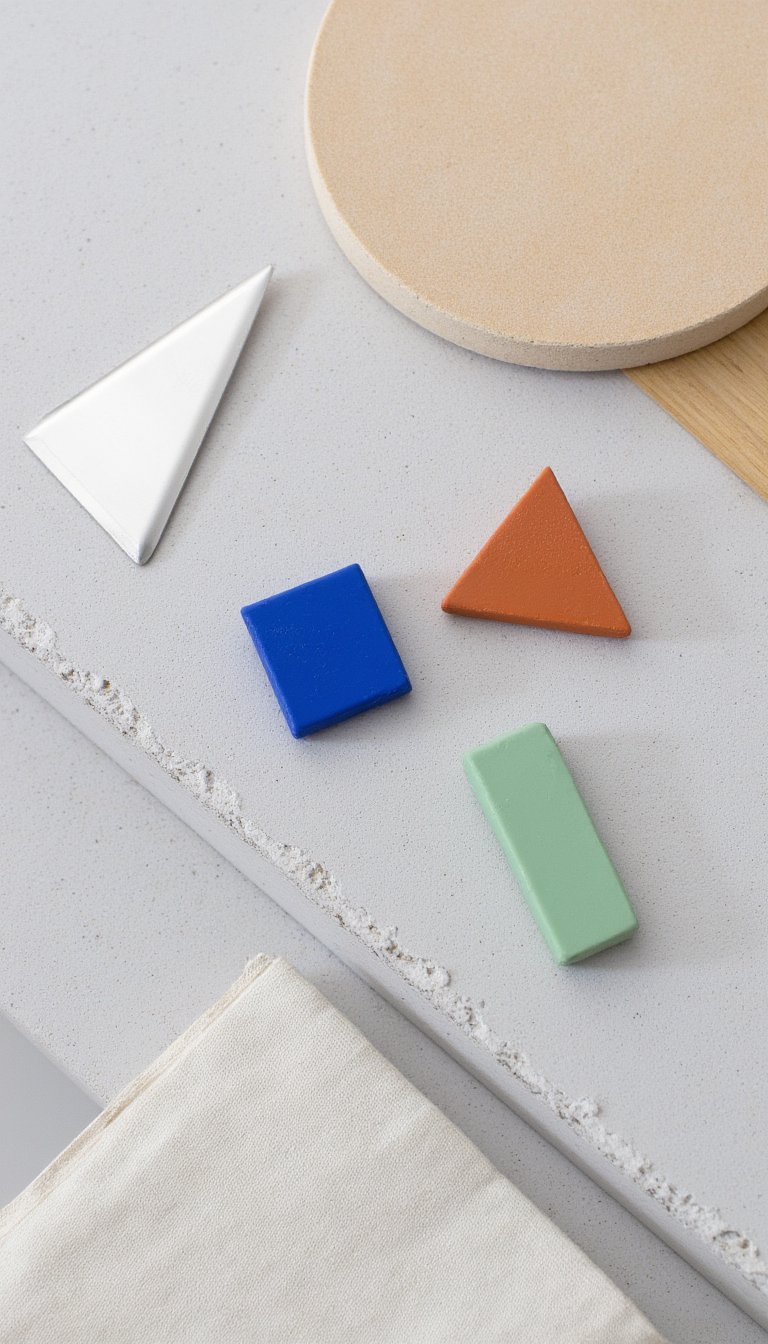
Clean lines, sharp corners, instant modern vibes. Use a blade to cut perfect squares, triangles, or slender rectangles from a solid-colored clay slab. The key here is sanding and buffing after baking. A little elbow grease with fine-grit sandpaper gives them a professional, ceramic-like finish that elevates the simplest shape.
5. Dainty Clay “Fabric” Hoops

Think clay can’t be delicate? Challenge accepted. Roll out your clay incredibly thin on the smoothest setting of your pasta machine (or roller). Cut long, thin strips, gently wrap them around a hoop mandrel or a thick marker, and bake. You get lightweight, textured hoops that look like woven fabric or porcelain.
6. Gold-Foil Embellished Drops
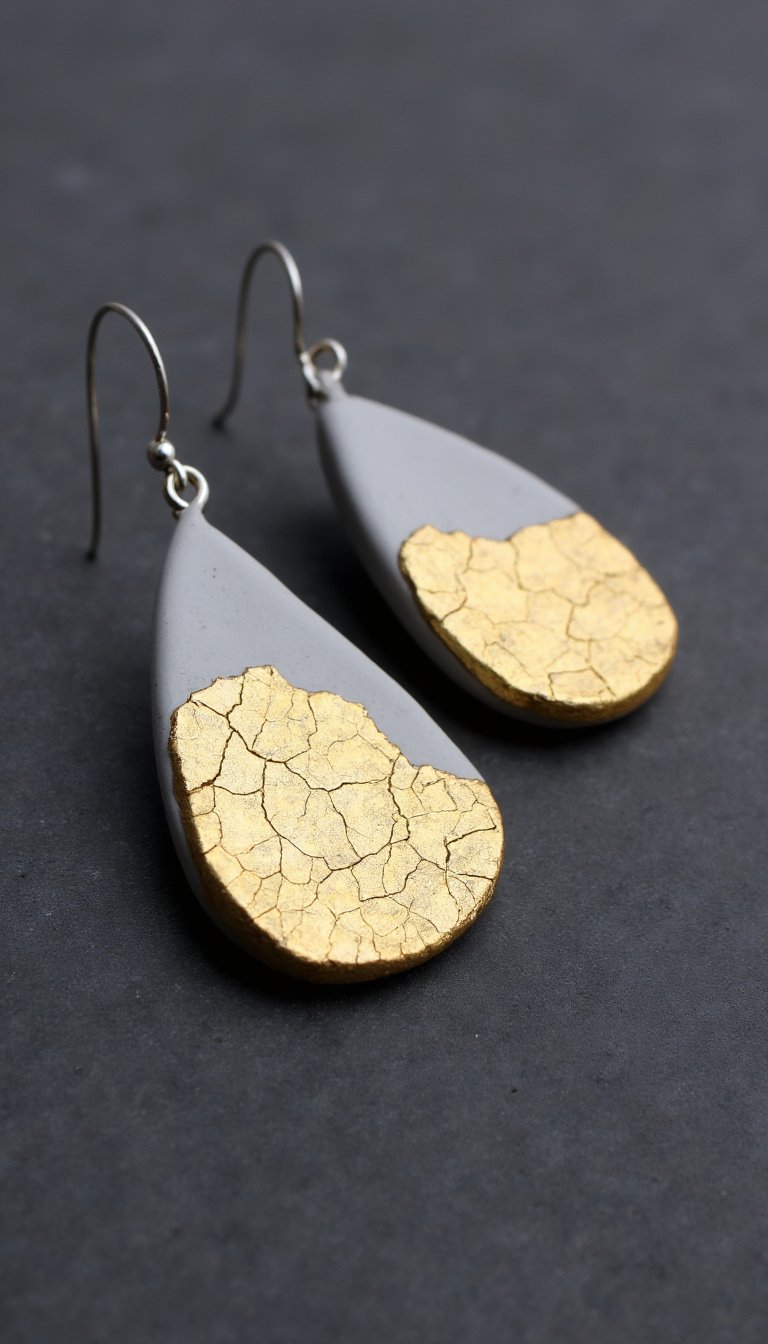
Add a touch of luxe for pennies. Before baking, press genuine gold leaf or imitation gold foil onto your shaped clay. Don’t smooth it down perfectly—let it crackle and crinkle for an antique, artisanal effect. Seal it with a thin layer of glossy varnish after baking to protect the finish. Instant heirloom pieces.
7. Playful Candy-Colored Dangles
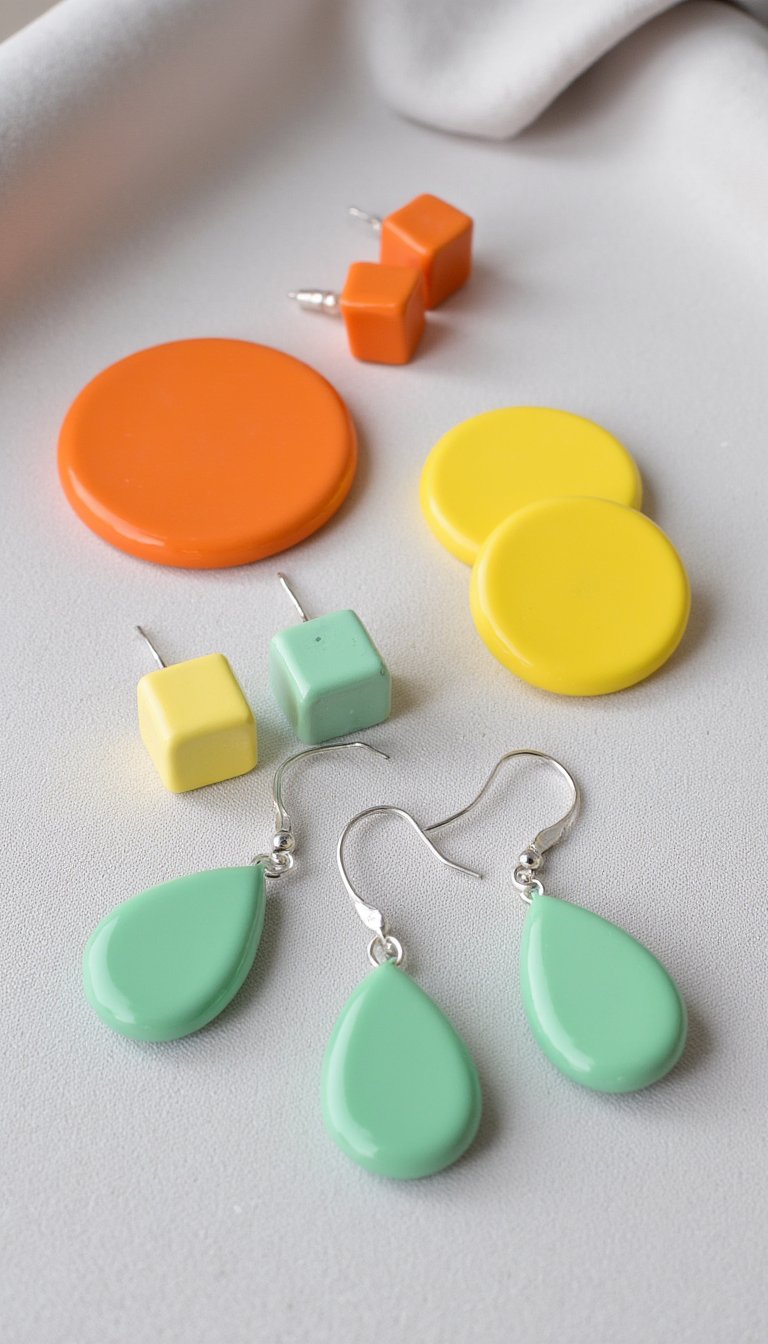
Channel your inner minimalist with a pop of joy. Create small, polished shapes in juicy colors like tangerine, lemon yellow, or mint green. Attach them to simple jump rings and French hooks. The magic is in the pairing—wear mismatched colors on each ear for a fun, modern twist.
8. Hollow Bead Statement Earrings

Big, bold earrings don’t have to be heavy. Form two identical pinch pots from clay and carefully seal the edges together to create a hollow bead. You can make spheres, ovals, or cubes. Pierce a hole for the post or hook before baking. This technique gives you dramatic size with barely any weight on your earlobes.
9. Gradient Ombre Squares

Create a smooth color transition that’s oh-so-satisfying. Roll out sheets of clay in three shades of the same color family. Layer them, then run the stack through the pasta machine on a thick setting, folding and feeding it through until the gradient blends seamlessly. Cut into squares or rectangles for a sleek, painterly effect.
10. Embroidered-Look Thread Wrapped

Combine clay with fiber arts for unbelievable texture. Bake simple clay discs or rings. Once cool, use a needle and embroidery floss to “stitch” around and through pre-punched holes in the clay. You can create mandala patterns, radial lines, or random wraps. It’s a meditative process with a stunning, textural result.
11. Mosaic Tile Earrings
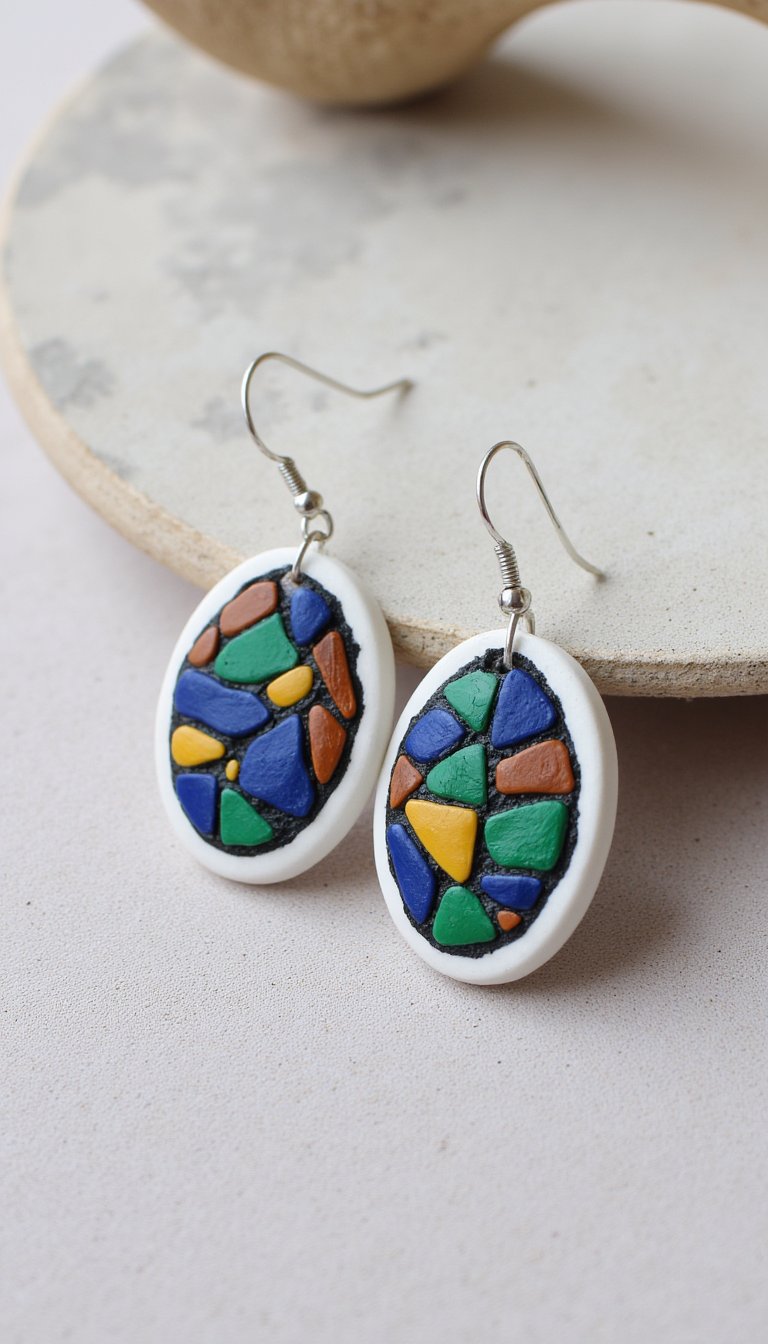
Got tiny clay scraps? Don’t throw them away! Chop them into tiny, irregular pieces and arrange them like a mosaic on a thin clay base. Press them down gently, then fill the “grout” lines with colored clay paste or even just smooth the base clay up between the pieces. A miniature masterpiece for your ears.
12. Sleek Matte & Glossy Contrast

Sometimes finish is everything. Make a simple pair of earrings—geometric shapes work great here. After baking, sand the front to a soft, velvety matte finish. Then, use a small brush to apply a high-gloss varnish just to the edges. That sharp contrast between the matte center and shiny border looks incredibly designer.
13. Whimsical Miniature Fruits

These are pure joy. Sculpt tiny strawberries, lemons, cherries, or abstract berries. Use a needle tool for seeds and texture. Pro tip: Dust chalk pastels on before baking for a natural blush on cheeks of peaches or apples. They’re light, fun, and guaranteed to get compliments.
14. Organic “Stone” Slabs

Embrace the imperfect. Roll out clay, then tear the edges instead of cutting them for a natural, ragged look. Blend flecks of gray, white, and beige clay for a granite or limestone effect. Keep the finish matte and pair them with rustic, oxidized silver findings. Effortlessly cool.
15. Dangling “Stained Glass” Windows
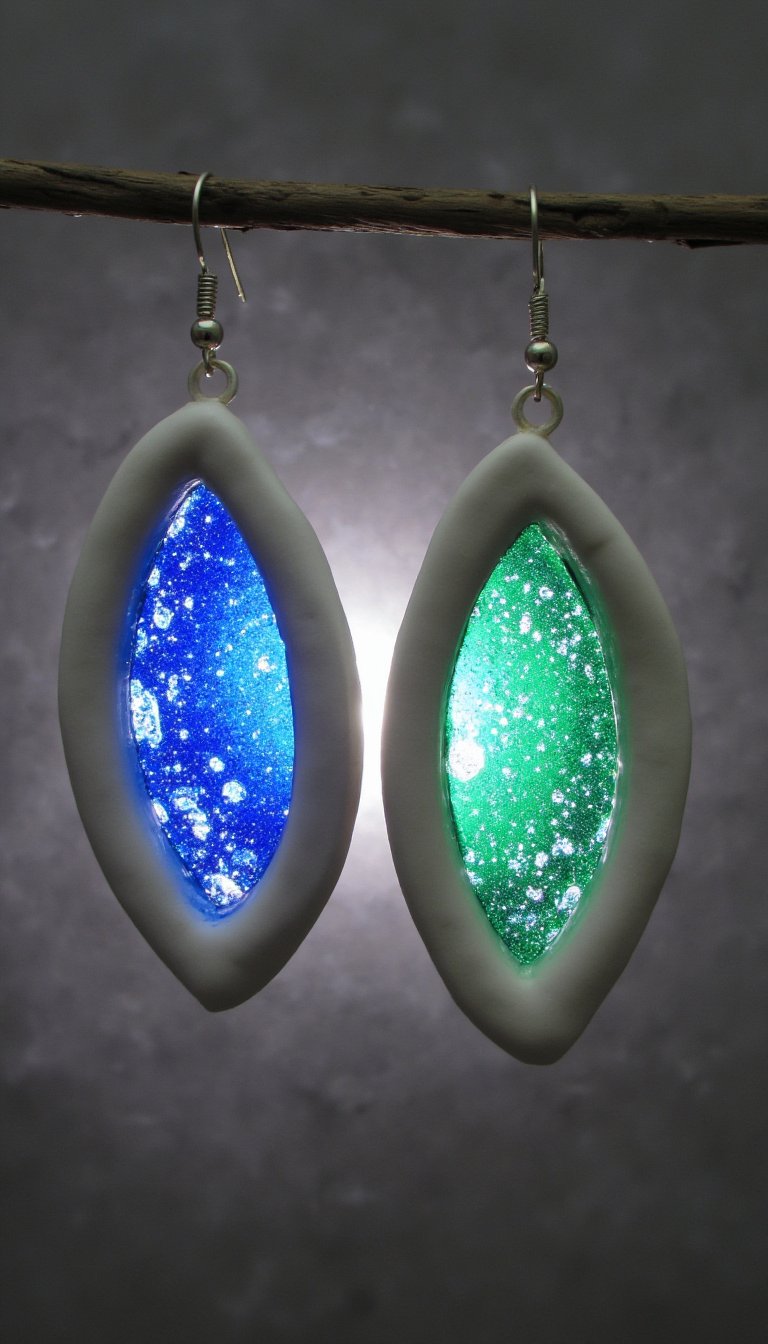
Create a “frame” from a rope of clay, forming a shape like a circle or arch on your work surface. Fill the center with translucent clay mixed with a tiny dot of colored ink or alcohol ink. Bake it, and the light will shine through the colored center, creating a stunning stained glass illusion.
16. Earring Jackets & Cuffs

Not into piercings? No problem. Design clay pieces that clip or slide onto the earring post behind your lobe, or sculpt lightweight cuffs that hug the edge of your ear. These look incredibly avant-garde and are a fantastic way to make a standard stud earring look completely custom.
17. Pressed Lace Doily Imprints
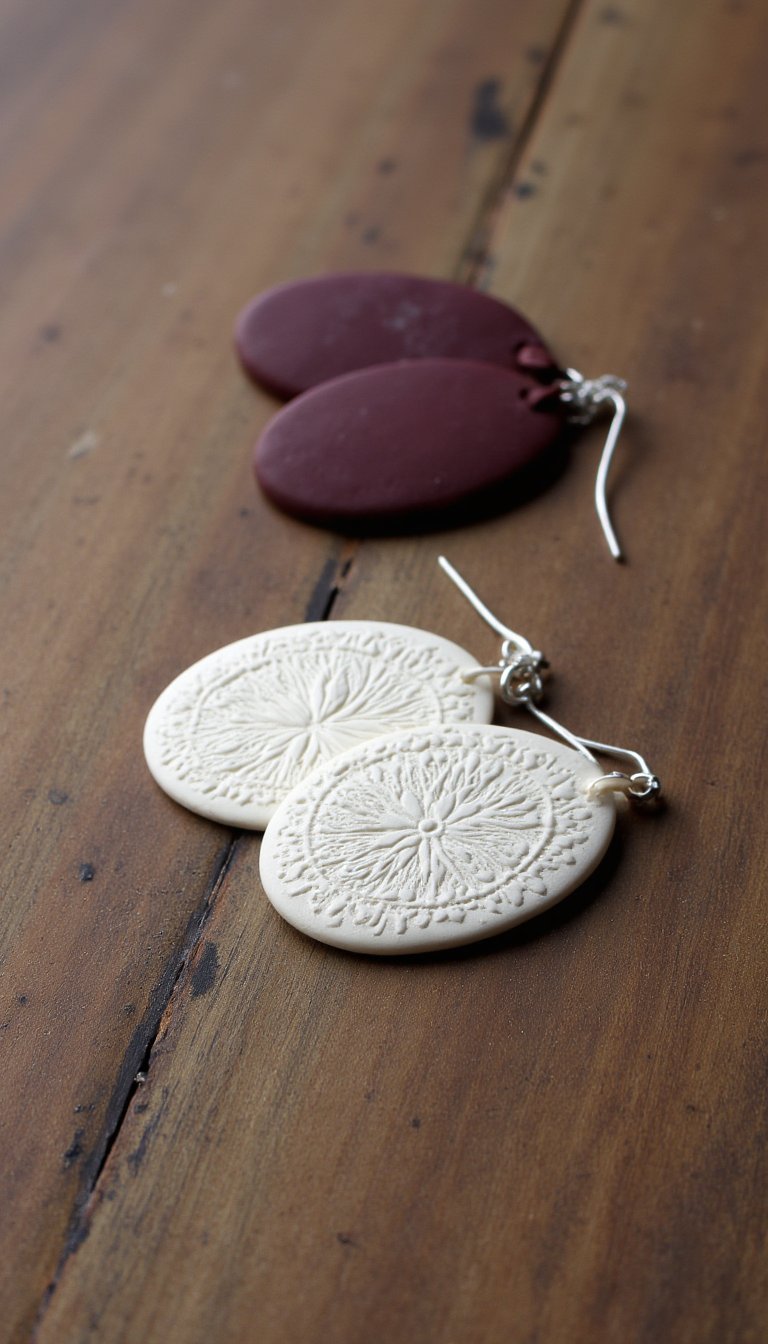
Raid your grandma’s linen closet (or the craft store) for delicate lace or crocheted doilies. Press them into the clay for an unbelievably intricate, romantic pattern. You can then back the lacy clay with a solid color for contrast or leave it as a delicate sheet. So feminine and elegant.
18. Modern Clay & Resin Fusion

Level up your DIY game. Bake a clay frame or bezel with a deep well. After baking and sealing the clay, mix a small batch of clear UV resin, add a drop of color or some glitter, and pour it in. Cure it under a UV light. The combo of the matte clay and glossy, gem-like resin is next-level stunning.
19. Personalized Initial Sculptures

Your final boss project: sculpt your initials, a favorite symbol, or a tiny animal in a 3D, wearable form. Work with a thicker slab and carve/add details with tools. This idea pushes your sculpting skills and results in a deeply personal accessory. They make phenomenal gifts, too—talk about a conversation starter.
So, there you have it—19 paths to a uniquely you jewelry collection. The real secret? It’s not about perfection. It’s about the squish of the clay in your hands, the surprise of unmolding a baked piece, and the pride of wearing something you created. Start with the marbled swirls, hoard beads and textures for inspiration, and soon you’ll be eyeing every object wondering, “Can I press that into clay?” Your earlobes are about to become your favorite canvas. Now go make something awesome. 😉