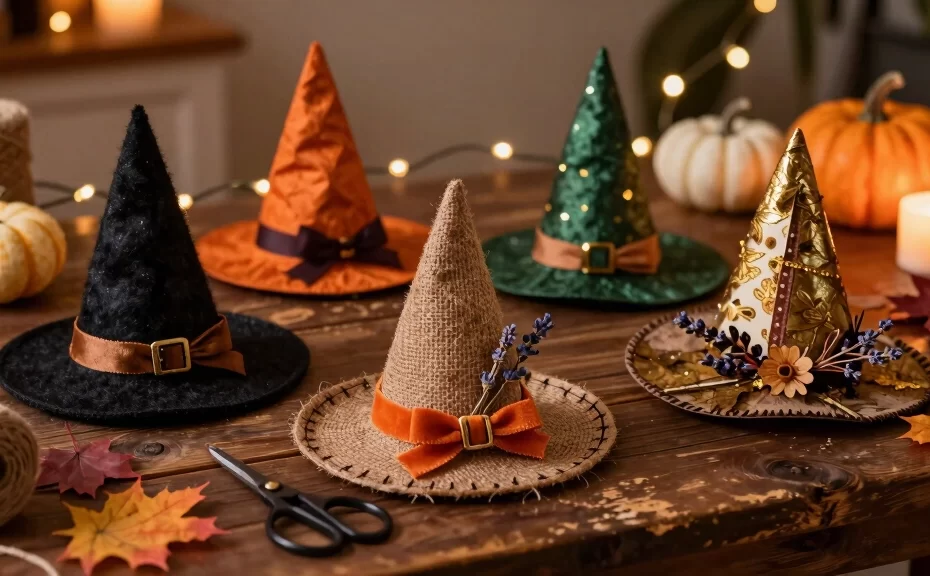
Halloween approaches faster than a witch on a supercharged broomstick. Are you ready to transform your home into a haunted haven without spending a fortune? Nothing screams classic Halloween quite like a pointy black hat. Instead of buying boring store-bought decor, why not craft your way into the spooky season?
We gathered the most creative, budget-friendly, and downright adorable witch hat crafts for crafters of all skill levels. Whether you want to entertain the kids on a rainy afternoon or create stunning centerpieces for your adult Halloween bash, we have you covered. Grab your hot glue gun, dust off your glitter, and let’s get crafting! 😉
1. Paper Plate Witch Hats
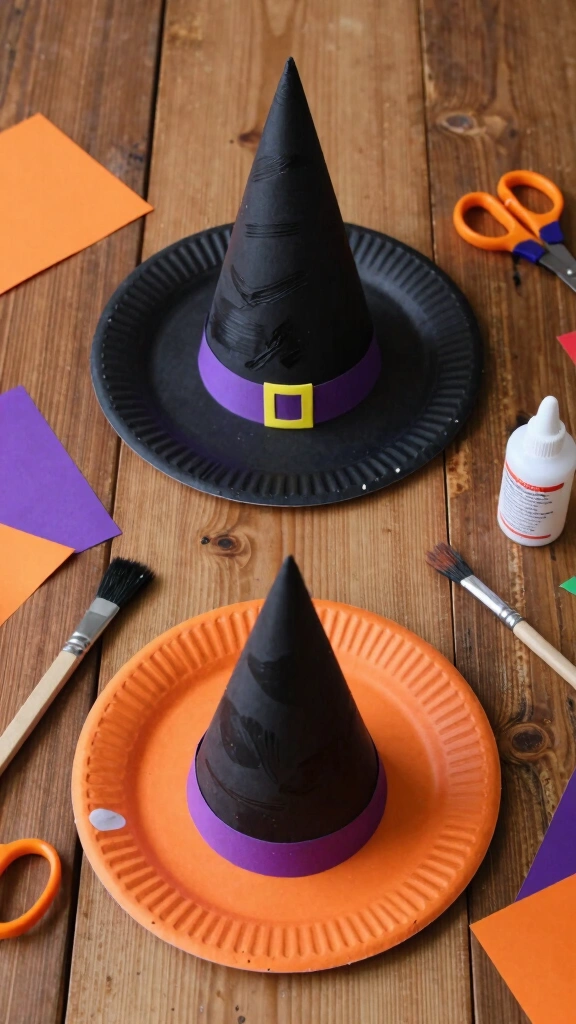
Do you have spare paper plates hiding in your pantry? Grab them right now to create these simple yet highly customizable witch hats. You only need paper plates, black paint, construction paper, and a little bit of imagination to bring this classic craft to life.
First, cut a circle out of the center of your plate to create the brim. Roll your black construction paper into a cone shape and secure it with tape or glue. Fit the cone through the center hole of the plate, secure it underneath, and let your kids decorate the brim with sequins, ribbons, and spooky stickers.
Pro Tip for Parents
Use non-toxic acrylic paint for a vibrant, glossy finish that dries quickly. You can also skip the paint entirely by purchasing pre-colored black paper plates to save time and minimize the cleanup hassle.
2. Yarn-Wrapped Witch Hat Ornaments
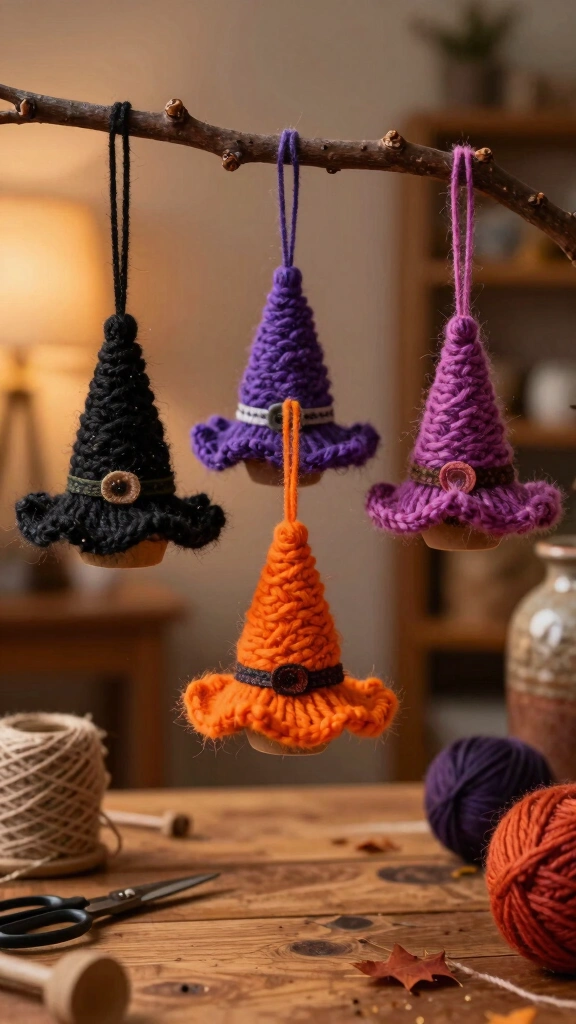
Who says ornaments only belong on Christmas trees? These cozy, textured yarn-wrapped witch hats make perfect hanging decorations for your Halloween branch tree or front porch light fixtures. This craft also helps kids develop their fine motor skills through wrapping and tying.
Cut a simple triangle shape out of thick cardboard to serve as your base. Secure the end of your favorite black, purple, or orange yarn to the back of the cardboard with hot glue. Wrap the yarn tightly around the triangle until you cover the entire surface, then secure the end and glue a small cardboard strip at the bottom for the brim.
Do you want to add some extra flair? Glue a tiny plastic spider or a bright orange bow to the brim to make the ornament pop!
3. Felt Witch Hat Headbands
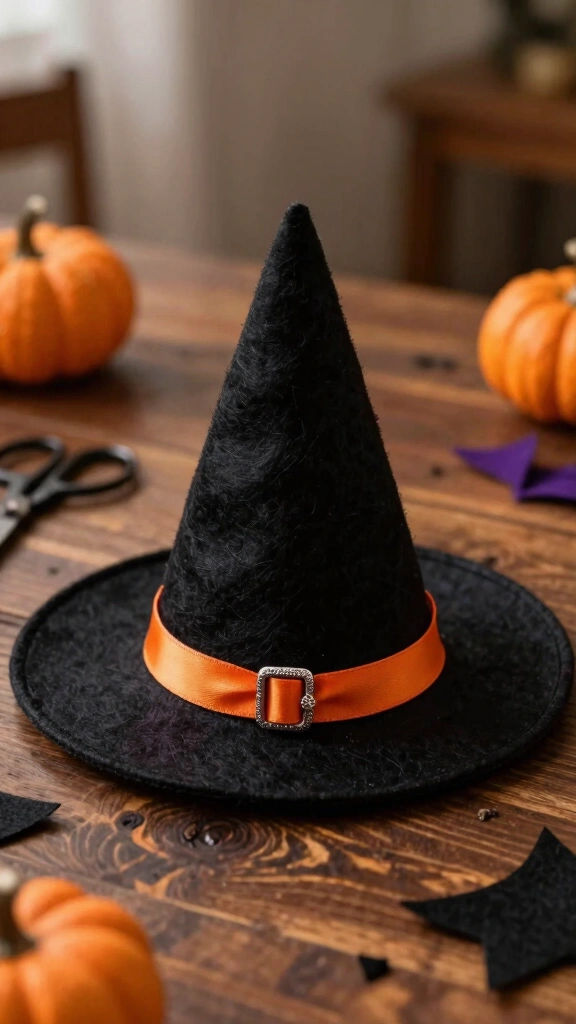
Are you looking for a quick costume accessory that looks incredibly stylish? These DIY felt witch hat headbands add the perfect touch of spooky glamour to any outfit. They lightweight design ensures you can wear them comfortably all night long at your next Halloween party.
Cut a circle and a cone shape out of stiff black craft felt. Assemble the hat using hot glue, stuffing the cone slightly with cotton balls to help it hold its shape. Glue the finished felt hat onto a plain plastic headband, then embellish the base of the hat with purple tulle, feathers, or a shiny plastic buckle.
IMO, this is the ultimate accessory for teachers, office workers, or anyone who wants to dress up without wearing a full costume.
4. Pinecone Witch Hats
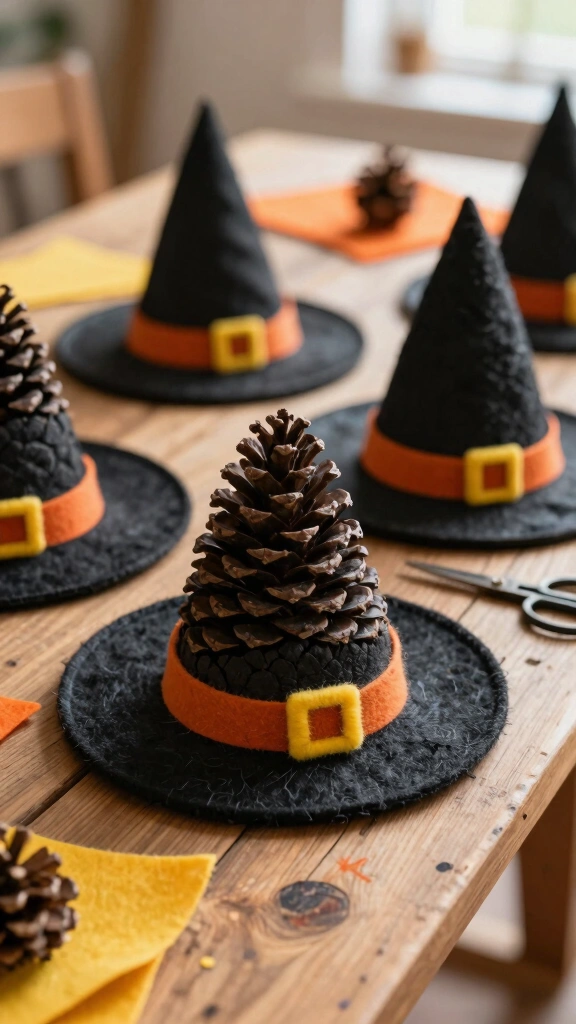
Send the kids outside to gather pinecones for this nature-inspired Halloween craft. Pinecones naturally mimic the texture of a spooky, weathered witch hat when you flip them upside down. It combines outdoor exploration with indoor creativity for a double win.
Paint your gathered pinecones with matte black craft paint. Cut a small circle out of black felt or cardstock to serve as the hat brim, then glue the painted pinecone directly to the center. Add a tiny yellow felt buckle to the front of the pinecone to complete the look.
These rustic little hats make fantastic place card holders for a Halloween dinner party or look wonderful scattered across your fireplace mantel.
5. Mason Jar Witch Hats
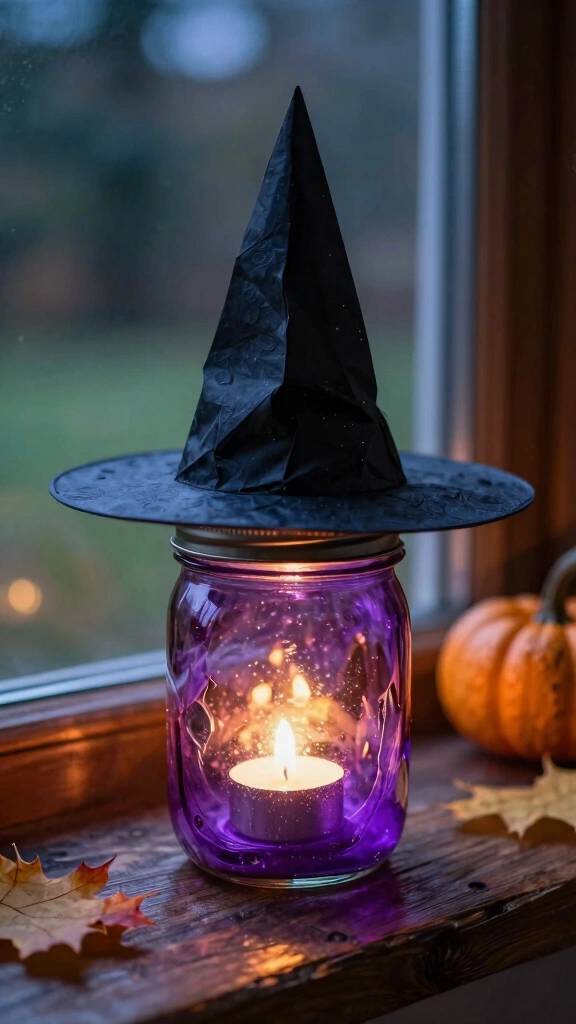
Mason jars continue to dominate the DIY crafting scene, and for good reason. You can easily turn a simple glass jar into a glowing witch hat lantern that illuminates your walkway or windowsill. This project is both functional and spooktacular!
Paint the inside of your mason jar with transparent purple or orange glass paint. Construct a large witch hat out of black cardstock that fits snugly over the metal lid of the jar. Place a battery-operated LED tea light inside the jar, screw the lid on, and top it with your handmade paper hat.
Watch as the jar glows beautifully in the dark, casting a warm, eerie light across your room.
6. Origami Paper Witch Hats
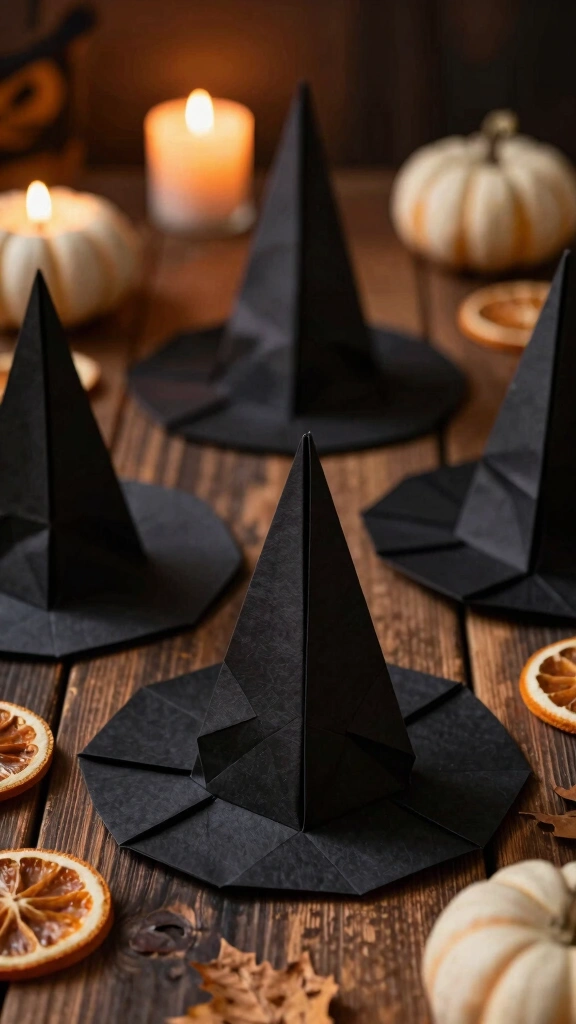
Do you want a mess-free craft that requires zero glue or paint? Origami is the answer. With just a single square sheet of black paper, you can fold a neat, three-dimensional witch hat in under five minutes.
Start with a square piece of origami paper, folding it diagonally to find the center line. Fold the edges inward to create a kite shape, then fold the bottom up to form the brim. Adjust the folds to create the classic pointed top and flared brim of a traditional witch’s hat.
Scatter these tiny paper hats across your party food table as confetti, or string them together to make a delicate paper garland.
7. Clay Witch Hat Jewelry Dishes
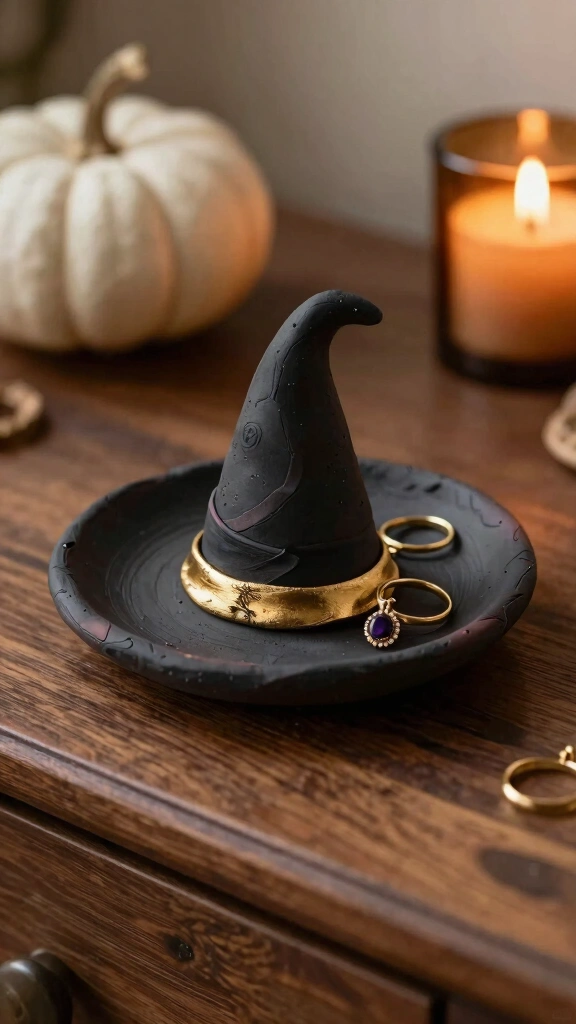
Treat yourself to a functional piece of Halloween decor that you can use year-round. Air-dry clay allows you to sculpt beautiful, custom jewelry dishes shaped like witch hats. It serves as the perfect landing spot for your rings, earrings, and keys.
Roll out a flat circle of air-dry clay to form the base of your dish, gently curving the edges upward. Sculpt a cone separately and attach it to the center of the dish, smoothing the seams with a wet finger. Once the clay dries completely, paint it with black acrylic paint and seal it with a glossy varnish.
This craft makes an incredibly thoughtful, handmade gift for your goth-loving friends.
8. Halloween Witch Hat Wreaths
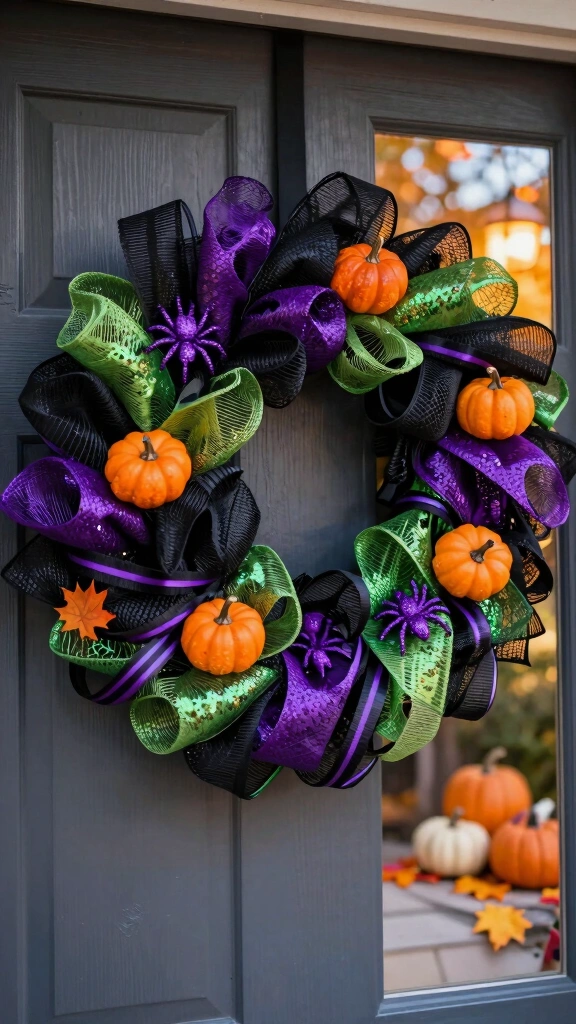
Welcome your trick-or-treaters with a stunning, voluminous witch hat wreath hanging on your front door. This project looks expensive, but you can easily make it using affordable supplies from your local dollar store. It provides instant curb appeal for the autumn season.
Purchase a wire witch hat wreath frame from a craft store. Weave rolls of black, purple, and green deco mesh through the wire frame to create a full, textured look. Finish the wreath by tucking in artificial glittery spiders, purple ribbons, and a sign that says, “The Witch is In.”
Your neighbors will definitely ask where you bought this eye-catching piece of holiday decor!
9. Cardboard Roll Witch Hats
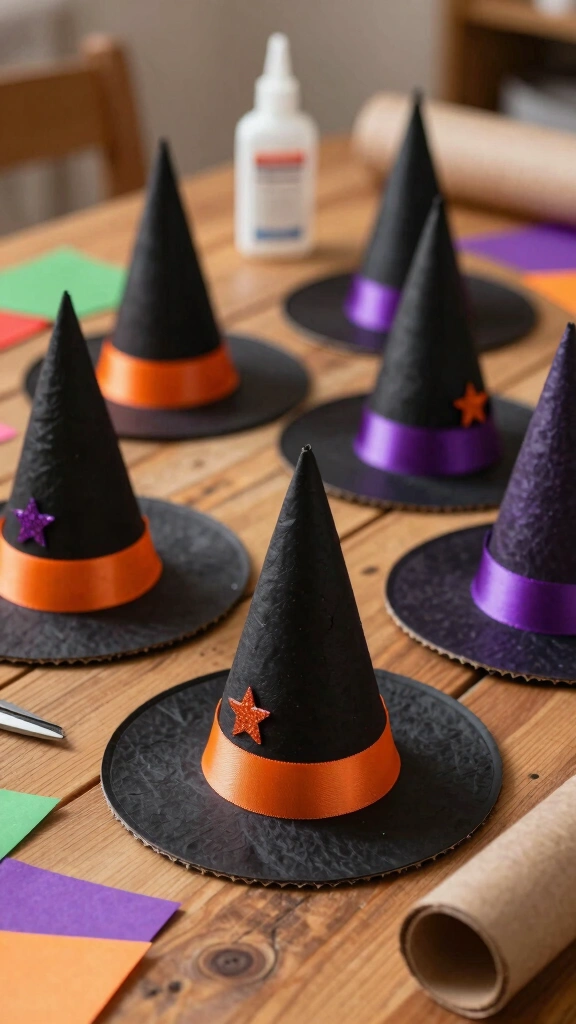
Save your empty toilet paper rolls and paper towel tubes for this eco-friendly crafting project. Upcycling household waste into holiday decor protects the planet while saving you money. Plus, kids love working with cardboard tubes!
Cut your cardboard tube into smaller sections to form the base chimney of the hat. Wrap black construction paper around the tube, then glue a paper circle to the bottom to create the brim. Cut a small cone out of paper, attach it to the top of the tube, and decorate the hat band with glitter paint.
You can hide small Halloween candies inside the tube for a fun party favor or table surprise for your guests.
10. Glittery Witch Hat Cupcake Toppers
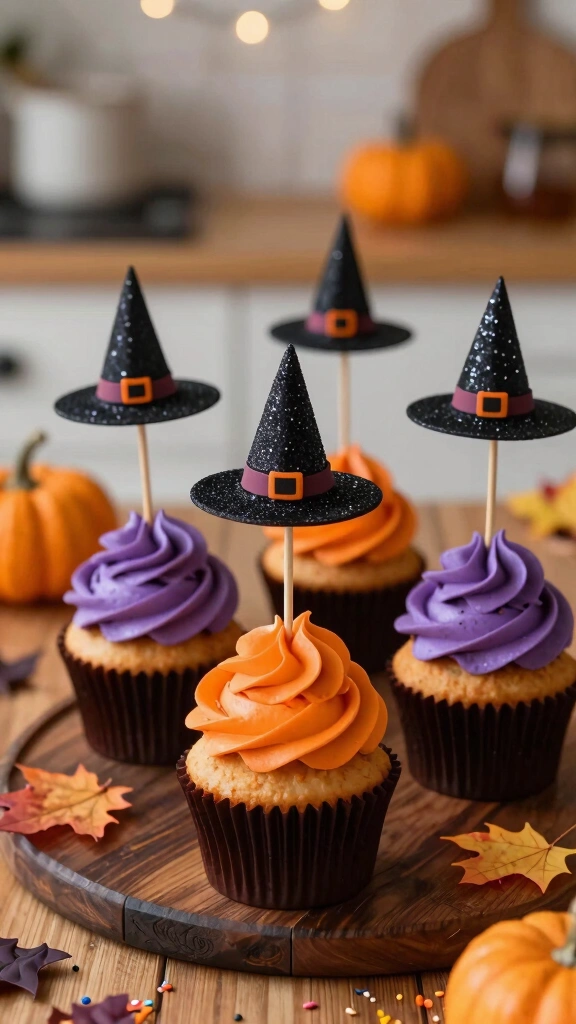
Are you planning a Halloween bake sale or hosting a classroom party? Elevate simple store-bought cupcakes with these dazzling, glittery witch hat toppers. They add instant drama to any dessert platter.
Punch out small circles from black glitter cardstock to act as the brims. Cut out triangles from the same glittery paper and glue them to the center of your circles. Glue a wooden toothpick to the back of each hat, let it dry, and insert them directly into the frosting of your cupcakes.
FYI: Use shed-free glitter paper to ensure no unwanted sparkle ends up in your delicious frosting.
11. Burlap Witch Hat Door Hangers
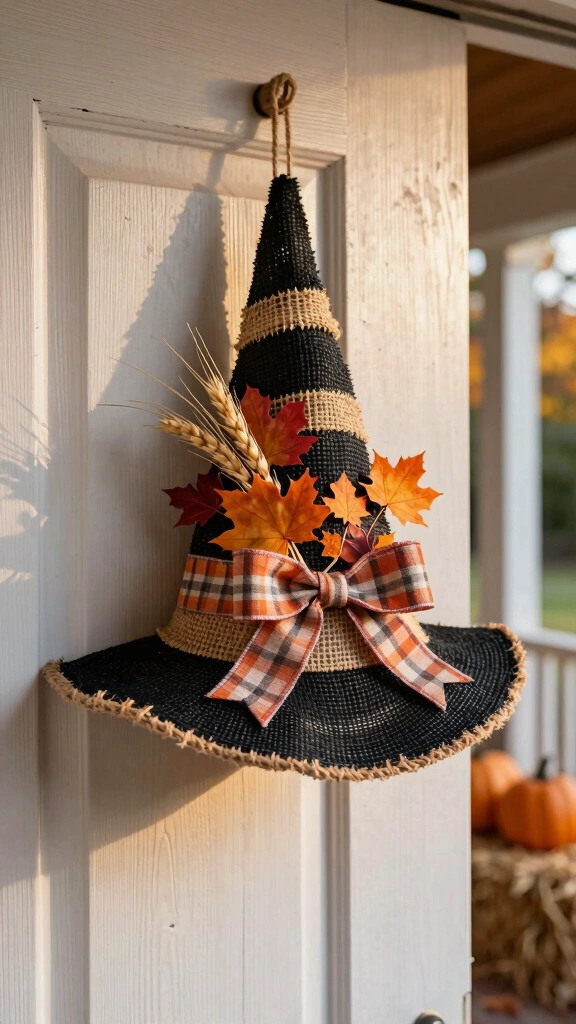
If you prefer rustic, farmhouse-style decor, this burlap witch hat project is perfect for you. Burlap adds a cozy, warm texture to your autumn decorations. It offers a softer alternative to bright plastics and shiny papers.
Cut out a large witch hat template from a piece of cardboard. Wrap natural or dyed black burlap tightly around the cardboard template, securing it on the back with hot glue. Add a rustic plaid ribbon, some faux fall leaves, and a few sprigs of artificial wheat around the hat band.
Hang this lightweight piece on your pantry door, bedroom door, or entryway wall for a touch of cozy Halloween charm.
12. Light-Up Witch Hats
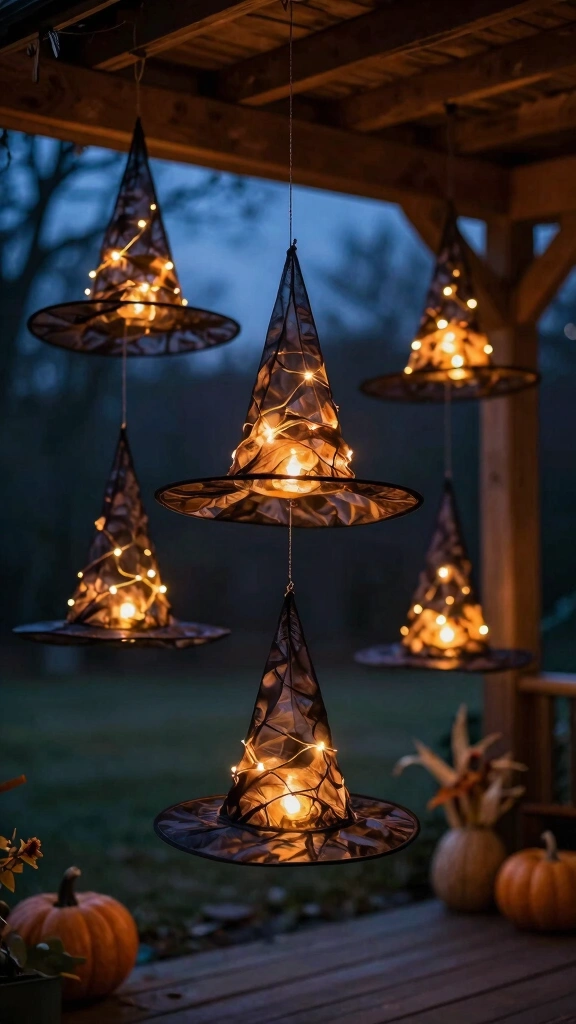
Transform your porch into a magical, floating display with light-up witch hats. When night falls, these glowing hats look like they float mid-air, creating a mystical atmosphere that delights kids and adults alike. It is incredibly easy to set up.
Buy cheap nylon witch hats online or at a party supply store. Feed battery-operated copper fairy lights inside the hat, securing the battery pack to the top of the cone with a safety pin. Hang the hats from your porch ceiling using clear fishing line and watch them glow.
Select fairy lights with a built-in timer so your floating hats turn on automatically at dusk every single night.
13. Witch Hat Garland
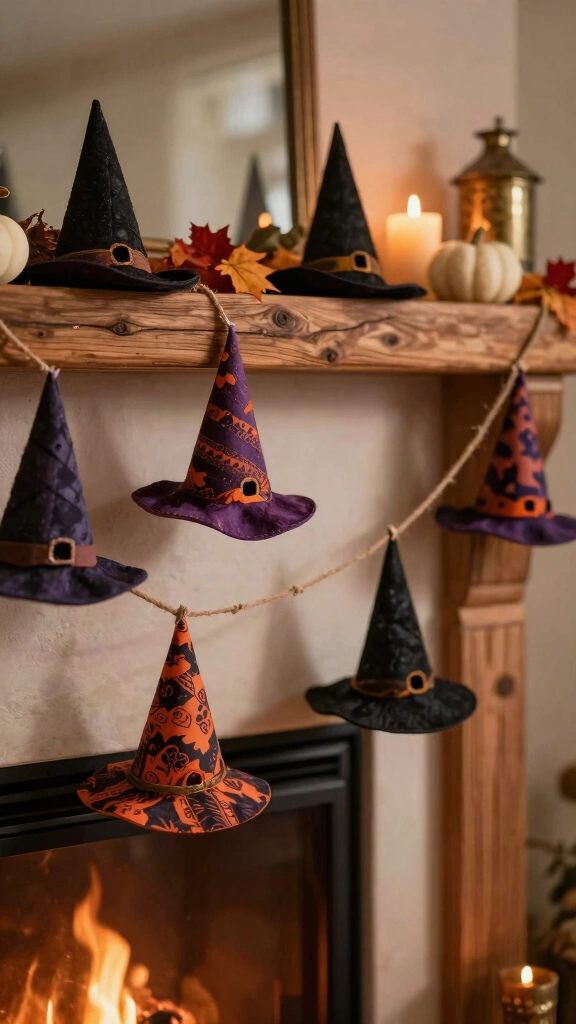
Drape this whimsical witch hat garland across your fireplace mantle, bookshelf, or party table. It connects multiple small hats into one cohesive, festive decoration. You can customize the colors to match your existing home decor.
Cut out multiple identical witch hats from patterned scrapbook paper, felt, or foam sheets. Punch two small holes in the top of each hat. Thread a long piece of rustic twine or black ribbon through the holes, spacing the hats evenly along the string.
You can hang this garland horizontally or create multiple vertical strands to hang in windows as a spooky backdrop.
14. Popsicle Stick Witch Hats
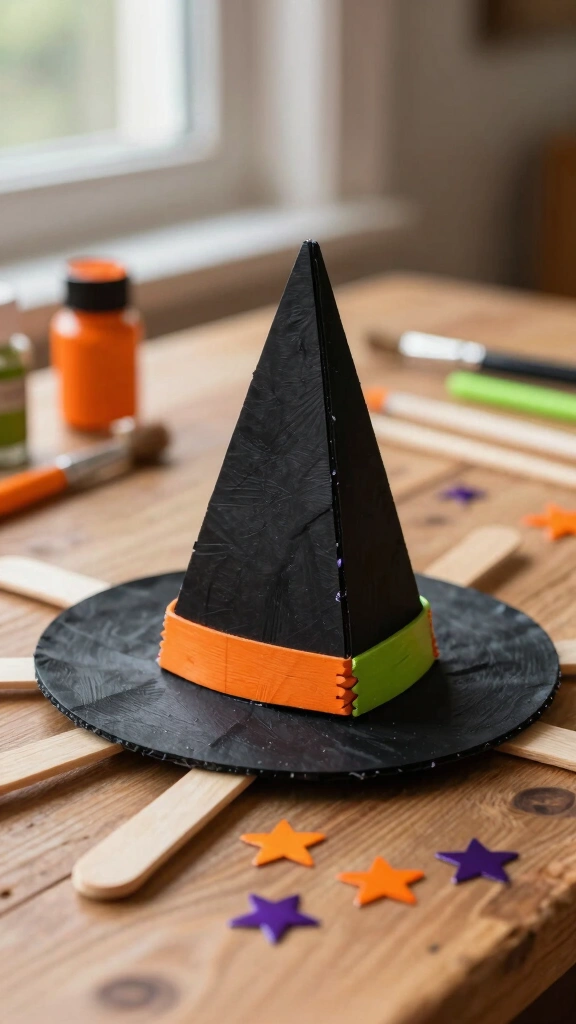
This classic craft is perfect for toddlers and preschoolers who love to paint and glue. Popsicle sticks provide a sturdy frame that stands up to heavy-handed crafting. It is a fantastic afternoon activity for busy hands.
Glue three popsicle sticks together into a triangle shape. Glue one more stick horizontally across the bottom to create the hat brim. Paint the entire frame black, then fill the empty center of the triangle by gluing a piece of black construction paper to the back of the sticks.
Let the kids paste googly eyes, colorful buttons, or plastic spiders onto the center of the hat to give it some quirky personality.
15. Witch Hat Pumpkin Decorating
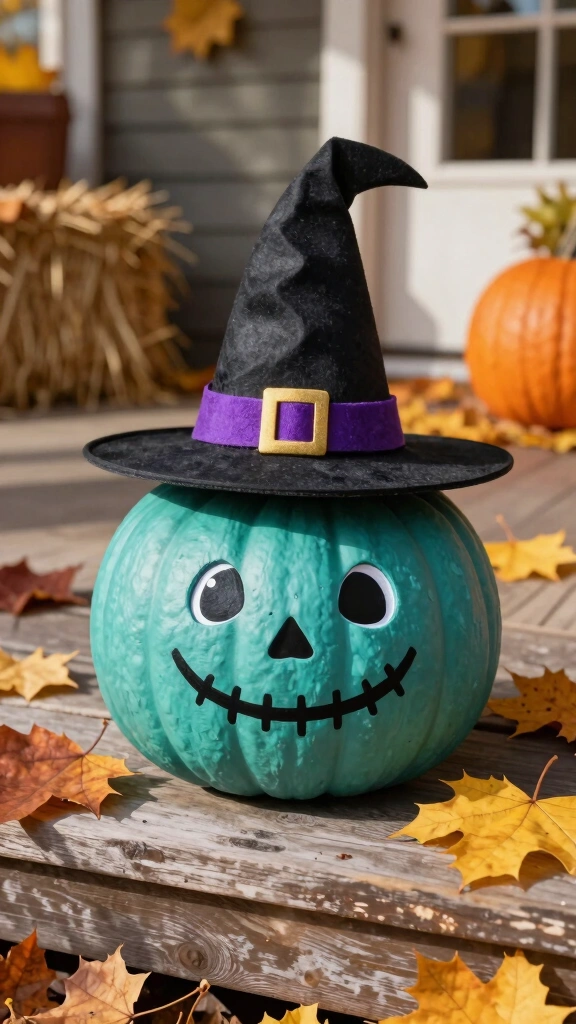
Skip the messy pumpkin carving this year and decorate your pumpkins with witch hats instead. This method keeps your pumpkins intact, meaning they will last much longer throughout the autumn season without rotting. It is a clean, creative solution.
Paint your pumpkin a bright, contrasting color like teal, white, or purple. Construct a large witch hat out of thick, weather-resistant craft foam. Glue the foam hat directly onto the top stem of the pumpkin, then draw a cute, spooky face on the pumpkin’s surface using a black permanent marker.
Place your pumpkin witch on your front porch stairs to greet your guests with a friendly smile.
Summary Table of Craft Materials
| Craft Idea | Primary Material | Difficulty Level | Time Required |
|---|---|---|---|
| Paper Plate Hats | Paper Plates | Easy | 15 Minutes |
| Yarn Ornaments | Yarn & Cardboard | Easy | 20 Minutes |
| Felt Headbands | Craft Felt | Medium | 30 Minutes |
| Pinecone Hats | Pinecones | Easy | 15 Minutes |
| Mason Jar Lanterns | Mason Jars | Medium | 40 Minutes |
| Light-Up Hats | Nylon Hats & Fairy Lights | Easy | 10 Minutes |
Embrace Your Spooky Creative Side
Which of these witch hat craft ideas will you try first? Crafting your own Halloween decor allows you to spend quality time with family while customizing your home to suit your unique style. You do not need expensive materials or professional skills to create beautiful, festive memories.
Gather your supplies, put on your favorite spooky movie playlist, and let your creativity run wild. Happy crafting, and have a wonderfully spooky Halloween season!