Have you ever walked down the seasonal aisle at a big-box store and gasped at the outrageous prices? I definitely have. Stop paying thirty dollars for mass-produced plastic junk that looks identical to your neighbor’s house. You can craft stunning, high-quality Halloween decorations at home using simple polymer or air-dry clay.
I spent last October experimenting with dozens of clay brands, ruining my fair share of baking sheets in the process. Now, I know exactly which techniques work and which ones waste your time. Get ready to elevate your spooky season aesthetic with these 14 amazing clay ghost DIY ideas for Halloween decor.
1. Tea Light Luminary Ghosts

Create a classic, eerie glow with simple luminary ghosts. You just roll out a thin sheet of white air-dry clay and drape it over a foil ball. Use a small straw to punch out circular eyes and a howling mouth before the clay hardens. Once dry, slip an LED tea light underneath to watch your little phantom come to life.
Safety First
Always use battery-operated LED tea lights for this project. Real flames will scorch your hard work and create a massive fire hazard. You want spooky decor, not an actual visit from the fire department.
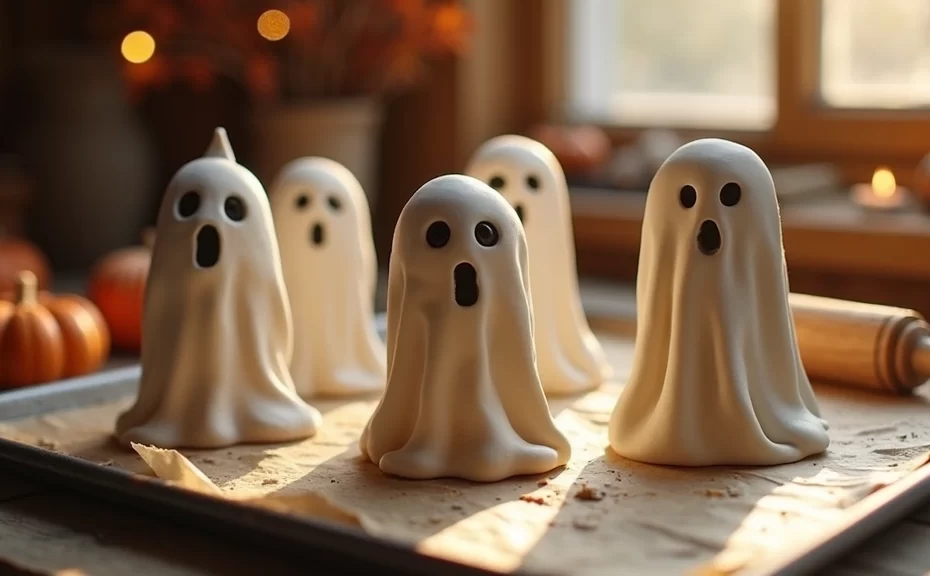
2. Hanging Ghost Ornaments
Decorate your Halloween tree or fireplace mantel with adorable hanging ornaments. Grab a ghost-shaped cookie cutter and punch out perfectly uniform shapes from rolled polymer clay. Poke a small hole at the top of the head before you bake them. Thread some rustic jute twine through the hole for a beautiful farmhouse vibe.
Customizing Your Phantoms
You can stamp names or spooky phrases into the wet clay using small letter presses. Paint the stamped letters with black acrylic paint to make the words pop against the white background. They even make incredible DIY gifts for your Halloween party guests.
3. Ghostly Ring Holders
Keep your favorite jewelry safe while adding a touch of seasonal flair to your nightstand. Form your clay into a tall, narrow cone shape, leaving the bottom wide enough to stand securely. Drape a second, thinner layer of clay over the cone to create those classic flowing ghost folds. Paint tiny black eyes near the top to finish the look.
Functional Decor Rules
I absolutely love crafts that serve a real purpose in my daily routine. You slide your rings right over the top of the ghost’s head before you go to sleep. IMO, this beats tossing your expensive jewelry onto the bare dresser any day.
4. Mini Air Plant Phantoms
Combine your love for houseplants with your spooky seasonal spirit. Shape a chunky ghost out of polymer clay, but carve a deep, thumb-sized indentation at the very top of its head. Bake the clay according to the package instructions until it fully hardens. Drop a real or faux air plant into the cavity so the spiky leaves look like wild, crazy hair.
Plant Care Tips
Air plants require very little moisture, making them the perfect companions for handmade clay pots. Take the plant out of the ghost once a week to mist it with water. Let the plant dry completely before putting it back into its spooky little home.
5. Creepy Incense Burners
Nothing sets a spooky mood quite like an incense burner billowing mysterious smoke. Build a hollow ghost figure similar to the luminary, but carve an oversized, open mouth. Leave a small opening at the base to slide a lit incense cone inside. As the incense burns, thick fragrant smoke pours directly out of the ghost’s mouth.
Setting The Mood
Choose autumnal scents like frankincense, cedarwood, or spiced pumpkin to maximize the fall vibes. You will impress every single guest who walks into your living room. Just ensure you place the burner on a heat-safe ceramic tray to protect your furniture from ash.
6. Spooky Twine Garland
String together a whole family of little ghosts to drape across your staircase or entryway. Sculpt a dozen miniature phantoms, making sure to pierce holes horizontally through their sides. Bake or dry the batch completely before threading a long piece of baker’s twine through the holes. Space them out evenly and tie small knots on either side of each ghost to keep them in place.
Styling Your Garland
Mix natural wooden beads or handmade clay pumpkins between your ghosts for extra texture. Hang this lightweight garland over large mirrors, window frames, or open kitchen shelving. It instantly screams Halloween without looking tacky or overdone.
7. Dinner Party Place Card Holders
Host the ultimate monster bash and assign seats with custom clay place card holders. Mold small, heavy-bottomed ghosts so they stand completely flat on your dining table. While the clay remains soft, use a butter knife to slice a straight, shallow groove across the top of the head. Slide a thick piece of cardstock bearing your guest’s name right into the slot.
Elevating Your Table
Handwrite your name cards using a metallic gold or silver calligraphy pen. These little guys double as incredible party favors that your friends can take home. Who does not love a personalized, handmade gift?
8. Glow-in-the-Dark Specters
Turn off the lights and watch your handmade decorations emit an eerie, green glow. You can buy specialty glow-in-the-dark polymer clay at almost any local craft store. Knead the clay thoroughly to activate the luminescent properties before you start sculpting. Form your classic ghost shapes and bake them just like regular polymer clay.
Maximum Glow Hacks
Charge your finished ghosts under a bright UV flashlight or direct sunlight for a few hours. When night falls, line them up along your front porch railing or window sills. Trick-or-treaters will lose their minds when they spot these glowing specters.
9. Pumpkin-Holding Phantoms
Add a pop of vibrant color to your white clay ghosts by giving them tiny accessories. Roll out a tiny ball of orange clay and use a toothpick to press vertical ridges into the sides. Give your ghost two distinct arms and wrap them tightly around the miniature pumpkin. Bake the entire piece together so the pumpkin fuses securely to the ghost’s body.
Painting the Details
Take a tiny detail brush and paint a green stem on the pumpkin after the clay cools. You can also brush a light layer of pink pastel onto the ghost’s cheeks for an adorable, kawaii-inspired look. This specific design perfectly bridges the gap between cute and creepy.
10. Vintage Lace-Stamped Ghosts
Create sophisticated, highly textured ghosts that look like expensive boutique decor. Roll your clay flat and press a piece of vintage lace or a textured doily firmly into the surface. Peel the fabric back slowly to reveal a beautiful, intricate pattern stamped directly into the material. Cut out your ghost shapes using a template or cookie cutter.
Finding The Best Textures
Raid your local thrift store for cheap lace curtains, knit sweaters, or embroidered napkins. You can use almost any heavy fabric to press unique patterns into your clay. These textured ghosts look stunning when hung against dark, matte-painted walls.
11. Fridge Magnet Boos
Bring the spooky season into your kitchen with a collection of flat-backed ghost magnets. Sculpt your ghosts directly on a flat surface like a ceramic tile or glass cutting board. This technique ensures the back of the ghost remains completely flush. Once the clay dries, squeeze a dot of strong superglue onto the back and attach a small circular magnet.
Magnet Strength Matters
Always purchase neodymium magnets for this specific craft. Standard craft magnets rarely hold up the weight of hardened clay, and your ghosts will slide right down the fridge door. Strong magnets guarantee your child’s Halloween artwork stays pinned securely in place.
12. Taper Candle Huggers
Transform your boring brass candlesticks into a spectacular haunted centerpiece. Sculpt a ghost with long, outstretched arms while the clay remains highly pliable. Gently wrap the ghost’s arms around a standard taper candle, pressing lightly so it holds the cylindrical shape. Carefully slide the candle out before the clay dries so you do not trap the wax.
Perfecting The Fit
Always use the exact brand of candles you plan to display when sizing your huggers. Different taper candles feature slightly different diameters, and you want a snug fit. Slip these finished ghosts over dark black or blood-red candles for maximum dramatic effect.
13. Bookworm Ghosts
Give your home library a subtle Halloween upgrade with little specters reading books. Craft a sitting ghost figure, flattening the base so it rests easily on a flat shelf. Build a tiny open book out of a contrasting clay color, like dark brown or deep red. Position the ghost’s hands so it looks like it eagerly reads the tiny spellbook.
Bookshelf Placement
Tuck these scholarly phantoms between your favorite mystery novels or heavy vintage encyclopedias. They add an unexpected element of surprise for anyone browsing your collection. FYI, these also make brilliant gifts for the fantasy readers in your life.
14. Floral Crown Phantoms
Blend the delicate beauty of spring flowers with the moody aesthetic of autumn. Sculpt a standard ghost base and let it partially dry so it holds its shape. Roll microscopic pieces of pink and red clay into tiny rosettes, pressing them gently onto the ghost’s head. Arrange the tiny flowers into an elegant halo or asymmetrical crown.
Finishing Touches
Add tiny green clay leaves around the roses to make the floral crown pop. Seal the finished product with a glossy varnish to protect the delicate flower petals from chipping. This feminine take on Halloween decor looks phenomenal on a brightly lit vanity or bathroom shelf 👻.
Final Thoughts on Your DIY Spooky Decor
You absolutely have the power to transform simple blocks of clay into incredible, high-end seasonal decorations. Making your own clay ghost DIY ideas for Halloween decor saves you serious cash while giving your home a totally unique vibe. Plus, working with your hands offers an incredibly therapeutic break from staring at screens all day.
Gather your crafting supplies, clear off your kitchen table, and start sculpting your own haunted family. Do you plan to make the glowing specters, or will you start with the functional ring holders? Whatever you choose, trust your creativity and embrace the glorious imperfections of handmade art. Have a spectacular, spooky, and safe Halloween season!