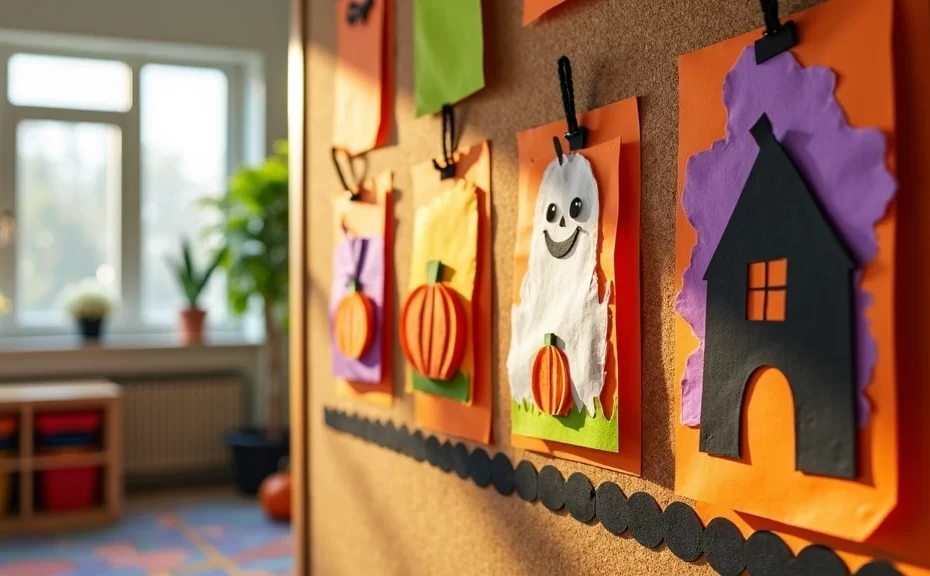
Remember that time you tried a “simple” fall craft and ended up vacuuming glitter until Thanksgiving? Yeah, me too. Teaching art to young kids during October often feels like wrangling sugar-crazed gremlins. 😉 But you still absolutely need your classroom bulletin boards looking festive, vibrant, and fun.
I have compiled a foolproof, teacher-tested list of 14 spooktacular Halloween art projects for elementary students that actually work in the real world. These specific classroom-tested crafts require minimal prep, use basic budget-friendly supplies, and keep those little hands incredibly busy. Do you want to create some creepy, low-stress magic this week? Grab your scissors and liquid glue!
1. Q-Tip Skeletons on Black Paper

Kids absolutely love building realistic bones. You just need heavy black construction paper, standard cotton swabs, and a trusty bottle of liquid school glue.
Have your students map out the ribs, spine, and limbs before they start permanently gluing anything down. Pro tip: cut a handful of Q-tips in half beforehand so students can easily form the smaller finger and toe bones.
Why This Activity Works
- Builds essential fine motor skills.
- Teaches basic human anatomy visually.
- Requires absolutely zero messy paint.
2. Tie-Dye Coffee Filter Bats
Do you want a spectacular window display without the massive cleanup headache? Grab a giant stack of standard white coffee filters and your darkest washable markers.
Students enthusiastically scribble moody colors like purple, black, and navy blue all over the filters. Next, they spray the paper generously with a water bottle and watch the ink bleed together into a spooky tie-dye effect.
Once the filters dry completely, kids cut them directly in half to form scalloped bat wings. They glue these colorful wings to a simple black paper body for an incredibly striking visual.
3. Shaving Cream Puffy Paint Ghosts
Nothing screams Halloween quite like a friendly ghost boasting a fabulous 3D texture. You mix equal parts white school glue and basic foaming shaving cream to create the ultimate sensory paint.
The resulting mixture feels exactly like literal marshmallow fluff, and young kids go absolutely wild for the tactile experience. They dollop the thick puffy paint onto dark cardstock to form swirling, billowing ghost shapes.
Students press two giant googly eyes into the wet fluff before it begins to set. FYI, this thick masterpiece takes a full 24 hours to cure, so plan your classroom drying rack space accordingly!
4. Apple Stamped Jack-o’-Lanterns
Please do not throw away those sad, bruised apples sitting in your fridge. Slice them right down the middle, dip the flat side into bright orange tempera paint, and stamp them firmly onto sturdy paper.
The natural, slightly lumpy shape of an apple mimics a plump farm pumpkin perfectly. Once the orange paint dries completely, students grab their black permanent markers to draw silly, weird, or terrifying Jack-o’-lantern faces.
As an art teacher, I love this project because it promotes sustainable classroom practices by upcycling food scraps. Plus, stamping requires zero advanced drawing skills, making it accessible for every single student.
5. Watercolor Spider Web Tape Resist
Tape resist art feels like actual magic to first and second graders. Give each child a thick piece of watercolor paper and a roll of thin masking tape.
Students carefully tear small strips of tape to form a geometric, intersecting spider web design across their page. Then, they wash dark, moody watercolors over the entire canvas, completely ignoring the tape lines.
Peeling the dry tape off reveals crisp, stark white webs popping brilliantly against a spooky midnight sky. The satisfying big reveal will absolutely earn you serious cool-teacher points.
6. Upcycled Toilet Paper Roll Mummies
You probably possess a secret stash of cardboard tubes hiding in your supply closet right now. Grab them immediately, along with some cheap white yarn or torn strips of muslin fabric.
Students simply wrap the white material tightly around the cardboard tube, securing the loose ends with a quick dab of glue. They stretch the fabric just enough to leave a small gap near the top.
Essential Supply Checklist
- Clean cardboard tubes.
- White yarn, medical gauze, or scrap fabric.
- Assorted sizes of googly eyes.
- Liquid glue or glue sticks.
7. Straw-Blown Paint Monsters
Do you want to hear contagious, genuine giggles echoing through your classroom? Drop a small puddle of watered-down tempera paint onto the center of a piece of thick paper.
Hand your students a standard drinking straw and instruct them to blow the paint forcefully in different directions. The random splatter effect creates wild, chaotic, and completely unique monster bodies with crazy paint tentacles.
When the paint finally dries, children attach five or six mismatched eyes and sketch sharp little teeth. CRITICAL WARNING: aggressively remind them to blow OUT, not suck IN!
8. Tissue Paper Frankenstein Suncatchers
Vibrant window art instantly transforms a dreary October classroom into a highly festive, engaging space. Cut an empty Frankenstein head border out of heavy black cardstock.
Give your students handfuls of torn green tissue paper squares to stick directly onto a sticky sheet of clear contact paper. They seal the messy green collage by pressing another sheet of contact paper directly over the top.
Students attach the black paper frame over the green background and trim the messy edges with scissors. You just helped them create a stained-glass monster that glows brilliantly in the autumn sunlight.
9. Creepy Crawly Handprint Spiders
Handprint crafts capture a specific, fleeting moment in childhood development, making them the ultimate parent-pleasing keepsake. Paint a child’s four fingers and palm solid black, making sure you skip the thumb entirely.
Press the painted hand firmly down on paper, then re-paint and press the OTHER hand down facing the exact opposite direction. The overlapping round palms create the spider’s plump body, while the eight splayed fingers form the creepy legs.
Students use a silver marker to draw a web string dropping from the top of the page down to the spider. IMO, this remains the absolute best craft for kindergartners who still crave messy, tactile learning experiences.
10. Spooky Haunted House Silhouettes
Older elementary students absolutely thrive when you introduce this moody, atmospheric art project. They start by actively blending yellow, orange, and red chalk pastels to create a fiery, glowing sunset background.
Next, students sketch and cut out a jagged, asymmetrical haunted house from solid black construction paper. They glue the stark black silhouette directly over their vibrant, smudged sunset.
Kids add tiny, intricate details like black bats flying in the sky or a crooked, dead tree clawing at the moon. This specific project effectively teaches color contrast, advanced blending techniques, and basic spatial composition.
11. Crumpled Tissue Paper Candy Corn
You either love eating candy corn by the handful, or you completely despise it. Regardless of your personal snacking preferences, this iconic Halloween treat inspires a fantastic, texture-heavy craft.
Draw a massive triangle on a piece of paper and divide it into three distinct horizontal sections. Students vigorously crumple tiny squares of white, orange, and yellow tissue paper into tight little spheres.
They glue the crumpled balls into the corresponding sections until the entire candy corn looks incredibly fluffy and three-dimensional. This continuous, repetitive pinching motion serves as fantastic occupational therapy for developing hand strength.
12. Painted Fall Leaf Ghosts
Send your kids outside on a brisk nature walk to collect broad, dry, recently fallen leaves. Oak and maple leaves usually provide the most ideal surface area for holding wet paint.
Students paint the entire front of the leaf with a surprisingly thick coat of white acrylic paint. You might need to instruct them to apply two coats to fully mask the brown and red autumn colors underneath.
Kids grab a black sharpie to draw three dark, elongated ovals for a classic howling ghost face. You can easily string these painted leaves together to construct an eco-friendly Halloween garland for your whiteboard!
13. Arching Paper Plate Black Cats
Flimsy paper plates remain the undisputed, heavyweight champions of elementary school art supplies. Students cut a standard paper plate perfectly in half to form the arched, terrifying back of a frightened alley cat.
Kids use the remaining half of the plate to cut out a round head, a long curly tail, and two sharp, pointy ears. They assemble the various pieces using a stapler, then paint the entire furious feline pitch black.
Fun Customization Ideas
- Glue on stiff pipe cleaner whiskers.
- Use glowing neon paint for the eerie cat eyes.
- Attach a tiny, colorful ribbon collar around the neck.
14. Fluffy Cotton Ball Witches
Round out your spooky season lesson plans with the classic, green-faced witch. Students cut out a large green circle for the main face and a tall black triangle for the iconic, pointy witch hat.
The real classroom fun begins when kids pull and stretch out standard cotton balls to create wild, frizzy, untamed witch hair. You can easily dye the cotton balls orange or purple by soaking them in water and food coloring the day before.
Students generously glue the fluffy, chaotic hair around the green face and firmly pop the black hat on top. This specific craft consistently delivers the perfect, crowd-pleasing balance of creepy and cute.
Time to Get Crafty This October!
Who knew you could create such incredible masterpieces using basic household staples and an industrial-sized bottle of school glue? These 14 spooktacular Halloween art projects for elementary students guarantee a classroom full of engaged, creative kids who actually enjoy the artistic process.
You dodge the dreaded teacher burnout by keeping your supply lists exceptionally short and your instructions delightfully simple. Which of these creepy, fun crafts will you introduce to your little monsters first?
Stock up on those googly eyes, embrace the inevitable messy desks, and make this October your most creative teaching month yet. 🙂 Happy crafting!