You know that feeling? You open a dusty box in the attic or slide a heavy album off a shelf, and the moment you touch the pages, you’re transported. The slightly musty smell of old paper, the delicate feel of a faded photograph, the whisper of a story waiting to be told. That’s the magic of vintage. But here’s the secret: you don’t need a trunk full of heirlooms to create it. With the right vintage scrapbook ideas, you can craft pages that feel like they’ve been cherished for generations, starting with the memories you’re making right now. Let’s unlock that old-world charm together.
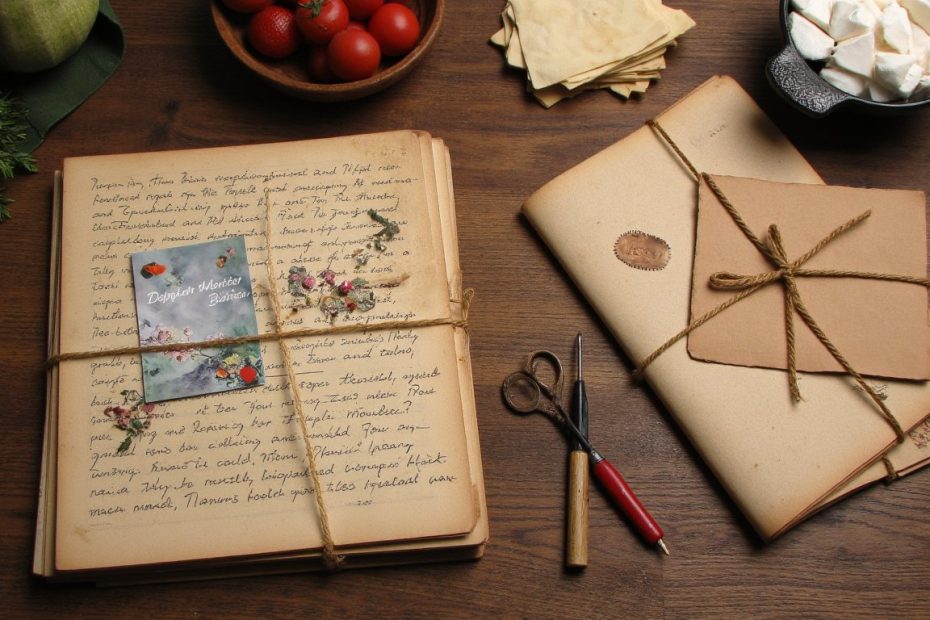
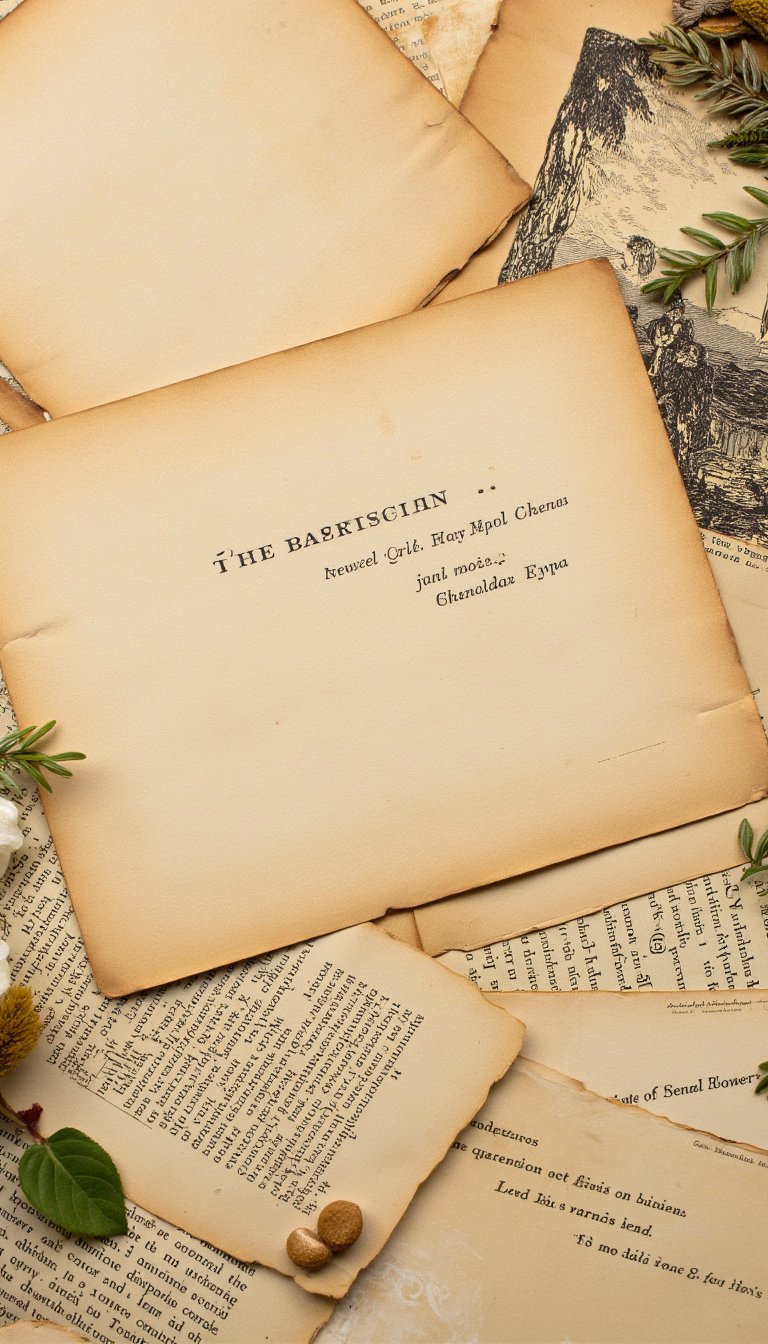
1. The Found Ephemera Title Page
Don’t just write the album’s title; build a collage that sets the entire mood. Hunt for vintage postcards, ledger paper, or book pages to use as your background. Layer on a focal point like an old monogram sticker, a piece of ornate lace, or a stamped library card. This first page should whisper, “Something beautiful and personal lives inside these covers.”
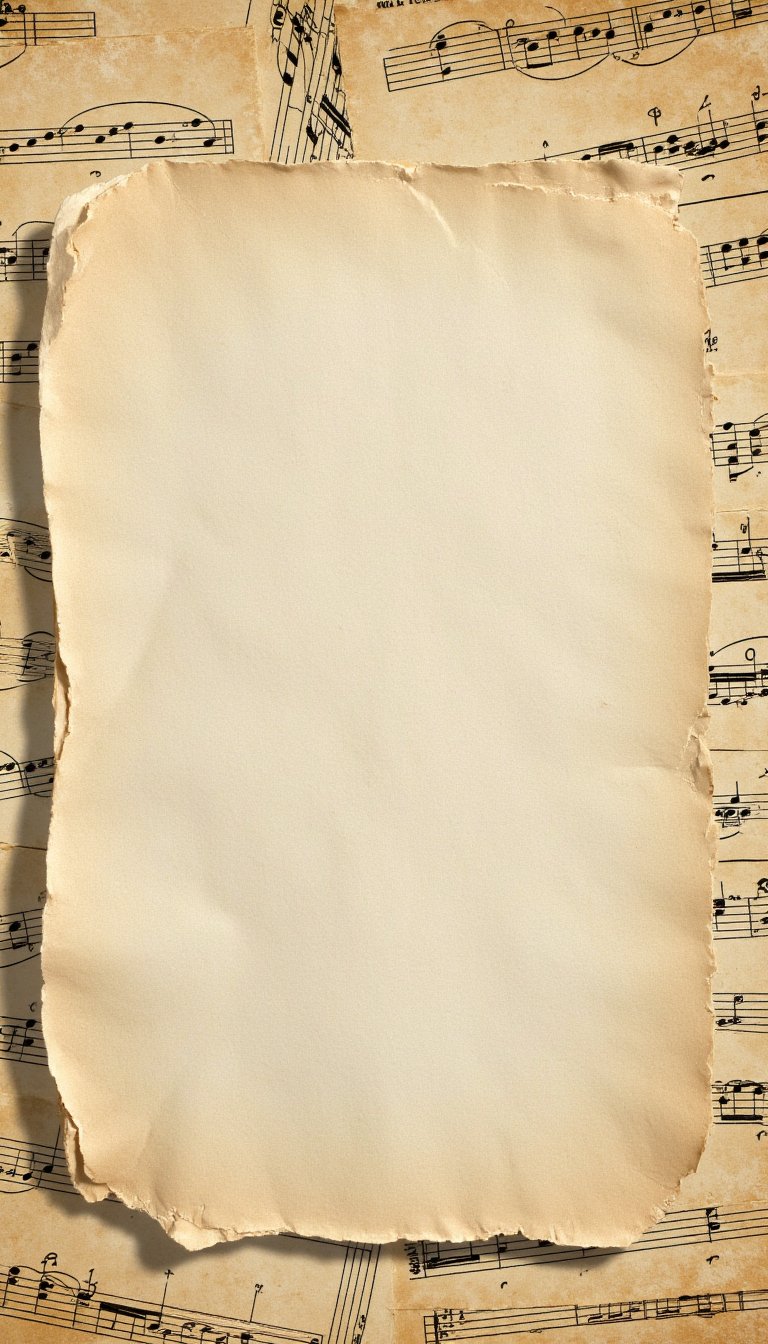
2. Tea-Dyed Paper for Instant Age
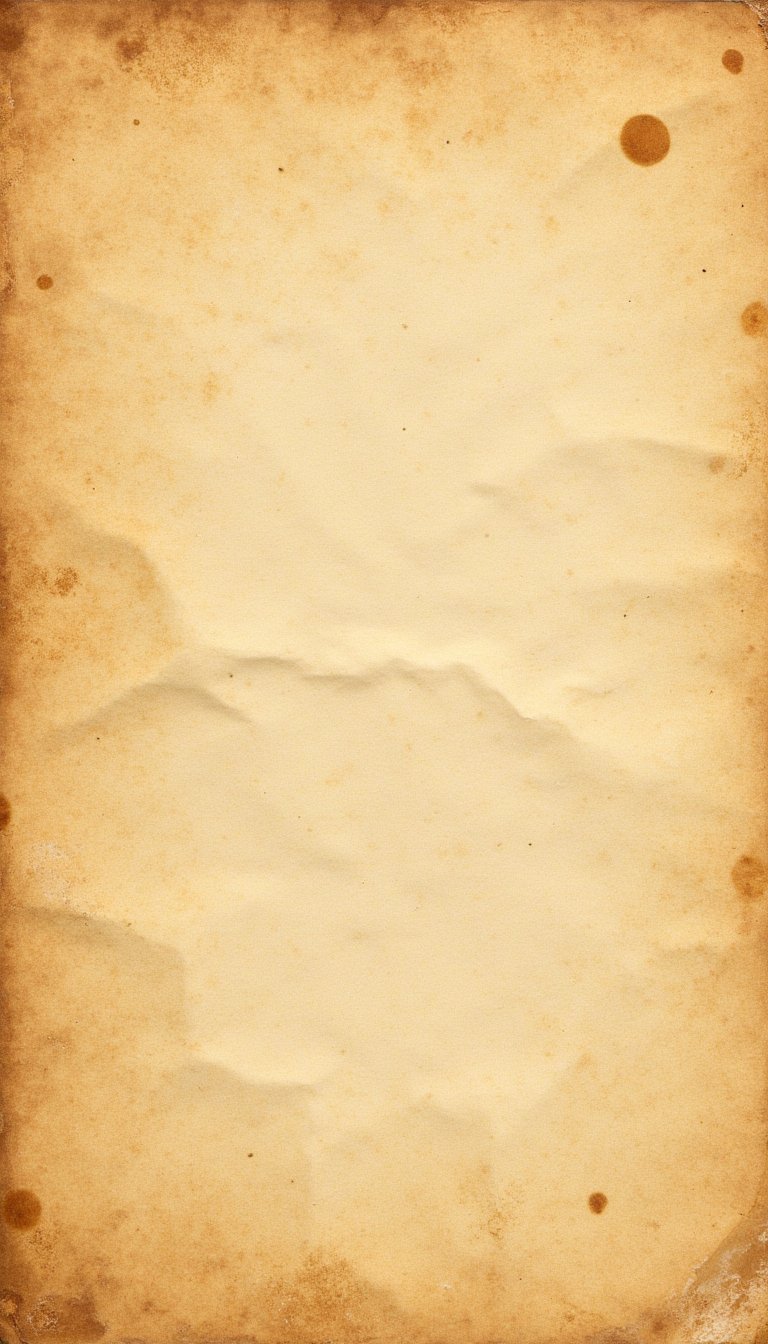
This is the easiest trick in the book for authentic vintage scrapbook ideas. Brew a strong pot of black tea or coffee, let it cool, and gently crumple and dip your plain cardstock or paper doilies. The result? Beautifully mottled, sepia-toned pages that look decades old. It adds texture and a warm, nostalgic base for your photos instantly.
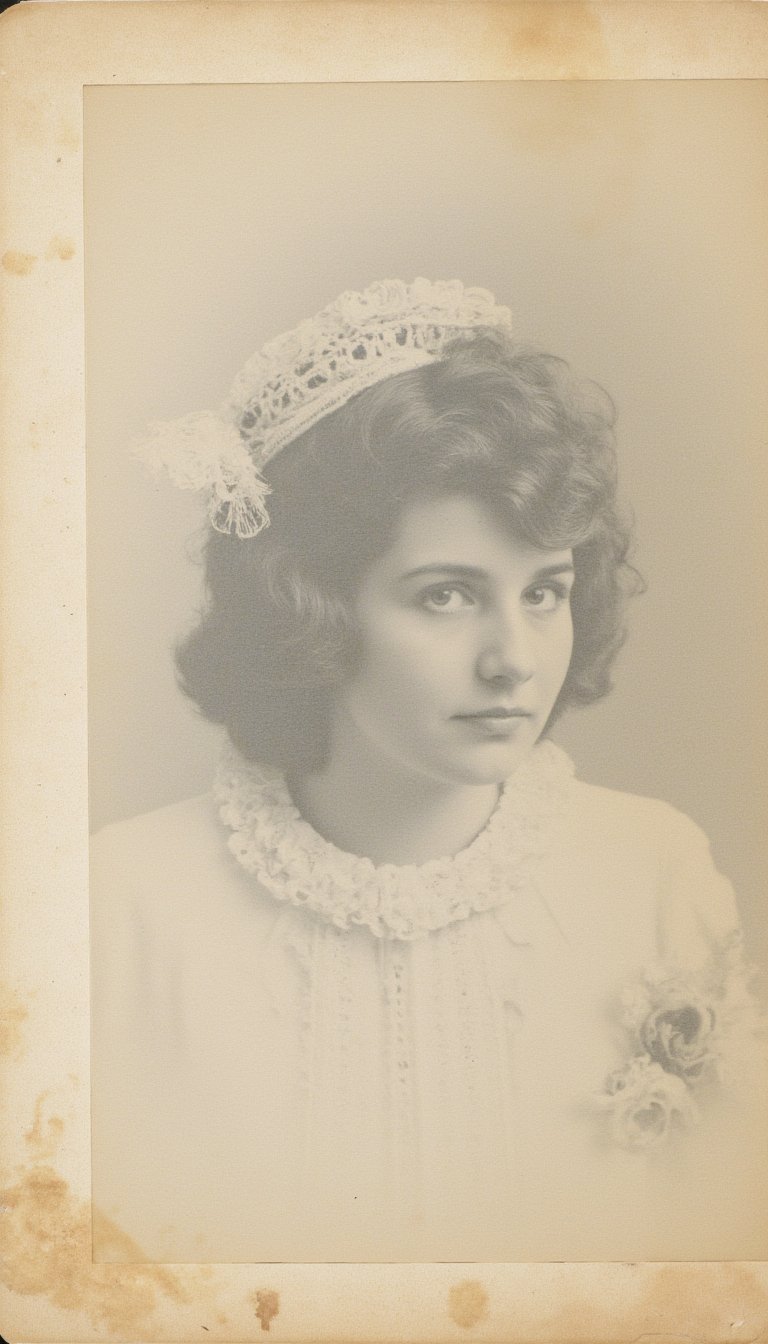
3. Cabinet Card & Tintype Replicas
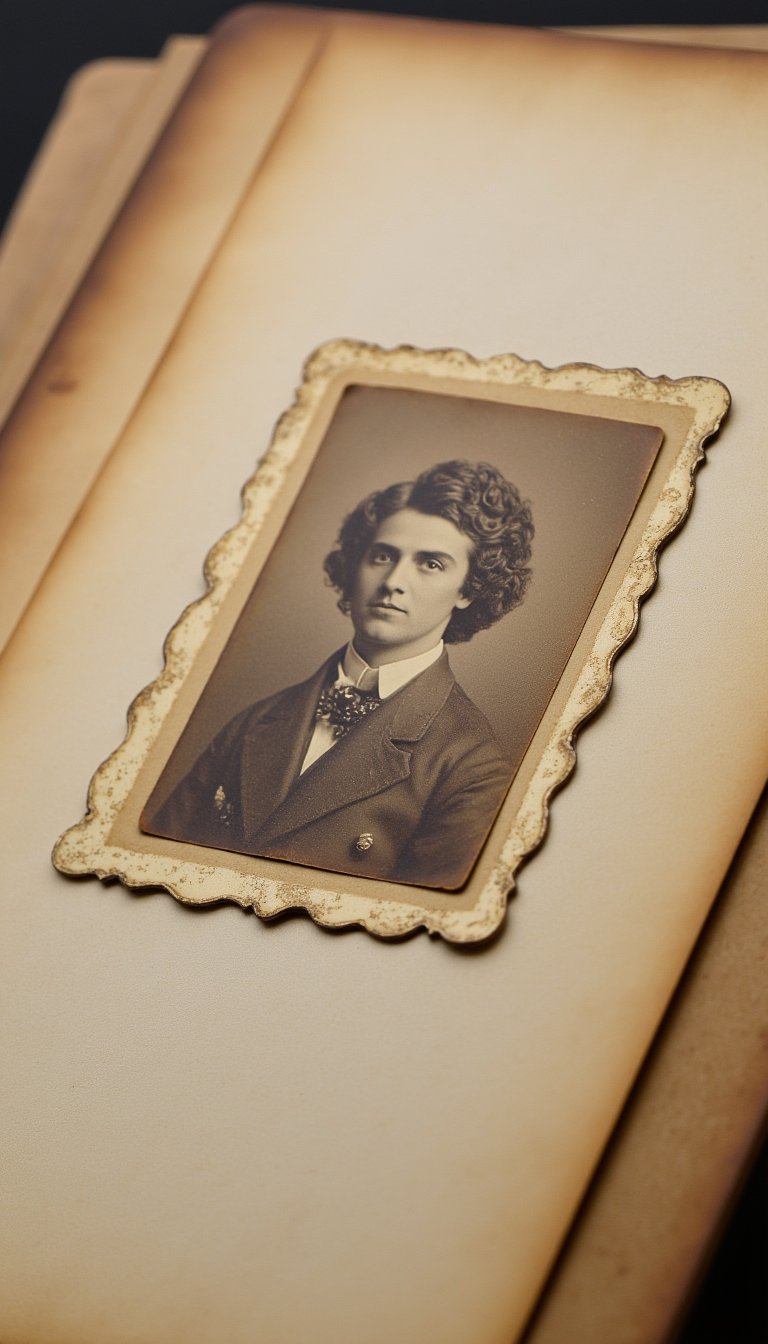
Give your modern photos a 19th-century makeover. Print a favorite portrait in sepia or black and white, then trim it with ornate, scalloped edges. Mount it on a slightly larger piece of thick, textured cardstock. For the full effect, add a handwritten date and name in script along the bottom border, just like the original photographers did.
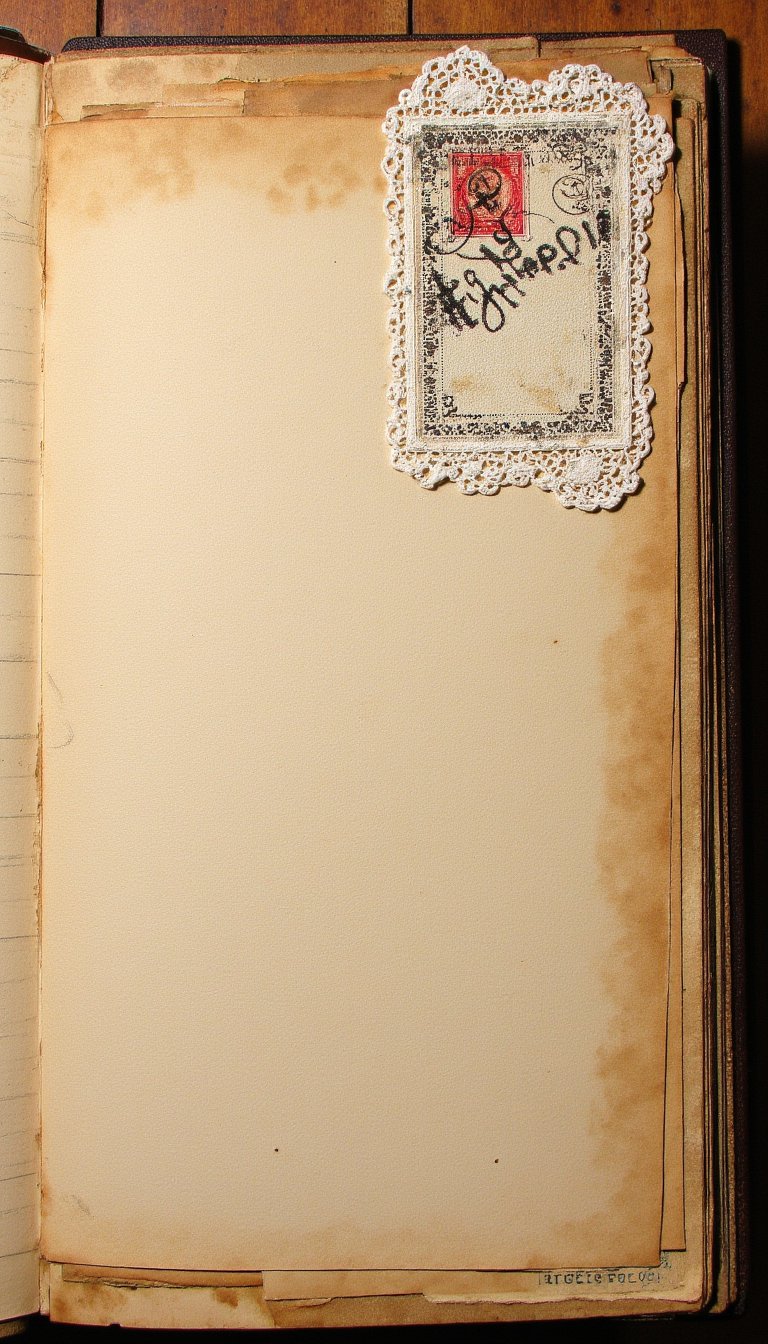
4. Vintage Postmark Journaling
Instead of just writing the date, make it an artful element. Use a rubber stamp with an old-fashioned postmark design, or carefully cut one from a real vintage envelope. Adhere it near your photo and use the circular shape as a guide for your handwritten notes. It frames your memory with a sense of history and place.
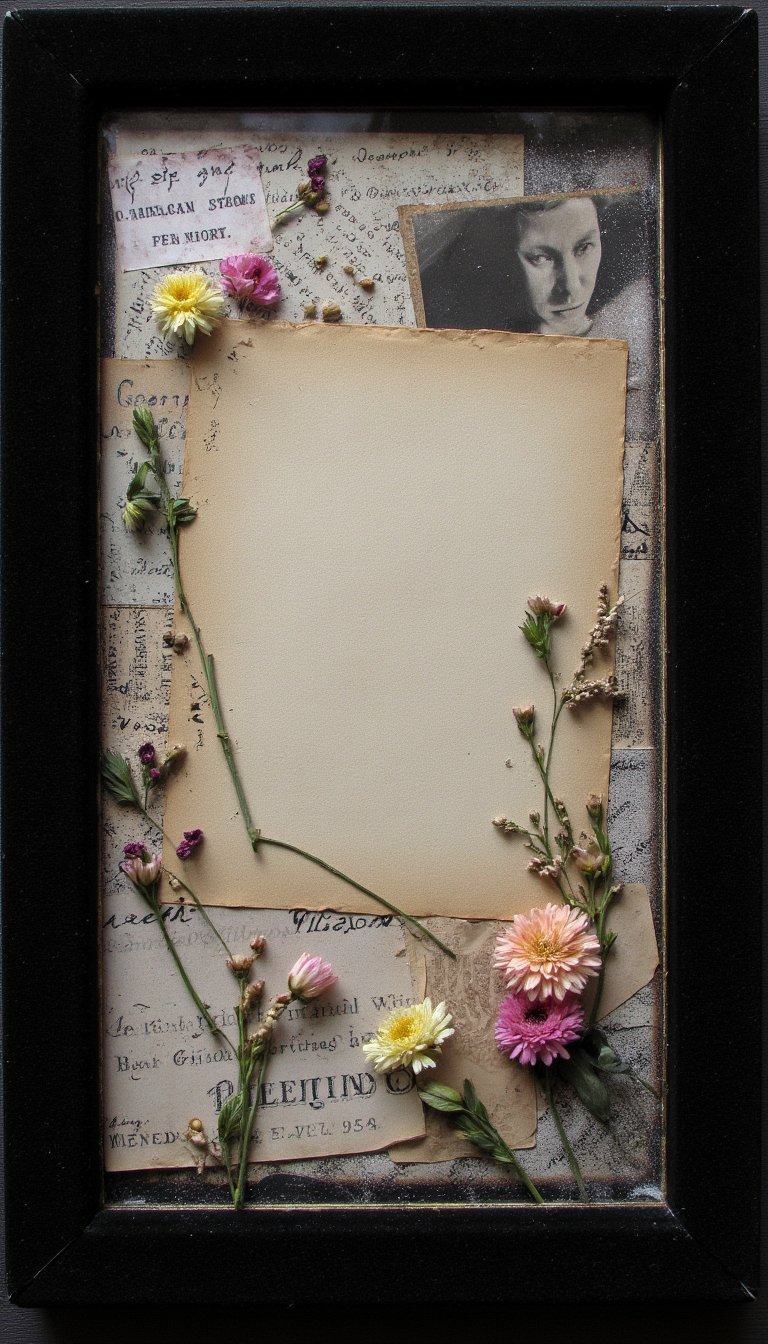
5. Herbarium & Pressed Flower Pages
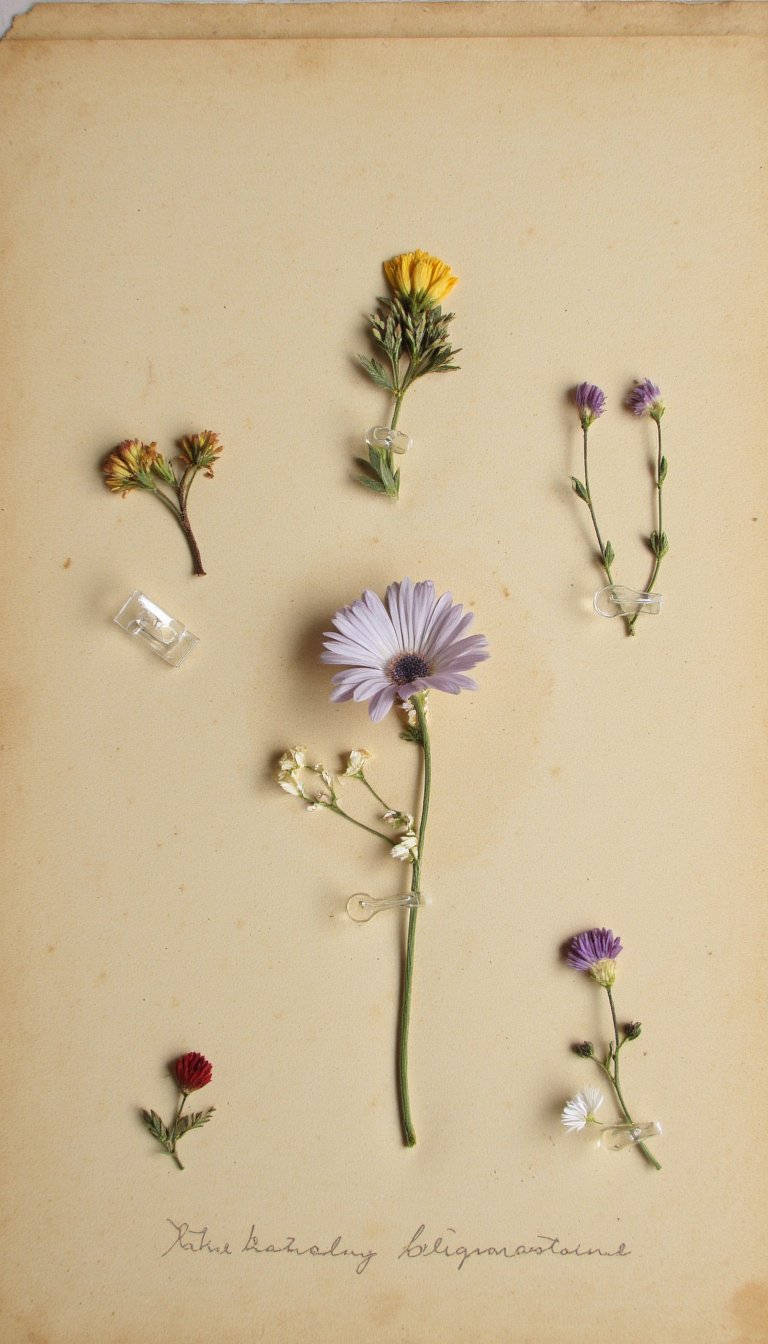
Channel a Victorian botanist. Preserve flowers from a special event—a wedding bouquet, a garden party, a birthday corsage. Press them flat and use tiny, clear photo corners or delicate washi tape to secure them to the page. Label them with their name and date in fine, elegant handwriting. The natural, faded colors are pure vintage magic.
6. Library Pocket Memorabilia Holders
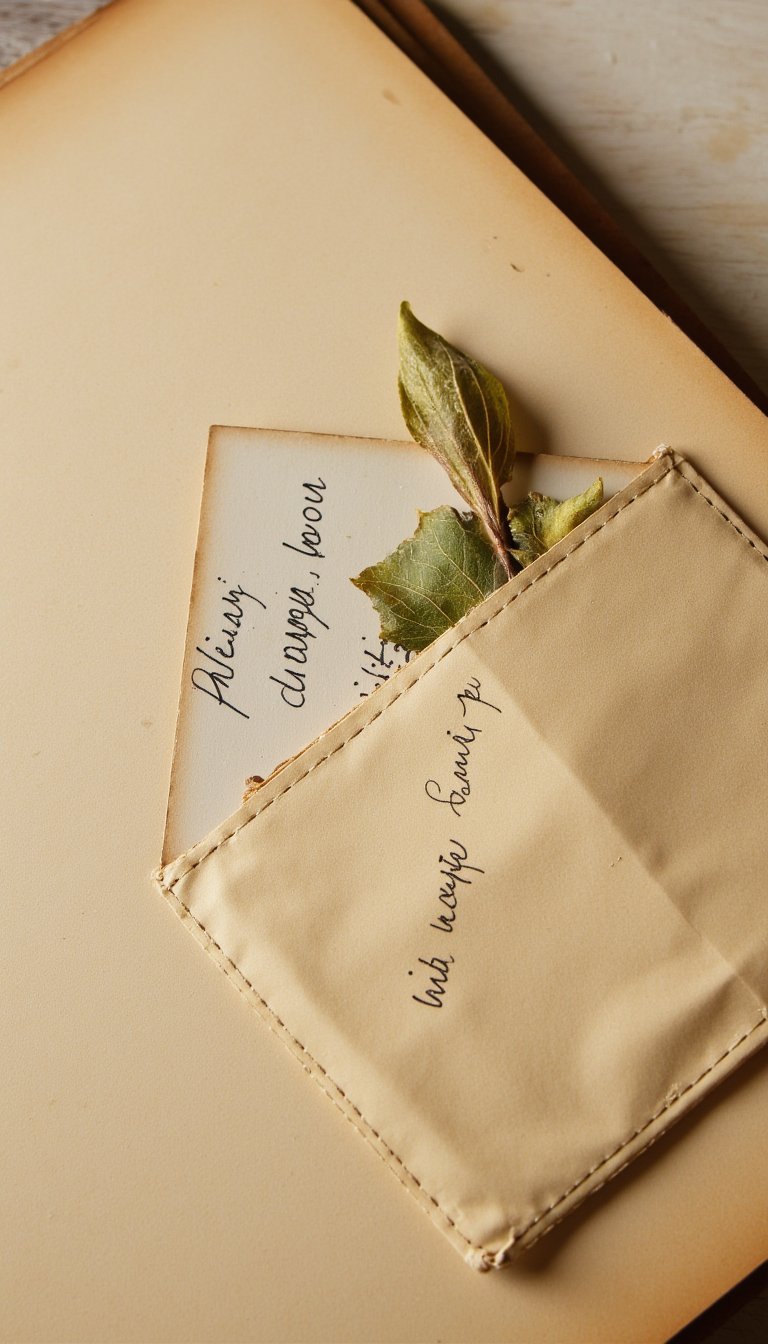
Some treasures are too bulky or precious to adhere flat. Sew or glue a small paper library pocket onto your page. Now you have a secret compartment for ticket stubs, love letters, pressed leaves, or a grandmother’s recipe card on a tiny slip of paper. It invites interaction and keeps fragile items safe.
7. Hand-Stitched Fabric Borders
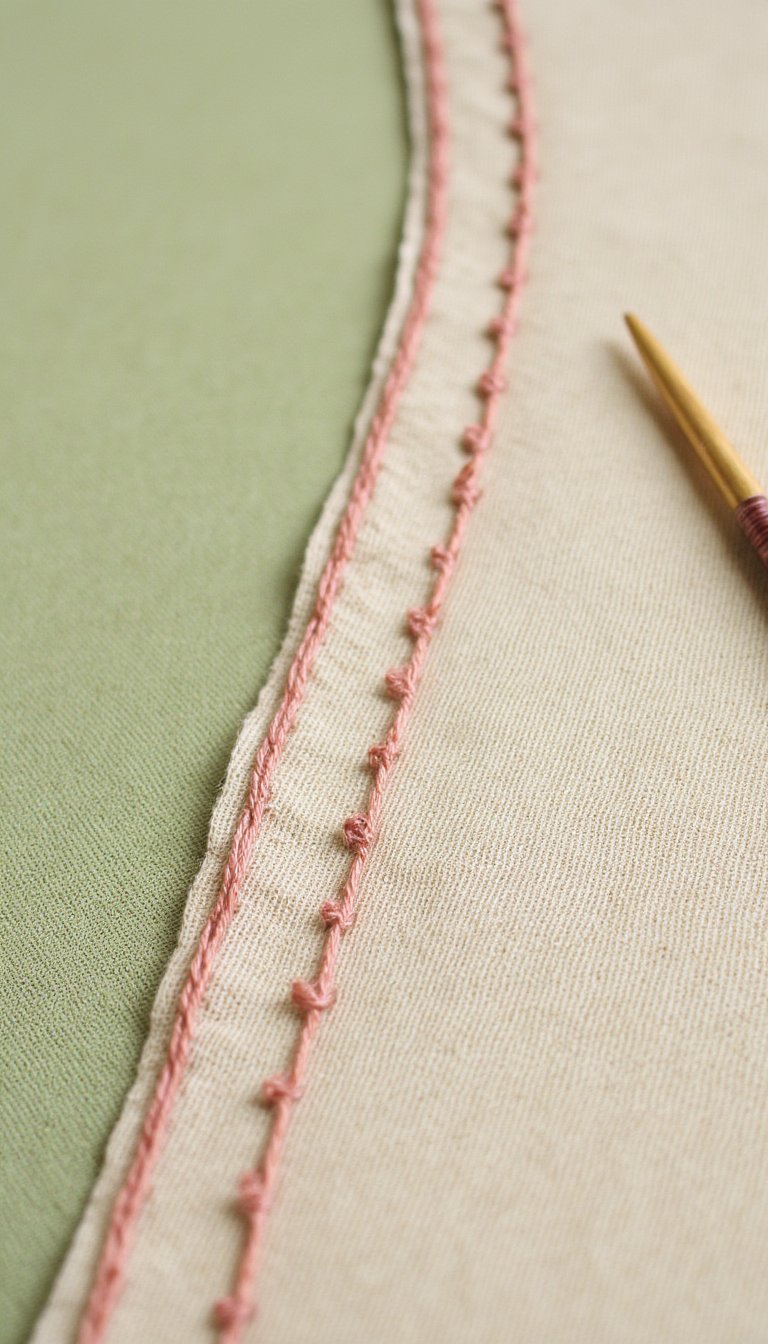
Before glue sticks, there was needle and thread. Add a homespun feel by stitching a border around your photo mat or along the edge of your page. Use embroidery floss in muted colors like ecru, sage green, or faded rose. A simple running stitch or cross-stitch detail screams lovingly handmade.
8. Transferred Photo onto Muslin

For a soft, dreamy, and truly antique look, use photo transfer medium to place an image onto a piece of natural muslin or linen. The fabric’s texture gives the photo a beautiful, painterly quality. Once dry, you can stitch the fabric square directly onto your page background for a stunning, tactile focal point.
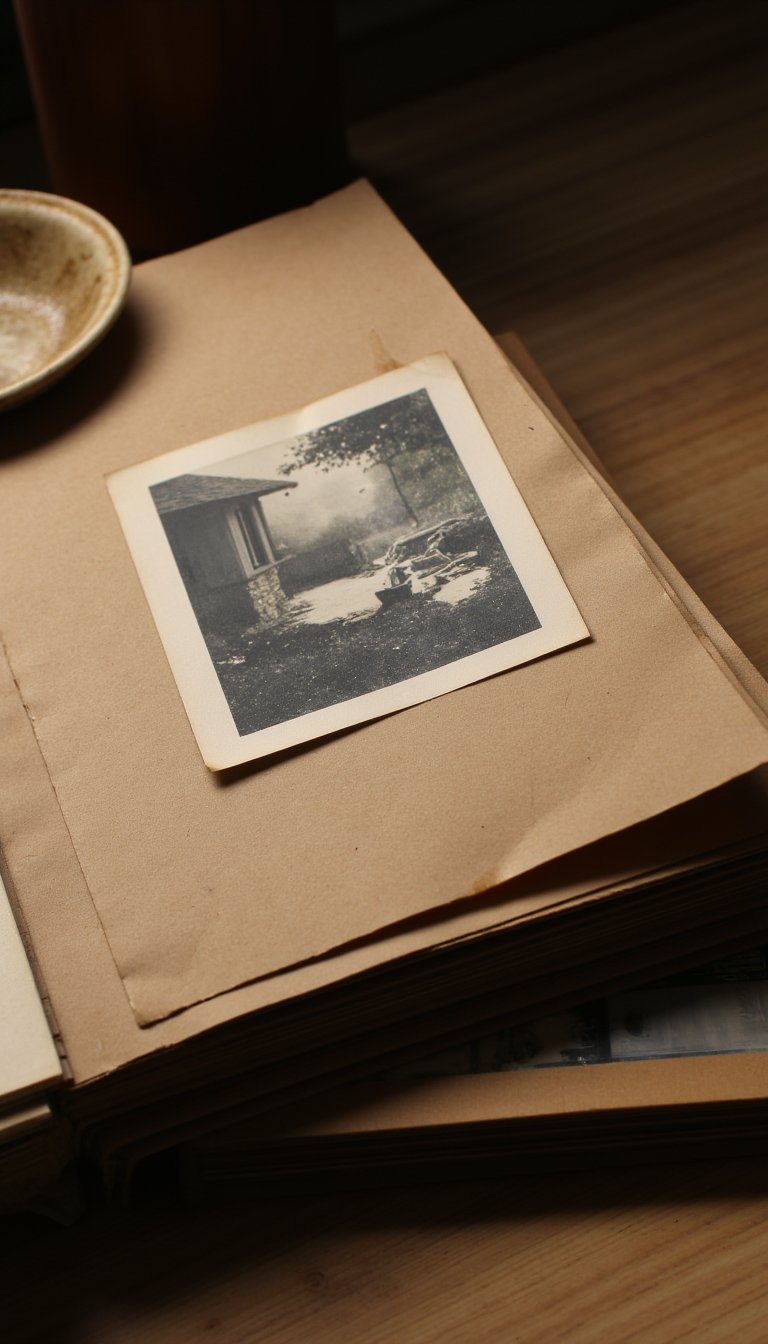
9. Antique Book Page Backgrounds
Raid a thrift store for a falling-apart classic novel or dictionary. The beautifully yellowed pages with their dense, old typeset are the perfect foundation for your photos. Adhere a full page as your background, or cut out interesting paragraphs or illustrations to layer as unique ephemera.
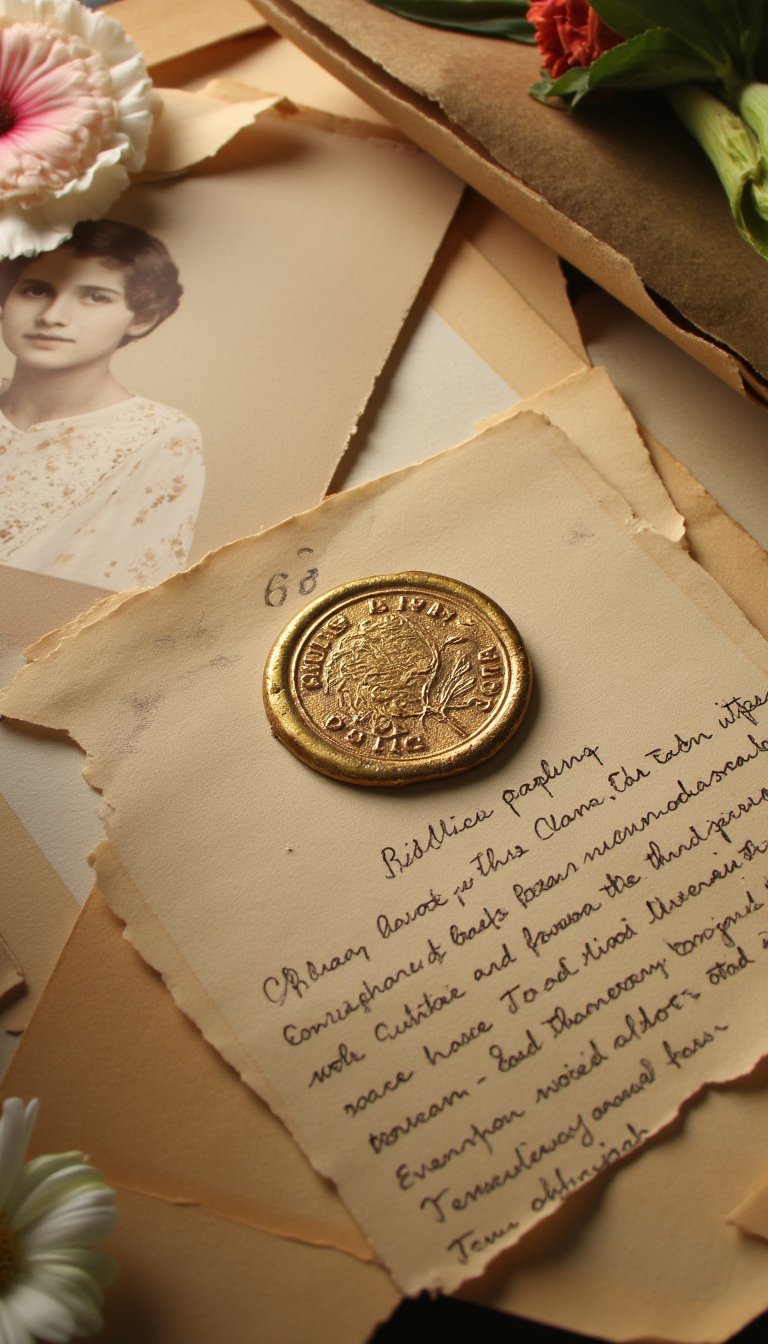
10. Wax Seal Embellishments
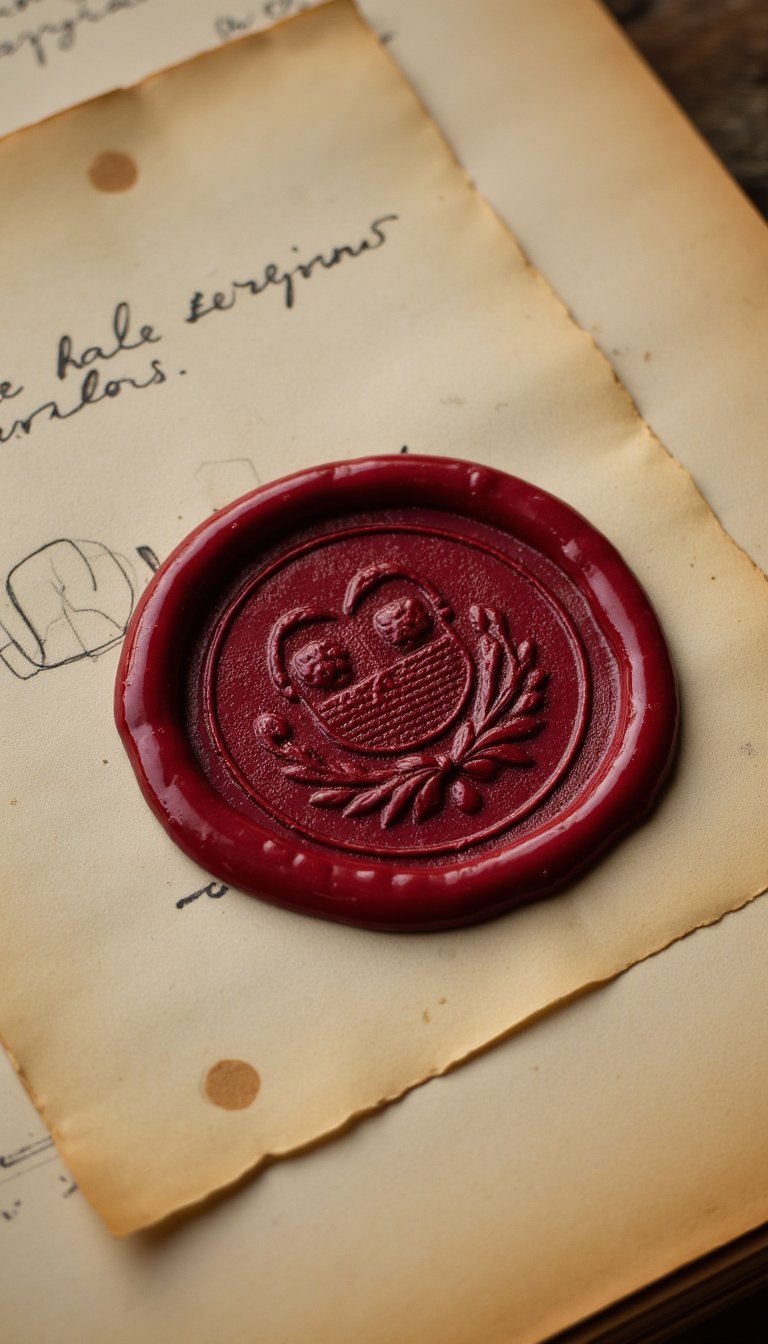
Nothing says “old world” like the look of sealing wax. Use a wax stamp with an initial, floral, or crest design to create custom embellishments. You can make them directly on your page (be careful!) or create them separately on parchment and glue them on. They add incredible dimension and elegance.
11. “Specimen” Labels for Everyday Items
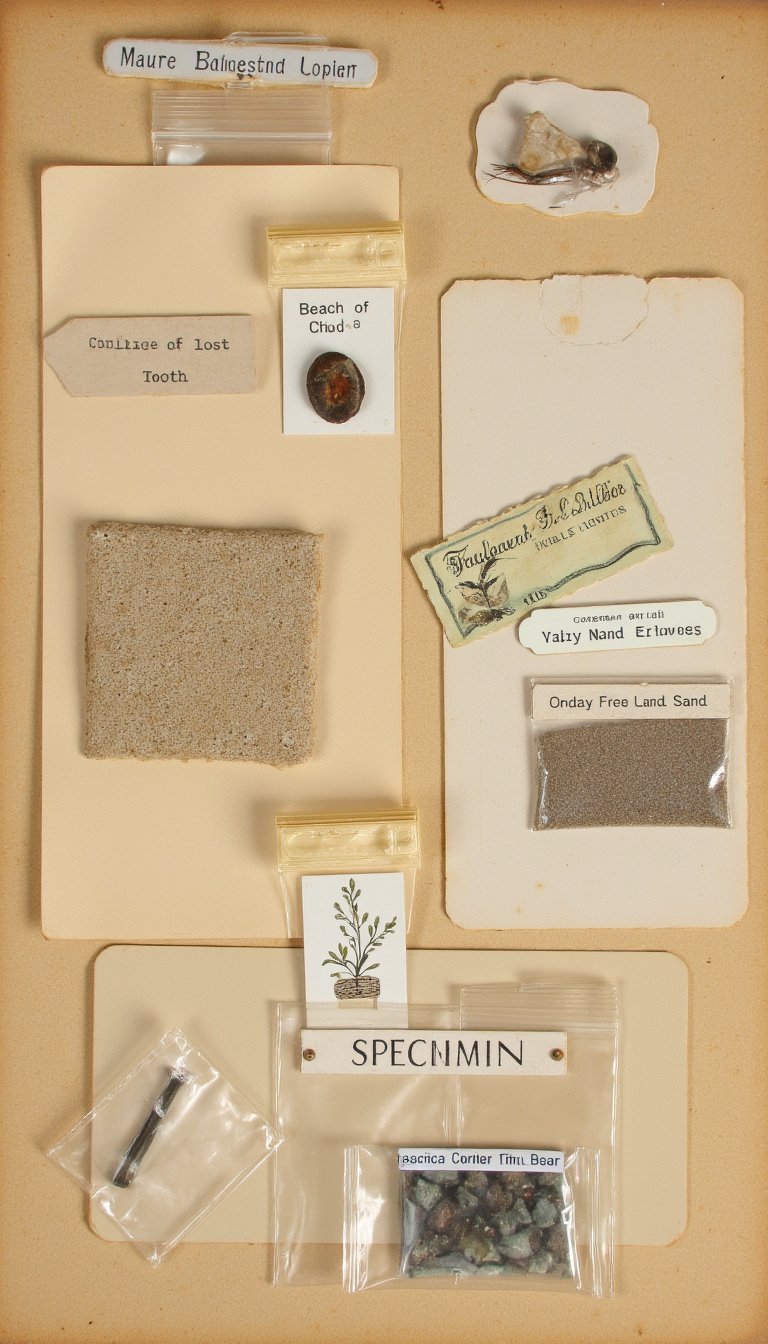
Turn ordinary moments into curated displays. Create tiny, typed or handwritten labels as if you’re cataloging artifacts. “Specimen: First Lost Tooth, 7/18/2023” or “Sample: Sand from Brighton Beach.” Pair them with the actual item (in a small bag) or a photo, mounted with photo corners for a scientific, yet charming, vibe.
12. Vintage Advertisement Collages
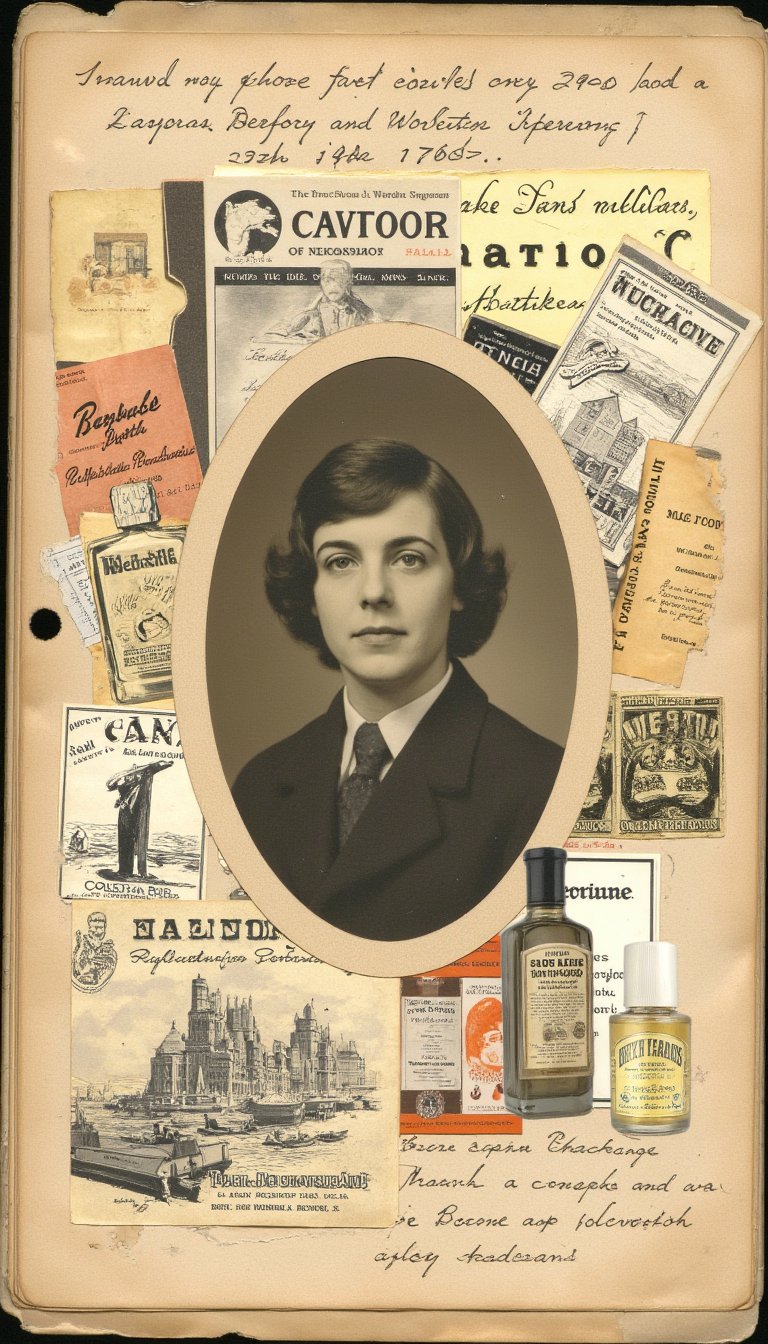
Find scans of old ads from magazines—think 1920s perfume, 1950s appliances, or 1970s travel. Cut out compelling graphics and typography. Use them to create a border around a photo from a similar era, or collage them into a background that tells a story about the time period your memory lives in.
13. Piano Roll or Sheet Music Layers
Music is a direct line to memory. Use pages from old sheet music or even a cut piece of a player piano roll as a layered background. It’s perfect for pages about family gatherings, holidays, or any moment where music played a part. The notes and staff lines create a beautiful, graphic texture.
14. Daguerreotype-Inspired Frames
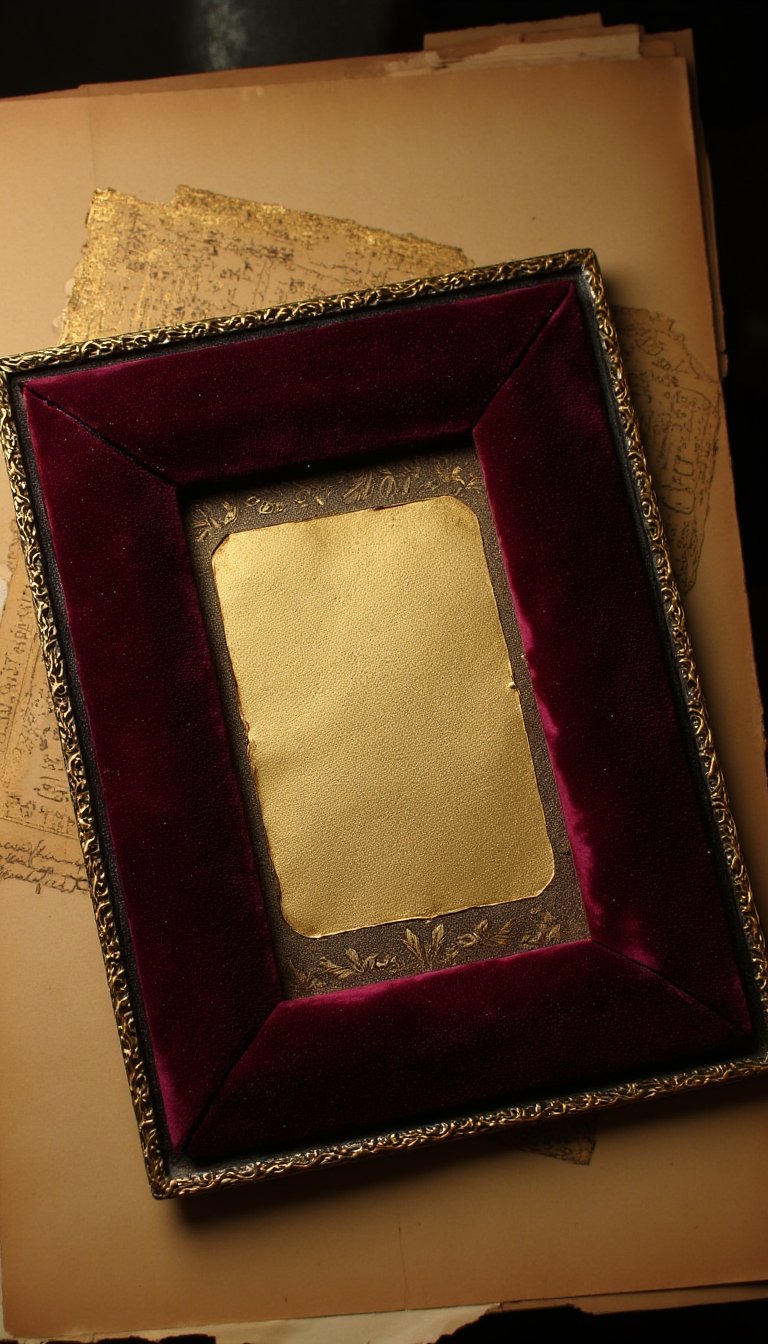
Mimic the look of those very first photographs. Create a frame from velvet or rich, patterned paper. Place your photo inside, and then add a “mat” cut from a piece of brass-colored metallic paper or cardstock behind a piece of clear acetate or plastic to simulate the glass and metal casing of a daguerreotype.
15. Travelogue with Map Fragments
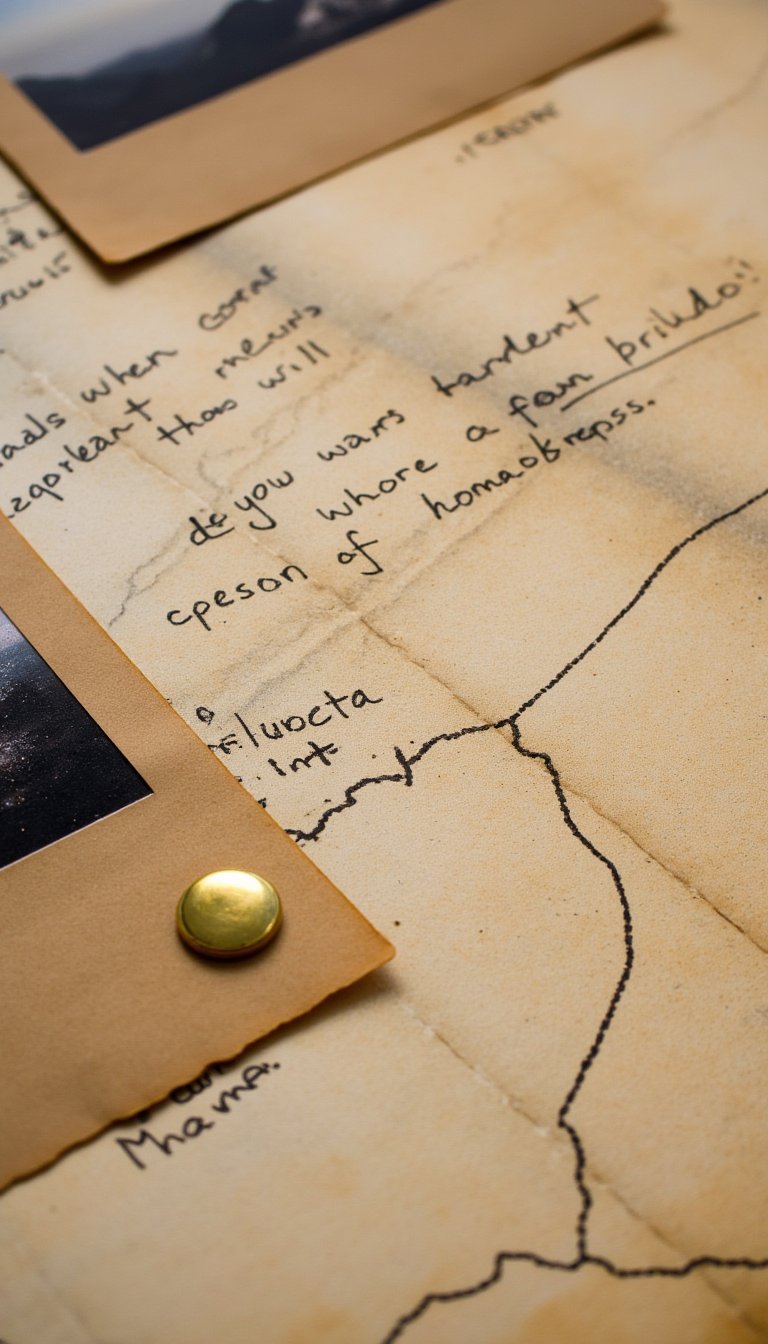
Document a trip the old-fashioned way. Tear or cut sections from a vintage-style map (or a real old map if you have one). Use the fragment showing your destination as the main background. Attach photos with small gold brads, and draw a dotted “travel route” from your hometown to the location with a fine-tip pen.
16. Calling Card & Carte de Visite Layout
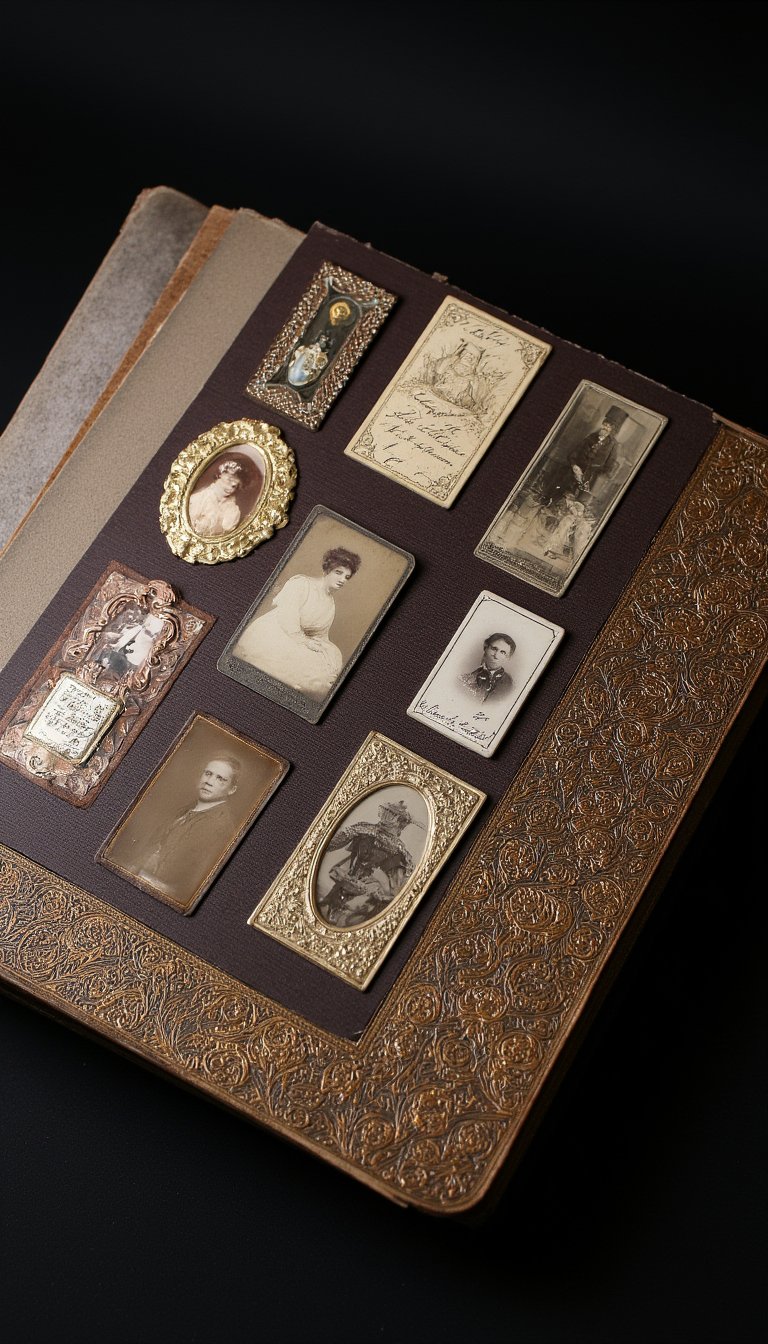
In the Victorian era, people exchanged decorative calling cards. Create a page that mimics an album filled with these cards. Print small portraits of family or friends, mount them on cardstock, and embellish with tiny floral borders. Arrange them in a grid on a dark, rich background page.
17. Tape Transfer for Faded Imagery
This technique creates a beautifully ghosted, translucent image. Use clear packing tape to lift the ink off a printed image (laserjet works best) or a vintage magazine page. Burnish well, soak in water, and rub the paper pulp away. You’re left with the image on the tape, which you can apply anywhere for a ethereal look.
18. Corrugated Cardboard as a Rustic Mat
Peel the top layer off a piece of corrugated cardboard to reveal the ridged interior. Cut it to size and use it as a mat for a rugged, industrial, or Depression-era style page. It adds fantastic texture and a sense of making do with what you have—a very vintage concept.
19. Simulated Ambrotype with Negative Space
Ambrotypes are glass positives with a dark backing. Simulate this by printing your subject in positive on clear transparency film. Mount it over a piece of black cardstock or velvet. The dark background will make the clear areas look black, while your image appears in silvery tones. It’s a stunning, advanced vintage technique.
20. Vintage Office Supplies: Paper Clips & File Tabs
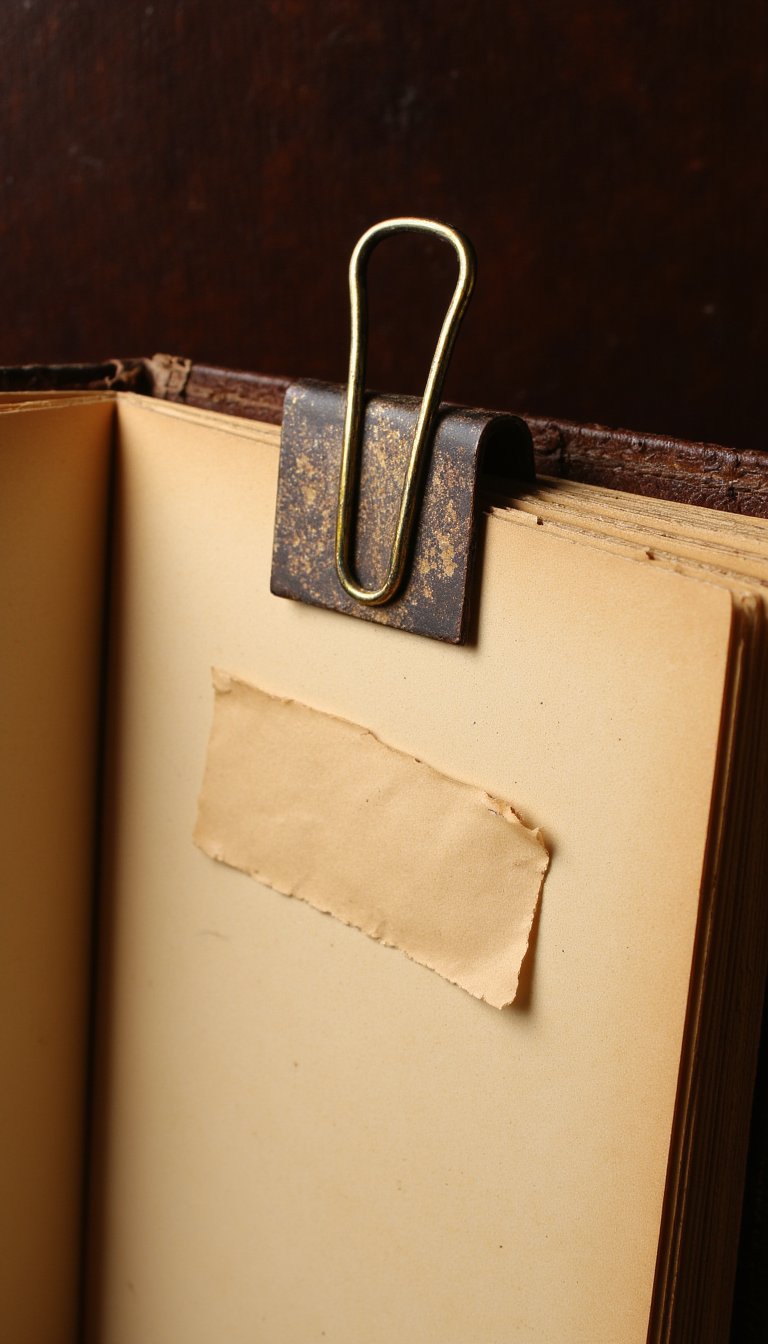
Incorporate genuine old office supplies. Use a large, brass paper clip to hold a stack of journaling cards or small photos. Adhere a manila file tab as a label for a section of your album. These functional items add authentic, utilitarian charm and a touch of nostalgia for a bygone workplace.
21. Locket-Inspired Miniature Portraits
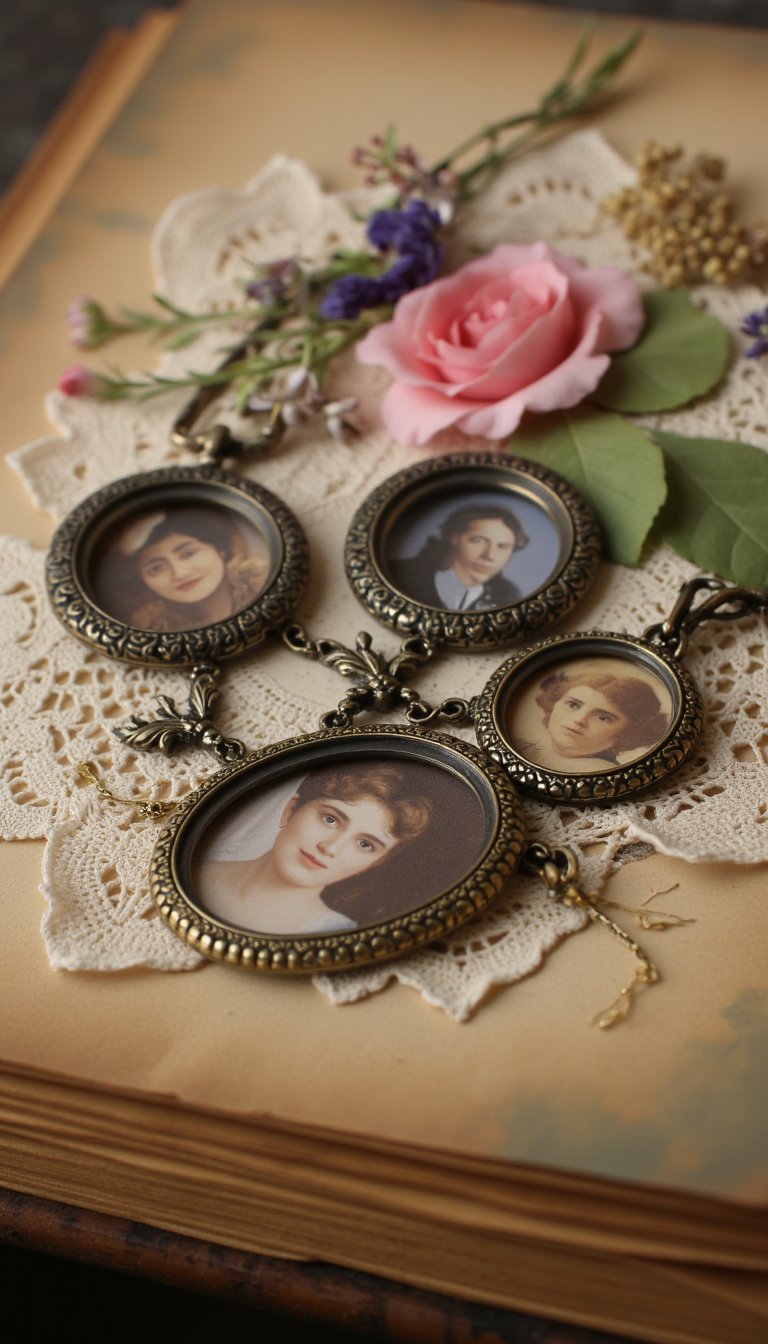
Create the feel of a cherished locket. Print a very small, intimate portrait (a face, a couple’s hands). Cut it into a circle or oval and frame it with a tiny, ornate metal filigree finding or draw a detailed frame with metallic gel pens. Cluster a few together on a page for a deeply personal display.
22. Quilt Block Patterned Pages
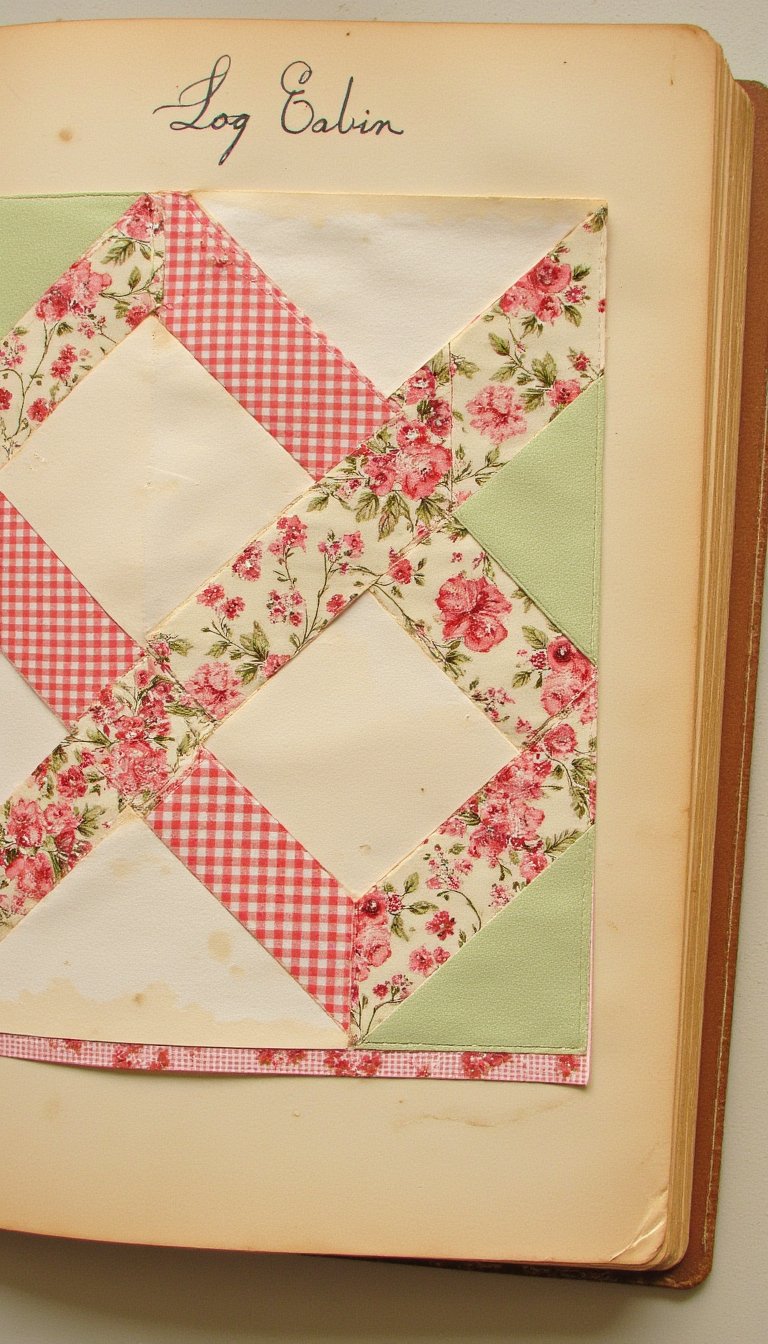
Our ancestors told stories in fabric. Borrow that tradition. Design your page layout based on a classic quilt block pattern, like a Log Cabin or a Nine-Patch. Use patterned papers that resemble calico, gingham, and feedsack fabrics. It creates a cozy, heritage-rich design that feels like home.
23. Botanical Illustrations as Embellishments

Skip the modern stickers. Source public domain botanical illustrations from old field guides. Print them on matte paper, cut them out carefully, and use them as the primary decorative elements on your page. A beautifully rendered rose or sprig of lavender adds natural, scholarly elegance.
24. “Secret Message” with Vellum Overlay
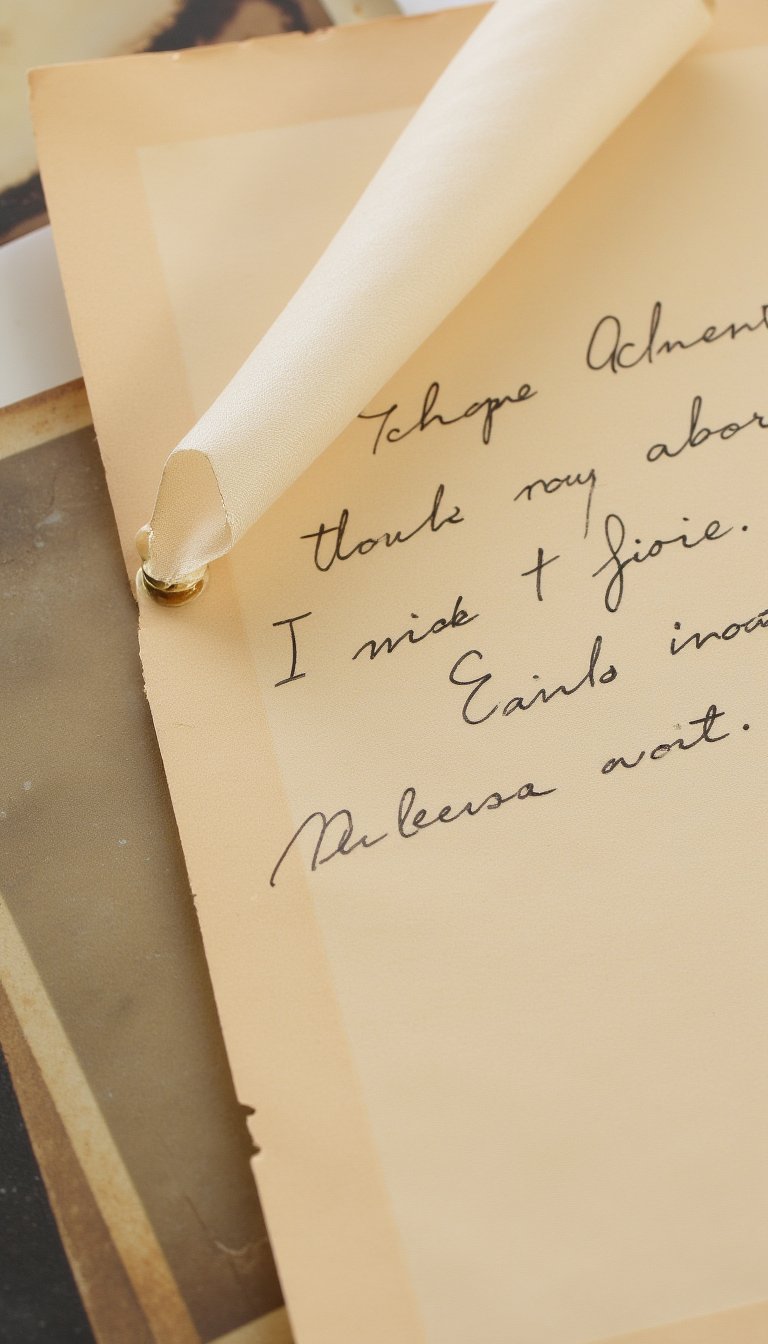
Vellum mimics the look of tracing paper or old architectural plans. Write a hidden journal entry or a meaningful quote on a vellum sheet. Attach it over a photo or background with just a few tiny dots of glue or brads in the corners. The viewer can lift it to reveal the secret beneath.
25. Tin Type Textures with Gesso
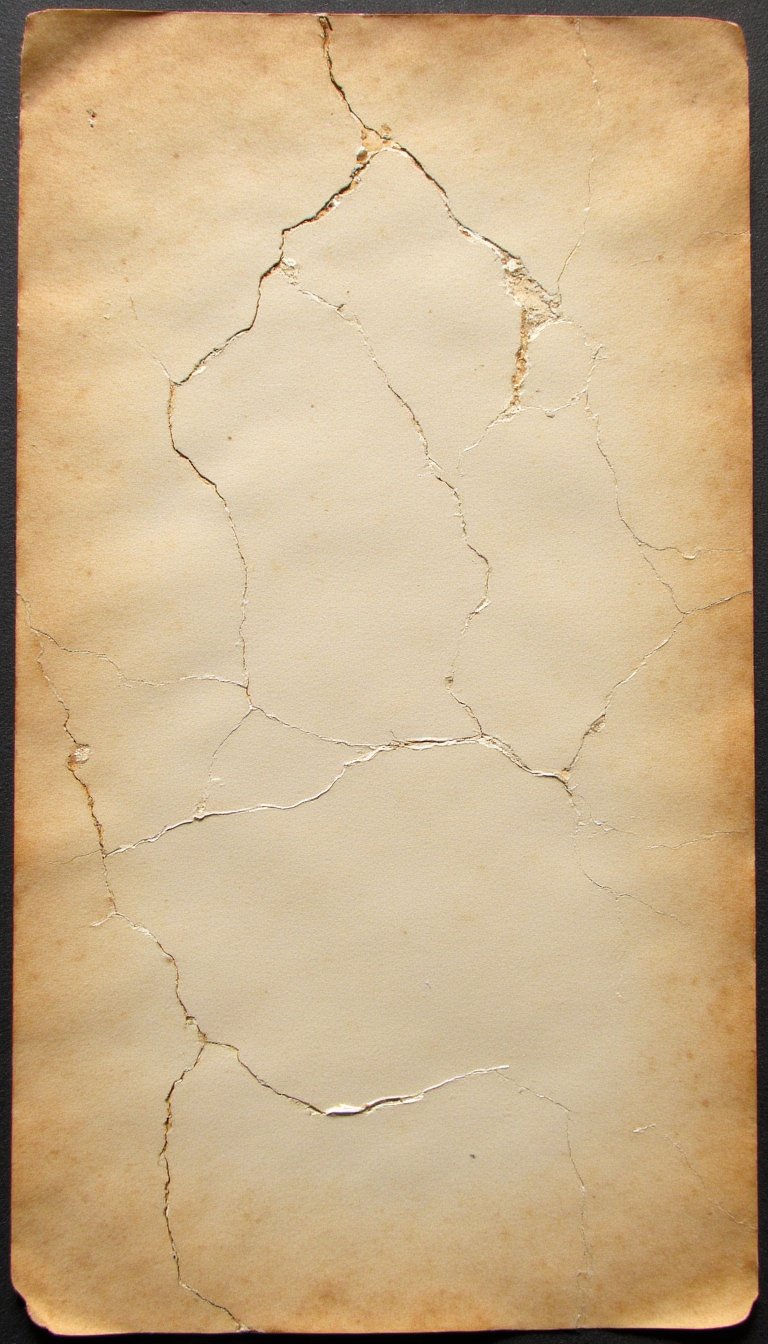
Create the cracked, textured surface of an old photograph. Apply a thin layer of white gesso to your cardstock background. Before it dries completely, gently crack it by bending the paper slightly. Once dry, rub a brown or gray ink pad over the surface, letting it settle into the cracks. Instant, beautiful age.
26. The “Memory Box” Shadow Box Page
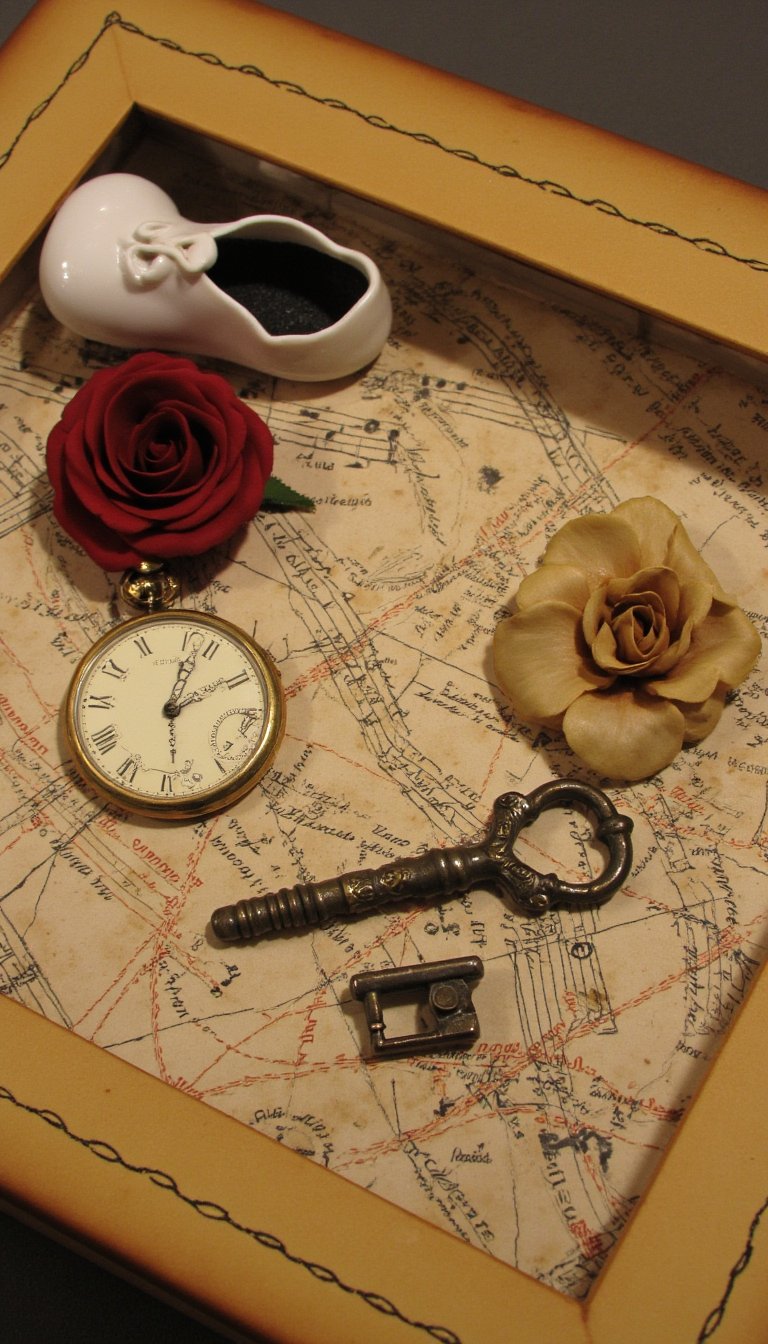
Sometimes a page isn’t enough. For your grand finale, create a deep shadow box within your album. Affix a small, sturdy box to the page and arrange 3D vintage treasures inside: a porcelain doll’s shoe, a vintage key, a watch face, a dried rose. It becomes a true curated cabinet of curiosities.
See? Creating vintage charm isn’t about having old stuff; it’s about embodying a thoughtful, handmade spirit. It’s in the texture of tea-stained paper, the patience of a hand-stitched border, the clever reuse of a map or a music sheet. These 26 vintage scrapbook ideas are your toolkit to slow down, touch your memories, and craft something that doesn’t just hold a photo, but holds a feeling. So, grab that glue, brew a cup of tea (for dyeing and for sipping), and start telling your story in a way that will whisper through the years. Your future self—and maybe your grandkids—will be so glad you did.