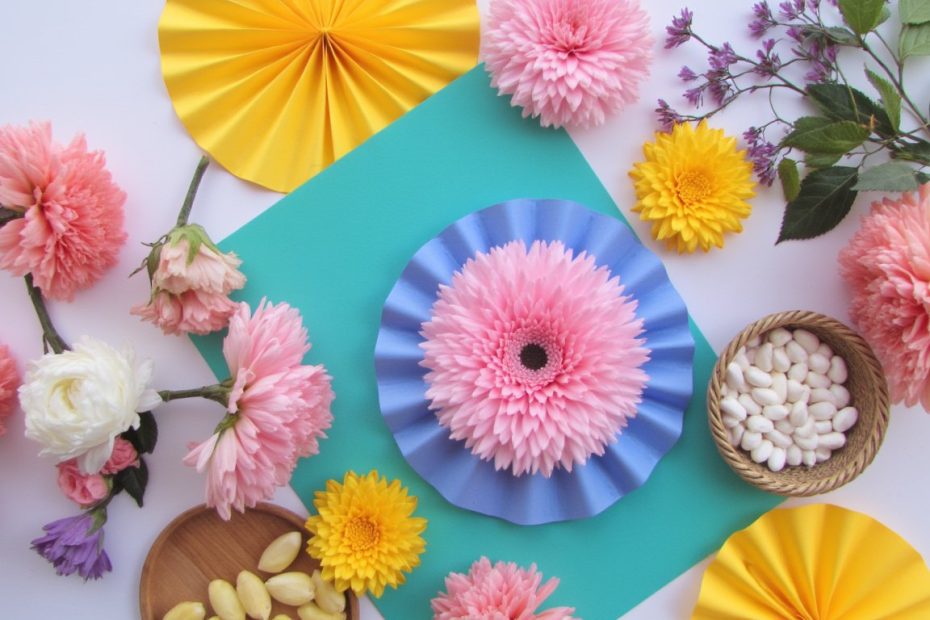
You know that overflowing drawer or that shoebox under your desk. The one filled with colorful paper scraps, old gift wrap, and magazine cutouts you just couldn’t bring yourself to toss. You’re not a hoarder; you’re a visionary with a storage problem. Sound familiar? Let’s finally give those beautiful bits a purpose. Forget complicated crafts that need a million tools. These 17 paper scraps ideas are your ticket to a more creative, less cluttered life, using exactly what you already have.
1. The Ultimate Confetti for Every Celebration
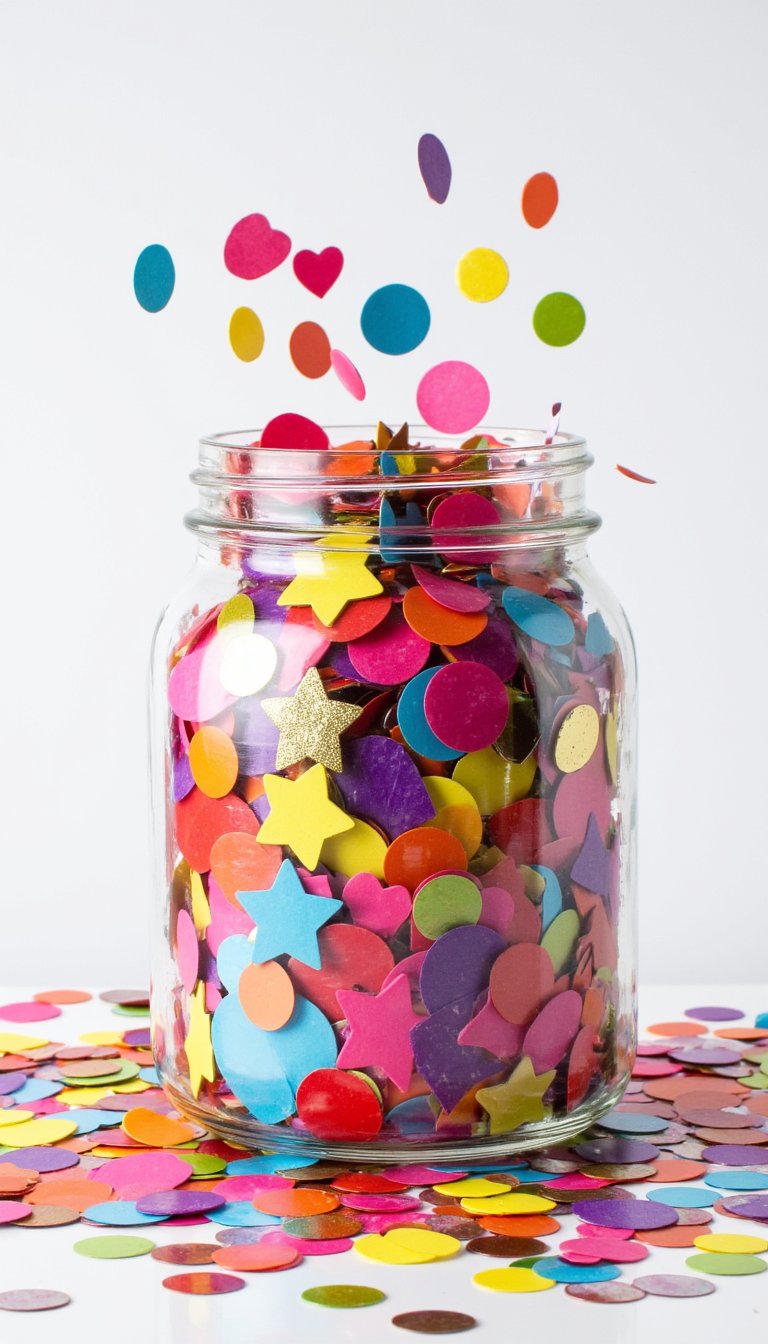
Stop buying plastic confetti! Grab your hole punches—standard circles, hearts, stars, even tiny geometric shapes. Feed your paper scraps through and create a custom, eco-friendly party mix. Use muted tones for a classy wedding send-off, bright primaries for a birthday, or metallic scraps for New Year’s Eve.
Pro tip: Mix different sizes and textures for maximum visual impact. Tissue paper, construction paper, and glossy magazine pages together create magic. Store your homemade confetti in jars—they look cute even before the party starts.
2. Stunning Handmade Gift Tags
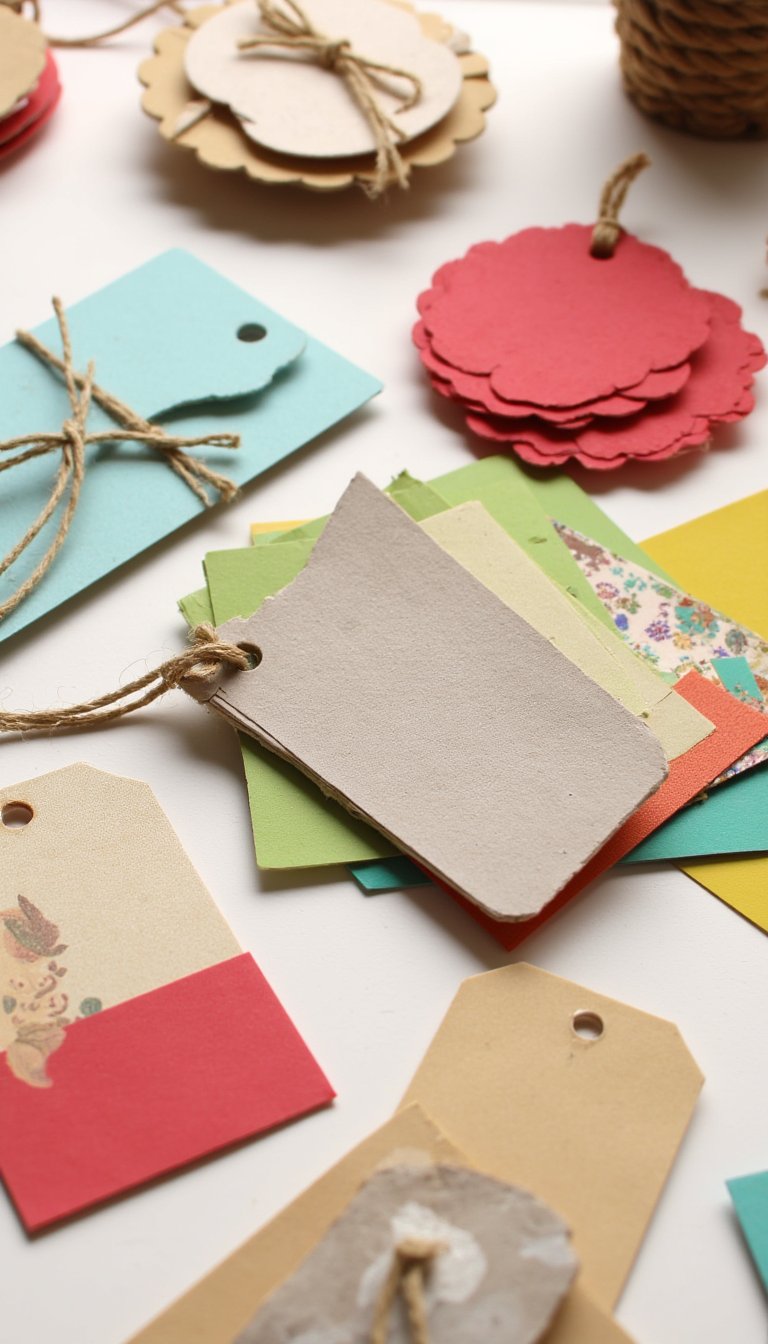
This is the ultimate quick win. Cut your sturdier scraps into rectangles, circles, or tag shapes. Punch a hole in the corner, add some string or baker’s twine, and you’re halfway there. But let’s elevate it. Layer a small, vibrant scrap on top of a neutral one. Use a corner punch to create decorative edges.
Handwrite your “To/From” or stamp it for a polished look. A gift with a personalized tag you made from scraps feels infinitely more thoughtful than a store-bought card. It’s a tiny masterpiece that says you care.
3. A Mosaic Masterpiece for Kids (and Adults!)
Channel your inner ancient Roman artist. Tear or cut your scraps into small, irregular pieces. Draw a simple outline on a cardstock base—a heart, a dinosaur, a rainbow. Then, let the glueing begin! This is a fantastic, motor-skill-building activity for kids, but don’t underestimate its therapeutic value for you.
Creating a gradient sunset or a geometric abstract mosaic with your paper scraps is incredibly satisfying. The key is embracing the irregular shapes—they give the mosaic its charming, textured character.
4. Custom Decoupage Decor
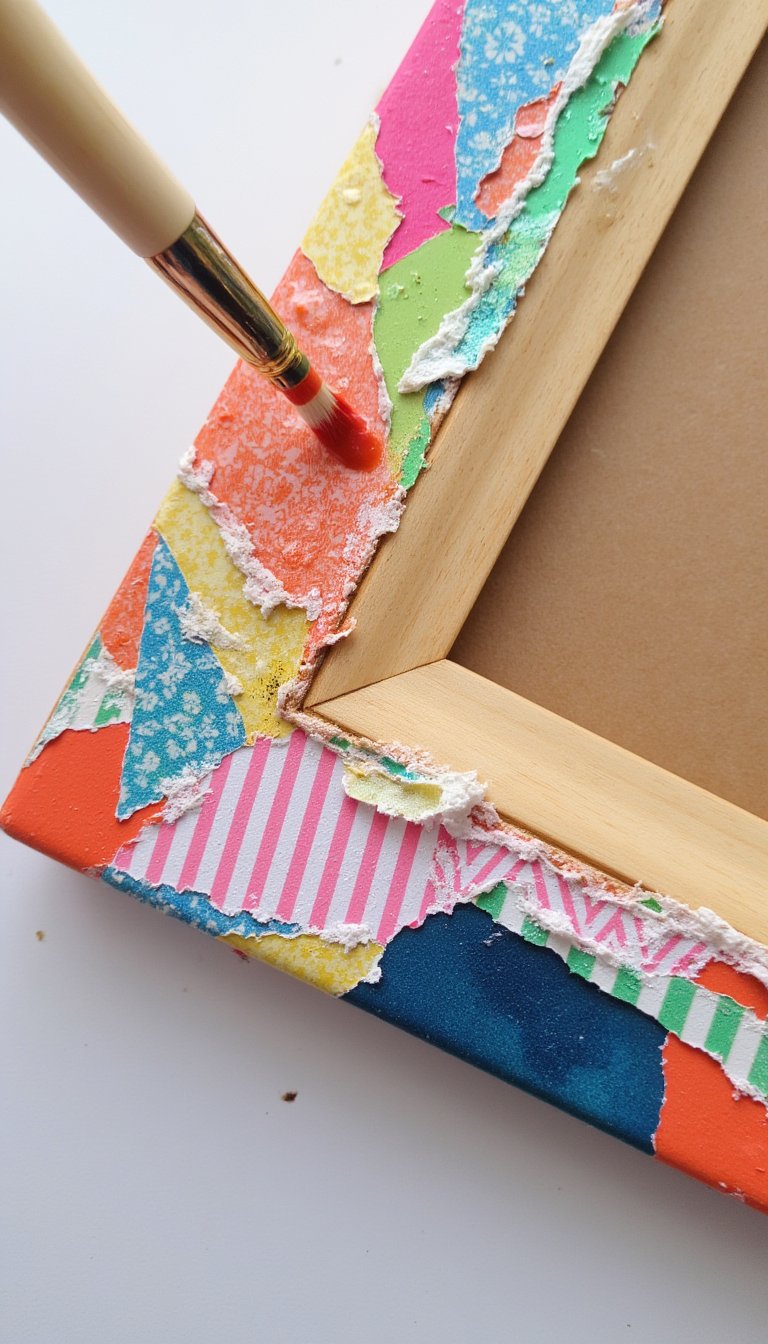
Decoupage sounds fancy, but it’s just glue and paper. Find a plain object: a wooden box, a picture frame, a vase, or even a boring notebook cover. Tear your favorite patterned or colored scraps into manageable pieces. Using Mod Podge or a simple glue-water mix, layer the pieces onto your object, sealing them as you go.
The torn edges create a soft, blended look. Cover the entire item for a bold statement or just accent the corners. Suddenly, that thrift store find looks like a high-end, bespoke piece of art.
5. Quilled Paper Jewelry

Paper quilling turns thin strips of paper into incredible 3D art. Cut your scraps into long, thin strips (about 1/8-inch wide). Roll them around a toothpick or quilling tool to create tight coils, teardrops, and marquise shapes. Glue these shapes together to form delicate earrings, pendants, or brooches.
Seal them with a clear glaze or resin for durability. Imagine wearing earrings made from the beautiful paper of your favorite birthday card. Now that’s a conversation starter.
6. A One-of-a-Kind Paper Bead Necklace
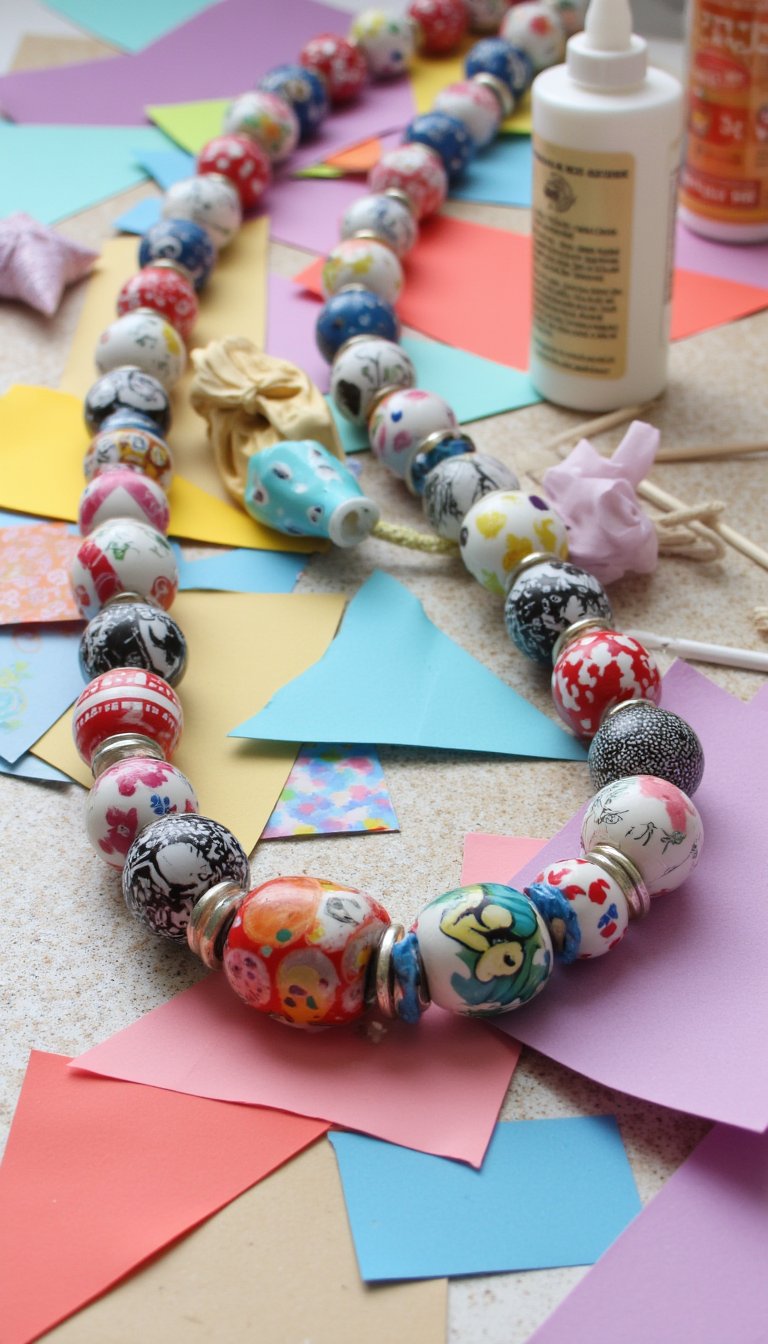
No quilling tools? No problem. Cut your scraps into long, skinny triangles. The wider the base of the triangle, the fatter your bead. Starting at the wide end, tightly roll the paper around a skewer or thin knitting needle. Secure the tip with a dab of glue, slide it off, and seal the whole bead with clear nail polish or decoupage glue.
String your beads together for a vibrant, statement necklace. The patterns from magazine text or gift wrap create surprisingly sophisticated results. It’s wearable recycling at its most chic.
7. Personalized Bookmark Bonanza
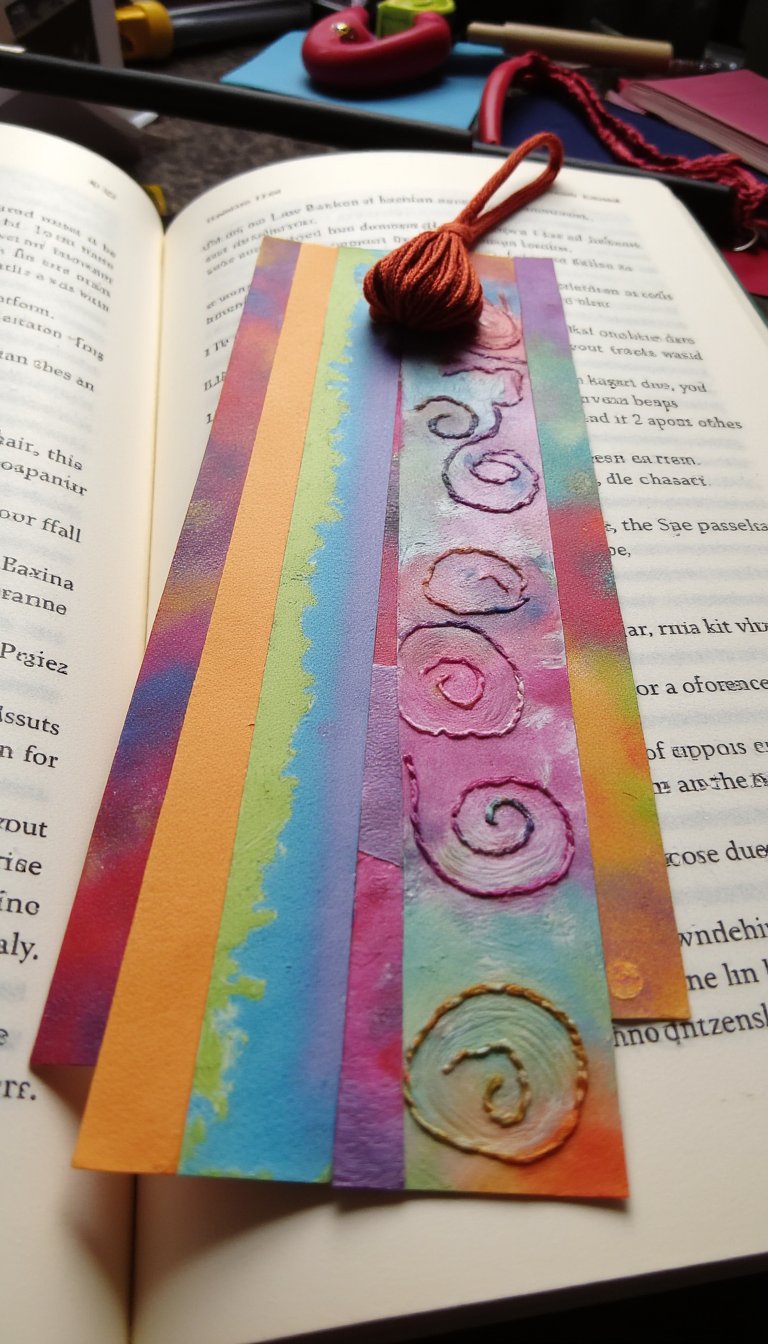
Book lovers, unite! This is how you never lose your place in style. Cut a bookmark base from cardstock or a thicker scrap. Now, decorate! Create a simple collage, add a tassel made from embroidery floss, or use a paper punch to make a decorative top.
You can laminate them with clear packing tape for durability. Make a whole set themed around your favorite genres—spooky scraps for horror, elegant patterns for classics. Your future reading self will thank you.
8. Colorful Paper Tassel Garland
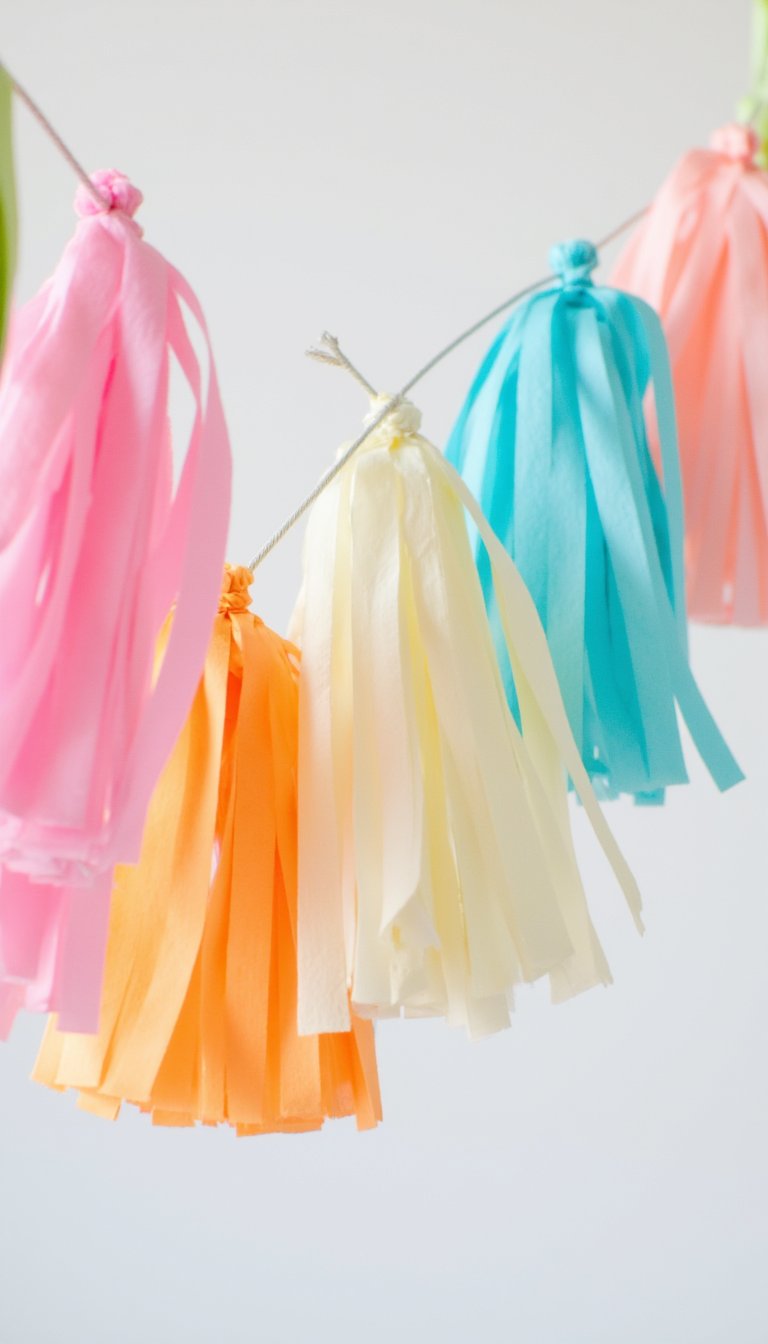
This garland adds instant party vibes to any room. Fold a rectangular paper scrap (about 4″x6″) accordion-style. Tie a string tightly around the middle of the folded paper. Carefully fan out the sides and start peeling apart the layers, fluffing them toward the center to create a full tassel.
Repeat with scraps in coordinating colors and tie them along a longer string. Drape it over a mantel, a bed frame, or a party backdrop. It’s lightweight, festive, and costs you exactly nothing.
9. DIY Seed Paper for Gifting
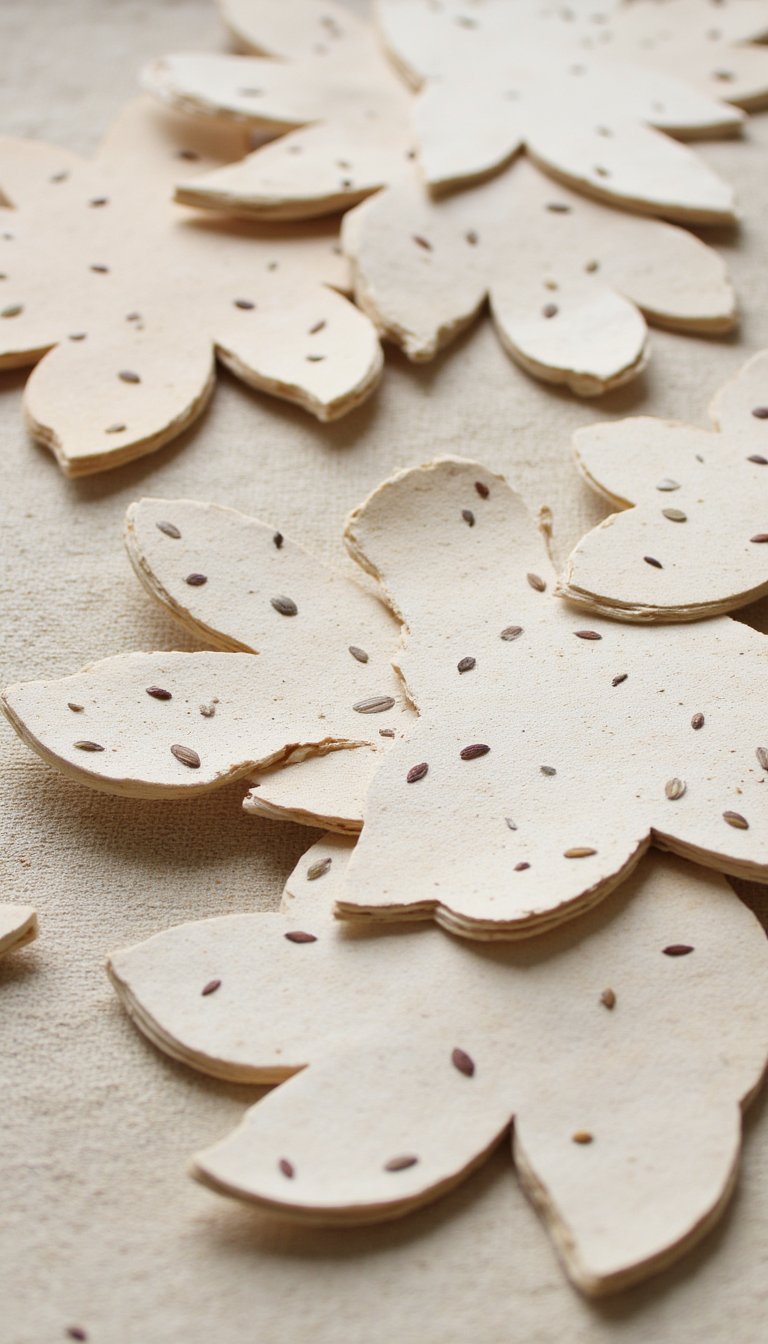
Turn your trash into literal life. Blend your plain paper scraps (avoid glossy paper) with water to make a pulp. Mix in some seeds—wildflowers or herbs work great. Press the pulp into cookie cutters or onto a screen to form shapes, let them dry completely, and you have plantable paper.
Give them as gift tags with instructions: “Plant me!” It’s a gift that grows, and it clears out your scrap pile. Talk about a full-circle moment.
10. Intricate Papercut Art Shadows
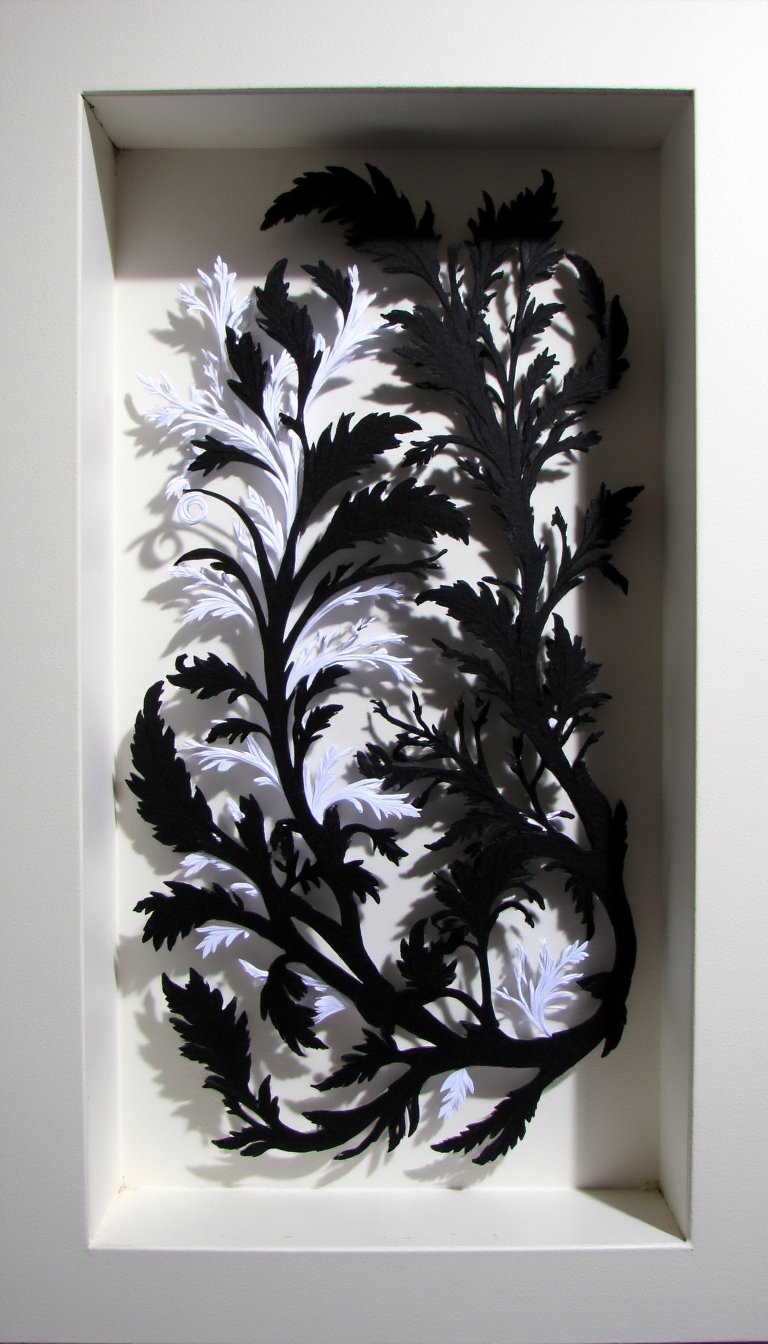
If you have a precision craft knife and a steady hand, this is for you. Layer a few contrasting pieces of paper scraps and sketch a simple, symmetrical design—a snowflake, a tree, an animal silhouette. Carefully cut out the design, then separate the layers and offset them slightly in a shadow box frame.
The different colored layers create stunning depth and shadow. It’s a sophisticated way to use even the smallest pieces of black, white, and colored paper.
11. Upcycled Paper Patchwork Cards
Why buy cards when you can sew? Well, paper-sew. Cut scrap pieces into geometric shapes or organic “patches.” Arrange them on a folded card base in a pleasing patchwork pattern. Instead of gluing, use a sewing machine (with a denim needle) or a needle and thread to stitch the patches onto the card.
The stitching adds incredible texture and a handmade, heirloom quality. It’s a card people will keep long after the occasion has passed.
12. Miniature Paper Buntings & Flags
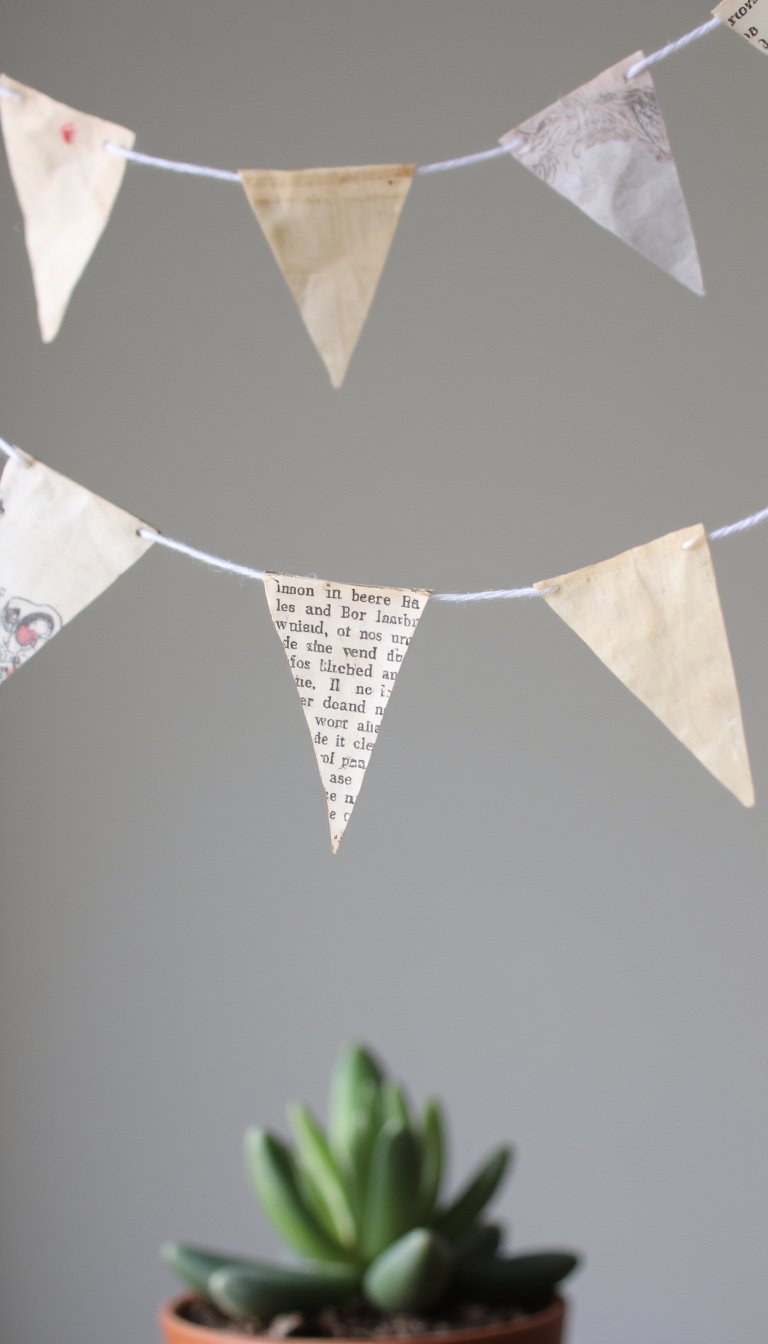
Perfect for dollhouses, dioramas, or decorating small plants and photo frames. Cut tiny triangles from your most delicate scraps—old dress patterns, tissue paper, or illustrated book pages. Glue them onto a single strand of thread or embroidery floss.
This micro-craft is oddly addictive and uses up the tiniest scraps you thought were useless. A little string of these on a potted succulent or a framed picture adds a whisper of whimsy.
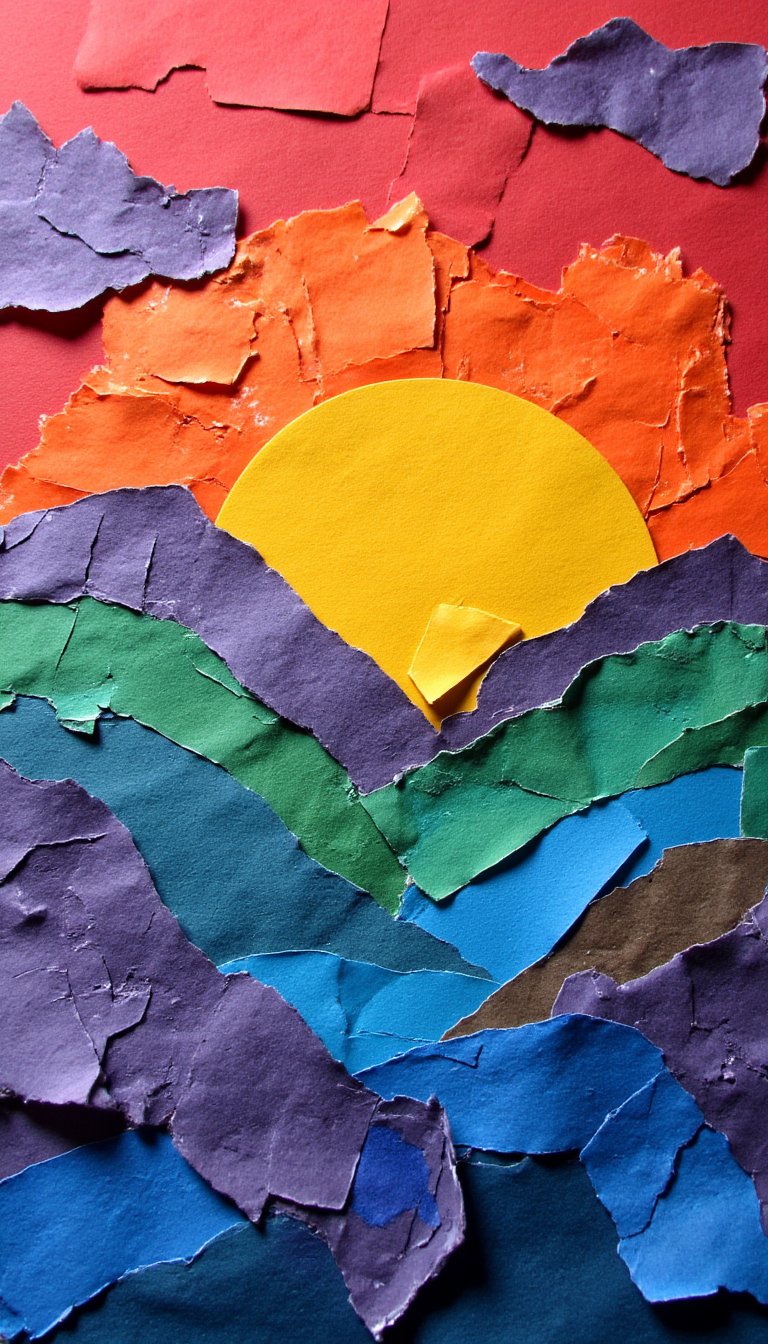
13. Abstract Collage Canvas Art
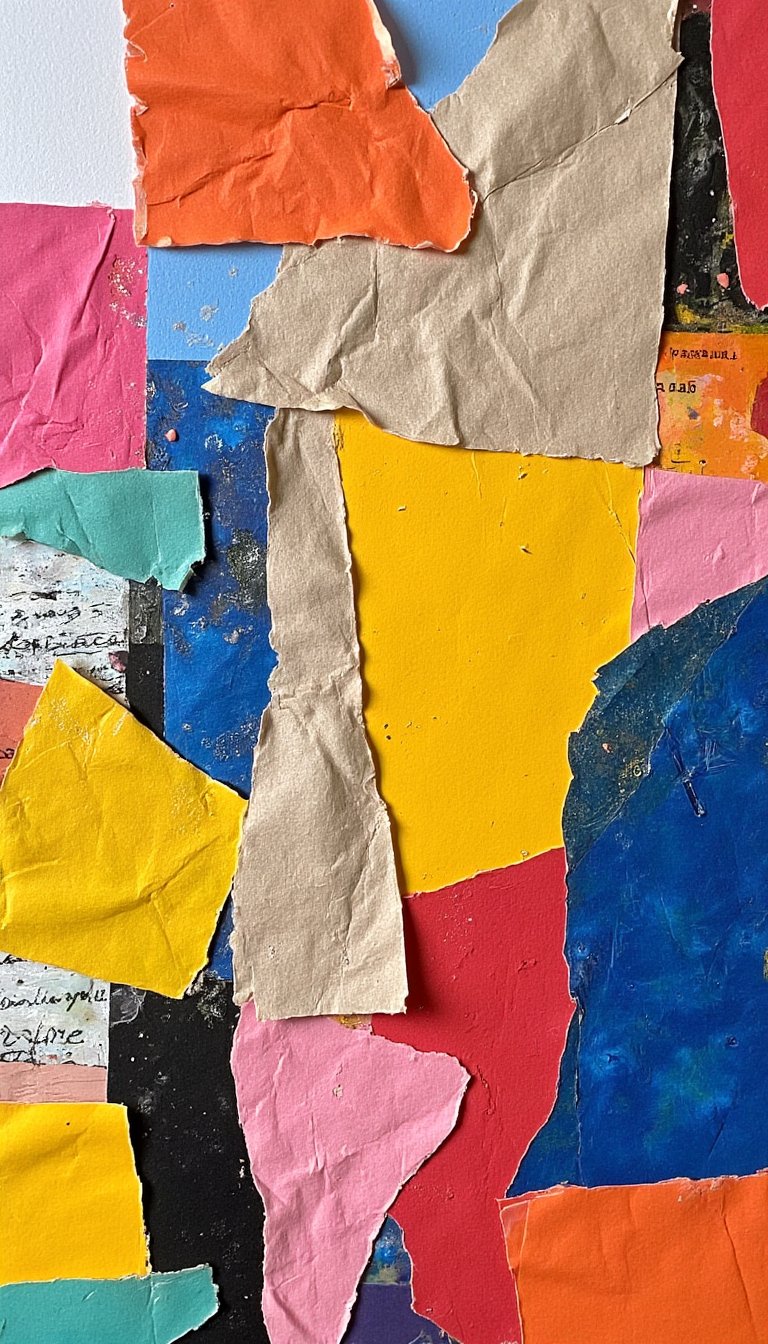
Channel your inner Matisse. Take a small canvas or a sturdy piece of cardboard as your base. Don’t think, just feel. Tear, cut, and arrange your scraps based purely on color, texture, and shape. Overlap them. Play with negative space.
Glue everything down when you feel a spark of joy. This isn’t about making a perfect picture; it’s about expressing a mood with color and composition. It’s therapy with a glue stick.
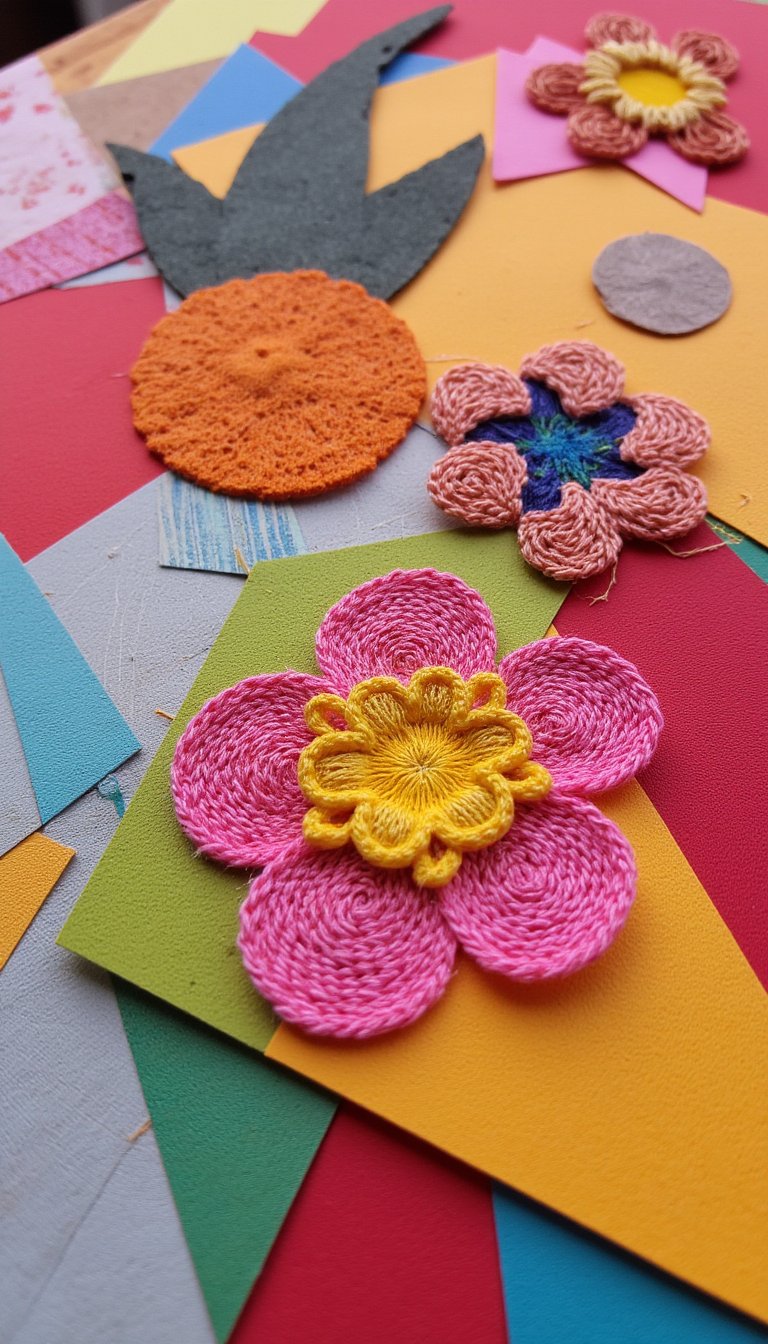
14. DIY Paper Scrap Embellishments
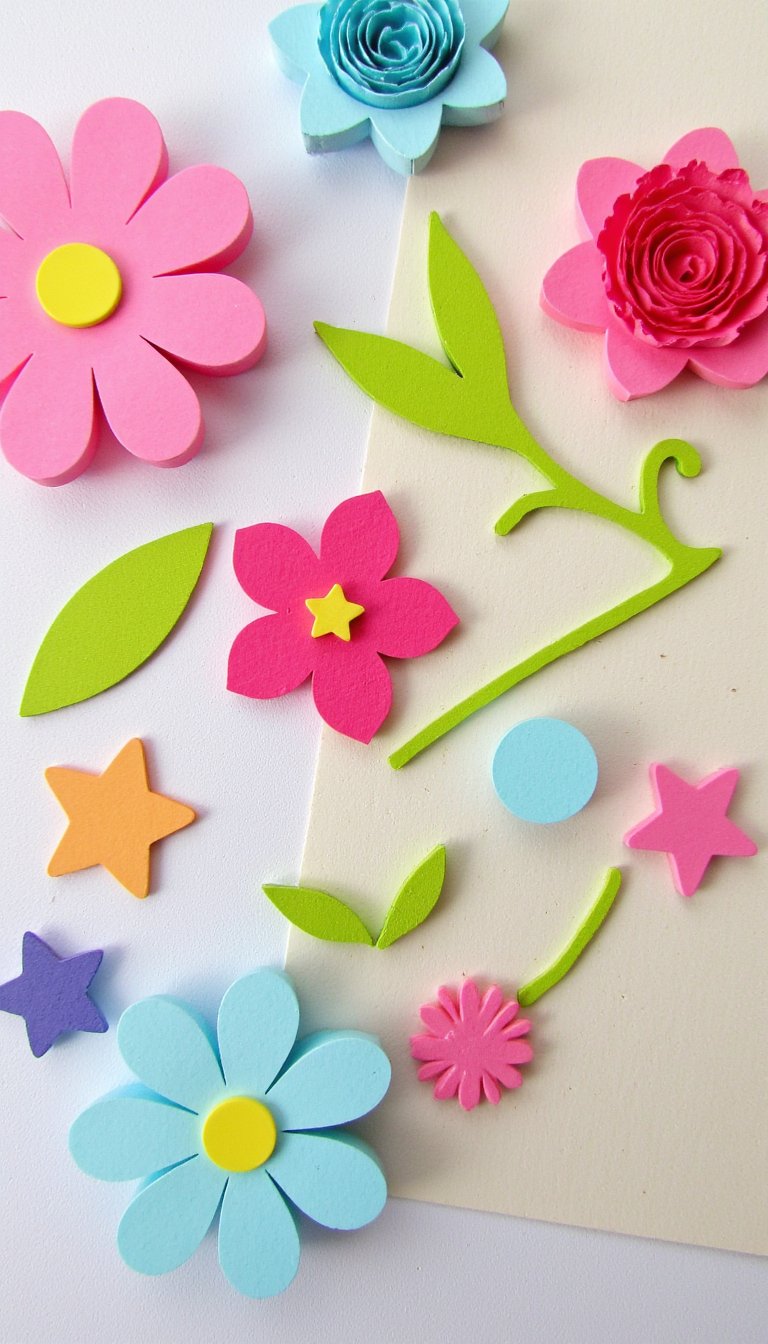
Become your own craft supply store. Use shaped punches to create a stash of uniform flowers, leaves, stars, or circles from your coordinated scraps. Keep them in a divided container. Now, whenever you’re making a card, journal spread, or gift tag, you have instant, matching embellishments ready to go.
It streamlines future projects and ensures your scrap pile actually gets used. Efficiency can be beautiful.
15. Paper Scrap Weaving
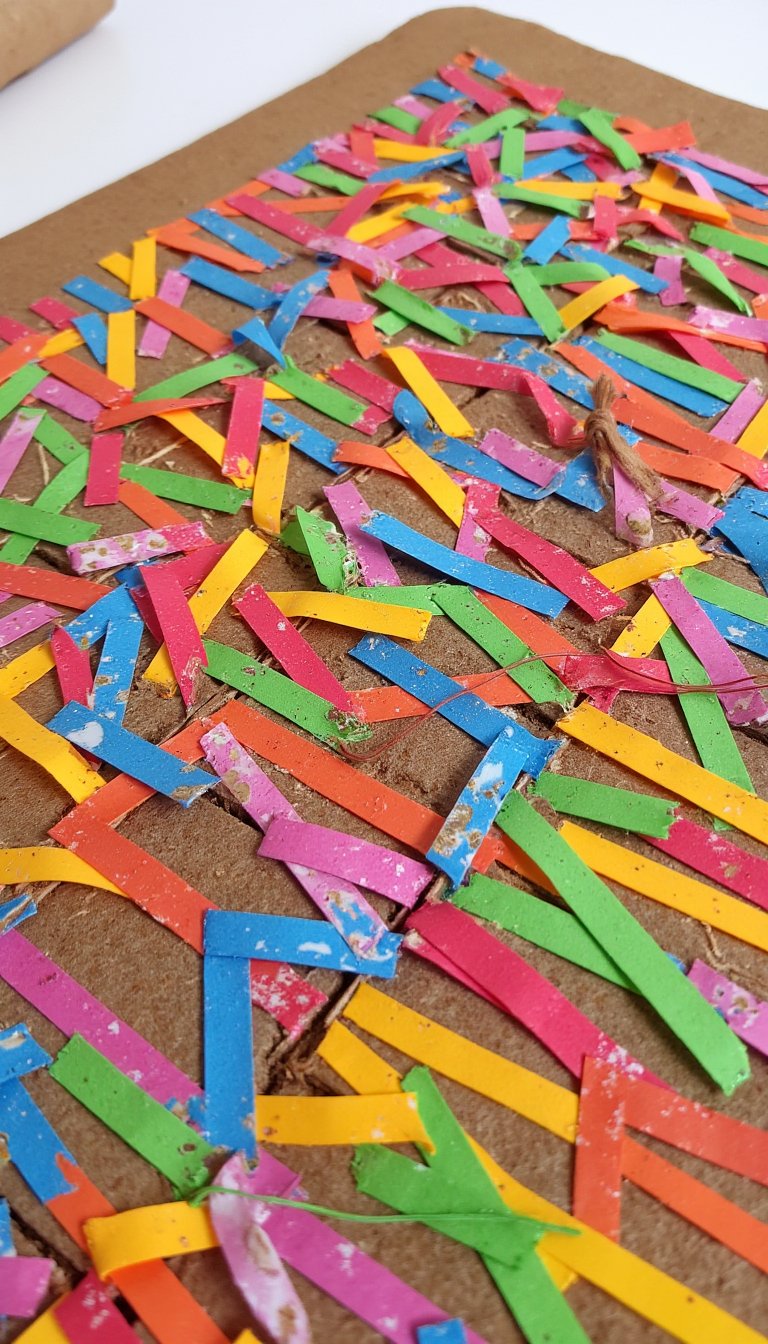
A fantastic, meditative craft. Cut a base piece of cardstock and make vertical cuts partway up, like a loom. Then, cut your other scraps into long, thin strips. Weave them over and under the “loom” strips. You can create simple check patterns or get fancy with different weaving techniques.
The result is a sturdy, textured piece of paper art you can use as a unique mat for a photo, a journal cover, or just frame it as is. It’s all about the rhythm and the pattern.
16. Personalized “Confetti” Filler for Gifts
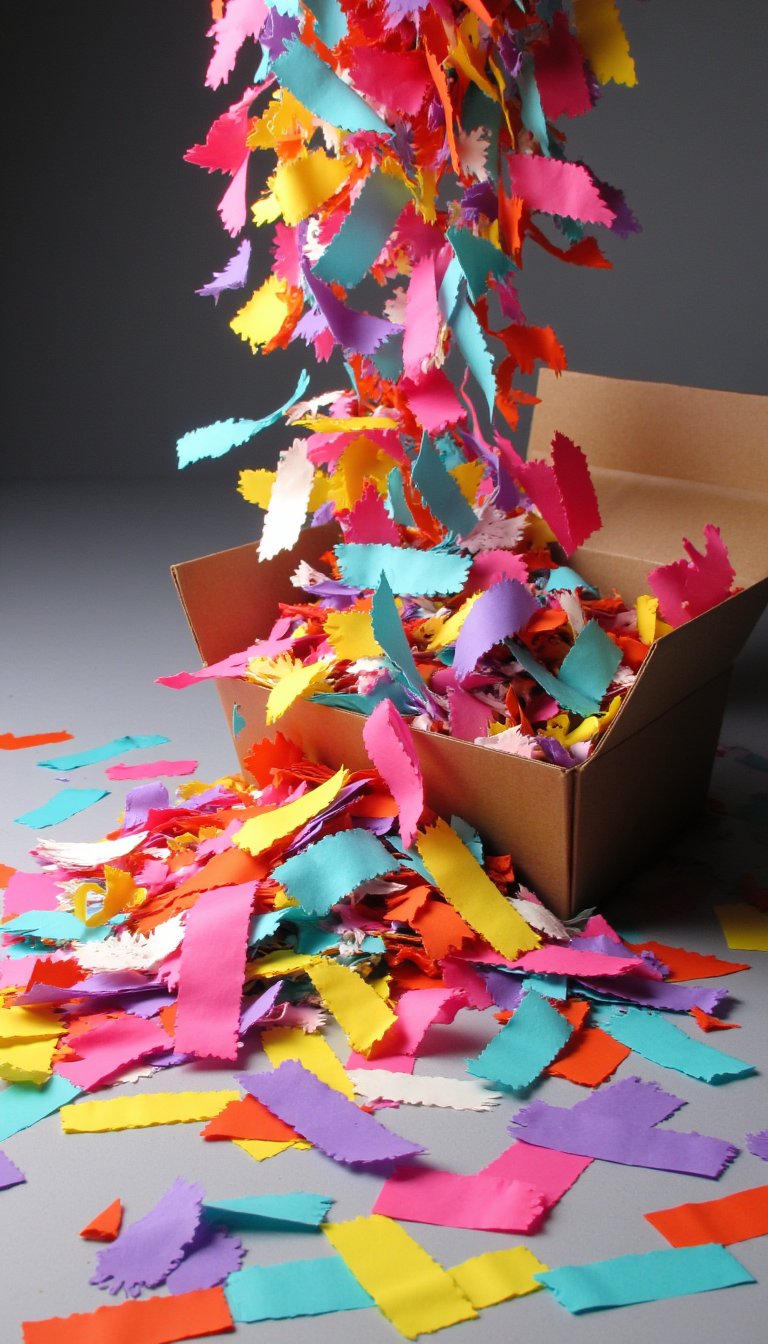
Ditch the plastic Easter grass or boring tissue paper. Shred or hand-tear your paper scraps into thin strips or small chunks. Use this colorful, custom mix as gift box or gift bag filler.
Match the colors to the recipient’s taste or the holiday. Opening a present becomes an experience as they dig through a cascade of personalized color. It’s the finishing touch that shows you went the extra mile.
17. A Visual Scrap Inventory Jar
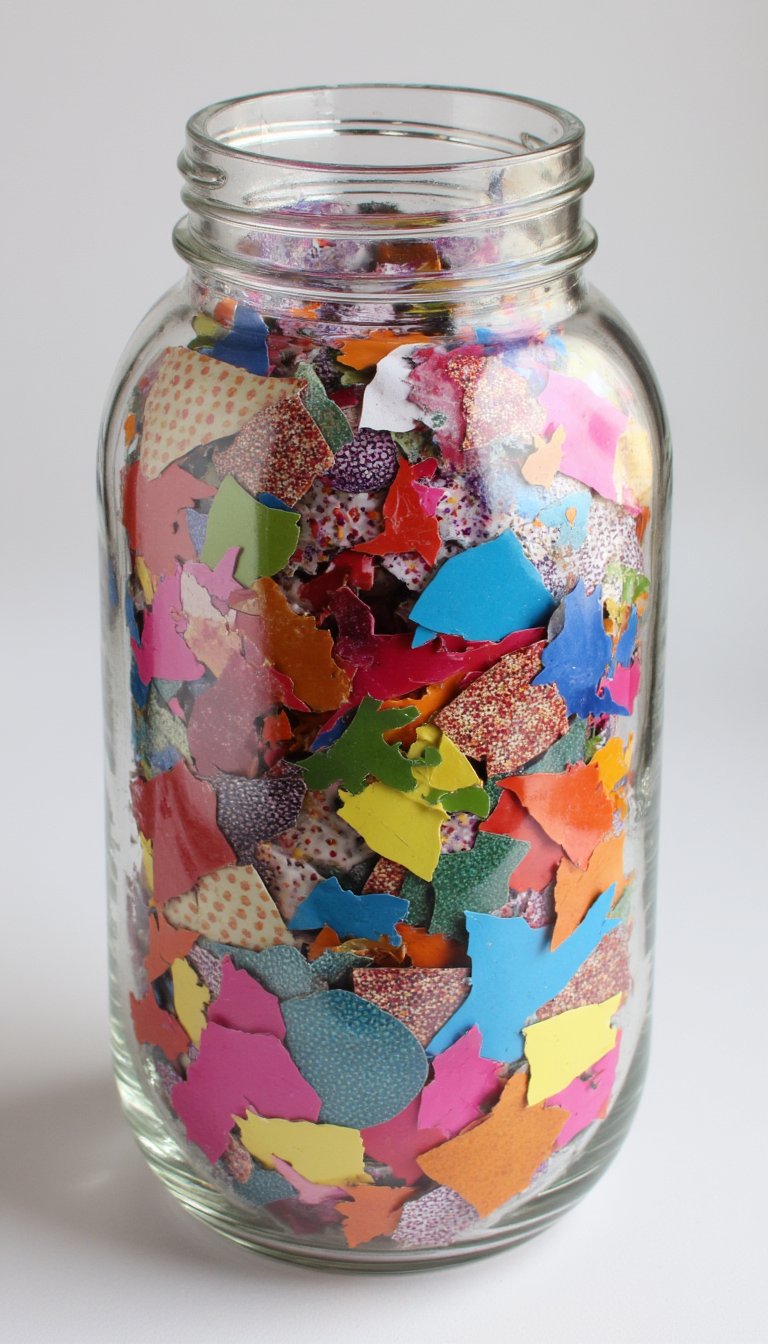
Okay, hear me out. For those tiny, gorgeous scraps that are too small for most projects but too pretty to discard, create an art piece *of* your collection. Find a large, clear jar or vase. Simply start dropping them in. Layer colors, textures, and patterns.
As you add to it over time, it becomes a swirling, colorful capsule of your creative journey. It’s not a messy pile anymore; it’s a deliberate display of potential. Sometimes, the best idea is to simply admire the raw material.
See? That drawer wasn’t a graveyard for forgotten paper; it was a treasure chest waiting for a key. The true magic of these paper scraps ideas isn’t just in the cute finished product—it’s in the mindset shift. You start seeing potential in every leftover bit. You approach creativity with a “use what you have” attitude that’s both budget-friendly and wildly inventive.
So, which one will you try first? Maybe you’ll punch confetti while watching TV tonight, or maybe you’ll get lost in a mosaic this weekend. The point is to start. Grab a handful of scraps, a glue stick, and make something unnecessarily wonderful. Your clutter (and your inner artist) will thank you.