
Let’s be honest, is there any creature that brings a smile to your face faster than a ladybug? Those tiny, spotted beetles are pure joy, and they make the absolute perfect muse for creative projects. Whether you’re a parent looking for a rainy-day rescue, a teacher planning a spring unit, or just someone who appreciates a cute craft, you’ve landed in the right spot. I’ve scoured the craftiverse (see what I did there?) to bring you the most delightful, doable, and downright adorable ladybug arts and crafts. Get ready to unleash your inner artist—no fancy skills required.
1. Paper Plate Ladybug Puppets

This classic is a classic for a reason. It’s cheap, easy, and the play value is through the roof. Grab a red paper plate, some black construction paper, and a popsicle stick. Cut the plate in half for two ladybug bodies, add black spots and a head, and glue on that stick. Voila! Instant puppet theater. Pro tip: Use a brad fastener to attach wiggly eyes so they can, well, wiggle. Kids love putting on shows with these, and you’ll love the minimal cleanup.
2. Ladybug Rock Pets

Turn a simple garden stone into a forever friend. Hunt for smooth, oval-ish rocks in your backyard or a craft store. A coat of red acrylic paint forms the perfect base. Once it’s dry, paint on a black head, a line down the back, and those iconic spots. Seal it with a clear outdoor Mod Podge, and you have a charming garden guardian. These make the sweetest gifts or a fun addition to a potted plant. Just try not to smile when you see one peeking out from your herbs.
3. Thumbprint Ladybug Cards

This one is personal, precious, and practically foolproof. All you need is a red ink pad or washable paint. Press your thumb (or a child’s thumb) onto the ink, then onto a piece of cardstock or blank card. After the print dries, use a fine black marker to add details: a head, antennae, legs, and spots. It’s a fantastic homemade card for birthdays, Mother’s Day, or just a “hello.” The tiny thumbprint body is just too cute for words.
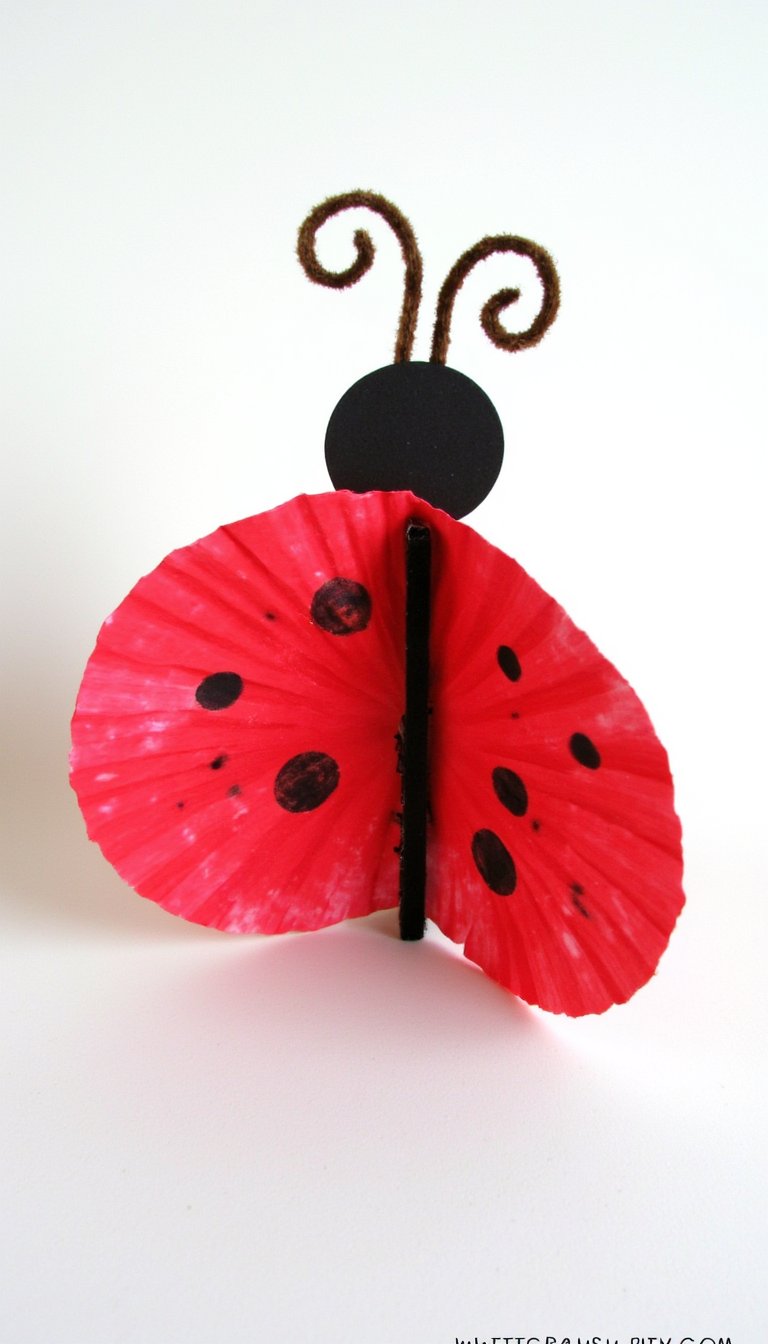
4. Egg Carton Ladybugs

Upcycling at its most adorable. Cut individual cups from a cardboard egg carton. Paint them red, inside and out. While they dry, cut thin black pipe cleaners for antennae and short, stubby ones for legs. Poke small holes to insert them, and don’t forget the black spots on the rounded back. These little 3D bugs are perfect for counting games, small world play, or just lining up on a windowsill.
5. Ladybug Suncatchers

Bring some color to your windows with this stained-glass effect craft. Cut a ladybug shape from black construction paper, but leave the “wing” area as a large open circle. Cover that opening with clear contact paper. Then, let your artist fill the sticky space with small pieces of red tissue paper or cellophane. Top with another piece of contact paper, trim the edges, and watch the sun light up their masterpiece. It’s pure magic in the afternoon light.
6. Pine Cone Ladybugs

Nature provides the perfect textured body. Gather small, rounded pine cones. Paint the rounded tips with red paint—you don’t need to get into all the nooks and crannies. Glue on a small black pom-pom for the head, add googly eyes, and dot on some black spots. These are wonderful for autumn crafts or creating a little ladybug village in a bed of moss. They have so much character!
7. Ladybug Headbands

Ready for some dress-up fun? Start with a plain, store-bought headband. Cut two large red felt circles for the wings and a black felt semicircle for the head. Glue the head to the center of the headband, then glue the wings on either side, leaving a slight gap down the middle. Add black felt spots and glue some curled black pipe cleaners to the top for antennae. Cue the impromptu bug parade around the living room.
8. Clay Pot Ladybug Planters

Give your greenery a playful home. Take a small terracotta pot and paint the entire outside with red acrylic paint. Paint the saucer black. Once dry, add black spots to the pot and use white paint to add a cheerful face. Plant some succulents or herbs inside, and you have a functional piece of art. It’s a craft that literally grows on you. See what I did there? 😉
9. Coffee Filter Ladybugs
The science-meets-art project. Let kids color a white coffee filter with red washable markers. Then, using a dropper or paintbrush, lightly dab water onto the filter and watch the colors beautifully bleed together. Once dry, fold it in half and clip the center with a black clothespin. Draw spots and a face on the clothespin, and glue on pipe cleaner antennae. The watercolor effect on the “wings” is always stunning.
10. Ladybug Corner Bookmarks

For the bookworms in your life. Fold a square of red cardstock into a classic corner bookmark shape. From black cardstock, cut a head, spots, and a thin strip for the body line. Glue them all on, and add little white paper eyes. It’s a quick, useful craft that encourages reading. Who wouldn’t want a friendly ladybug holding their page?
11. Recycled Bottle Cap Ladybugs

Got a stash of plastic bottle caps? Put them to work. Paint the top red and the sides black. Glue them onto a piece of cardstock in a cute line or cluster. Draw on legs and antennae with a sharpie. You can also add a magnet to the back for fridge art. It’s a fantastic way to talk about reusing materials while making something cute.
12. Ladybug Painted Stones for Kindness

This craft spreads joy beyond your home. Paint smooth stones as ladybugs, but on the bottom, write a short, uplifting message like “You’re Awesome” or “Smile!” Seal them with a clear coat. Then, go on a walk and leave them in parks, on library steps, or in your neighborhood. It’s a stealth mission of happiness, and these kindness rocks are sure to make someone’s day.
13. Ladybug Collage Art

Unleash the power of texture. Draw a simple ladybug outline on a canvas or heavy paper. Then, raid your craft bin. Use red buttons, sequins, torn tissue paper, or fabric scraps to fill in the wings. Use black beans, beads, or pom-poms for the spots. The process of choosing materials and gluing them down is incredibly engaging, and the final result is a unique masterpiece.
14. Flying Ladybug Windsock

Make a craft that dances in the breeze. Decorate a red paper cup or the inside of a cardboard tube as a ladybug face with big eyes. Attach long, flowing streamers in reds and blacks to the inside bottom. Punch two holes at the top, thread string through, and hang it from a porch or tree branch. Watching those streamers flutter is the perfect finish to our list of ladybug arts and crafts.
And there you have it—14 spotted, dotted, and absolutely delightful ways to bring the charm of ladybugs into your world. From quick thumbprint cards to garden-ready rock pets, the real magic lies in the making. These projects aren’t just about the final product; they’re about the laughter, the focus, and the little “I made that!” moment of pride. So, grab some red paint, round up your craft supplies, and let your creativity take flight. The world could always use a few more ladybugs, don’t you think?